background image


W W W . T M G I N D U S T R I A L . C O M  


P 0 / 1 5  


T o l l   F r e e : 1 - 8 7 7 - 7 6 1 - 2 8 1 9  


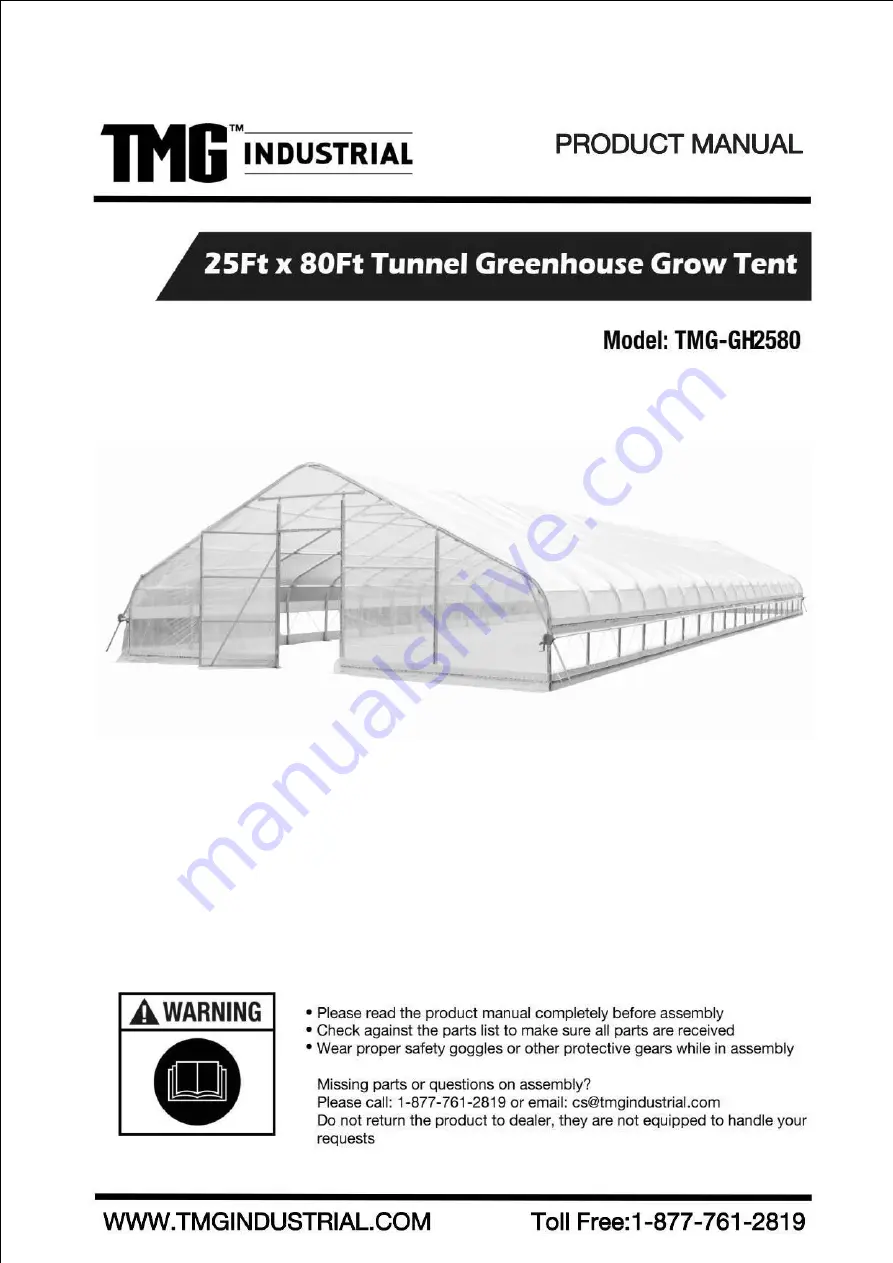
Содержание TMG-GH2580

Страница 1: ...W W W T M G I N D U S T R I A L C O M P 0 1 5 T o l l F r e e 1 8 7 7 7 6 1 2 8 1 9...

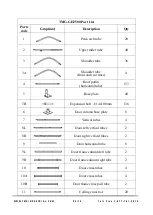
Страница 2: ...s and parts before installation All parts are marked with a part number please refer to the parts list to make sure you have all parts Choose a day with low or no wind to install assembly is hard in h...

Страница 3: ...er tube front and rear truss 4 4 Roof purlin horizontal tube 133 5 Base plate 40 5B Expansion bolt 14x100mm 136 6 Door column base plate 8 7 Vertical tubes 4 8L Door left vertical tubes 2 8R Door righ...

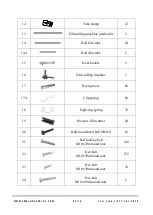
Страница 4: ...l film tube 24 14A Roll film tube 2 15 Door buckle 2 16 Film rolling machine 2 17 Reed groove 88 17A Clip spring 88 18 Eight clip spring 78 19 Pressure film carrier 40 20 Half round head bolt M6x50 16...

Страница 5: ...8 1 9 25 Self tapping screw 12x25 500 26 Self tapping screw 12x35 184 27 Square plug 8 28 Round plug 25 6 29 Braided rope 1 bundle 80m 30 Top cover film 1 30A Front and rear door film 2 31 Adhesive ta...

Страница 6: ...installation site Mark the ground in the final building location with a line showing the positions of base plates front doors All lines should be drawn from center to center of all base plate tubes Di...

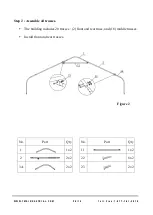
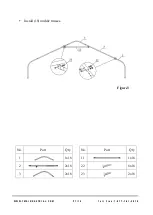
Страница 7: ...o l l F r e e 1 8 7 7 7 6 1 2 8 1 9 Step 2 Assemble all trusses The building includes 20 trusses 2 front and rear truss and 18 middle trusses Install front and rear trusses Figure 2 No Part Qty No Pa...

Страница 8: ...W W W T M G I N D U S T R I A L C O M P 7 1 5 T o l l F r e e 1 8 7 7 7 6 1 2 8 1 9 Install 18 middle trusses Figure3 No Part Qty No Part Qty 1 1x18 11 1x18 2 2x18 22 8x18 3 2x18 23 2x18...

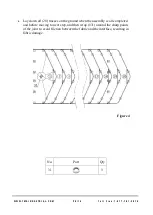
Страница 9: ...2 8 1 9 Lay down all 20 trusses on the ground when the assembly is all completed and before moving to next step and then wrap 31 around the sharp points of the joint to avoid friction between the fab...

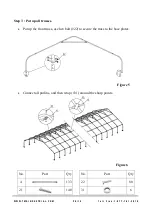
Страница 10: ...e e 1 8 7 7 7 6 1 2 8 1 9 Step 3 Put up all trusses Put up the front truss use hex bolt 22 to secure the truss to the base plates Figure 5 Connect all purlins and then wrap 31 around the sharp points...

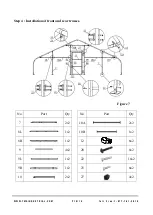
Страница 11: ...C O M P 1 0 1 5 T o l l F r e e 1 8 7 7 7 6 1 2 8 1 9 Step 4 Installation of front and rear trusses Figure 7 No Part Qty No Part Qty 7 2x2 10A 2x2 8L 1x2 10B 1x2 8R 1x2 12 6x2 9 4x2 20 8x2 9L 1x2 22 1...

Страница 12: ...all boards 34 and reed groove 17 Fix the board 34 with self tapping screw 26 Fix the reed groove 17 with the self tapping screw 25 Parts used in this step 88 Reed groove 17 440 Self tapping screw 25 1...

Страница 13: ...7 7 6 1 2 8 1 9 Step 6 Install front and rear film Lift the film 30A and fix the film with a clip spring 17A from top to bottom Install door buckle 15 with self tapping screw 25 Cut the door film as...

Страница 14: ...building frame on one side the cover must be pulled over the top of the truss frame without being snagged or stressed on any frame members tighten the film evenly to eliminate wrinkles and make the f...

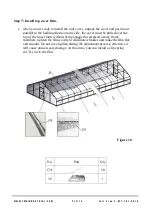
Страница 15: ...m tube and clamped with a pressure film carrier 19 Figure 11 No Part Qty No Part Qty 14 24 25 48 14A 2 28 2 19 40 A round plug 28 is put on both ends of the film rolling machine guide tube 13 and the...

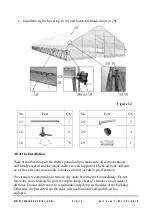
Страница 16: ...components are still firmly secured and the whole shelter is well supported Check all bolts and nuts as well as all connection points to make sure they are all in good position We strongly recommend...

Отзывы: