background image

K I O S K   O P E R A T I O N S   M A N U A L  


14 

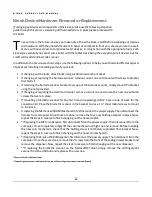
Kiosk Device/Hardware Removal or Replacement 

If changing out devices or components of the kiosk, please use the following steps as a 
guide through this process. Assuming all tools needed are in place please proceed with 
the build.  

o save time in the future, ensure you make note of how the kiosk is built before swapping out devices 
and hardware. With the printed document in hand, or computer in front you, ensure you are in a well-
lit area with easy access to components and devices, in conjunction with the appropriate tools. 

Each 

kiosk style essentially has exact same build, with the tablet kiosk being the exception for all devices but the 
credit card reader and barcode scanner.


In addition to the previous sections’ steps, use the following options to help you with certain different aspects 
of physically installing or building parts of your kiosk:  


If changing out the locks; attach locks using Loctite and wrench or socket. 


If changing or replacing the barcode scanner; remove current one and mount with screws to bracket 
that holds it. 


If removing the barcode scanner bracket to swap out the barcode scanner, simply mount the bracket 
using the nuts provided. 


If changing or replacing the credit card reader, remove current one and secure the new one with the 
screws that were in place. 


If mounting a biometric scanner for the first time (or replacing), drill ¾” hole in side of kiosk for the 
conversion kit. Place the biometric scanner in the bracket and use 1 ½” sheet metal screws to mount 
to the kiosk. 


If replacing the MEI Series 2000 Bill Mechanism, first disconnect the power supply. Then disconnect the 
harness from computer. Once those are done, remove the four nuts holding acceptor in place. Now, 
repeat the steps in reverse to finish changing out the new acceptor. 


*If replacing the MEI Coin Recycler, first disconnect from the power supply. Then disconnect from the 
computer. Once completed, simply lift the coin mechanism straight up and remove. Before installing 
the new coin mechanism, check that the holding screw is still barely separated from bracket. Now, 
repeat the steps in reverse to finish changing out the new coin mechanism. 


*If replacing the Fujitsu F53 Bill Dispenser, first disconnect the power supply. Then disconnect from the 
computer. Once those are done, remove the 2 screws from the front of the sliding drawer bracket and 
remove the dispenser. Now, repeat the steps in reverse to finish changing out the new dispenser. 


**If  replacing  the  biometric  scanner  on  the  Microsoft©  Tablet,  simply  remove  the  old  fingerprint 
scanner from the USB hub and replace with a new one. 

*These are Cash-Out Kiosk only steps. 

**Depending on when your tablet was ordered, you will have a fingerprint scanner located differently. 


Содержание Kiosk

Страница 1: ... S K I N S T R U C T I O N A L O P E R A T I O N S T R O U B L E S H O O T I N G M A N U A L ThreeSquareMarketKioskGuide Three Square Market 2801 Harvey St Hudson WI 54016 Phone 715 386 2233 By Dan Heineman ...

Страница 2: ...n and Network Set Up 12 Kiosk Device Hardware Removal or Replacement 14 Kiosk Troubleshooting Guide 15 Item will not scan at kiosk 15 Bill acceptor not working with or without βα message next to App version 16 Touch Screen is not working 16 Credit Card Reader is not reading cards 17 Biometric fingerprint scanner not working 17 Black Screen and or Kiosk Rebooting Continuously 18 Index 19 Appendix A...

Страница 3: ... will contain o Kiosk Computer PC o 15 Touchscreen Monitor o Ethernet Cable o Ethernet Switch o Kiosk Leveling Feet o Mouse o Keyboard o USB type A to B Cord o Kiosk Lock Key o Warranty See Appendix E p25 Must match corresponding TSM on computer to the last three on the kiosk shell number before building kiosk Proper lighting is a must when working inside the kiosk shell so have a flashlight ready...

Страница 4: ...rd reader barcode scanner biometric scanner if ordered outlet power strip USB hub power cords MEI harness webcam and other items not listed above in the contents box Once ready ensure the computer is mounted to the back of the touchscreen and then align the bracket with the four bolts on the inside of shell Finally tighten nuts onto the bolts and ensure it is held firmly in place Now that everythi...

Страница 5: ... which typically is COM3 but Three Square Market will finish when registering the kiosk 9 If using a biometric scanner follow this step simply plug into one of the computers or USB hub s 2 0 USB ports and the drivers are automatically installed after you plug in the reader for the first time 10 Locate the webcam at the top of the kiosk in the center and plug it into a 3 0 USB port on the computer ...

Страница 6: ...ling Feet Kiosk Snap Ring 1 5 M3 0 5x10mm Screws for Credit Card Reader USB to Serial Adapter USB Hub Kiosk Cable Staple Clip 5 Port Network Switch Biometric Scanner Custom Decal Custom Wrap The kiosk shell will arrive with MEI Bill Acceptor MEI harness MEI Coin Recycler Fujitsu Bill Dispenser credit card reader barcode scanner biometric scanner if ordered outlet power strip USB hub power cords we...

Страница 7: ...Bill Dispenser USB cord plugged into a 2 0 USB port on the computer Then power on the dispenser Three Square Market will finish the installing process when registering the kiosk 6 Next get the MEI Coin Recycler s USB cord and plug into a 2 0 USB port on the computer Then power on the coin recycler Three Square Market will finish the installing process when registering the kiosk 7 Using the MEI Bil...

Страница 8: ...l Three Square Market and we will work with you to finish up the installation process and get your kiosk registered with the 32M system Junior Kiosk Model This model is roughly 25 in height 24 wide 11 25 deep and weighs approximately 75 lbs It leaves Three Square Market with a contentsbox itemslisted above and the Kiosk shellwithallthe items securelyfastened inside This and any additional informat...

Страница 9: ...ply cord is securely in place on the monitor and computer proceed to plug both into the power supply Turn on and wait for computer to start up Windows and the kiosk software 4 Reference Troubleshooting Guide on page 14 and use the opening section as a guide to get to the desktop of your kiosk s computer 5 On the desktop of computer open the device manager as follows to open device manager click on...

Страница 10: ... and get your kiosk registered with the 32M system Express Kiosk Model This model is roughly 25 in height 24 wide 11 25 deep and weighs approximately 70 lbs It leaves Three Square Market with a contentsbox itemslisted above and the Kiosk shellwithallthe items securelyfastened inside This and any additional information can be found at www 32marketstore com The kiosk will arrive in a couple of diffe...

Страница 11: ...eference Troubleshooting Guide on page 14 and use the opening section as a guide to get to the desktop of your kiosk s computer 5 On the desktop of the computer open the device manager as follows to open device manager click on the Windows start button lower left corner of screen and then type device into the search bar at the bottom Once Device Manager populates into the list click on it At this ...

Страница 12: ...essory Device Component check list Microsoft Surface Pro 2 Tablet 10 6 ClearType Full HD Touchscreen Tablet Power Supply Credit Card Reader Swiper Barrel Lock for kiosk Jadak Barcode Scanner CAT5e Patch Cable M3 0 5x10mm Screws for Credit Card Reader USB to Serial Adapter USB Hub Biometric Scanner Custom Decal Custom Wrap The tablet kiosk will arrive with credit card reader barcode scanner biometr...

Страница 13: ...n for a wireless icon or computer monitor cord icon to ensure the computer is online Call Three Square Market if you experience any difficulty with this 8 At this point call Three Square Market and we will work with you to finish up the installation process and get your kiosk registered with our system Depending on whenyour kiosk was ordered you will have a couple differentmakes it could be MEI Se...

Страница 14: ...connection is preferred over a wireless or hotspot connection All kiosk communication is strictly outbound and does not require any inbound communication DVR Night Owl Product Information and Network Set Up ThefollowinginformationistheonlysupportThreeSquareMarketprovidesfortheNightOwlSecuritySystem Regardless of which system was purchased Night Owl 4 Channel DVR X9 44 50 o 4 Channel Security Syste...

Страница 15: ...ystem with a 2TB HDD 8 Hi Res 900 TVL Cameras and Free Night Owl Pro App Night Owl s cutting edge X9 168 2TB is a 960H complete security solution with a 2TB pre installed hard drive 8 hi resolution 900 TVL cameras with 70 wide angle viewing and remoteplayback Utilizingtheincluded6ft HDMIcable vieworplaybackfootage seeingevery detail clearer than ever With this TRUE 960H DVR now you can enlarge you...

Страница 16: ... and secure the new one with the screws that were in place If mounting a biometric scanner for the first time or replacing drill hole in side of kiosk for the conversion kit Place the biometric scanner in the bracket and use 1 sheet metal screws to mount to the kiosk If replacingthe MEISeries2000 BillMechanism firstdisconnect the power supply Thendisconnect the harness from computer Once those are...

Страница 17: ... screen does not change or actually scan o Go to the desktop of computer through task manager or site admin button on kiosk when logged in and open device manager To open device manager click on Windows start button lower left corner of screen and then type device into search bar at the bottom Once Device Manager populates into the list click on it Check for errors then unplug scanner from compute...

Страница 18: ... the computer After that you need to power on the bill accepter Finally restart the computer so that the connection reset Disabled from System o Check for red light blinking twice Once confirmed disconnect USB cord that goes from the bill acceptor to the computer Next power off the bill acceptor ONLY Then plug the USB cord back into the computer After that you need to power on the bill accepter Fi...

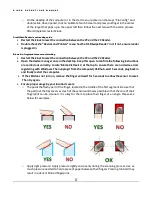
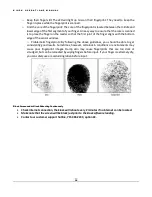
Страница 19: ...o confirm the following instructions are carried out correctly Locate Biometric Device at the top to ensure there are no device errors registering with Windows Then unplug it from the computer USB hub wait 5 seconds plug back in and finally restart the computer If the LED does not turn on remove the finger and wait for 5 seconds to allow the sensor to reset Then try again Ensure proper usage by yo...

Страница 20: ...or window o Problematic fingerprints By following the above guidelines you should be able to get consistently good results Sometimes however certain skin conditions or environments may cause poor fingerprint images Damp skin may cause fingerprints that are too dark or smudged but can be remedied by wiping fingers before input If your finger is extremely dry you can safely use a moisturizing lotion...

Страница 21: ...er is not reading cards 17 18 Ctrl Alt Del 15 Custom Decal 2 4 7 8 10 Custom Wrap 2 4 7 8 10 desktop 15 Device Manager Installation Troubleshooting 3 5 7 9 15 16 Disabled from System Troubleshooting 16 DVR 12 DVR Night Owl 12 Ethernet Cable 1 Ethernet Switch 1 Express Kiosk 8 Fan Guard Grill 2 4 6 8 Fujitsu F53 4 Fujitsu Power Supply 4 Fujitsu Power Supply Outlet Cord 4 Full Kiosk 1 Green Lights a...

Страница 22: ...t i 1 3 5 6 7 8 9 10 11 12 15 16 Touch Screen is not working 16 un calibrated Touchscreen 16 USB Hub Installation Troubleshooting 2 4 6 8 10 USB to Serial Adapter 2 4 6 8 10 USB type A to B MEI Harness Troubleshooting 1 2 4 5 6 7 9 Monitor 5 7 9 Touchscreen 2 VGA cable Monitor 2 5 7 9 Warranty Kiosk Parts 1 webcam Installation Troubleshooting 2 3 4 5 7 8 9 Webcam Installation Troubleshooting 2 4 6...

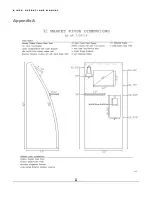
Страница 23: ...K I O S K O P E R A T I O N S M A N U A L 21 Appendix A ...

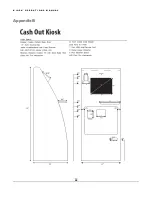
Страница 24: ...K I O S K O P E R A T I O N S M A N U A L 22 Appendix B ...

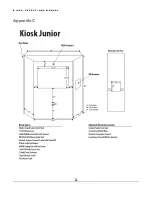
Страница 25: ...K I O S K O P E R A T I O N S M A N U A L 23 Appendix C ...

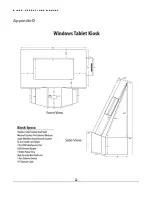
Страница 26: ...K I O S K O P E R A T I O N S M A N U A L 24 Appendix D ...

Страница 27: ...K I O S K O P E R A T I O N S M A N U A L 25 Appendix E ...

Отзывы: