EVOS
™
M5000 Imaging System User Guide
41
Quick Save images
Optional
: Enable
Quick Save
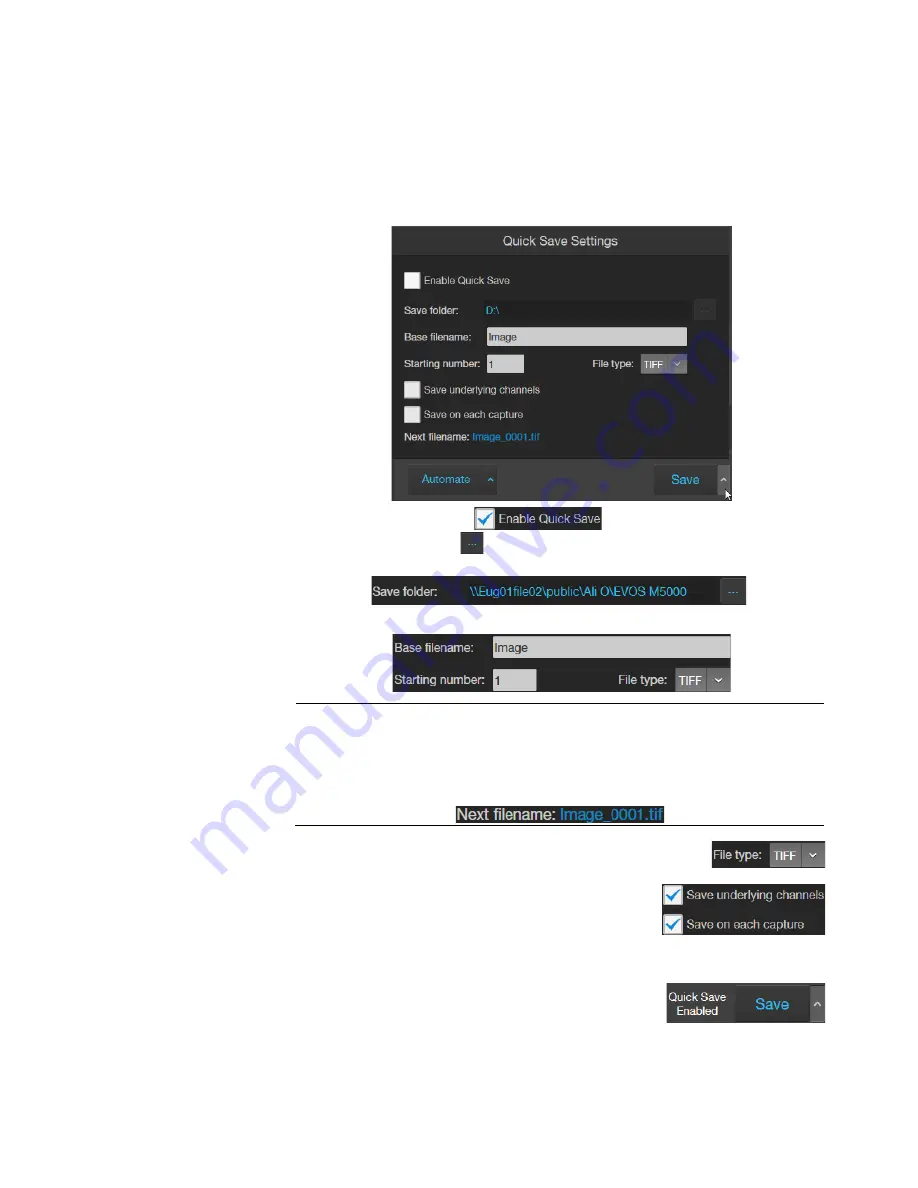
Quick Save function allows you to set the save options in advance and save your
captured images with a single click directly from the Capture tab or automatically
without having to click Save after each capture.
1.
Click the
Quick Save Settings
button (the arrow on the Save split button) to
open the Quick Save Settings dialog.
2.
Select
Enable Quick Save
.
3.
Click the
Browse
button to open the Select folder dialog, navigate to the
folder where you want to save captured images, then click
Select Folder
.
4.
Enter a
Base Filename
and
Starting number
for saved images.
Note:
The default base filename is Image. Base filename is appended by a
numerical suffix and channel name.
Starting number determines the starting numerical suffix, which is increased
by one for each subsequently saved image. For example, Image_0001,
Image_0002, and so on.
5.
Select the File Type from the dropdown menu. Available
options for file type are
PNG
,
TIFF
,
JPEG
, and
BMP
.
6.
To save the image displayed in the viewing area and
each underlying channel individually, select
Save
underlying channels
.
7.
To save captured images automatically without having to click Save after each
capture, select
Save on each capture
.
8.
Click the
Quick Save Settings
button again to save
your settings and close the dialog.


