67-058-690
TPS202 Powerseal Outdoor Power Enclosure Instructions
The Powerseal Outdoor Power Enclosure is a member of the Powerseal range which is manufactured from tough, durable thermoplastic and is intended for
use in an outdoor environment or wherever the protection provided by the Powerseal range is required. All products in the range are rated at IP55 or better for
protection against water and dust. All Powerseal products must be fi tted according to the relevant instructions to maintain their IP rating once installed.
This product complies with the following standards:
IP55 rating: BS EN 60529
Socket outlet: BS1363
Introduction
This Powerseal Outdoor Power Enclosure is designed to accommodate accessories such as trailing sockets with plugs and transformers that are pre-wired
by the manufacturer.
There is no earth terminal facility within this enclosure, ensure any accessory requiring an earth is connected via the incoming supply.
The supply should be taken from a power outlet protected by a residual current device (RCD).
Ensure any exposed cable is suitable for use outdoors.
Do not drill holes into any part of the enclosure as this could impair the IP55 weatherproof rating.
Installation
This product is not intended for permanent installation.
The product should be mounted on a vertical surface with cable entries at the bottom and not more than 1.5m above the ground.
The Powerseal Outdoor Power Enclosure can be installed in two ways.
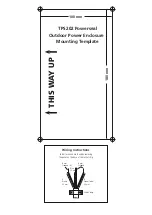
1. The product can be fastened to the wall using four No.8, min 1.5in. long wood screws. To aid installation in this manner, a template for the four mounting
holes has been provided on the reverse of this instruction leafl et. Note - installation onto an uneven surface may cause the base to twist and prevent the lid
from properly sealing, always check that the lid is properly located. If it is not, open the lid, slacken one or more of the four base fi xing screws and try again.
2. The Powerseal Outdoor Power Enclosure can also be supported on the picture hooks located at the top rear of the product.
Wire the socket strip following the wiring instructions on the reverse of these instructions.
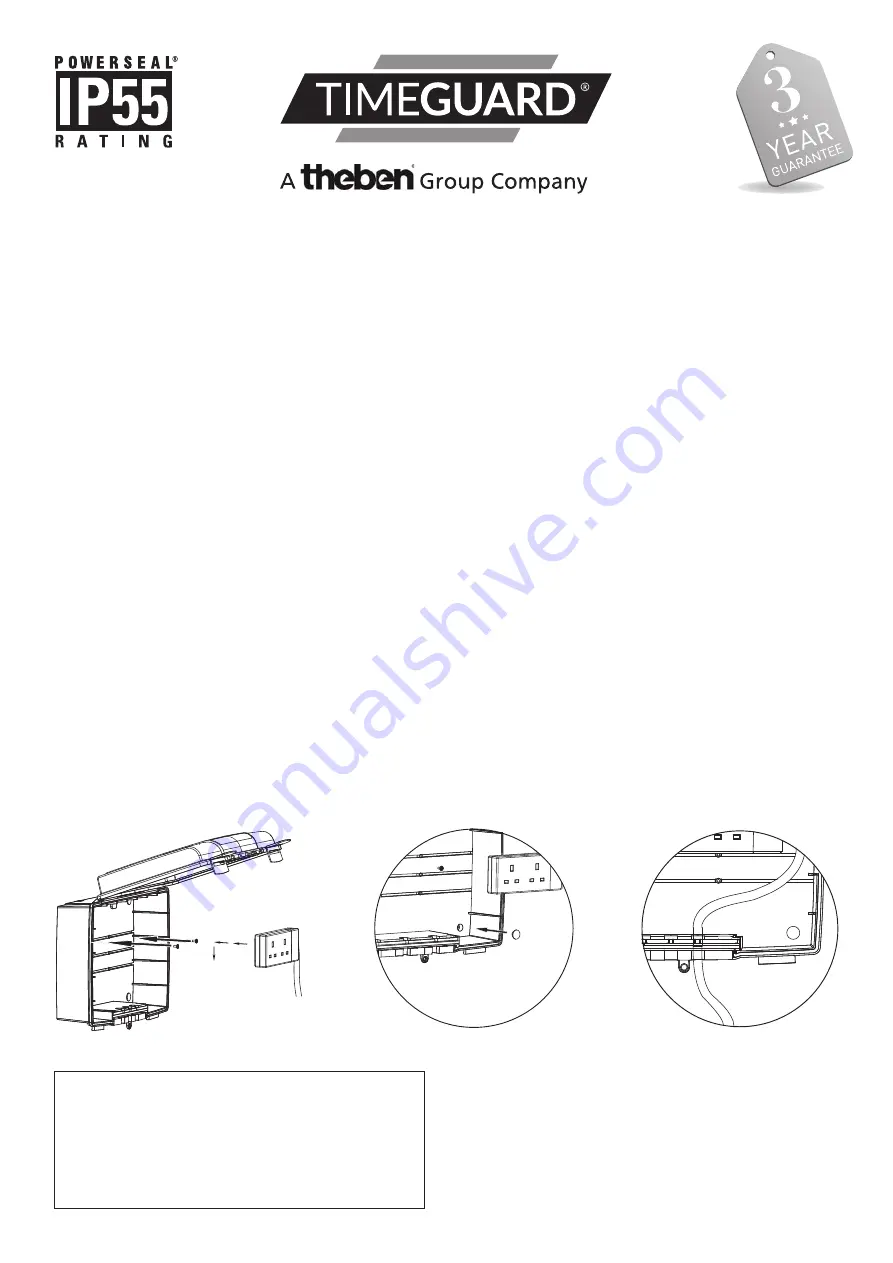
Determine where in the box you want the socket strip located. Fix the two short screws to the appropriate holes and tighten, leaving a distance of
approximately 3mm between the bottom of the screw head and the base of the box. Hook the socket strip into place. If the socket strip won’t hook onto
the screws or is too loose, tighten or loosen the screws to adjust. (Fig .1)
Alternatively, the socket strip can be fi xed in place using the supplied velcro.
Ensure that the silicone bungs provided are installed in the 4 screw holes on the bottom of the box. These prevent water entering the product. (Fig .2)
Plug in the output plugs / transformers as required, making sure the cables pass through the waterproof slots. (Fig .3)
Specifi cations for the enclosure.
Degree of protection
IP55
Maximum cable size
2.5 sq.mm, 3core
Operating temperature range
-20º to 40ºC
Installation temperature range
0º to 40ºC
Timeguard Ltd.
Victory Park, 400 Edgware Road,
London NW2 6ND Tel: 020-8452-1112
3 Year Guarantee
In the unlikely event of this product becoming faulty due to defective
material or manufacture within 3 years of the date of purchase, please
return it to your supplier in the fi rst year with proof of purchase and it
will be replaced free of charge. For years 2 and 3 or any diffi culty in
the fi rst year telephone the helpline on
020 8450 0515.
3
.
g
i
F
2
.
g
i
F
1
.
g
i
F


