Service and Repair Manual
December 2018
Turntable Rotation Components
58
Z®-60/37 DC • Z®-60
/37 FE
Part No. 1271125GT
3
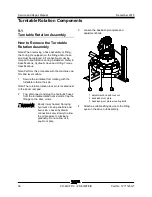
Push the backlash pivot plate towards the
turntable as far as possible (this will push the
rotation gear into the turntable bearing ring
gear).
4
Loosen the lock nut on the adjustment bolt.
5
Turn the adjustment bolt clockwise until it
contacts the backlash pivot plate.
6
Turn the adjustment bolt 1/2 turn
counterclockwise. Tighten the lock nut on the
adjustment bolt.
7
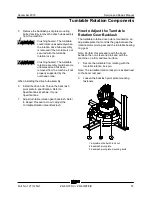
Rotate the backlash pivot plate away from the
turntable until it contacts the adjustment bolt.
Then torque the mounting fasteners on the
backlash pivot plate to specification. Refer to
Specifications,
Machine Torque
Specifications
.
8
Rotate the turntable through an entire rotation.
Check for tight spots that could cause binding.
Readjust if necessary.
9-2
How to Replace the Universal Tilt
Sensor (UTS)
This machine has a dual axis angle-sensing device
called the Universal Tilt Sensor (UTS). It is mounted
on the turntable to monitor and communicate
ground angle relative to gravity via CAN bus.
Should the turntable be tilted at the
Allowable Tilt
Angle
or greater an alarm will sound at both the
turntable and the platform. If not calibrated, the
machine will only drive in the stowed configuration
in turtle mode.
Note: Perform this procedure on a firm, level
surface with the machine in the stowed position.
1
Push in the red Emergency Stop button to the
off position.
2
Tag and disconnect the harness from the tilt
sensor.
Note: Record the X and Y axis orientation of the tilt
sensor.
3
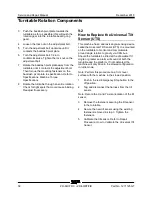
Remove the fasteners securing the tilt sensor
to the turntable.
4
Secure the new tilt sensor using the existing
fasteners removed in step 3. Tighten the
fasteners.
5
Calibrate the tilt sensor. Refer to Repair
Procedure,
How to Calibrate the Universal Tilt
Sensor
.
Содержание Genie Z-60 DC
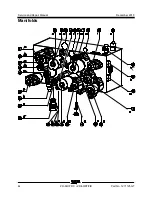
Страница 54: ...Service and Repair Manual December 2018 Manifolds 44 Z 60 37 DC Z 60 37 FE Part No 1271125GT ...
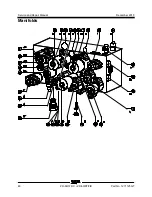
Страница 56: ...Service and Repair Manual December 2018 Manifolds 46 Z 60 37 DC Z 60 37 FE Part No 1271125GT ...
Страница 104: ...Service and Repair Manual December 2018 CAN BUS Wiring Diagram DC Models 94 Z 60 37 DC Z 60 37 FE Part No 1271125GT ...
Страница 106: ...Service and Repair Manual December 2018 96 Z 60 37 DC Z 60 37 FE Part No 1271125GT This page intentionally left blank ...
Страница 107: ...December 2018 Service and Repair Manual 97 Wiring Diagram Options ...
Страница 108: ...Service and Repair Manual December 2018 98 Z 60 37 DC Z 60 37 FE Part No 1271125GT Wiring Diagram Options ...
Страница 110: ...Service and Repair Manual December 2018 100 Schematics Options 4WD DC and FE Models ...
Страница 111: ...December 2018 Service and Repair Manual 101 Power Cable Wiring Diagram ...
Страница 112: ...Service and Repair Manual December 2018 102 Z 60 37 DC Z 60 37 FE Part No 1271125GT Power Cable Wiring Diagram ...
Страница 113: ...December 2018 Service and Repair Manual 103 Hydraulic Schematic DC and FE Models ...
Страница 114: ...Service and Repair Manual December 2018 104 Z 60 37 DC Z 60 37 FE Part No 1271125GT Hydraulic Schematic DC FE Models ...
Страница 115: ...December 2018 Service and Repair Manual 105 Electrical Schematic DC FE Models ...
Страница 116: ...Service and Repair Manual December 2018 106 Z 60 37 DC Z 60 37 FE Part No 1271125GT Electrical Schematic DC FE Models ...
Страница 117: ...December 2018 Service and Repair Manual Part No 1271125GT Z 60 37 DC Z 60 37 FE 107 Electrical Schematic DC FE Models ...
Страница 118: ...Service and Repair Manual December 2018 108 Electrical Schematic DC FE Models ...
Страница 119: ...December 2018 Service and Repair Manual Part No 1271125GT Z 60 37 DC Z 60 37 FE 109 Electrical Schematic DC FE Models ...
Страница 120: ...Service and Repair Manual December 2018 110 Electrical Schematic DC FE Models ...
Страница 121: ...December 2018 Service and Repair Manual 111 Ground Control Box Terminal Strip Wiring Diagram DC FE Models ...
Страница 125: ......

