background image


PCoIP Management Console User Manual


Table 4-1: Example AutoConfig rules 

Group


Device


Password


Cdn3


IP


Range


Cdn2


Group


A


Add


device


with


no


password


PASSW0RD


<Empty>


Group


B


Add


device


with


no


password


192.168.50.1

 ‐ 

192.168.50.254


Table 4-2: Example AutoConfig rule application 

Note: AutoConfig is enabled so condition 1 is always true. 

Zero


Client


Group


A


Rule


Group


B


Rule


AutoConfig


Result


IP


Password


Cdn


2


Cdn


3


Cdn


2


Cdn


3


192.168.60.10


PASSW0RD


TRUE


TRUE


FALSE


FALSE


Added


to


Group


A


192.168.50.10


PASSW0RD


TRUE


TRUE


TRUE


FALSE


Added


to


Group


A


192.168.60.20


TRUE


FALSE


FALSE


TRUE


Not


added


to


any


group


192.168.50.20


TRUE


FALSE


TRUE


TRUE


Added


to


Group


B


To create a new AutoConfig rule: 

1.  Optionally disable AutoConfig before adding or editing rules. This is 

recommended practice so interim rule configurations do not result in unexpected 
group memberships. 

2.  Choose an existing group from the 

Choose Group

 select box and click 

Add rule 

for group

. When a new rule is created it has no IP ranges, no specific passwords 

and Add device with no password is checked. If AutoConfig is enabled this rule 
will match all Zero Clients with no password. 

3.  To restrict the rule's password matching click 

Add Password

 to add one or more 

specific passwords to the rule. Once the rule contains one or more specific 
passwords the 

Add devices with no password

 checkbox can be cleared if 

desired. There is no limit on the number of specific passwords a rule can have. 

4.  To restrict the rule's IP address matching click 

Add IP Address Range

 to add one 

or more IP address ranges. There is no limit on the number of IP address ranges 
a rule can have. 

5.  If AutoConfig was disabled in step 1 enable it now to make the current rule 

configuration active. 

When two rules conflict with each other the Manage AutoConfig screen will display a 
warning. Leaving rule conflicts unresolved will result in unexpected group memberships 
as the AutoConfig feature randomly selects which rule gets applied to a Zero Client that 
satisfies more than one rule. 

After creation, AutoConfig rules can be freely edited by adding and removing specific 
passwords and IP address ranges and changing the Add devices with no password 
checkbox. Again, it is recommended to disable AutoConfig before editing the rules and to 
re-enable it when done. 

TER0812002 Issue 5


54


Содержание PCoIP Management Console

Страница 1: ...PCoIP Management Console User Manual TER0812002 Issue 5 2...

Страница 2: ...user Without limiting the rights under copyright no part of this document may be reproduced stored in or introduced into a retrieval system or transmitted in any form or by any means electronic mechan...

Страница 3: ...placed PCoIPMC with MC Added support for Internet Explorer 4 September 17 2010 Updated for release 1 3 30 of the Management Console Added Device Log Monitoring Added support for Firmware Release 3 2 5...

Страница 4: ...g 21 1 4 Management Console and Firmware Version Compatibility 22 2 INSTALLATION AND SETUP 24 2 1 Management Console Host System Requirements 24 2 2 Contents of the Management Console package 24 2 3 I...

Страница 5: ...y optional 38 4 2 2 Legend 38 4 2 3 Query Devices and Update Database 40 4 2 4 Filtering Devices 40 4 2 5 Configure Device Group 41 4 2 6 Linking Devices 42 4 2 7 Access Device Web Page 43 4 2 8 Summa...

Страница 6: ...4 7 2 Logging Controls 68 4 7 3 Status 68 4 8 Manage Settings 68 4 8 1 Database Management 69 4 8 2 Environment Settings 70 4 9 Site Status 70 4 10 Online Help 72 5 GETTING STARTED 73 5 1 Start the M...

Страница 7: ...evice Management Legend Box 39 Figure 4 8 Adding Devices to a Group 42 Figure 4 9 Peering a Pair of Devices 43 Figure 4 10 Summary Device Information Dialog Box 44 Figure 4 11 Edit Device Name Using S...

Страница 8: ...l Update Devices Web Page 65 Figure 4 31 Second Update Devices Web Page 66 Figure 4 32 Firmware Update Status Web Page 66 Figure 4 33 Device Log Monitoring Web Page 67 Figure 4 34 Settings Web Page 69...

Страница 9: ...nagement Console User Manual Tables Table 2 1 Potential Problems Associated with Upgrading the MC 26 Table 4 1 Example AutoConfig rules 54 Table 4 2 Example AutoConfig rule application 54 TER0812002 I...

Страница 10: ...On Screen Display PC over IP Personal Computer over Internet Protocol PCoIP Personal Computer over Internet Protocol PC over IP PCoIP Host Host side of PCoIP system PCoIP Zero Client Desktop or clien...

Страница 11: ...available in the PCoIP Administrative Interface User Manual TER0606004 This document is broken into the following sections Section 1 provides a description of the components found in a PCoIP deployme...

Страница 12: ...grouped together peered The PCoIP Management Console used for peering and configuration is shown The figure does not show a connection broker which is required when Hosts are dynamically assigned to Z...

Страница 13: ...ed to This is required to allow the tool to communicate with the PCoIP devices Connection Broker A Connection Broker is an optional component that allows an administrator to manage user access to comp...

Страница 14: ...w to do this The current release of the MC is only compatible with versions 3 0 and higher of the Firefox web browser and versions 7 and 8 of the Internet Explorer web browser Support for additional b...

Страница 15: ...ontains a subset of the configuration parameters If the firmware on a device is updated when a profile is applied the profile settings will be written to the device after the new firmware is activated...

Страница 16: ...e through the device web interface or Zero Client OSD interface 3 If a DNS SRV record cannot be installed and the deployment cannot use the PCoIP MC DNS Based Discovery Prefix configuration setting th...

Страница 17: ...o local domain and _tcp entry Figure 1 3 DNS Service Configuration Menu 3 Right click and select Other New Records 4 Select Service Location SRV 5 Fill in the entries as shown in Figure 1 4 and enter...

Страница 18: ...e g if a PCoIP device is located in the domain sales europe companyname com then the MC s domain name can be any one of sales europe companyname com europe companyname com or companyname com The PCoI...

Страница 19: ...ttempts to transmit a status message to the MC at the FQDN Upon transmission timeout the device composes the next FQDN variation by proceeding one level up the domain hierarchy The last domain name at...

Страница 20: ...tuation the administrator can discover devices using this feature and configure the PCoIP MC DNS Based Discovery Prefix setting of each device so the devices contact the MC each time they boot Figure...

Страница 21: ...nd optional IP address ranges as described here o No Password Add discovered Zero Clients to this group if they have no password configured o Password Add discovered Zero Clients to this group if they...

Страница 22: ...0 19 current 0 19 2 2 Added the ability to Configure View Connection Server address Configure View Connection Server port Enable disable View Connection Server SSL Enable disable View Connection Serve...

Страница 23: ...n Display menu entries VMware View Connection Server address cache behaviour and content Choose the Estonian Hungarian Latvian and Serbian keyboard layouts Configure VMware View auto logon 1 5 20 0 19...

Страница 24: ...s than 1000 devices the server machine CPU should be a 2GHz or faster Intel Pentium 4 or better processor If the MC manages 1000 or more devices the server machine CPU should be an Intel Core 2 Duo Pr...

Страница 25: ...thod to import the MC VM into a VMware ESX server is to use the VMware vCenter Converter Standalone Client This free tool can be downloaded from http www vmware com products converter Install the tool...

Страница 26: ...th recommendations on how to avoid them Information that will and will not be imported from a backed up database Steps the administrator should follow when migrating to a new version of the MC 2 6 1 P...

Страница 27: ...vices in the deployment 2 6 2 What Information is Imported When a database is imported into the MC the following information will be populated Device information for all devices device details profile...

Страница 28: ...down the values of the settings that will not be imported 4 Shutdown the old version of the MC Refer to section 3 8 5 Install and begin running to the new version of the MC 6 Upload the database to th...

Страница 29: ...n displayed on the MC VM Console window 3 2 Set Web Interface Password The MC web interface is protected by a password When a browser connects to the MC web interface the user is prompted to enter a p...

Страница 30: ...efault the MC uses DHCP to acquire an IP address The MC network settings can be modified to use a static IP address if a DHCP server does not exist on the network or the administrator wishes to assign...

Страница 31: ...rwritten by the settings configured in the DHCP server 3 5 Database Management The MC maintains a database containing information on the discovered PCoIP devices configuration data entered by the admi...

Страница 32: ...database archive command allows the administrator to delete a database archive from the MC VM 3 6 Change Time Zone The MC retrieves the current time from the host machine The host machine provides th...

Страница 33: ...orm a clean shutdown of the MC VM select the Halt virtual machine option on the MC VM console The MC VM can be restarted at a later time When the MC VM is restarted the MC database is restored to the...

Страница 34: ...Install Certificate When the Certificate Import Wizard appears click the Next button In the next window choose to Automatically select the certificate store based on the type of certificate and click...

Страница 35: ...her browser it will connect to the MC and the user is prompted to accept the MC License Agreement shown in Figure 4 3 This process must be completed once Future logins to the MC will not prompt the us...

Страница 36: ...ion 3 2 describes how to modify this password Figure 4 4 Web Interface Login After logging in the MC Home web page shown in Figure 4 5 is displayed Administrators can do the following from this web pa...

Страница 37: ...t The Device Management web page shown in Figure 4 6 supports the following actions Discover devices manually Query devices and update database Display a subset of devices based on various filter crit...

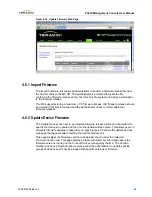
Страница 38: ...3 describes the Device Discovery optional feature 4 2 2 Legend The device management Legend shown in Figure 4 7 provides information that explains the meaning of special symbols and line colors displ...

Страница 39: ...strator wishes to have the MC maintain this peering information the user should link the devices in the MC Refer to section 4 2 6 for details on how this is done A dashed line indicates the device is...

Страница 40: ...al on the Device Management web page equal to Last Updated 4 2 4 Filtering Devices The Filter box supports different ways of filtering the PCoIP devices displayed in the HOSTS and ZERO CLIENTS columns...

Страница 41: ...o the device Peer the device Send power management commands to the device Update firmware on the device Edit the device name The concepts associated with a MC group are explained in section 1 3 1 User...

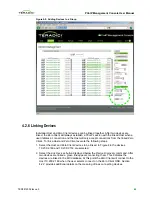
Страница 42: ...o Client execute the following steps 1 Select the Host and Zero Client devices to be linked In Figure 4 9 the devices 10 200 2 160 and 10 200 2 153 are selected 2 Select the Link Devices button displa...

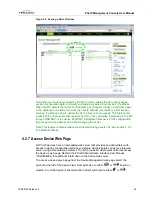
Страница 43: ...ix configuration field is equal to the address of the MC managing the device Note This feature is disabled when the Brokered setting equals Yes See section 4 8 2 for additional details 4 2 7 Access De...

Страница 44: ...s must be unique The Name field is a string that users can set equal to whatever they want Users should consider including location information in the name to simplify locating the device but this is...

Страница 45: ...ce by the MC is deleted This includes the device name group peering information and other information 4 2 8 4 View Device Event Log All PCoIP devices maintain a persistent event log containing message...

Страница 46: ...ure 4 12 Users can view all of the categories by selecting the Expand All link Users can collapse all of the categories by selecting the Collapse All link Below is a list of the possible values assign...

Страница 47: ...rofile settings to a single device in a group 4 2 9 4 Open Device Profile The View Profile link opens the Profile Management web page for the profile associated with this device Administrators can use...

Страница 48: ...of devices in each group manage AutoConfig rules and view profile application status information Administrators can initiate the following actions using this web page Create Modify Edit Delete groups...

Страница 49: ...When the MC is initially started the Default group is created This is done to simplify the use of the MC by not forcing users to create a group Administrators are free to use this group or delete it 4...

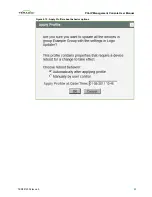
Страница 50: ...ain properties that require a device reboot when the profile is applied The Apply Profile confirmation dialog displays radio buttons to select automatic or manual device rebooting Figure 4 15 shows th...

Страница 51: ...PCoIP Management Console User Manual Figure 4 15 Apply Profile reboot behavior options TER0812002 Issue 5 51...

Страница 52: ...when the profile is applied The legend contains the following description of each reboot icon indicates that the profile includes a property that requires a device restart for the new setting to take...

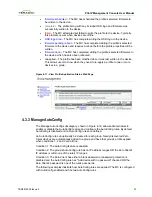
Страница 53: ...es in a group Figure 4 17 View Profile Application Status Web Page 4 3 3 Manage AutoConfig The Manage AutoConfig subcategory shown in Figure 4 18 allows administrators to enable or disable the AutoCon...

Страница 54: ...checked If AutoConfig is enabled this rule will match all Zero Clients with no password 3 To restrict the rule s password matching click Add Password to add one or more specific passwords to the rule...

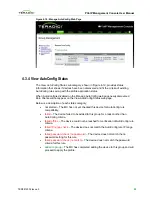
Страница 55: ...f each status category not started The MC has not yet checked this device for AutoConfig rule compatibility failed The device failed to be added to this group for a reason other than AutoConfig criter...

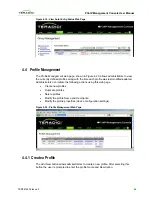
Страница 56: ...dated Administrators can initiate the following actions using this web page Create new profiles Duplicate profiles Delete profiles Modify the profile Name and Description Modify the profile properties...

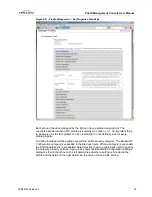
Страница 57: ...ured 4 4 3 Delete a Profile The Delete link allows the administrator to delete a profile The Delete link will not work if a profile is associated with one or more groups To delete a profile assigned t...

Страница 58: ...e property To define individual profile settings expand the profile property category The Bandwidth Configuration category is expanded in the previous figure When a category is expanded the Edit Prope...

Страница 59: ...property 4 4 5 2 Firmware in a profile A firmware file can be assigned in a profile along with upgrade criteria that must be met before the firmware is pushed to each device To associate firmware wit...

Страница 60: ...web page shown in Figure 4 25 supports the following actions Send reset commands to PCoIP Host and Zero Client devices Send power off commands hard S5 and soft S5 to host PCs Workstations Schedule res...

Страница 61: ...ation is powered off or restarted Power off Commands Soft power off commands sent to Host PCoIP devices trigger the same action that occurs when the user presses the host PC Workstation power button f...

Страница 62: ...s than or equal to the current time The administrator must choose which devices the command will be sent to by selecting the checkbox next to each target To schedule the command s the administrator mu...

Страница 63: ...be sent in the future 4 6 Update Firmware The Update Firmware web page shown in Figure 4 29 allows administrators to update the firmware running on PCoIP devices Administrators can initiate the follo...

Страница 64: ...2 Update Device Firmware The Update Devices link next to an imported firmware release allows an administrator to specify the devices to update and the time the update will take place This allows users...

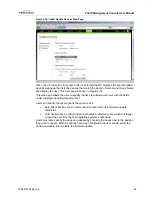
Страница 65: ...ur with the fields under the Begin updating targets at text Users can specify the reset options they wish to use Zero Client devices can be commanded to reset when the firmware update completes Host d...

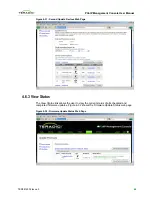
Страница 66: ...vices Web Page 4 6 3 View Status The View Status link allows the user to view the current status of all scheduled and completed firmware updates Figure 4 32 shows the Firmware Update Status web page F...

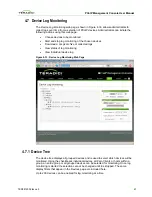
Страница 67: ...tatus of log monitoring View individual device log Figure 4 33 Device Log Monitoring Web Page 4 7 1 Device Tree The device tree displays all grouped devices and is used to select which devices will be...

Страница 68: ...to format the logs collected into individual txt files per device archived into tar gz format and presented as a downloadable file When log monitoring is no longer needed press Stop to end the log mo...

Страница 69: ...pload and download database files from the MC VM When this link is selected the web page shown in Figure 4 35 appears Figure 4 35 Database Management Web Page Uploading a Database The Browse and Uploa...

Страница 70: ...ironment Settings The Brokered configuration setting shown in Figure 4 34 should be set equal to Yes if the deployment is using a connection broker to manage Host and Zero Client peerings The setting...

Страница 71: ...he status will turn red indicating the administrator must clean up the MC database Options to reduce memory usage include limiting the number of firmware images stored in the database along with the n...

Страница 72: ...n the Update DNS SRV Records button on the home web page is selected 4 10 Online Help All MC web pages include HELP link in the upper right hand corner When this link is selected the screen shown in F...

Страница 73: ...3 Adding Devices to a Group Once the PCoIP devices are discovered the administrator must add them to a group This is done using the Device Management web page see Figure 5 1 The steps below walk the u...

Страница 74: ...t and Zero Client have been peered a PCoIP session can be started from the Zero Client To start a PCoIP session the user must select the connect button on the Zero Client OSD This section describes ho...

Страница 75: ...OSD Screensaver Text field in the OSD Configuration settings Refer to section 4 4 Create a Group and assign the profile created in the previous step to the new group Refer to section 4 3 Assign some d...

Страница 76: ...to a device and view power management status information Refer to section 4 5 Backup the MC database and download it from the MC VM to an external server Refer to sections 3 5 1 and 4 8 1 Upload a ba...

Отзывы: