background image

GENERAL INFORMATION

5300T MM382 (10–94)

1-8

MACHINE JACKING

You can jack up the machine for service at the
designated locations. Use a jack of adequate
capacity and good working condition. Always stop
the machine on a flat, level surface and block the
tires before jacking the machine up.

TO JACK UP THE MACHINE

1. Park the machine on a level surface.

2. Set the machine parking brake.

FOR SAFETY: Before Leaving Or Servicing
Machine; Stop On Level Surface, Set Parking
Brake, Turn Off Machine And Remove Key.

3. Block the machine tires that are not being

jacked up, to secure the machine position.

FOR SAFETY: When Servicing Machine, Block
Machine Tires Before Jacking Machine Up.

4. Use a jack of adequate capacity to raise the

machine. Jack up the machine only at the
designated locations.

FOR SAFETY: When Servicing Machine, Jack
Machine Up At Designated Locations Only.
Block Machine Up With Jack Stands.

5. Block machine up with jack stands or similar

devices near the designated jacking
locations to secure the machine.

6. Lower the machine onto the jack stands.

7. Check to make sure the machine is secure.

8. When finished servicing the machine, raise

the machine off the jack stands.

9. Remove the jack stands from under the

machine.

10. Lower the machine.

11. Remove the blocks from the tires.

Содержание 5300T

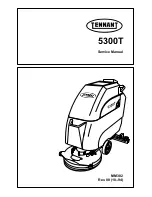
Страница 1: ...5300T MM382 Rev 00 10 94 Service Manual ...

Страница 2: ...lacement Transaxle and Transaxle drive motor replacement Scrubbing Squeegee assembly replace and adjust Scrubber head replace and adjust Scrubber brush motor replacement Vacuum fan replacement Solution recovery tank replacement Power wand pump replacement and Scrubbing troubleshooting chart Electrical Battery maintenance and replacement Charging instructions Circuit breaker relay replacement Instr...

Страница 3: ... STORE MACHINE 1 8 STORAGE INFORMATION 1 8 MACHINE JACKING 1 10 TO JACK UP THE MACHINE 1 10 SPECIFICATIONS 1 11 GENERAL MACHINE PERFORMANCE 1 11 POWER TYPE 1 11 MAINTENANCE 1 12 MAINTENANCE CHART 1 12 HARDWARE INFORMATION 1 13 STANDARD BOLT TORQUE CHART 1 13 METRIC BOLT TORQUE CHART 1 13 BOLT IDENTIFICATION 1 14 THREAD SEALANT AND LOCKING COMPOUNDS 1 14 ...

Страница 4: ...GENERAL INFORMATION 5300T MM382 10 94 1 2 ...

Страница 5: ...ne Avoid Moving Parts Do Not Wear Loose Jackets Shirts Or Sleeves When Working On Machine Block Machine Tires Before Jacking Machine Up Jack Machine Up At Designated Locations Only Block Machine Up With Jack Stands Use Hoist Or Jack Of Adequate Capacity To Lift Machine Wear Eye And Ear Protection When Using Pressurized Air Or Water Disconnect Battery Connections Before Working On Machine Avoid Con...

Страница 6: ...el in its place BATTERY CHARGING LABEL LOCATED ON THE BOTTOM OF THE OPERATOR CONSOLE FLAMMABLE SPILLS LABEL LOCATED ABOVE THE SOLUTION TANK FILL OPENING AND ON THE RECOVERY TANK COVER FOR SAFETY LABEL LOCATED ON THE MACHINE BACK PANEL ABOVE THE SQUEEGEE LEVER FLAMMABLE MATERIALS LABEL LOCATED ON THE UNDERSIDE OF THE RECOVERY TANK 09182 MOVING PARTS LABEL LOCATED ON THE SCRUB HEAD ACCESS DOOR ...

Страница 7: ... 09181 A Solution Tank I Recovery Tank Drain Hose B Recovery Tank J Console Panel C Scrub Head K Stop Arm D Scrub Head Access Cover L Squeegee E Solution Tank Fill Opening M Scrub Head Pedal F Batteries N Squeegee Down Pressure Knob G Recovery Tank Cover O Squeegee Leveling Knob H Solution Tank Hose ...

Страница 8: ...peed Switch D Brush Pressure Gauge E Machine Power Switch F Solution Switch G Pump On Light Option H ES Switch Option I Power Wand Switch Option J Hourmeter Option K On off Key Switch Option L Circuit Breakers M Power Kill Switch Option N Solution Flow Knob O Brush Pressure Knob P Brush Pressure Indicator Q Solution Tank Hose R Recovery Tank Drain Hose S Squeegee Lever T Parking Brake Lever Option...

Страница 9: ...E FOR SAFETY Before Leaving Or Servicing Machine Stop On Level Surface Set Parking Brake Turn Off Machine And Remove Key 1 Make sure the tanks are drained and rinsed out 2 Un plug the batteries and charge them properly STORAGE INFORMATION The following steps should be taken when storing the machine for extended periods of time 1 Drain and clean the solution and recovery tanks 2 Park the machine in...

Страница 10: ...not being jacked up to secure the machine position FOR SAFETY When Servicing Machine Block Machine Tires Before Jacking Machine Up 4 Use a jack of adequate capacity to raise the machine Jack up the machine only at the designated locations FOR SAFETY When Servicing Machine Jack Machine Up At Designated Locations Only Block Machine Up With Jack Stands 5 Block machine up with jack stands or similar d...

Страница 11: ...ght less batteries 102 kg 225 lb GENERAL MACHINE PERFORMANCE Item Measure Aisle turnaround width 1525 mm 60 in Turning radius 735 mm 29 in Maximum trailer loading clearance angle 5 POWER TYPE Type Quanity Volts Ah Rating Weight Batteries 2 12 130 20 hr rate 30 kg 66 lb 2 12 180 20 hr rate 53 kg 117 lb Type Use VDC Kw hp Electric Motors Scrub brush 24 0 56 0 75 Vacuum fan 24 0 56 0 75 Propelling 24...

Страница 12: ...ry tank Clean 1 1 Recovery tank ES mode Clean ES filter 1 3 Recovery tank float screen Clean 1 5 Solution tank ES mode Clean 1 6 Machine Check for leaks 1 7 Scrub head skirt Check adjustment 1 Check for damage and wear 1 100 Hours 4 Rear caster Lubricate SPL 1 2 Squeegee Check leveling 1 400 Hours 9 Vacuum fan motor Check motor brushes 1 10 Scrub brush motor Check motor brushes 1 11 Propelling mot...

Страница 13: ...ORQUE CHART Thread SAE Grade 5 SAE Grade 8 Size Torque ft lb Nm Torque ft lb Nm 0 25 in 7 10 9 14 10 13 14 38 0 31 in 15 20 20 27 20 26 27 35 0 38 in 27 35 37 47 36 47 49 64 0 44 in 43 56 58 76 53 76 72 103 0 50 in 65 85 88 115 89 116 121 157 0 62 in 130 170 176 231 117 265 159 359 0 75 in 215 280 291 380 313 407 424 552 1 00 in 500 650 678 881 757 984 1026 1334 NOTE Decrease torque by 20 when usi...

Страница 14: ...NT AND LOCKING COMPOUNDS Thread sealants and locking compounds may be used on this machine They include the following Locktite 515 sealant gasket forming material TENNANT Part No 75567 15 oz 440 ml cartridge Locktite 242 blue medium strength thread locking compound TENNANT Part No 32676 0 5 ml tube Locktite 271 red high strength thread locking compound TENNANT Part No 19857 0 5 ml tube ...

Страница 15: ...382 10 94 CONTENTS Page DRIVE TRANSAXLE 2 3 TO REMOVE THE TRANSAXLE 2 3 TO INSTALL THE TRANSAXLE 2 4 TO REPLACE TRANSAXLE DRIVE MOTOR 2 5 TO REPLACE DRIVE WHEEL TIRE ASSEMBLY 2 6 REAR CASTER 2 7 TO REPLACE REAR CASTER 2 7 ...

Страница 16: ...CHASSIS 5300T MM382 10 94 2 2 ...

Страница 17: ...n the machine power off 3 Lift the rear of the machine with an over head hoist or other lifting device until the transaxle drive wheels are off the ground 4 Place a jackstand under the machine frame 5 Remove the four 0 250 in hex nuts holding each drive wheel to the transaxle Remove the drive wheels from the machine 6 Un plug the transaxle drive motor from the main harness 7 Remove the four M8 hex...

Страница 18: ... under the machine frame Make sure the drive motor and electric leads are on the right hand side of the machine 6 Lift the transaxle up into the machine frame until the mount brackets and M8 hex screws can be reinstalled Tighten to 18 24 Nm 15 20 ft lb 7 Plug the drive motor into the main harness See schematic in the ELECTRICAL section of this manual 8 Reinstall the drive wheels onto the transaxle...

Страница 19: ...CHASSIS 2Ć5 5300T MM382 10 94 TO REPLACE TRANSAXLE DRIVE MOTOR The transaxle drive motor and transaxle must be replaced as one unit ...

Страница 20: ...il the rear caster is off the ground Place a jackstand under the machine frame 4 Place a jackstand under the machine frame 5 Remove the four 0 250 in hex nuts holding the drive wheel to the transaxle Remove the drive wheel from the machine 6 Reinstall the new drive wheel onto the transaxle using the four 0 250 in hex nuts Tighten to 11 14 Nm 7 10 ft lb 7 Remove the jack stands and lower the machin...

Страница 21: ...the rear of the machine with an over head hoist or other lifting device until the rear caster is off the ground Place a jackstand under the machine frame 3 Place a jackstand under the machine frame 4 Remove the four M8 hex screws and washers holding the caster to the machine frame Remove the caster from the machine 5 Position the new caster under the machine and reinstall the four M8 hex screws an...

Страница 22: ...CHASSIS 5300T MM382 10 94 2Ć8 ...

Страница 23: ...RESSURE SHOCK ABSORBER 3 15 TO REPLACE SCRUB BRUSH MOTOR 3 16 SQUEEGEE 3 18 REMOVING THE SQUEEGEE 3 18 INSTALLING THE SQUEEGEE 3 19 LEVELING THE SQUEEGEE 3 19 ADJUSTING SQUEEGEE BLADE DEFLECTION 3 20 SQUEEGEE BLADES 3 21 REPLACING OR ROTATING THE FRONT SQUEEGEE BLADE 3 21 REPLACING OR ROTATING THE REAR SQUEEGEE BLADE 3 22 TO REPLACE SQUEEGEE LIFT CABLE 3 23 TO REPLACE WATER SOLENOID VALVE 3 24 TO ...

Страница 24: ...SCRUBBING 5300T MM382 10 94 3Ć2 ...

Страница 25: ...used water flows from the solution tank through the solution valve to the scrub brushes The brushes scrub the floor As the machine is moved forward the squeegee wipes the dirty solution off the floor which is then picked up and drawn into the recovery tank by the vacuum fan ...

Страница 26: ... REMOVE RECOVERY TANK 1 Turn the machine power off FOR SAFETY Before Leaving Or Servicing Machine Stop On Level Surface Turn Off Machine 2 Tilt the recovery tank up NOTE Drain the recovery tank 3 Remove the worm drive clamp holding the drain hose to the recovery tank Remove the hose 4 Support the recovery tank and remove the M6 pan head screw holding the tank cable assembly to the recovery tank 5 ...

Страница 27: ...t the recovery tank up and support it 4 Align the four holes in the pivot hinge with the threaded inserts in the recovery tank Reinstall the four M6 pan head screws and tighten to 11 14 Nm 7 10 ft lb 5 Re attach the tank cable assembly to the recovery tank using the M6 pan head screw Tighten to 11 14 Nm 7 10 ft lb 6 Reinstall the drain hose and worm drive clamp to the bottom of the recovery tank H...

Страница 28: ... Turn Off Machine 2 Remove the recovery tank See TO REMOVE RECOVERY TANK instructions in this section 3 Disconnect and remove the two batteries from the machine 4 Remove the two clamps holding the wire harness to the solution tank in the battery tray area 5 Disconnect the harness from the scrub brush motor 6 Disconnect the harness from the transaxle drive motor vacuum fan vacuum fan switch ES pump...

Страница 29: ...m fan from the machine See TO REPLACE SCRUBBING VACUUM FAN instructions in this section 15 Remove the two M5 pan head screws holding the scrub head down pressure knob assembly to the back of the solution tank 16 Pull the scrub head down pressure knob assembly back away from the solution tank 17 Remove the two M5 pan head screws holding the water flow adjustment cable knob assembly to the back of t...

Страница 30: ...oles in the main frame with the threaded inserts in the solution tank Reinstall the five M8 hex screws and washers and tighten to 18 24 Nm 15 20 ft lb 26 Reinstall any miscellaneous parts that were removed in step 22 27 The solution tank main frame assembly should be flipped back up on its wheels at this point NOTE Use at least two people to flip the machine up on its wheels 28 Position the water ...

Страница 31: ...ical harness on the machine Make sure to follow the same path as it came out Reinstall the two clamps in the battery compartment Hand tighten the hardware 35 Position the instrument panel mount assembly onto the solution tank Reinstall the two M6 pan head screws and M6 two flat head screws Tighten to 11 14 Nm 7 10 ft lb 36 Reconnect the transaxle drive motor scrub brush motor vacuum fan vacuum fan...

Страница 32: ... the scrub head is lowered Check the skirt for damage or wear daily ADJUSTING THE SCRUB HEAD SKIRT 1 Turn the machine power off FOR SAFETY Before Leaving Or Servicing Machine Stop On Level Surface Turn Off Machine 2 Lower the scrub head 3 Check to see if the scrub head skirt touches the floor all the way around the scrub head 4 If the skirt needs to be adjusted loosen the skirt band clamp and move...

Страница 33: ...OR SAFETY Before Leaving Or Servicing Machine Stop On Level Surface Turn Off Machine 2 Raise the scrub head 3 Loosen the skirt band clamp 4 Pull the old skirt and band off the scrub head 5 Put the new skirt on the scrub head Make sure the holes in the skirt are facing the rear of the machine 6 Place the skirt band over the new skirt and tighten the skirt band clamp 7 Adjust the skirt as stated in ...

Страница 34: ...g pads must be placed on pad drives before they are ready to use The cleaning pad is held in place by a pad holder Cleaning pads need to be cleaned with soap and water after every use REPLACING THE SCRUB BRUSH 1 Turn the machine power off and set the parking brake if your machine has this option FOR SAFETY Before Leaving Or Servicing Machine Stop On Level Surface Turn Off Machine 2 Raise the scrub...

Страница 35: ...cing front Push the brush under the scrub head 9 Make sure one of the drive pin slots can be seen through the access opening 10 Line up the brush drive pin on the brush with the drive pin slot on the drive plate 11 Lift the scrub brush from underneath onto the brush drive hub Turn the brush counter clockwise to engage the drive pins into the drive slots 12 Check the brush to make sure it is secure...

Страница 36: ...hat hold the bracket in place 3 Remove the screw going through the slot in the bracket that is threaded into the down pressure coupler Un thread the tee knob from the coupler 4 Drive the pin out of the collar using a 1 8 inch drift pin 5 Remove the collar from the tee knob remove the tee knob from the bracket 6 Install the replacement tee knob into the bracket Install the collar and pin 7 Thread t...

Страница 37: ...e down pressure coupler by removing the cotter pin and the clevis pin 4 Using a 13 mm wrench remove the nut that secures the rod end portion of the shock to the foot pedal 5 Un thread and remove the rod end from the shock shaft It is not necessary to remove the bolt from the rod end assembly unless replacing the rod end 6 Thread the rod end assembly on to the new shock HAND TIGHTEN ONLY 7 Install ...

Страница 38: ...ad level bracket NOTE The spring is attached to the second slot from the bottom on the bracket 3 Snip the plastic wire ties on the motor leads and unplug the motor pigtail from the harness plug 4 Remove the phillips head screw and clamp holding the solution feed tube in position Disconnect the feed hose from the scrubber head NOTE Mark the hose 38 mm 1 1 2 inches from the end When pushing hose bac...

Страница 39: ...nd scrubber head assembly 8 Position the scrub head assembly with motor upside down remove the brush drive hub using a 13 mm socket and ratchet 9 Using a 14 mm socket and ratchet remove the 4 bolts that secure the motor and gearbox to the scrubber head NOTE The orientation of the motor gearbox on the scrubber head before disassembly The motor and gearbox are considered a unit and are not available...

Страница 40: ...e blades should be checked daily or when scrubbing a different type of floor The leveling of the squeegee should be checked every 100 hours of machine operation The squeegee can be removed from the squeegee pivot so the squeegee will not be damaged during transport of the machine REMOVING THE SQUEEGEE 1 Turn the machine power off and set the parking brake if your machine has this option FOR SAFETY...

Страница 41: ...ng scrubbed Make sure this adjustment is done on an even level floor 1 Turn the machine power on 2 Lower the squeegee 3 Drive the machine forward then turn the machine power off 4 Look at the deflection of the squeegee blade over the full length of the squeegee blade 5 If the deflection is not the same over the full length of the blade turn the squeegee leveling knob counter clockwise to increase ...

Страница 42: ...he machine forward and look at the deflection of the squeegee blade The correct amount of deflection is 12 mm 0 50 in for scrubbing smooth floors and 15 mm 0 62 in for rough floors 4 Turn the machine power off 5 To adjust the amount of deflection turn the squeegee deflection knob counter clockwise to decrease the blade deflection Turn the squeegee deflection knob clockwise to increase blade deflec...

Страница 43: ...ee blades REPLACING OR ROTATING THE FRONT SQUEEGEE BLADE 1 Turn the machine power off and set the parking brake if your machine has this option FOR SAFETY Before Leaving Or Servicing Machine Stop On Level Surface Turn Off Machine 2 Make sure the squeegee is raised off the floor 3 Remove the six thumbscrews holding the retainer and squeegee blade to the squeegee frame 4 Pull the squeegee blade off ...

Страница 44: ...e retainer clamp and remove the retainer from the squeegee frame 4 Remove the backup strip the squeegee blade from the squeegee frame 5 Replace or rotate the squeegee blade to allow a new edge to face the front of the machine 6 Place the squeegee blade and backup strip on the squeegee frame 7 Secure the squeegee blade and backup strip with the retainer Tighten the retainer clamp 8 Adjust the squee...

Страница 45: ...ulley to the lift arm NOTE Document how the water cable is routed before removing 4 Remove both hex nuts that mount the threaded cable end to the cable bracket Use a 7 16 inch open end wrench 5 Pull the cable end through the cable bushing 6 Remove the phillips head screw that mounts the eyelet end of the cable to the adjustment knob 7 To install the replacement cable reverse steps 1 5 NOTE After r...

Страница 46: ...e main frame 4 Orientate the water valve and cable into position so that the set screw holding the cable end to the shaft on the valve can be loosened Use a 5 64 inch or 2 mm allen wrench 5 Disconnect both wires and both hoses from the valve and remove the valve 6 Using a 10 mm wrench and a phillips head screwdriver remove the valve from the bracket 7 Install the replacement valve to the bracket 8...

Страница 47: ... tank body Remove the bracket 5 Pull the water control cable out of its installed position next to the console and lay it on the floor NOTE Document how the water cable is routed before removing 6 Block the left transport wheel off the floor and remove the wheel using a 13 mm socket and ratchet NOTE Drain both tanks first Place the scrub head in the down position 7 Using a 13 mm open end wrench re...

Страница 48: ... water valve bracket to the main frame 12 Reinstall the left wheel remove blocks and set machine on floor 13 Reinstall the opposite end of the control cable to the bracket and install the bracket onto the solution tank 14 With your fingers twist the end of the water control cable clockwise as far as possible Install the control knob on the cable shaft with the indicator portion of the knob pointin...

Страница 49: ...recovery tank 2 Remove the 4 phillips head screws that mount the vacuum motor cover to the solution tank 3 Using a 1 2 inch socket and ratchet remove the two bolts that mount the vacuum motor to the solution tank pull motor out of cavity 4 To remove the vacuum motor from the machine completely snip any wire ties on the vacuum motor leads and unplug the motor from the harness connection 5 Plug the ...

Страница 50: ... tank up NOTE Drain the recovery tank 2 Un plug the ES pump from the main harness 3 Loosen the worm drive clamp from the small outlet hose on the ES pump Remove the hose 4 Remove the ES pump from the tank by un screwing it counter clockwise 5 Put water proof thread sealant on the threads of the new ES pump 6 Screw the new pump clockwise into the recovery tank Tighten until the outlet tube points t...

Страница 51: ...ate the power wand pump up and behind the scrub brush motor 5 Disconnect the pump from the main harness 6 Loosen the worm drive clamp on the small hose going to the inlet side of the pump This is the bottom fitting Remove the hose 7 Loosen the worm drive clamp on the small hose going to the outlet side of the pump This is the top fitting Remove the hose 8 Remove the two M6 pan head screws holding ...

Страница 52: ...hten the two M6 pan head screws to 11 14 Nm 7 10 ft lb 12 Re connect the small hose to the inlet side of the pump This is the bottom fitting 13 Re connect the small hose to the outlet side of the pump This is the top fitting 14 Re connect the pump to the main harness See schematic in the ELECTRICAL section of this manual 15 Raise the scrub brush 16 Fill the solution tank and check the power wand p...

Страница 53: ...r Little or no solution flow to the Solution tank empty Fill solution tank floor Solution switch off Turn switch on Solution control cable broken or out of adjustment Replace and or adjust cable Solution flow knob turn off Turn solution flow knob on Solution supply lines plugged Flush solution supply lines Solution solenoid clogged or stuck Clean or replace ES mode ES switch off Turn ES switch on ...

Страница 54: ...SCRUBBING 5300T MM382 10 94 3Ć32 ...

Страница 55: ...AND HUB ASSEMBLY 4 11 TO REPLACE THE POTENTIOMETER SWITCH 4 12 TO REPLACE THE LATCH LEVER 4 13 ELECTRIC MOTORS 4 14 TO REPLACE VACUUM FAN MOTOR BRUSHES 4 14 TO REPLACE SCRUB BRUSH MOTOR BRUSHES 4 15 TO REPLACE VACUUM FAN SWITCH 4 16 TO REPLACE CHARGER SWITCH 4 17 ELECTRICAL SCHEMATIC 4 18 Page TROUBLESHOOTING 4 19 5300 TRACTION DRIVE SCHEMATIC 4 20 5300 OPTIONS SCHEMATIC 4 21 POWER UP CIRCUIT 4 22...

Страница 56: ...ELECTRICAL 5300T MM382 10 94 4Ć2 ...

Страница 57: ...ion to enter the batteries Use a wire brush to clean the terminal posts and the cable connectors After cleaning apply a coating of clear battery post protectant to the terminals and the cable connectors Keep the tops of the batteries clean and dry Keep all metallic objects off the top of the batteries which may cause a short circuit Replace any worn or damaged wires Never add acid to the batteries...

Страница 58: ...at dry surface in a well ventilated area 2 Turn the machine power off and set the parking brake if your machine has this option FOR SAFETY Before Leaving Or Servicing Machine Stop On Level Surface Turn Off Machine 3 Lift up the recovery tank to get access to the batteries NOTE The recovery tank must be empty 4 Check the water level in all the battery cells If the level is low add just enough disti...

Страница 59: ...attery 7 The optional TENNANT charger will start automatically When the batteries are fully charged the optional TENNANT charger will automatically turn off 8 After the charger has turned off unplug the charger from the wall outlet 9 Unplug the charger connector from the battery connector on the machine FOR SAFETY When Maintaining or Servicing Machine Avoid Contact With Battery Acid 10 Check the e...

Страница 60: ...ck enough to access the components the two wires attached to the micro switch next to the handle gear and hub assembly must be disconnected 2 When reinstalling the panel reconnect all wires that were disconnected Install the eight phillips head mounting screws DO NOT over tighten the screws or damage to the female brass insert could occur TO REPLACE BRUSH MOTOR CONTACTOR FOR SAFETY Before Leaving ...

Страница 61: ...l TO REPLACE BRUSH OR VACUUM FAN MOTOR CIRCUIT BREAKERS FOR SAFETY Before Leaving Or Servicing Machine Stop On Level Surface Turn Off Machine FOR SAFETY Disconnect the battery connections before working on the machine 1 Loosen and remove the breakers mounting nut located on the front side of the switch panel using a 9 16 inch wrench and a pair of pliers 2 Push the breaker through its mounting hole...

Страница 62: ...O REPLACE BRUSH PRESSURE AND AMP GAUGE FOR SAFETY Before Leaving Or Servicing Machine Stop On Level Surface Turn Off Machine FOR SAFETY Disconnect the battery connections before working on the machine 1 Disconnect wires 8 and 10 from the two terminal studs on the back of the gauge using a 5 16 inch wrench 2 Remove the two nuts that secure the gauges mounting bracket against the panel using a 5 16 ...

Страница 63: ...and connect wires 9 and 17 to the positve terminal and wires 3 28 34 and 38 to the negative terminal on the back of the gauge using a 5 16 inch wrench DO NOT over tighten the wire connections or damage may occur to the gauge 4 With the gauge properly positioned install the mounting bracket to the back of the gauge and snug down the two nuts that hold the gauge in place TO REPLACE MAIN POWER OR SOL...

Страница 64: ...switch terminals are plugged into the correct slots on the harness plug See schematic in this section TO REPLACE JUMPER PLUG FOR SAFETY Before Leaving Or Servicing Machine Stop On Level Surface Turn Off Machine FOR SAFETY Disconnect the battery connections before working on the machine 1 Remove the two phillips head screws securing the jumper plug to the front of the panel 2 Pull the plug out of i...

Страница 65: ...ndlebar 3 Remove the nut and bolt assembled through the gear and hub assembly using a 10mm wrench 4 Pull the handlebar out of the left side of the console while sliding the gear and hub assembly and shims off the bar 5 To reassemble reverse the above procedure When reinstalling the handle grips on to the handlebar it is necessary to use either compressed air or liquid soap TO REPLACE GEAR AND HUB ...

Страница 66: ...remove the switch from the bracket 4 Install replacement switch onto the bracket Only slightly snug down the switches mounting hardware so that further adjustment of the switch can be achieved later 5 Reinstall the switch bracket and switch back into the console 6 Reinstall the handlebar gear and hub assembly collar etc into the console Install right handle grip using compressed air or soap to ass...

Страница 67: ... off the lever with a small straight screwdriver 4 Reassemble the lever grip bushings and spring to the replacement lever and install the retaining ring with a retaining ring tool 5 Apply a small amount of multi purpose grease to the end of the lever This will help the lever seat into each adjustment hole location 6 Using your fingers squeeze the two bushings together and install the lever assembl...

Страница 68: ...ved 3 Remove the two phillips head screws that hold the clamps and motor brushes in place NOTE If the motor brushes measure 10 mm 0 375 in of an inch or less in length install new brushes 4 If motor brushes replacement is necessary carefully pull the wire tab connection out of the brush mechanism using a needle nose pliers 5 Install the wire tab connections into each one of the two replacement mot...

Страница 69: ...Using a hammer and straight screwdriver gently tap and pry the motor top off 5 Change the motor brushes if worn to 10 mm 0 375 of an inch or less in length NOTE When installing new motor brushes do not push the brushes completely into the brush holder Let the brush spring rest on the side of the brush This will prevent the brushes from hitting the commutator during motor re assembly After the top ...

Страница 70: ...ve the two phillips head mounting screws and the bolt that mounts the lift arm and bracket Use a 13 mm socket and ratchet to remove the bolt 5 Using a 7 32 inch socket and ratchet remove the switch from the bracket 6 Install replacement switch and adjust NOTE The switch should be adjusted so that when the lift arm is unlatched to allow the squeegee to sit on the floor the arm activates the roller ...

Страница 71: ...adjust NOTE The switch should be adjusted so thatwhen the lift arm is unlatched to allow the squeegee to sit on the floor the arm activates the roller lever on the switch with moderate force You will hear a click when the switch is activated Improper adjustment of the switch will cause the lift arm to damage the switch 3 Reassemble the bracket and lift arm assembly to the tank wall reversing steps...

Страница 72: ...ematic 4 5 6 M 69 70 T3 T4 T1 T2 12 36 14 24 22 R 26 20 28 13 34 17 38 32 M 11 BLK RED 24VDC 16 10 21 RED 18 8 56 M BLK A 30 19 9 57 15 23 67 68 3 2 72 80 1 75 44 62 42 46 M 47 50 55 40 A 51 52 63 60 M B 49 54 48 32 20 43 45 A 41 15 65 71 19 23 09166 ...

Страница 73: ...5300T MM382 10 94 TROUBLESHOOTING The troubleshooting charts that follow are organized so they lead you through the circuits They include flow charts and instructions for you as to where to insert your test instruments ...

Страница 74: ...4 17 38 15 7 A MAIN CB FAN CB 17A BR CB 35A MAIN BR CONTACTOR VAC FAN BRUSH FAN RELAY MAIN POWER SW BDI HEAD LIMIT SW BRUSH PRESSURE GAUGE SOLUTION SW SOL VALVE SOLUTION PUMP LMT SW SQ LIFT SW 5300 TRACTION DRIVE M 80 2 1 72 69 70 65 3 71 4 5 6 75 68 67 T1 T2 T3 T4 TRANSAXLE CB 15A PMC BOARD TRANS AXLE FUSE 2A MAIN POT 5K OHM HIGH LOW SPEED POT 0 20K OHM SCHEMATIC ...

Страница 75: ...4 46 41 45 43 47 50 20 32 15 54 62 POWER WAND SWITCH POWER WAND PUMP ES TIMER ES PUMP ES SWITCH RECOVERY TANK SENSOR HOURMETER PUMP ON IND LIGHT 5 OPTION PACKAGES 1 TOTAL OPTIONS 2 WAND PUMP ONLY 3 KEY SWITCH AND HOURMETER 4 KEY SWITCH HOURMETER ES 5 KEY SWITCH HOURMETER WAND PUMP SCHEMATIC ...

Страница 76: ...ELECTRICAL 4Ć22 5300T MM382 10 94 BATTERY CHARGE PLUG BLK RED BLK RED 36 20 2 12 VOLT BATTERIES 24VDC 14 32 9 34 17 15 7 A MAIN CB MAIN BR CONTACTOR MAIN POWER SW BDI LIMIT SW POWER UP CIRCUIT ...

Страница 77: ...OWER SWITCH NO REPAIR OR REPLACE WIRE 14 YES AT CUT OUT CHECK VOLTAGE WIRE 36 TO NEG NO YES NO POWER TURN POWER SWITCH ON CHECK VOLTAGE ACROSS BATTERIES CHARGE BATTERIES LOW 24V LOOSE CORRODED BATTERY CABLES CLEAN AND LUBRICATE SWITCH WIRE 14 TO NEG NO YES AT CUT OUT CHECK VOLTAGE SWITCH REPLACE CUT OUT SWITCH ...

Страница 78: ...EG CHECK VOLTAGE WIRE 32 TO NEG REPAIR OR REPLACE WIRE 32 20 OR CHECK VOLTAGE WIRE 34 TO NEG YES NO REPLACE CHECK VOLTAGE YES NO REPAIR OR REPLACE WIRE 34 CHECK VOLTAGE WIRE 9 TO POS YES NO REPLACE REPAIR OR REPLACE WIRE 9 AT MAIN C B MAIN C B AT POWER SWITCH CONNECTOR PLUG AT POWER SWITCH REPLACE MAIN POWER SWITCH AT BDI WIRE 34 TO NEG AT BDI BDI ...

Страница 79: ... 94 BATTERY CHARGE PLUG BLK RED BLK RED 36 12 20 2 12 VOLT BATTERIES 24VDC 14 32 M 22 26 24 13 28 11 9 34 17 15 7 A MAIN CB FAN CB 17A MAIN BR CONTACTOR VAC FAN FAN RELAY MAIN POWER SW BDI SW SQ LIFT SW VAC FAN CIRCUIT CUT OUT LIMIT ...

Страница 80: ...REPLACE AT FAN CB CHECK VOLTAGE WIRE 12 TO NEG WIRE 12 AT FAN CB CHECK VOLTAGE WIRE 22 TO NEG FAN REPLACE FAN CB AT FAN RELAY CHECK VOLTAGE WIRE 22 TO NEG NO REPAIR OR REPLACE WIRE 22 YES AT FAN RELAY CHECK VOLTAGE WIRE 28 TO NEG NO REPAIR OR REPLACE WIRE 28 YES AT FAN RELAY CHECK VOLTAGE WIRE 26 TO NEG NO REPLACE FAN RELAY YES ...

Страница 81: ... VOLTAGE WIRE 26 TO 13 ADJUST OR REPLACE SQ LIFT SW AT SQ LIFT SW CHECK VOLTAGE WIRE 13 TO POS REPAIR OR REPLACE WIRE 13 AT FAN RELAY CHECK VOLTAGE WIRE 24 TO NEG YES NO REPLACE FAN RELAY CHECK VOLTAGE AT VAC FAN WIRE 24 TO NEG YES NO REPAIR OR REPLACE WIRE 24 CHECK VOLTAGE AT VAC FAN WIRE 11 TO POS YES NO REPLACE VAC FAN REPAIR OR REPLACE WIRE 11 ...

Страница 82: ...Y CHARGE PLUG BLK RED BLK RED 36 20 2 12 VOLT BATTERIES 24VDC 14 16 32 M 10 8 56 18 57 9 34 17 38 7 7 A MAIN CB BR CB 35A MAIN BR CONTACTOR BRUSH MAIN POWER SW BDI HANDLE LIMIT SW HEAD LIMIT SW BRUSH PRESSURE GAUGE LIMIT SW MAIN BRUSH CIRCUIT ...

Страница 83: ...E WIRE 18 TO NEG BRUSH AT HEAD LIMIT CHECK VOLTAGE WIRE 18 TO NEG NO REPAIR OR REPLACE WIRE 18 YES CHECK VOLTAGE WIRE 16 TO NEG NO YES AT MAIN BRUSH CHECK VOLTAGE WIRE 16 TO NEG NO YES SWITCH SWITCH ADJUST OR REPLACE HANDLE LIMIT SWITCH SWITCH AT HEAD LIMIT SWITCH ADJUST OR REPLACE HEAD LIMIT SWITCH CONTACTOR REPAIR OR REPLACE WIRE 16 REPAIR OR REPLACE YES NO WIRE 7 AT MAIN BRUSH CHECK VOLTAGE WIR...

Страница 84: ...WIRE 8 TO NEG YES NO REPAIR OR REPLACE WIRE 8 CHECK VOLTAGE WIRE 56 TO NEG YES NO REPAIR OR REPLACE MAIN BRUSH C B AT MAIN BRUSH CONTACTOR REPLACE MAIN BRUSH CONTACTOR GAUGE AT BR PRESSURE GAUGE REPLACE BRUSH PRESSURE GAUGE AT BRUSH C B CHECK VOLTAGE AT BRUSH MOTOR WIRE 56 TO NEG NO YES REPAIR OR REPLACE WIRE 56 CHECK VOLTAGE AT BRUSH MOTOR WIRE 57 TO POS NO YES REPAIR OR REPLACE WIRE 57 REPLACE B...

Страница 85: ... CHARGE PLUG BLK RED BLK RED 36 20 2 12 VOLT BATTERIES 24VDC 14 16 32 21 30 19 18 9 23 34 17 38 7 7 A MAIN CB MAIN BR CONTACTOR MAIN POWER SW BDI HANDLE LIMIT SW HEAD LIMIT SW SOLUTION SW SOL VALVE SOLUTION PUMP LIMIT SW SOLUTION PUMP CIRCUIT ...

Страница 86: ...SOLUTION CHECK VOLTAGE WIRE 21 TO NEG WIRE 21 CHECK VOLTAGE WIRE 30 TO NEG REPLACE AT SOL VALVE CHECK VOLTAGE WIRE 30 TO NEG NO REPAIR OR REPLACE WIRE 30 YES AT SOL VALVE CHECK VOLTAGE WIRE 23 TO POS NO REPAIR OR REPLACE WIRE 23 YES SWITCH AT SOLUTION SWITCH SOLUTION SWITCH REPLACE SOL VALVE ...

Страница 87: ... 24VDC 14 16 32 18 9 34 17 38 15 7 A MAIN CB MAIN BR CONTACTOR MAIN POWER SW BDI HEAD LIMIT SW LMT SW TRACTION DRIVE CIRCUIT M 80 2 1 72 69 70 65 3 71 4 5 6 75 68 67 T1 T2 T3 T4 TRANSAXLE CB 15A PMC BOARD TRANS AXLE FUSE 2A MAIN POT 5K OHM HIGH LOW SPEED POT 0 20K OHM ...

Страница 88: ...OR REPLACE AT FUSE CHECK VOLTAGE WIRE 2 TO NEG WIRE 2 AT FUSE CHECK VOLTAGE WIRE 1 TO NEG REPLACE FUSE AT PMC BOARD CHECK VOLTAGE WIRE 1 TO NEG NO REPAIR OR REPLACE WIRE 1 YES CHECK VOLTAGE WIRE 71 TO NEG NO YES AT TRANSAXLE C B CHECK VOLTAGE WIRE 71 TO NEG NO YES TRANSAXLE AT PMC BOARD REPLACE PMC BOARD REPAIR OR REPLACE WIRE 71 ...

Страница 89: ...R REPLACE WIRE 72 CHECK VOLTAGE WIRE 3 TO NEG YES NO CHECK RESISTANCE WIRE 69 TO 70 REPAIR OR REPLACE WIRE 65 ACROSS AT PMC BOARD REPAIR OR REPLACE WIRE 3 OF TRANSAXLE MOTOR AT THE PMC BOARD DISCONNECT BATTERIES 1 OHM 1 OHM RECONNECT BATTERIES CHECK AMP DRAW OF MOTOR REPLACE MOTOR 2 8 AMPS 1 8 1 AMP 2 8 AMPS CHECK RESISTANCE OF TRANSAXLE MOTOR AT TRANSAXLE MOTOR 1 OHM REPAIR OR REPLACE WIRES CONNE...

Страница 90: ...ONNECTOR AT PMC BOARD WIRE 4 TO 6 INCORRECT READJUST TRY AGAIN CORRECT ROTATE HANDLE FULL FORWARD 5 0K OHMS 10 FULL REVERSE 0 0 OHMS 10 CORRECT INCORRECT REPLACE POT CHECK VOLTAGE AT PMC BOARD RED METER LEAD TO T3 BLACK METER LEAD TO T4 ROTATE HANDLE FORWARD 24 5 VOLTS ROTATE HANDLE REVERSE 12 5 VOLTS CORRECT INCORRECT REPLACE PMC BOARD 2 5K OHMS 10 ...

Страница 91: ...ELECTRICAL 4Ć37 5300T MM382 10 94 BLK RED 36 20 2 12 VOLT BATTERIES 24VDC 14 7 A MAIN CB MAIN BR CONTACTOR LIMIT SW VAC WAND CIRCUIT M KEY SW 55 60 40 20 15 POWER WAND SWITCH POWER WAND PUMP 51 15 ...

Страница 92: ... VOLTAGE WIRE 40 TO NEG WIRE 40 OR 20 CHECK VOLTAGE WIRE 60 TO NEG AT POWER WAND CHECK VOLTAGE WIRE 60 TO NEG NO REPAIR OR REPLACE WIRE 60 YES CHECK VOLTAGE WIRE 55 TO POS NO REPAIR OR REPLACE WIRE 55 YES SWITCH AT POWER WAND SWITCH REPLACE POWER WAND SWITCH PUMP AT POWER WAND PUMP REPLACE POWER WAND PUMP ...

Страница 93: ...2 10 94 63 ES PUMP CIRCUIT KEY SW M 52 49 48 42 44 45 43 47 50 20 32 15 54 62 ES TIMER ES PUMP ES SWITCH RECOVERY TANK SENSOR PUMP ON IND LIGHT BLK RED 36 20 2 12 VOLT BATTERIES 24VDC 14 15 7 A MAIN CB MAIN BR CONTACTOR LIMIT SW ...

Страница 94: ...HECK VOLTAGE WIRE 20 TO NEG WIRE 20 CHECK VOLTAGE WIRE 42 TO NEG REPLACE AT ES SWITCH CHECK VOLTAGE WIRE 44 TO NEG NO REPAIR OR REPLACE WIRE 44 YES AT ES SWITCH CHECK VOLTAGE WIRE 48 TO NEG NO REPLACE ES SWITCH YES AT ES TIMER CHECK VOLTAGE WIRE 48 TO NEG NO YES AT KEY SWITCH KEY SWITCH REPAIR OR REPLACE WIRE 48 ...

Страница 95: ...O POS AT TANK SENSOR CHECK VOLTAGE WIRE 62 TO NEG REPAIR OR REPLACE WIRE 62 CHECK VOLTAGE WIRE 63 TO POS YES NO CHECK VOLTAGE AT ES TIMER WIRE 54 TO NEG YES NO REPAIR OR REPLACE WIRE 52 54 CHECK VOLTAGE AT ES TIMER WIRE 50 TO NEG YES NO REPLACE ES TIMER AT ES TIMER REPAIR OR REPLACE WIRE 45 AT TANK SENSOR REPAIR OR REPLACE WIRE 63 CONT NEXT PAGE ...

Страница 96: ...ELECTRICAL 4Ć42 5300T MM382 10 94 YES NO REPAIR OR REPLACE YES NO WIRE 50 CHECK VOLTAGE WIRE 47 TO POS AT ES PUMP REPAIR OR REPLACE WIRE 47 CHECK VOLTAGE AT ES PUMP WIRE 50 TO NEG REPLACE ES PUMP ...

Страница 97: ...estions you may have regarding our machine manuals If you find an error or have a suggestion please complete this postage paid form and mail it to us Thank you for helping us make zero defects a way of life at Tennant Manual No Rev No Publish Date Page Machine Report Error Suggestion Name Date Customer Number Company Address City State Zip Code ...

Страница 98: ...estions you may have regarding our machine manuals If you find an error or have a suggestion please complete this postage paid form and mail it to us Thank you for helping us make zero defects a way of life at Tennant Manual No Rev No Publish Date Page Machine Report Error Suggestion Name Date Customer Number Company Address City State Zip Code ...

Отзывы: