Cyclone User Manual
77
Christie D4K-40 RGB
–
Portrait
WARNING: This projector is HEAVY. You will need
at least four people or a mechanical lifting device
to install it in the enclosure. Do not attempt to lift
the projector if in any doubt about your lifting
capacity.
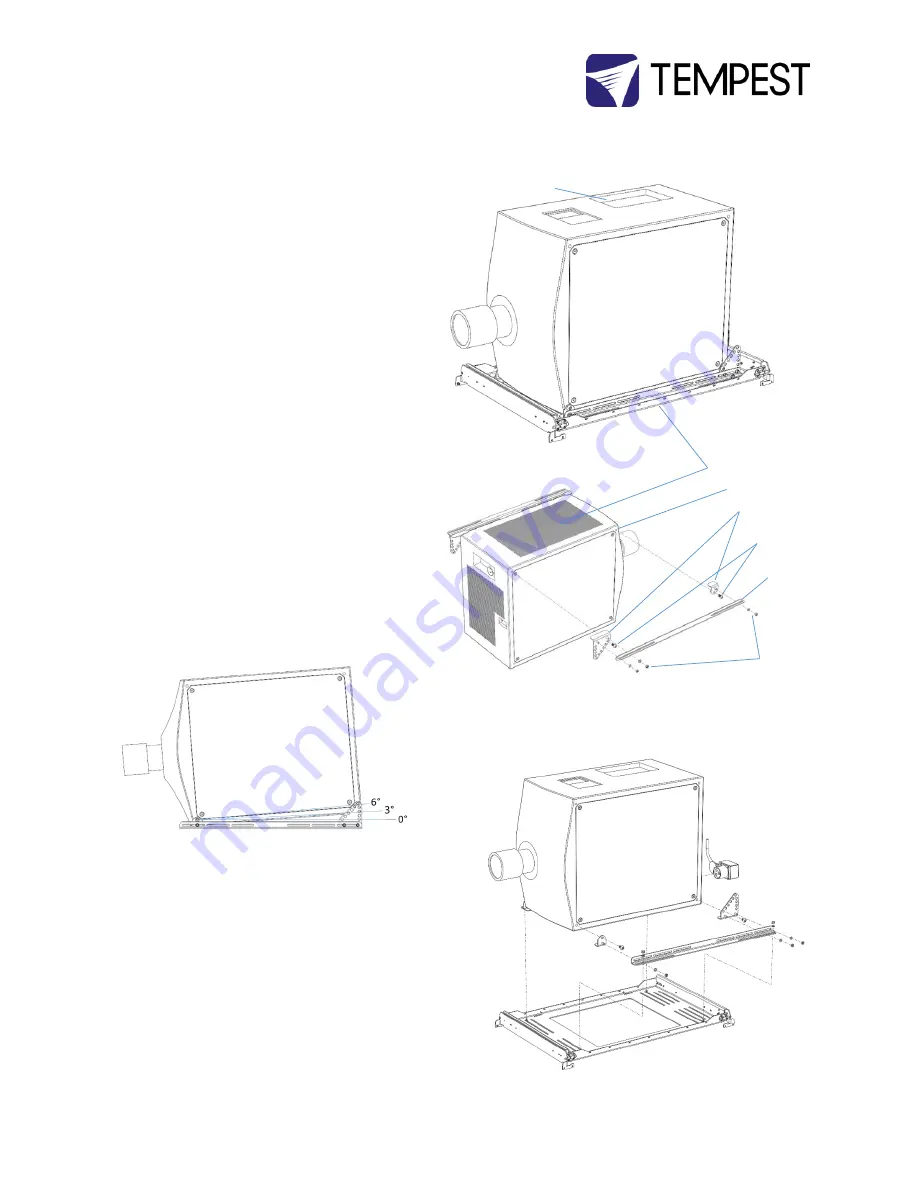
Tempest provides a custom projector mount, with the
ability to install the projector either horizontal or at a
tilt angle up to 6° up or down.
IMPORTANT: The projector MUST be installed air inlet
down, connector panel up, as shown. Installing any
other way will lead to overheating.
1.
Set the projector on the ground, with the
connector panel DOWN and the air inlet UP.
2.
Bolt the mounting brackets and mounting
bars to the M12 threaded holes in the
projector chassis, as shown:
3.
NOTE: the holes in the triangular bracket are
set 1.5° apart, so you can set the projector
either horizontal, or tilted up to 6°. It is much
easier to do this now than when the
projector is installed!
The illustrations here show the projector tilted DOWN. If you need
to tilt UP, install the triangular bracket to the FRONT.
4.
Now, flip the projector and set onto the
enclosure tray.
5.
Adjust position so the front of the lens is about
25mm (1in) from the port glass.
6.
Bolt the Mounting Bars to the Projector Tray with
the carriage bolts, nuts and washers supplied
For clarity, illustrations show the projector tray assembly removed
from the enclosure.
Connector Panel
Air Inlets
Mounting Brackets
Bolts
M12 Screws
Mounting Bar
Washers, Locknuts
Nut, Washer
M12 threaded holes


