Installing and Maintaining the Server
Maintaining the Lightspeed Server
49
Lightspeed Live Capture User Guide
Installing New or Replacement Hard Drives
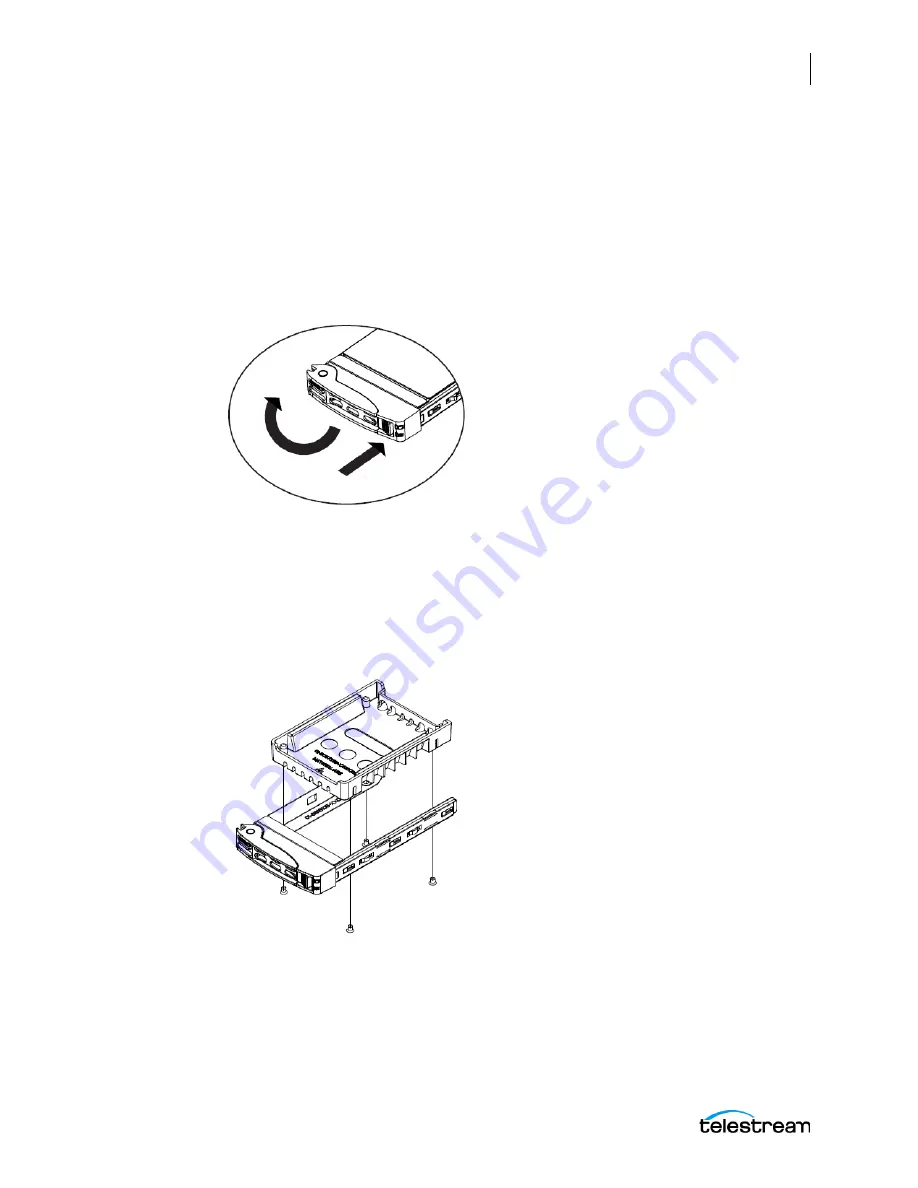
Follow these steps to replace a failing hard drive or install a new one. Drives may be
removed or replaced with power on. See
for new or replacement drive
specifications.
1.
Remove the front bezel from the chassis.
2.
Press the release button on the right front of the drive carrier.
3.
Use the drive carrier handle to pull the carrier out of the chassis.
4.
Remove the drive or dummy drive from the carrier by removing the four M3 screws
from the underside of the carrier. Retain the screws.
5.
Insert the new drive into the carrier with the PCB side down and the connector
facing the back of the carrier.
6.
Secure the drive to the carrier with the four M3 screws retained from removal.
Gently tighten but do not over tighten the screws, which could cause damage.
7.
Slide the drive carrier into its bay with the drive facing up until the drive seats firmly
in the rear connector.
8.
Push the carrier handle closed flat against the front of the carrier to secure the
carrier and drive in place.
9.
Replace the front bezel on the chassis, and go to the next topic to rebuild the RAID.
Содержание lightspeed live capture
Страница 1: ...June 2019 277130 Lightspeed Live Capture Guide Live Capture 3 0 with ComponentPac 7 2...
Страница 22: ...Contents 22...
Страница 52: ...Installing and Maintaining the Server Monitoring Lightspeed Live via SNMP 52 Lightspeed Live Capture User Guide...
Страница 196: ...Using the Tape Capture Web Application Using the Job Status View in Tape Capture 196 Lightspeed Live Capture User Guide...
Страница 208: ...Calculating Live Capture Resources Lightspeed Live Capture Resource Calculator 208 Lightspeed Live Capture User Guide...
Страница 216: ...Appendix A Support Using Log Files and Other Support Information 216 Lightspeed Live Capture User Guide...
Страница 316: ...Appendix B Containers Codecs and Vantage Actions Vantage Actions 316 Lightspeed Live Capture User Guide...


