Quick Start Guide
TeleEye MX125E-HD Network Camera
This Quick Start Guide will guide you how to install and configure the TeleEye MX125E-HD Network
Camera for remote video monitoring.
1. Camera Installation
Step 1
Step 2
Step 3
Step 4
Start sureSIGHT or a web browser to start a remote video monitoring in order to adjust
the camera.
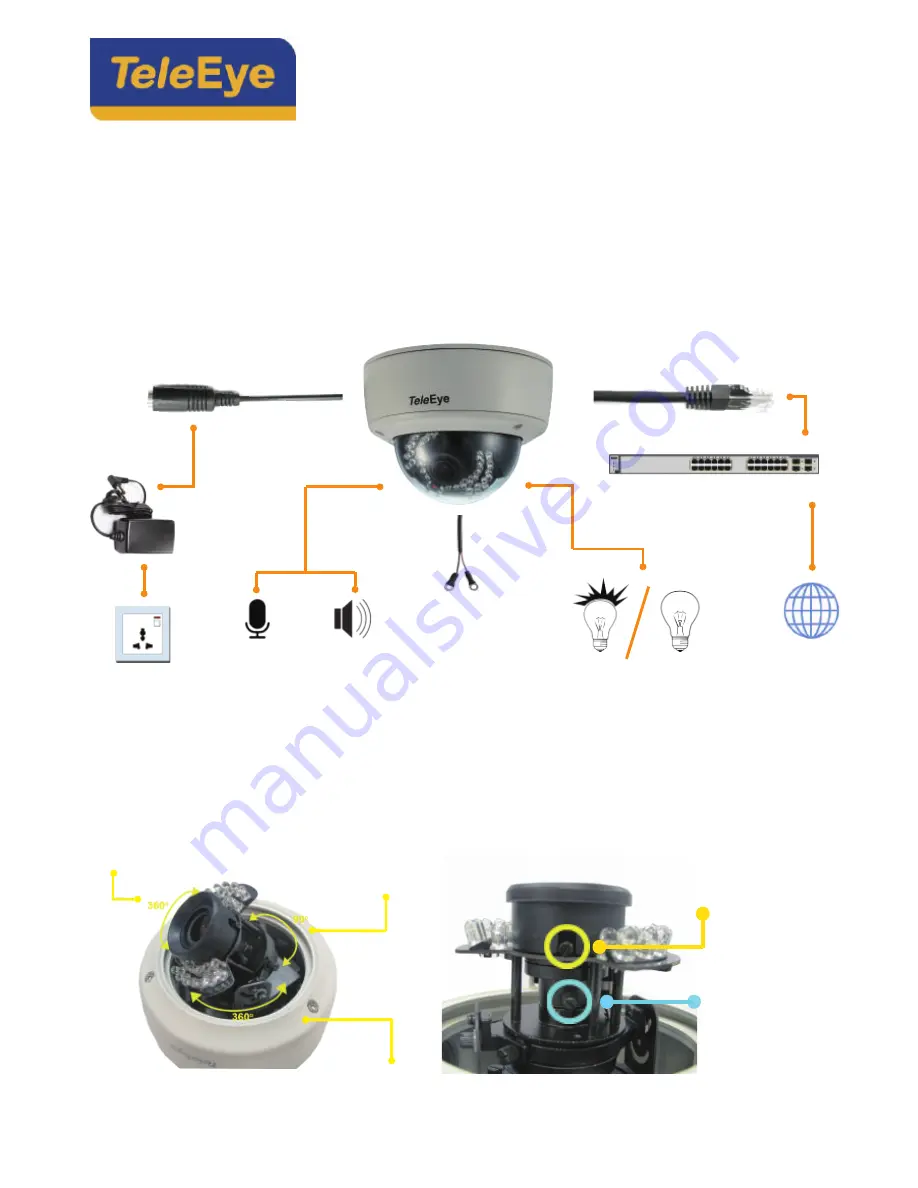
After mounting the camera on the wall or ceiling, connect the Ethernet cable to the
LAN adapter. If PoE is not available, connect the 12VDC power supply to the power cable.
[Reference] Please refer to the following sections to understand how to start video monitoring.
After removing the camera cover,
loosen the screws to adjust the viewing angle of the
camera.
Tighten the screws to fix the direction of the camera module. Close the camera cover.
[Reference] Please refer to the section 2 for connecting the cable to RJ45 plug.
1
Power Cable (12V DC)
Ethernet Cable
Alarm Cable
12V DC
Power Adapter
(Optional)
Audio In
Audio Out
Relay
Internet
Network Switch / Router
Adjust the zoom :
loosen the screw
and slide the stick
Adjust the focus :
slide the stick
Adjust the direction
Rotation
Tilt


