


3. Dust Profiler Operation and Software
3.1. Getting Started
Computer Requirements
CD-ROM Drive or internet connection for software download
RS232 serial port or USB
– RS232 serial port converter and USB cable (included)
Windows OS version 2000 or later
Minimum 100 Mb of spare hard drive space
Recommended 512 Mb RAM or more
Recommended 1 GHz processor speed or faster
1. Once the Dust Profiler is assembled and power is connected install the SD card into the control
module.
2. Start the Dust Profiler by pushing the on/off switch on the control module (See Section 1.3 for
location of On/Off switch)
3. Connect the instrument using a computer via the USB cable to the outside of the enclosure
4. Install Aeroqual Dust Monitor software.
This can also be downloaded from the Aeroqual
website at www.aeroqual.com
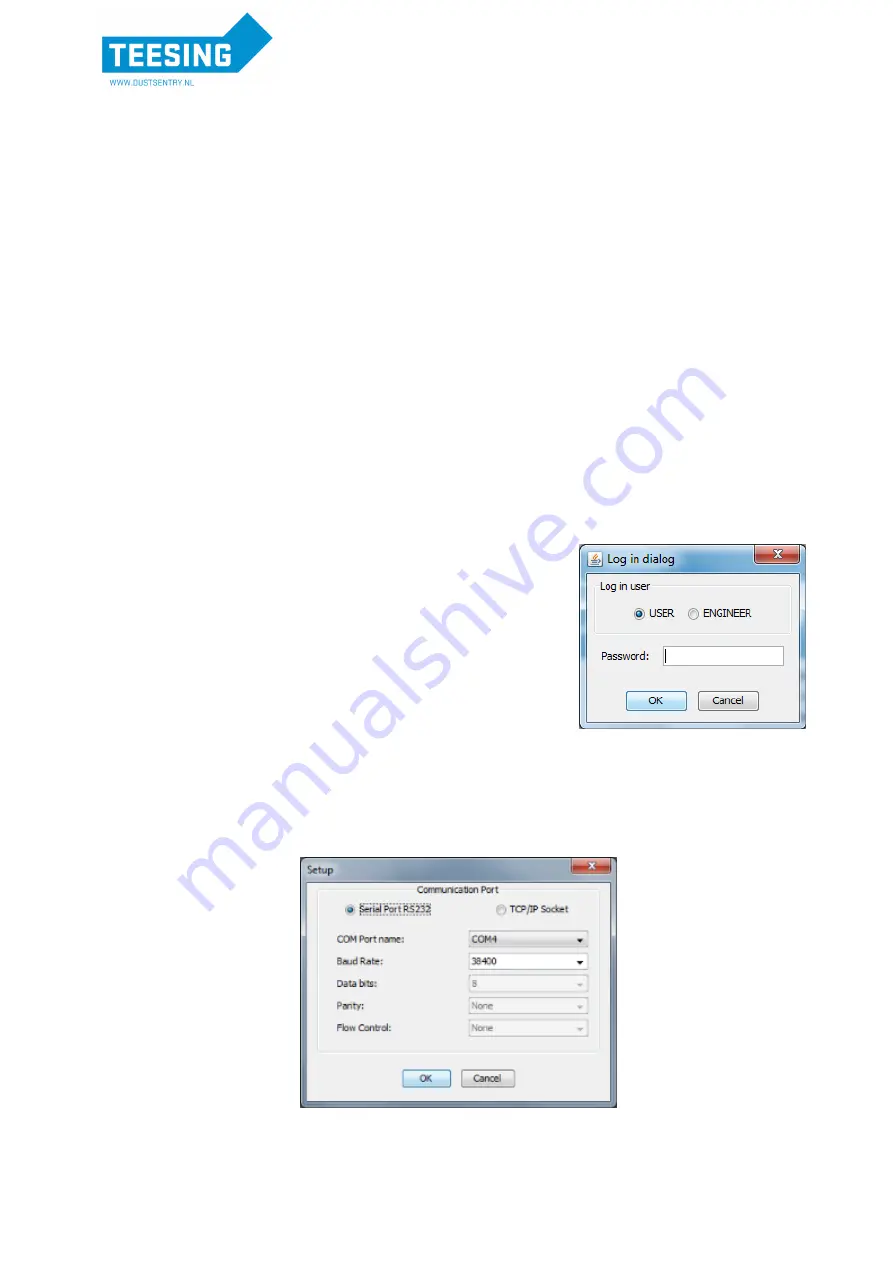
5. Launch the Aeroqual Dust Monitor PC software.
a.
Select to log in as either:
i.
User (default password = “password”)
ii.
Engineer (default password = “aeroqual”)
Note 1
:
User has access to most day to day functions on the
instrument. Engineer has access to all functions, including
diagnostic parameters (Sensor Module Settings and Sensor
Diagnostic View).
6. Configure the Dust Profiler instrument:
a.
Select Setup
Communication Port
b.
Select Serial Port RS232 and the relevant Com port. Press OK when complete.
Note 2: The settings should be as seen below:
Note 3: To connect via the modem select TCP/IP Socket and enter the network IP address and
port number. If the PC is behind a proxy server this information needs to be added as well.


