10
Mounting
Caution
: If you drill a hole in the wall, please make sure that power cables, electrical
cords and/or pipelines are not damaged. When using the supplied mounting material,
we do not take the liability for a professional installation. You are entirely responsible
to ensure that the mounting material is suitable for the particular masonry, and that
the installation is done properly. When working at higher altitudes, there is danger of
falling! Therefore, use suitable safeguards.
Using the wall bracket
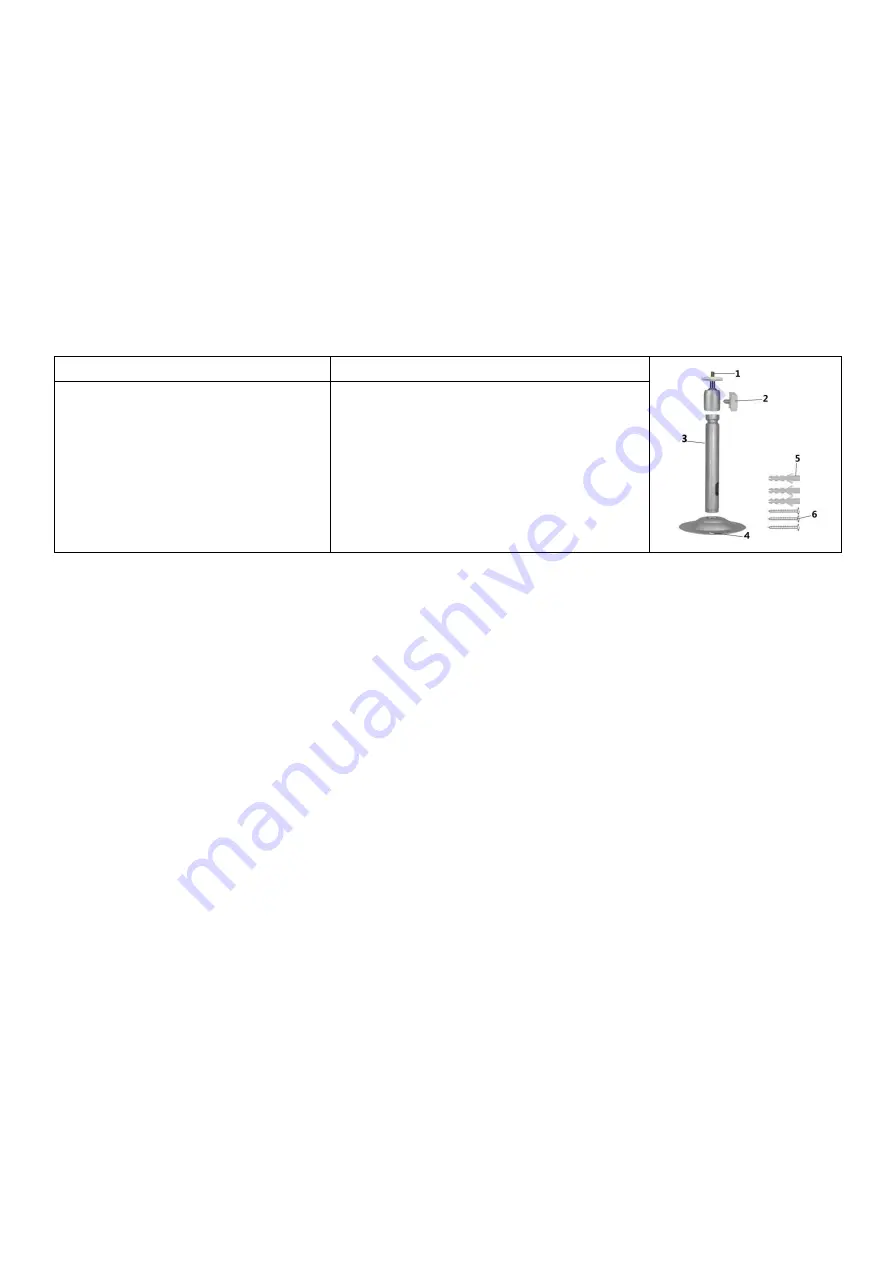
You can mount the Time-lapse camera permanently on a wall using the supplied wall
bracket. Before mounting the camera you should ensure that all existing screws are
tight.
Components
Required tools
1. Tripod screw
2. Bracket fixing screw
3. Bracket support rod
4. Drill holes
5. Wall plugs
6. Screws
⚫
Drill
⚫
6 mm masonry/concrete drill
bit
⚫
Phillips head screwdriver
Install Steps
⚫
Mark the drill holes by holding the foot of the wall bracket at the desired mounting
location and marking the hole positions.
⚫
Use a drill with a 6 mm drill bit to drill the required holes and insert the plugs and
insert the wall plugs flush with the wall.
⚫
Screw the wall bracket to the wall using the supplied screws.
⚫
Mount the camera on the tripod screw and screw the camera a little way on (about
three turns).
⚫
Turn the camera in the desired direction and lock it with the lock nut.
⚫
To move the camera into its final position, undo the two pivot bolts a little, position
the camera and fix the position by tightening the two pivot bolts.
Using the Mounting Belt
Use the mounting belt to mount the Time-lapse camera to any object (e.g. tree) you
can get the belt around.
Pull the belt through the rectangular oblong holes on the back and put the belt around
the desired object. Now fasten the belt.


