EN
G
LI
SH
9
4
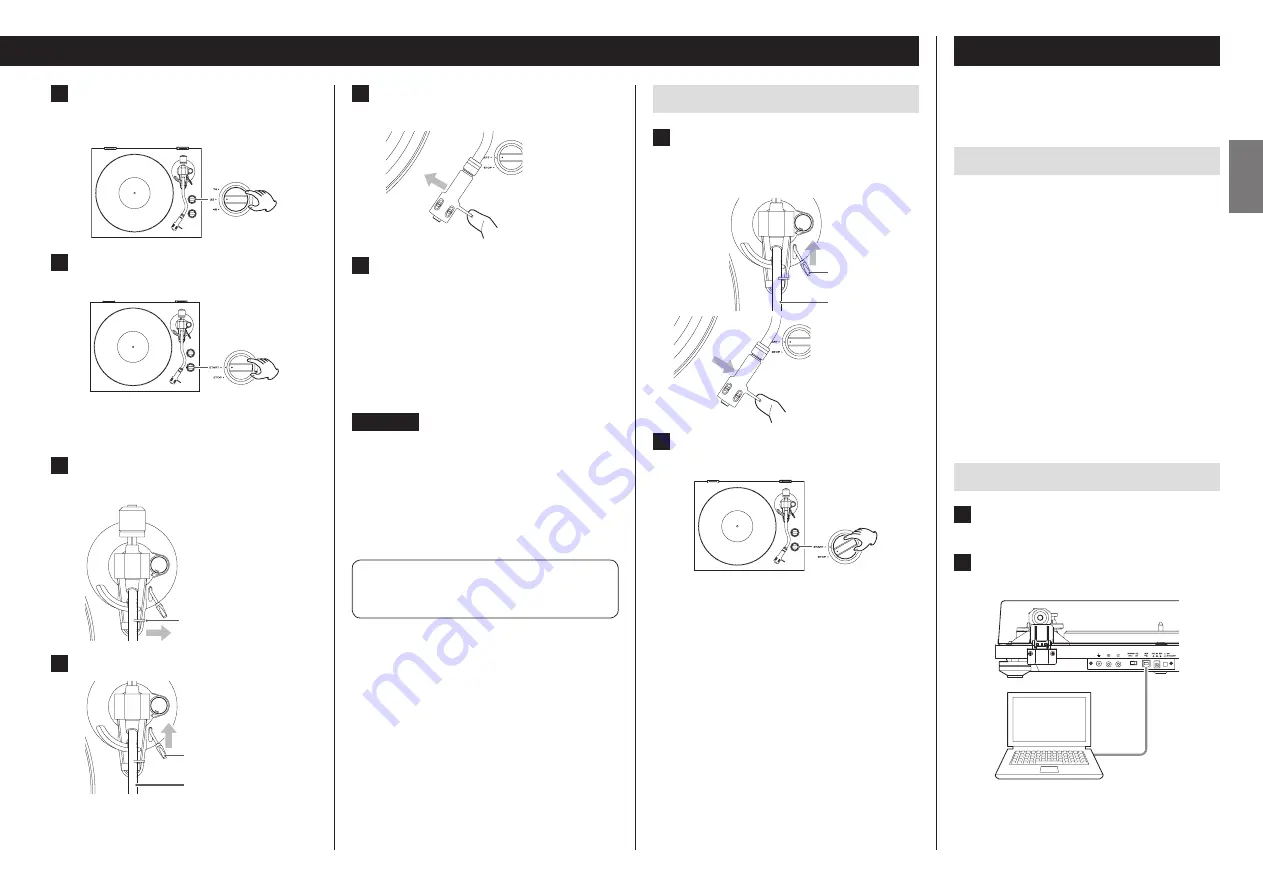
Select the rotation speed indicated on
the record.
The rotation speed can be set to 33 1/3, 45 or 78 RPM.
5
Turn the START/STOP rotation knob to
START to start the turntable (platter).
o
When the START/STOP rotation knob is set to START,
the turntable (platter) will start rotating and the blue
START lamp will light.
6
Slide the tone arm clasp to the right to
remove it.
Clasp
A
N
T I
– S K A T IN
G
3
0
7
Raise the arm lifter.
Tone arm
Arm lifter
A
N
T I
– S K A T IN
G
3
0
o
You can also move the tone arm to above the record
without raising the arm lifter and then slowly lower
the tone arm to start playback.
8
Move the tone arm to the track where
you want to start playback.
9
Lower the arm lifter.
Lower the tone arm slowly until the stylus touches the
record and playback begins.
o
Close the dust cover during playback. Doing so
reduces the occurrence of noise by preventing skip-
ping caused by unintended contact and blocking
external sound pressure.
V
Do not place anything on the dust cover.
ATTENTION
o
During playback, do not touch the tone arm or the record.
Doing so could damage the stylus tip and cause scratches
on the record.
o
Do not forcibly stop turntable (platter) rotation during
playback. Since this product is not a turntable designed
for DJs (direct drive), doing something like this could cause
malfunction.
During record playback, feedback could occur if the vol-
ume is too loud. If this happens, lower the volume of the
amplifier.
When playback finishes
1
Raise the arm lifter to separate the sty-
lus from the record, and return the tone
arm to its original position.
Tone arm
Arm lifter
A
N
T I
– S K A T IN
G
3
0
2
Turn the START/STOP rotation knob to
STOP to stop the turntable (platter).
o
The blue START lamp will become unlit and the turn-
table (platter) will stop.
Recording with a computer
The sound of a record can be digitally recorded on a computer
by using a commercially-available USB cable to connect this
unit to a USB port on the computer.
Supported operating systems
Computers running the following operating systems can be
connected by USB to this unit (as of September 2016).
Windows
Windows 7 (32-bit, 64-bit)
Windows 8 (32-bit, 64-bit)
Windows 8.1 (32-bit, 64-bit)
Windows 10 (32-bit, 64-bit)
Mac
OS X Lion (10.7)
OS X Mountain Lion (10.8)
OS X Mavericks (10.9)
OS X Yosemite (10.10)
OS X El Capitan (10.11)
Use with operating systems other than these is not guaranteed.
o
This unit will run with the standard Windows or OS X driver.
so there is no need to install a special driver.
Connecting with a computer
1
Turn the computer on.
Confirm that the operating system is working correctly.
2
Use the USB cable to connect the com-
puter and this unit.
o
Use a commercially-available USB cable with a ferrite
core.
Continued on the next page
e


