Recalling, storing and deleting settings
UpCon English Manual (2014-10-07) 70
Library – Store page
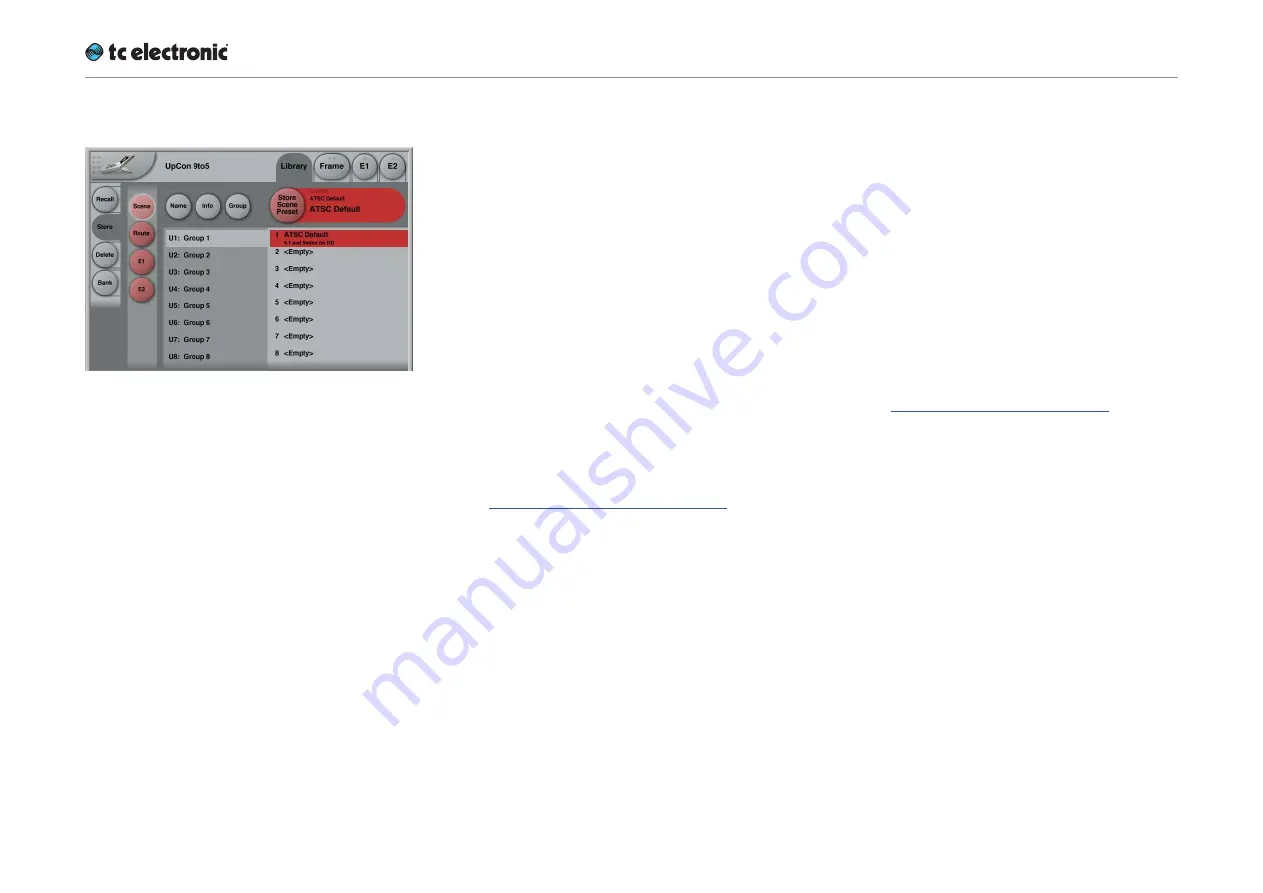
Fig. 33.: Library – Scene Store page
Use the Library Store page of the TC Icon soft-
ware to store (save) settings to a memory bank.
You can only store settings as User presets. Fac-
tory presets cannot be overwritten.
All colored buttons and selected items on the
Store page are colored in red.
To access the Library Store page:
►
Select the “Library” tab.
►
Select the “Store” page.
►
Select the subpage for the setting type you
want to store:
– Scene – to store all settings (including
Routing and all algorithm settings) as a
Scene.
– Route – to store the current Routing.
– E(ngine) 1 or E(ngine) 2 – to store the set-
tings of either Engine 1 or 2 as an Engine
preset.
►
Select a User preset group.
There are 8 User preset groups, with each
group holding up to 8 presets.
►
Select a preset slot in the currently selected
group that you want to use.
►
Click the large “Store
(Scene / Route / Engine)
Preset” button to store (save) your settings as
a preset.
The selected data type will be stored as a
preset. You can then recall this preset – see
“Library – Recall page” on page 69.
Naming Presets
All user preset types can be (re)named.
To rename a preset:
►
On the Store page, select the preset that you
want to rename.
►
Click the “Name” button.
►
An on-screen keyboard will be shown.
►
Use the on-screen keys or the physical key-
board of your computer to edit the name.
►
Click the large Enter button to confirm the
new name.
! Please note that the preset itself is
not
stored
when you click the Enter button! To store
the preset with its new name, click the large
“Store
(Scene / Route / Engine)
Preset” button.
Adding Preset Information
You can add information to presets you have
created or modified. When recalling such a pre-
set later, an inverted “Info” tag will appear at the
bottom of the large Preset Recall button, allow-
ing the user to access this additional information
– see “Preset information” on page 69.
To add information to a preset:
►
On the Store page, select the preset that you
want to add information to.
►
Click the “Info” button.
►
An on-screen keyboard will be shown.
►
Use the on-screen keys or the physical key-
board of your computer to edit the name.
►
Click Enter to confirm.
! Please note that the preset itself is
not
stored
when you click the Enter button! To store the
preset with the newly added information, click
the large “Store
(Scene / Route / Engine)
Pre-
set” button.
Содержание UpCon
Страница 4: ...Important safety instructions UpCon English Manual 2014 10 07 1 Important safety instructions...
Страница 8: ...About this manual UpCon English Manual 2014 10 07 5 About this manual...
Страница 10: ...Before you get started UpCon English Manual 2014 10 07 7 Before you get started...
Страница 12: ...Unpacking and setup UpCon English Manual 2014 10 07 9 Unpacking and setup...
Страница 14: ...Software TC Icon and UpCon firmware UpCon English Manual 2014 10 07 11 Software TC Icon and UpCon firmware...
Страница 20: ...UpCon An introduction UpCon English Manual 2014 10 07 17 UpCon An introduction...
Страница 22: ...UpCon Basic concepts and operation UpCon English Manual 2014 10 07 19 UpCon Basic concepts and operation...
Страница 26: ...UpConstatus indicators and ports UpCon English Manual 2014 10 07 23 UpCon status indicators and ports...
Страница 34: ...Setting up UpCon UpCon English Manual 2014 10 07 31 Setting up UpCon...
Страница 40: ...Basic operation UpCon English Manual 2014 10 07 37 Basic operation...
Страница 45: ...Accessing UpCon UpCon English Manual 2014 10 07 42 Accessing UpCon...
Страница 48: ...Obtaining UpCon status information UpCon English Manual 2014 10 07 45 Obtaining UpCon status information...
Страница 52: ...Setting up audio and syncing UpCon English Manual 2014 10 07 49 Setting up audio and syncing...
Страница 59: ...UpCon remote control UpCon English Manual 2014 10 07 56 UpCon remote control...
Страница 77: ...Updating UpCon firmware UpCon English Manual 2014 10 07 74 Updating UpCon firmware...
Страница 84: ...Icon Setup UpCon English Manual 2014 10 07 81 Icon Setup...
Страница 90: ...The UpCon algorithm UpCon English Manual 2014 10 07 87 The UpCon algorithm...
Страница 100: ...The UpCon algorithm UpCon English Manual 2014 10 07 97...
Страница 104: ...Appendix 2 UpCon GPI O page UpCon English Manual 2014 10 07 101 Appendix 2 UpCon GPI O page...
Страница 107: ...Technical specifications UpCon English Manual 2014 10 07 104 Technical specifications...
Страница 114: ...Technical specifications UpCon English Manual 2014 10 07 111...


