6-2
OPERATING PROCEDURES
Model C612
Operating Procedures
6
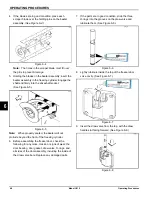
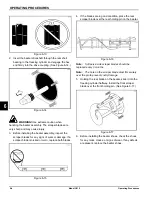
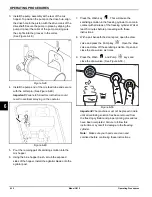
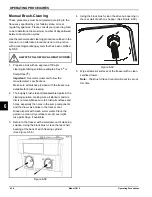
4. If the blades are in good condition, place each
scraper blade over the holding pins on the beater
assembly. (
See Figure 6-4.)
Figure 6-4
Note:
The holes in the scraper blade must fit over
the pins to prevent damage.
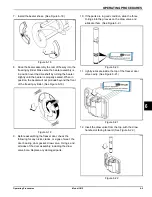
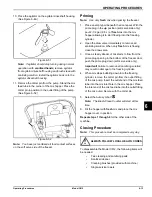
5. Holding the blades on the beater assembly, insert the
beater assembly in the freezing cylinder. Engage the
shaft end firmly into the driveshaft socket.
(See Figure 6-5.)
Figure 6-5
Note:
When properly seated, the beater will not
protrude beyond the front of the freezing cylinder.
6. Before assembling the freezer door, check the
following for any nicks, cracks, or signs of wear: the
door bearing, door gasket, draw valve, O-rings, and
all sides of the door assembly, including the inside of
the draw valve bore. Replace any damaged parts.
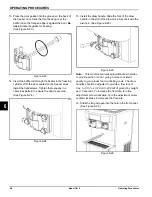
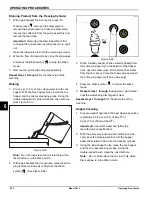
7. If the parts are in good condition, slide the three
O-rings into the grooves on the draw valve and
lubricate them. (See Figure 6-6.)
Figure 6-6
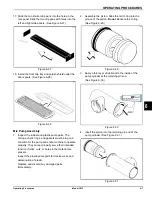
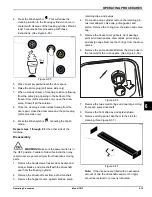
8. Lightly lubricate inside the top of the freezer door
valve cavity. (See Figure 6-7.)
Figure 6-7
9. Insert the draw valve from the top, with the draw
handle slot facing forward. (See Figure 6-8.)
Figure 6-8
Содержание C612
Страница 8: ...1 4 TO THE INSTALLER Model C612 To the Installer 1 Notes...
Страница 54: ...9 2 PARTS REPLACEMENT SCHEDULE Model C612 Parts Replacement Schedule 9 Notes...
Страница 58: ...10 4 LIMITED WARRANTY ON EQUIPMENT Model C612 Limited Warranty on Equipment 10 Notes...
Страница 62: ...11 4 LIMITED WARRANTY ON PARTS Model C612 Limited Warranty on Parts 11 Notes...

