GUIDA ALL’INSTALLAZIONE
INSTALLATION GUIDE
INSTALLATIONSANLEITUNG
NOTICE D’INSTALLATION
GUÍA PARA LA INSTALACIÓN
GUIA DE INSTALAÇÃO
IT - Istruzioni originali
D749MA-R
D-MNL0D749MA-R
14-10-2021 - R
ev
.15
Ver. Firmware 8.xx
Страница 1: ...NSTALLAZIONE INSTALLATION GUIDE INSTALLATIONSANLEITUNG NOTICE D INSTALLATION GUÍA PARA LA INSTALACIÓN GUIA DE INSTALAÇÃO IT Istruzioni originali D749MA R D749MA R D MNL0D749MA R 14 10 2021 Rev 15 Ver Firmware 8 xx ...
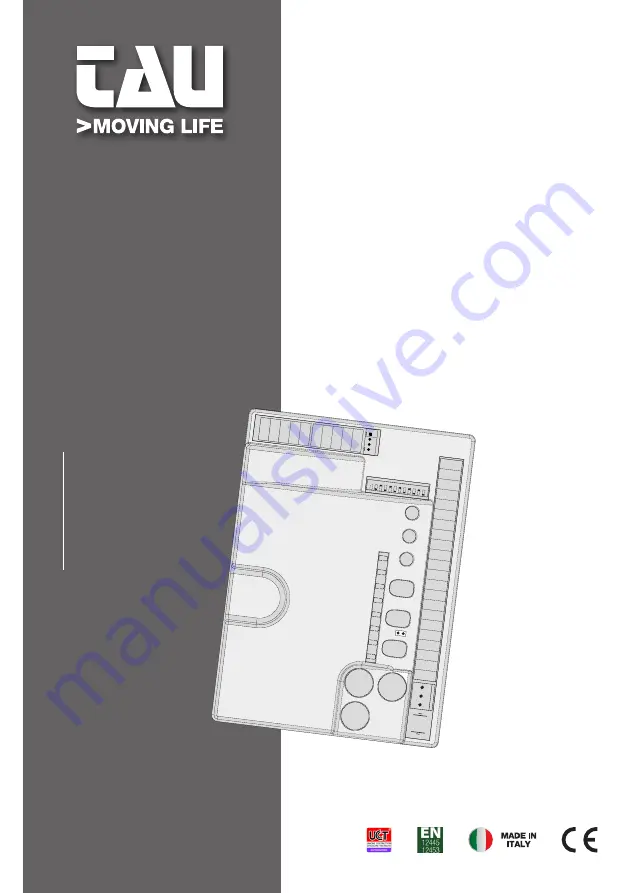
Страница 2: ...1 DL8 FIXED SAFETY EDGE EXT PHOTO INT PHOTO STOP OPEN CLOSE PEDESTRIAN ERRORS DL7 BATT TCA FR TRA TRASF 1 2 3 4 5 6 7 8 9 10 11 12 13 14 15 16 17 18 19 20 21 22 M1 5V ENC GND M2 5V ENC GND J6 23 J4 J3 24 25 26 27 28 29 30 31 32 SCHEMA CABLAGGIO D749MA R D749MA R WIRING DIAGRAM SCHALTPLAN DER D749MA R SCHÉMA CÂBLAGE D749MA R ESQUEMA DEL CABLEADO D749MA R ESQUEMA DE LIGAÇÕES D749MA R ...
Страница 3: ...ll be activated and at the end of each manouvre outputs 11 12 12 13 14 15 16 17 and 16 18 will be switched off Klemmen 1 2 Achtung Nicht verpolen Wenn der Jumper 6 nicht eingesteckt ist wird die Modalität Energiespar aktiviert und am Ende jedes Manövers werden die Ausgänge 11 12 12 13 14 15 16 17 und 16 18 abgeschaltet Etaux 1 2 Assurez vous de NE PAS inverser la polarité Si le cavalier J6 n est p...
Страница 4: ...4 PORTAFUSIBILI COME FISSARE LA CENTRALE D749MA SULLA SCATOLA HOW TO FIX THE D749MA CONTROL UNIT ON THE BOX WIE MAN DAS D749MA STEUERGERÄT AN DER BOX BEFESTIGT A ...
Страница 5: ... CAIXA A B B C C Portafusibili Fuse holder Sicherungshalter Porte fusible Portafusibles Fusível Trasformatore Transformer Transformator Transformateur Transformador Transformador Collegamento faston a centrale Faston connection to control unit Faston Verbindung zum Steu ergerät Connexion Faston au panneau de commande Conexión Faston al panel de control Conexão Faston ao painel de controle ...
Страница 6: ...à allegata è fondamentale che anche l installatore nel realizzare gli impianti prosegua nel rispetto scrupoloso delle norme Personale non qualificato o non a conoscenza delle normative applicabili alla categoria dei cancelli e porte automatiche deve assolutamente astenersi dall eseguire installazioni ed impianti Chi non rispetta le normative è responsabile dei danni che l impianto potrà causare Si...
Страница 7: ...o modalità per l eventuale alimentazione da altre fonti di energia es batterie caricate da pannello fotovoltaico A collegamento ultimato in modalità basso consumo premere brevemente il pulsante PROG I Leds verdi devono essere tutti accesi corrispondono ciascuno ad un ingresso Normalmente Chiuso Si spengono solo quando sono interessati i comandi ai quali sono associati I Leds rossi devono essere tu...
Страница 8: ...izzati 7 COM 9 FOT Nota il trasmettittore della fotocellula deve sempre essere alimenta to dai morsetti nr 12 e nr 13 in quanto su di esso si effettua la verifica del sistema di sicurezza Fototest Senza questo collegamento la cen tralina non funziona Per eliminare la verifica del sistema di sicurezza o quando non si usano le fotocellule porre il dip switch nr 6 in OFF 7 10 BORDO SENSIBILE Ingresso...
Страница 9: ...li tramite TAUPROG o TAUAPP T WIFI vedi istruzioni relative In tabella è riportata la configurazione standard Se il jumper 6 non è inserito verrà attivata la modalità basso consumo e al termine di ogni mano vra le uscite 11 12 12 13 14 15 16 17 e 16 18 verranno spente IMPORTANTE non collegare relè ausiliari o altri dispositivi all uscita 24 V DC morsetti 11 12 della centrale onde evitare di pregiu...
Страница 10: ...usano le fotocellule 7 COLPO D ARIETE On la funzione colpo d ariete è inserita Permette lo sgancio dell elettro serratura da utilizzarsi solo se è presente l elettroserratura L automa zione in chiusura effettua la spinta per agganciare l elettroserratura Off la funzione colpo d ariete è disinserita 8 SELEZIONE MOTORI On è abilitato l uso di un solo motore M1 Off è abilitato l uso di 2 motori 9 10 ...
Страница 11: ...procedura dall inizio con led DL8 giallo lampeggiante usare il comando AP CH il tasto del radiocomando se programmato o premere brevemente il tasto PROG Si ricorda che la presenza di un ostacolo durante la procedura di memorizzazione è in terpretata come finecorsa meccanico il sistema non interviene attuando movimenti di sicurezza ma solo fermando i motori Accertarsi pertanto di non sostare nelle ...
Страница 12: ...ella scheda con una serie di lampeggi predefiniti di diversi colori Legenda led acceso fisso led lampeggiante 1 lampeggio ogni 4 sec Verde funzionamento regolare lampeggio alternato Rosso Verde memorizzazione da eseguire lampeggio veloce Giallo memorizzazione in corso 1 lampeggio Rosso errore fototest Disabilitare fototest dip switch 6 in OFF verificare funzionamento fo tocellule e loro collegamen...
Страница 13: ...me morizzazione dei radiocomandi sempre acceso Verde canale CH1 in attesa di programmazione lampeggio veloce Verde memoria canale CH1 piena sempre acceso Giallo canale CH2 in attesa di programmazione lampeggio veloce Giallo memoria canale CH2 piena sempre acceso Rosso canale CH3 in attesa di programmazione lampeggio veloce Rosso memoria canale CH3 piena lampeggio Verde canale CH1 in attesa di canc...
Страница 14: ...pureattendere10secondieriprendere dal punto 1 5_ se si desidera memorizzare altri radiocomandi premere il tasto da memorizzare sugli altri dispositivi entro 2 3 sec Passato questo lasso di tempo il led DL8 si spegne è necessario ripetere la procedura dal punto 1 fino ad un massimo di 86 trasmettitori 6_ se si desidera effettuare la memorizzazione sul 2 canale ripetere la procedura dal punto 1 util...
Страница 15: ...ata succesivamente Per inserire nuovi radiocomandi si ripeterà l operazione descritta precedentemente ATTENZIONE nel momento in cui si innesta toglie una scheda di memoria la centrale deve essere spenta RESET MEMORIA RADIO tenere premuti i tasti CH1 e PROG fino a che i led DL7 e DL8 iniziano a lampeggiare velocemente en trambi in giallo A questo punto rilasciare i tasti e premerli nuovamente fino ...
Страница 16: ...ariparazioneconsostituzionegratuita francosedeTAU spesediimballoeditrasporto sonoacaricodelcliente dellepartichepresentanodifettidilavorazioneovizidimaterialericonosciutidallaTAU In caso di intervento a domicilio anche nel periodo coperto da garanzia l utente è tenuto a corrispondere il Diritto fisso di chiamata per spese di trasferimento a domicilio più manodopera La garanzia decade nei seguenti ...
Страница 17: ...nti ulteriori direttive CEE 2014 35 EU Direttiva Bassa Tensione 2014 30 EU Direttiva Compatibilità Elettromagnetica ed ove richiesto alla Direttiva 2014 53 EU Apparecchiature Radio e apparecchiature terminali di telecomunicazione Dichiara inoltre che non è consentito mettere in servizio il macchinario fino a che la macchina in cui sarà incorporato o di cui diverrà componente sia stata identificata...
Страница 18: ...alling the system Unqualified personnel or those who are unaware of the standards applicable to the automatic gates and doors category may not install systems under any circumstances Whoever ignores such standards shall be held responsible for any damage caused by the system Do not install the unit before you have read all the instructions INSTALLATION Before proceeding make sure the mechanical co...
Страница 19: ...tor 5 A 24 V DC Fast acting fuse for protection of input power supply 13 5 V AC F4 5x20 F 16A Fast acting fuse for battery charger protection F5 5x20 F 10A Fast acting fuse for protection of auxiliary circuits 18 V DC F3 5x20 F 3 15A Motor power supply circuits voltage 24V DC Auxiliary device circuits supply voltage 24V DC Logic circuits supply voltages 5V DC Operating temperature 20 C 55 C 4 CONN...
Страница 20: ...ITIVE If the jumper J6 is not plugged in at the end of each maneuver this out put 11 and 12 will be switched off energy saving mode 12 13 TX PHOTOCELLS 24V DC output for transmitter photocell phototest max no 1 photocell transmitters 12 POSITIVE 13 NEGATIVE 14 15 FLASHING LIGHT LED CABINET 24V DC max 20W output for flashing light supply flashing signal sup plied by the control unit rapid for closi...
Страница 21: ...djustment Note by rotating the TRIMMER FR clockwise the sensitivity of the gearmotor to obstacles diminishes and therefore the thrust force increases vice versa by rotating it counter clockwise the sensitivity of the gearmotor to obstacles increases and therefore the thrust force diminishes T R A Dip switch 1 AUTOMATIC CLOSING On when completely open closure is automatic after the set time on the ...
Страница 22: ...rom closing mechanical stop Press without releasing the PROG button till the DL8 LED starts flashing yellow the automation starts to open slowly looking for the opening limit gate stop If the automation closes instead of opening stop the run of the gate by cutting the photocells or closing the STOP contact invert the polarity of the motor that closes take the gate in the closed position on the mec...
Страница 23: ... during a closing manoeuvre the automation opens all the way WARNING the control panel logics may interpret mechanical friction as an obstacle 8 DIAGNOSTICS LED DL1 Red PEDESTRIAN button LED signal DL2 Red OPEN CLOSE button LED signal DL3 Green STOP button LED signal DL4 Green INTERNAL PHOTOCELLS LED signal DL5 Green EXTERNAL PHOTOCELLS LED signal DL6 Green SENSITIVE EDGE LED signal LED DL7 Apart ...
Страница 24: ... fuse F5 4 flashes yellow no motor 2 signal Check wiring check the motor rotates freely and is powered directly by the battery check fuse F5 5 flashes red max current limit for motor 1 exceeded Excessive absorption peaks of the gearmotor check there are no obstacles on the automation path check the current absorption of the motor when in a no load condition and when applied to the gate 5 flashes y...
Страница 25: ...ADIO RECEIVER The radio receiver can learn up to a maximum of 30 codes of rolling code S2RP S4RP K SLIM RP T 4RP to be set freely on 3 channels The first channel directly commands the control board for opening the automatic device the second channel commands a relay for a N O no voltage output contact terminals 19 20 max 24V AC 1 A and the third channel controls directly the pedestrian opening fro...
Страница 26: ...d separately To allow the previously stored codes max 30 to be moved to the control unit it is required to install a memory card making sure that the control unit is at that time off and that the memory card is brand new and therefore completely empty When the control unit is restarted the codes will automatically move to the memory card Moving the codes from the control unit to the memory card do...
Страница 27: ...ceipt or invoice This guarantee covers the repair or replacement at TAU s expense ex works TAU packing and trans port at the customer s expense of parts that TAU recognises as being faulty as regards workmanship or materials For visits to the customer s facilities also during the guarantee period a Call out fee will be charged for travelling expenses and labour costs The guarantee does not cover t...
Страница 28: ...5 EU Low Voltage Directive 2014 30 EU Electromagnetic Compatibility Directive and where required with the Directive 2014 53 EU Radio equipment and telecommunications terminal equipment Also declares that it is not permitted to start up the machine until the machine in which it is incorporated or of which it will be a component has been identified with the relative declaration of conformity with th...
Страница 29: ...onformitätserklärung von grundlegender Wichtigkeit ist dass sich auch der Installateur bei der Durchführung der Anlage genauestens an die Vorschriften hält Personal das nicht qualifiziert ist oder die Vorschriften nicht kennt die für die Kategorie automatische Türen und Tore anwendbar sind darf Installationen und Anlagen keinesfalls ausführen Wer sich nicht an die Vorschriften hält haftet für die ...
Страница 30: ...viert sind mit denen sie kombiniert sind müssen alle roten LEDs abgeschaltet sein jede LED entspricht einem gewöhnlich geöffneten Ein gang Sie leuchten erst auf wenn die Steuervorrichtungen aktiviert sind mit denen sie kombiniert sind 3 TECHNISCHE MERKMALE Versorgung der Steuerkarte 230 V AC 50 Hz Max Absorption des Gleichstrommotors 5 A 24 V DC Schnellsicherung zum Schutz der Eingangsversorgung 1...
Страница 31: ...g Sicherheitkontakleisten Widerstandsempfindliche Leiste oder Leiste mit normalerweise geschlossenen Kontakt siehe DIP SWITCH 12 Während der Öffnungsphase bewirkt dies das vorübergehende Anhalten des Tors und eine teilweise Wiedereinschaltung desselben um etwa 20 cm wodurch das mögliche Hindernis gelöst wird Während der Schließphase bewirkt dies das Anhalten gefolgt von der vollständigen Wiedererö...
Страница 32: ... 11 12 12 13 14 15 16 17 und 16 18 abgeschaltet WICHTIG keine Hilfsrelais oder andere Belastungen an den 24V DC Ausgang Klemme Nr 11 12 anschließen um den korrekten Betrieb der Steuerung nicht zu beeinträchtigen Dafür lieber einen separaten Trafo verwenden in der Nähe der Automatisierung keine Switching Speisegeräte oder ähnliche Apparaturen anschließen die Störungen verursachen könnten 5 EINSTELL...
Страница 33: ...ß ist ausgeschaltet 8 AUSWAHL MOTOREN On Nur die Benutzung eines Motors M1 ist aktiviert Off Die Benutzung von zwei Motoren ist aktiviert 9 10 11 Automatisierungstyp Selektion Dip 9 Dip 10 Dip 11 Automatisierungstyp Off Off Off ARM BR zu 200 Kg oder Flügelig weniger als 3 m EASY BR On Off Off ARM BR über 200 kg und Flügel weniger als 3 m EASY BR Off On Off Nicht verwendet On On Off R40 R Off Off O...
Страница 34: ...kurz die Taste PROG Das Vorhandensein eines Hindernisses während des Abspeicherungsverfahrens wird als Anschlag interpretiert das System greift aus Sicherheitsgründen nicht ein aber die Motoren bleiben stehen Halten Sie sich daher während des Abspeicherungsverfahrens nicht in der Nähe der Automatisierung auf 7 MERKMALE DER SCHALT UND STEUERTAFEL D749MA R ÖFFNUNG UND SCHLIEßUNG MIT ZEITUHR Die Öffn...
Страница 35: ...genommen werden Schnelles Aufblinken gelb Abspeicherung läuft 1 Aufblinken rot Fehler Fototest Fototest deaktivieren DIP Switch 6 OFF Betrieb der Fotozelle und ihren Anschluss überprüfen 1 Aufblinken gelb Status unbekannt nächstes Manöver VERLANGSAMUNG 2 Aufblinken rot Vorhandensein Hindernis für den Motor 1 Prüfen dass keine Hindernisse entlang des Torlaufs vorhanden sind und kontrollieren ob das...
Страница 36: ... Eeprom intern extern Führen Sie das Verfahren RESET SPEICHER FUNK Außer Hinweisen Fehlern der Logik zeigt die LED DL8 auch den Status des Steuergerätes während der Abspeicherung der Fernsteuerungen an Immer an grün Kanal CH1 wartet auf Programmierung Schnelles Aufblinken grün Speicher Kanal CH1 voll Immer an gelb Kanal CH2 wartet auf Programmierung Schnelles Aufblinken gelb Speicher Kanal CH2 vol...
Страница 37: ...ität Programmierung 3_ auf die Taste der Funksteuerung drücken die man benutzen will 4_ Die LED DL8 grün geht aus um die Abspeicherung anzuzeigen dann leuchtet wieder und wartet auf weitere Handsender falls die LED nicht leuchtet nochmals einen Befehl geben oder das Verfahren ab Punkt 1 wiederholen 5_ wenn man andere Handsender speichern will innerhalb von 2 3 Sekunden auf die Tasten des Handsende...
Страница 38: ... der Codes von der Steuerung auf die Speicherkarte funktioniert nicht wenn eine Speicherkarte verwendet wird auf der bereits Funksteuercodes gespeichert und die an schließend gelöscht wurden Um neue Handsender einzufügen muss man der oben beschriebene Vorgang wiederholen ACTUNG Vor dem Einstecken Ausstecken des Moduls die Stromversorgung zur Steuer platine unterbrechen RESET SPEICHER FUNK Halten S...
Страница 39: ...hließt die Reparatur mit kostenlosem Ersatz ab Werk der Firma TAU Verpackungs und Transportkosten gehen zu Lasten des Kunden jener Teile ein die von TAU anerkannte Fabrikations oder Materialfehler aufweisen Im Falle von Eingriffen am Standort des Kunden auch in der Garantiezeit hat der Kunde ein feste Abrufgebühr für die Reisekosten zum Standort des Kunden und die Arbeitskraft zu zahlen Die Garant...
Страница 40: ... EU Niederspannungsrichtlinie 2014 30 EU Richtlinie für elektromagnetische Kompatibilität Und wo gefordert der Richtlinie 2014 53 EU Radio equipment and telecommunications terminal equipment Außerdem wird erklärt dass es nicht zugelassen ist die Vorrichtung in Betrieb zu setzen bis die Maschine in die sie integriert wird oder deren Bestandteil sie sein wird identifiziert und die Konformität gegenü...
Страница 41: ...e il est fondamental que l installateur lui aussi lorsque qu il réalise l installation respecte scrupuleusement les normes Tout personnel non qualifié ou ne connaissant pas les normes applicables à la catégorie des portails et portes automatiques doit absolument s abstenir d effectuer des installations Qui ne respecte pas les normes est responsable des dommages que l installation pourra causer Nou...
Страница 42: ...iées sont actives Les Leds rouges doivent être toutes éteintes elles correspondent chacune à une entrée Normalement Ouverte Elles ne s allument que lorsque les commandes auxquelles elles sont associées sont actives 3 CARACTÉRISTIQUES TECHNIQUES Alimentation carte 230 V AC 50 Hz Puissance maximale moteur cc 5 A 24 V DC Fusible rapide protection alimentation entrée 13 5 V AC F4 5x20 F 16A Fusible ra...
Страница 43: ...tomatique sera désactivée Lorsque n est pas utilisée faire un pont entre les bornes 7 COM 10 BARRE PALPEUSE Note si on connecte un bord sensible résistif mettre le dip switch n 12 sur ON Si on connecte une barre palpeuse fixe avec contact NF mettre le dip switch n 12 sur OFF 11 12 AUX sortie auxiliaires 24V DC max 15 W pour photocellules récepteurs etc 11 NÉGATIF 12 POSITIF Si le cavalier J6 n est...
Страница 44: ...pour rendre actifs les nouveaux réglages TRIMMERS T R A réglage du temps supplémentaire de décalage du deuxième vantail en fermeture en plus du temps programmé pour la procédure de mémorisation Normale ment ce réglage est maintenu au minimum en tournant le trimmer dans le sens horaire on augmente le temps de décalage du deuxième vantail T C A réglage Temps de Fermeture Automatique de 1 à 120 secon...
Страница 45: ...sé maintenir le dip sur OFF 6 PROCÉDURE DE MÉMORISATION ATTENTION Après avoir alimenté la logique de commande attendre 2 secondes avant de com mencer les manœuvres de réglage Note les butées mécaniques de l automatisme doivent être obligatoirement réglés aussi bien en ouverture qu en fermeture voir instructions moteur Après avoir terminé l installation de l automatisme Vérifier la position des dip...
Страница 46: ...ctée en cas de coupure de courant l automatisme fonctionne quand même Si la tension descend en dessous de 11 3 Vcc l automatisme cesse de fonctionner l armoire de commande reste alimentée quand par contre elle descend en dessous de 10 2 Vcc la carte déconnecte complè tement la batterie l armoire de commande n est plus alimentée DÉTECTION DES OBSTACLES La fonction de détection des obstacles réglabl...
Страница 47: ...eur 2 Contrôler l absence d obstacles le long de la course de l automatisme et son coulissement fluide Dans le cas d une intervention obstacle avec la fonction de fermeture automa tique habilitée la manœuvre automatique de fermeture du portail sera désac tivée Pour la fermeture du portail sera nécessaire enclencher une commande 3 clignotement rouge absence signale encoder moteur 1 Vérifier le câbl...
Страница 48: ...acement total des chaînes de radio L indication de plusieurs erreurs est effectuée avec une pause de 2 secondes entre une signalisation et la suivante Dans le cas d une intervention par l encodeur détection d obstacle pendant la phase de fermeture le centrale de commande inverse le mouvement et il commence la phase de ralentissement de la course en ouverture avec l arrêt de la fermeture automatiqu...
Страница 49: ...mode d apprentissage sans mémoriser un code presser brièvement la touche CH1 ou la touche CH2 Dans le cas de obtention du numéro maximal de radiocommandes n 30 le led DL8 clignote rapidement pendant environ 3 secondes mais sans effectuer la mémorisation PROGRAMMATION RECULÉ PAR T 4RP K SLIM RP S 2RP S 4RP V 4 X Avec la nouvelle version de logiciel V 4 X il est possibile d effectuer l apprentissage...
Страница 50: ...x en rouge À ce stade relâchez les boutons et les presser à nouveau jusqu à ce que les led s éteint remise à zéro en course indiquant que l opération est terminée si ils ne sont pas pressée et on reste en attente la fiche renvoie à un fonctionnement normal après environ 12 secondes À la relance vous devez effectuer la procédure de mémorisation Si on fait un RÉGLAGES DE FABRIQUE la mémoire du récep...
Страница 51: ...a pas été effectuée suivant les instructions fournies par le constructeur et présentes à l intérieur de chaque emballage Si l on n a pas utilisé que des pièces originales TAU pour l installation de l automatisme Si les dommages sont causés par des calamités naturelles des actes de malveillance une sur charge de tension une alimentation électrique incorrecte des réparations impropres une installa t...
Страница 52: ... directives CEE suivantes 2014 35 EU Directive Basse Tension 2014 30 EU Directive Compatibilité Électromagnétique et si requis à la Directive 2014 53 EU Équipements hertziens et équipements terminaux de télécommunication Le Fabricant déclare également qu il n est pas permis de mettre en service l appareil tant que la machine dans laquelle il sera incorporé ou dont il deviendra composant n a pas ét...
Страница 53: ... declaración de conformidad adjunta también es fundamental que el instalador al realizar la instalación respete escrupulo samente las normas Personal no cualificado o que no conozca las normativas aplicables a la categoría de las cancelas y puertas automáticas debe abstenerse de efectuar instalaciones Quien no respeta las normativas es responsable de los daños que la instalación podría provocar Se...
Страница 54: ...os apagados cada uno de ellos corresponde a una entrada Normalmente Abierta Se encienden sólo cuando están afectados los mandos a los que están asociados 3 CARACTERÍSTICAS TÉCNICAS Alimentación tarjeta 230 V AC 50 Hz Máxima absorción del motor DC 5 A 24 V DC Fusible rápido protección alimentación entrada 13 5 Vac F4 5x20 F 16A Fusible rápido protección carga batería F5 5x20 F 10A Fusible rápido pr...
Страница 55: ...so si está programado se inhibirá el cierre automático Efectuar un puente en los bornes si no se utilizan 7 COMÚN 10 BORDE SENSIBLE Nota si se conectara una banda sensible resistiva coloque el dip switch nro 12 en ON Si se conectara una banda fija con contacto NC coloque el dip switch nro 12 en OFF 11 12 AUX salida auxiliares 24V DC máx 15 W para fotocélulas receptores etc 11 NEGATIVO 12 POSITIVO ...
Страница 56: ...r o dip switches TRIMMER T R A ajuste adicional atraso 2a hoja en cierre se suma al atraso ya programado normalmente se deja al mínimo moviendo en sentido horario se aumenta el atraso de la segunda hoja T C A ajuste Tiempo de Cierre Automático de 1 a 120 segundos aprox véase dip switch nº 1 FR ajuste sensibilidad detección obstáculos Nota girando el TRIMMER FR en el sentido de las agujas del reloj...
Страница 57: ...ber alimentado el tablero de control espere 2 seg antes de efectuar las maniobras de ajuste Nota los topes mecánicos del automatismo deben regularse obligatoriamente tanto en apertura como en cierre véanse instrucciones motor Cuando haya terminado la instalación de la automatización Verificar la posición de los dips 9 10 y 11 Los dips se deben configurar según el modelo de automatización véase tab...
Страница 58: ...cta la batería en ausencia de red la automatización funciona de todos modos Si la tensión desciende por debajo de los 11 3 Vdc la automatización deja de funcionar el tablero de control sigue estando alimentado cuando en cambio desciende por debajo de los 10 2 Vdc la tarjeta se desconecta completamente de la batería el tablero de control deja de estar alimentado DETECCIÓN OBSTÁCULOS La función de d...
Страница 59: ...tomatismo y su deslizamiento Con el cierre automático activo tras la intervención para la detección de obstáculos se desactiva el cierre automático Se requiere un pulso de mando para realizar el cierre 3 destellos Rojo ausencia de señal encoder motor 1 Controle el cableado compruebe el encoder mediante el TEST ENCODER opcional 3 destellos Amarillo ausencia de señal encoder motor 2 Controle el cabl...
Страница 60: ...les radio La indicación de que existe más de un error se lleva a cabo con una pausa de 2 seg entre una seña lación y la otra Si se produce intervención durante la maniobra de cierre por parte de l encoder detección de obstácu los la central invierte el movimiento entra en la fase de carrera decelerada buscando el tope de apertura y bloquea el cierre automático En el impulso de mando sucesivo se re...
Страница 61: ...tellará rápidamente durante unos 3 segundos sin ejecutar la memorización PROGRAMACIÓN REMOTA TRÁMITE T 4RP K SLIM RP V 4 X Con la nueva versión del software V 4 X es posible hacer l aprendizaje remoto de la nueva versión de los radiocontroles T 4RP K SLIM RP S 2RP S 4RP V 4 X o sea sin obrar directamente sobre las teclas de programación del receptor Será suficiente disponer de un radiocontrol ya p...
Страница 62: ... concluido si no se pulsaran y se mantiene en espera la tarjeta vuelve al funcionamiento normal después de unos 12 segundos en el reinicio habrá que realizar el proceso de memorización En el caso de un Hard Reset la memoria del radiorreceptor no se borra los emisores existentes se quedan memorizados 11 PREPARACIÓN PARA EL FUNCIONAMIENTO CON APLICACIONES TAU Para utilizar las aplicaciones TauApp y ...
Страница 63: ...a instalación realizada sin respetar las instrucciones dadas por la empresa que se encuentran en el interior de cada embalaje Si no se han utilizado todos los componentes originales TAU para la instalación del automatismo Si los daños han sido causados por catástrofes naturales modificaciones sobrecargas de ten sión alimentación incorrecta reparaciones inadecuadas instalación incorrecta u otras ca...
Страница 64: ...riores directivas CEE 2014 35 EU Directiva Baja Tensión 2014 30 EU Directiva Compatibilidad Electromagnética y donde es necesario con los de la Directiva 2014 53 EU Equipos radioeléctricos y equipos terminales de telecomunicación Declara además que no está permitido poner en servicio la maquinaria hasta que la máquina en la que se incorpora rá o de la que se convertirá en componente se haya identi...
Страница 65: ...alam o producto Pessoal não qualificado ou outros desconhecedores das normas aplicáveis à categoria portões e portas automáticas não podem instalar o sistema sob quaisquer circunstâncias Quem quer que ignore tais normas será responsabilizado por qualquer dano causado pelo sistema Não instale a unidade antes de ler as instruções INSTALAÇÃO Antes de prosseguir certifique se que todos os componentes ...
Страница 66: ...o da placa 230 V AC 50 Hz Máxima absorção do motor DC 5 A 24 V DC Fusível rápido de protecção linha alimentação 13 5 V AC F4 5x20 F 16A Fusível rápido protecção carregador de bateria F5 5x20 F 10A Fusível rapido protecção dos circuitos auxiliares 24V DC F3 5x20 F 3 15A Tensão circuitos alimentação motor 24V DC Tensão alimentação circuitos auxiliares 24V DC Tensão aliemntação circuitos lógicos 5V D...
Страница 67: ...ra fotocélulas receptores etç 11 NEGATIVO 12 POSITIVO Se o jumper J6 não estiver ligado esta saída 11 e 12 será desativada modo de baixo consumo no fim de cada manobra 12 13 FOTOCÉLULAS Saída 24V DC para emissor fotocélulas fototeste máximo 1 fotocélulas emissoras 13 NEGATIVO 12 POSITIVO 14 15 PIRILAMPO 24V DC Máx 20W saída para pirilampo sinal pirilampo enviado pelo quadro de controlo rápido no f...
Страница 68: ...culos diminui e a força de impulso aumenta pelo contrário rodando no sentido anti horário a sensibilidade do motorredutor aos obstáculos aumenta e a força de impulso diminui T R A Dip switch 1 FECHO AUTOMÁTICO On Depois de abrir a automação fecha se automaticamente quando tempo definido no trimmer T C A Tempo de Abertura e Fecho expirar Off A manobra de fecho requere um comando manual 2 2 4 CURSO ...
Страница 69: ... inicia lentamente a abertura na pesquisa do limite final de abertura Se o automatismo se fecha em vez de abrir interrompa o percurso do portão através das fotocélulas ou fechando o contacto STOP inverter a polaridade do motor que fecha trazer o portão na posição de fecho no bloqueio e repetir o procedimento Nota se a automatização não funciona verifique as ligações de entrada Os LED s DL6 DL5 DL4...
Страница 70: ...ânica como um obstáculo 8 LED s de DIAGNÓSTICO DL1 Vermelho Led de aviso botão de PEDONAL DL2 Vermelho Led de aviso botão de ABERTURA FECHO DL3 Verde Led de aviso botão STOP DL4 Verde Led de aviso FOTOCÉLULAS INTERNAS DL5 Verde Led de aviso FOTOCÉLULAS EXTERNAS DL6 Verde LED do BORDO SENSITIVO BARRA DE APALPAÇÃO LED DL7 Além de sinalizar a presence de bateria o LED DL7 mostra anomalias com uma sér...
Страница 71: ...ue a cablagem verifique se o motor roda livremente e se é actuado directamente pela bateria verificar o fusível F5 5 piscar vermelho corrente maxima do motor 1 excedida Picos de absorção excessivos do motorredutor verifique que não existem obstáculos no caminho da automação verifique a corrente absorvida pelo motor numa condição de sem carga e quando apli cada à portão 5 piscar amarelo corrente ma...
Страница 72: ... curso e abranda mentos não funcionarão 10 RECEPTOR RÁDIO INCORPORADO 433 92 MHz O receptor de rádio pode aprender até um máximo de 30 códigos de código contínuos S 2RP S 4RP K SLIM RP T 4RP para ser definido livremente em três canais O primeiro canal comanda directamente a placa electrónica de controlo para a abertura da automati zação o segundo canal comanda um relé para um contacto sem potência...
Страница 73: ...250SM126 254 códigos Art 250SM254 1022 códigos Art 250SM1022 Os quadros são equipados de origem com memória de 30 códigos Os módulos de memória podem ser encomendados separadamente Para permitir que os códigos armazenados anteriormente máx 30 sejam movidos para a unidade de controle será necessário instalar um cartão de memória certificando se de que a unidade de con trole esteja nesse momento sej...
Страница 74: ...e 24 para o motor 2 13 GARANTIA CONDIÇÕES GERAIS A garantia TAU tem uma duração de 24 meses a contar da data de compra dos produtos o documento fiscal de venda recibo ou factura Esta garantia cobre a reparação ou substituição a espensas TAU à saída da fábrica embalagem e trans porte por conta do cliente das peças que que apresentem defeitos de fabrico ou material defeituoso reconhecidos pela TAU E...
Страница 75: ...guintes directivas CEE 2014 35 EU Directiva de Biaxa Voltagem 2014 30 EU Directiva de Compatibilidade Electromagnética e onde requerido com a Directiva 2014 53 EU Equipamentos rádio e terminais de telecomunicações rádio Também declara que não é permitido colocar em serviço o aparelho até que a máquina na qual ele será incorporado ou se tornar componente não estiver identificado e que a sua conform...
Страница 76: ...ow to learn a Rolling Code transmitter on Diamond con trol boards How to HARD RESET the control board of your automatic gate How to HARD RESET the RADIO RECEIVER of the control board FRANÇAIS VIDEO TUTORIAL Apprentissage d un émetteur à code variable sur les centrales de commande série Diamond Comment effectuer la RÉINITIALISATION MATÉRIELLE de la centrale de commande Comment effectuer la RÉINITIA...
Страница 77: ...77 ...
Страница 78: ...78 ...
Страница 79: ...79 ...
Страница 80: ...50376 info tauitalia com www tauitalia com Foglietto illustrativo CARTA Raccolta differenziata Segui le indicazioni del tuo comune N B togliere i punti metallici Instruction leaflet PAPER Waste separation Follow the instruction s of your city hall Note remove the staples 22 PAP ...