


Power Supplies
7-47
PS
19
AC Power Su
pply U
n
it
7
5.
Secure the PS19 AC to the card cage by fastening the two captive screws, located
at the top and bottom of the PS19 AC to the cage. See
6.
Turn the power switch ON, and verify that the green Power indicator is lit, while
the red Alarm indicator is not lit.
Removing the Power Supply
1.
Locate a desk or table top that can support 50 lb (23kg). If the surface can be
damaged by sharp objects, place a protective sheet of cardboard or similar
material over the top surface.
2.
Place an anti-static sheet over a desk or a table top (the card’s plastic shipping bag
will suffice).
3.
Turn the PS19 AC power supply switch OFF (turn the switch downwards).
4.
Unfasten the two captive screws on the front panel of the PS19 AC. See
.
5.
Carefully remove the PS19 AC from its slot.
6.
Place the PS19 AC over the anti-static material with the component side facing
upwards.
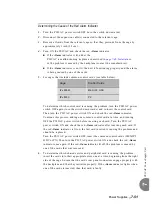
Turn ON the PS19 AC units in the expansion cages only after powering the Main Cage
(IPx 800M) and verifying that the Main Cage has initialized properly and the alarm
indicator does not illuminate. Otherwise the cards in the expansion cages (IPx 800X)
may not initialize.
Do not remove the PS19 AC unit from the cage when turned ON. Sudden power surges
could damage system components. Before extracting the PS19 AC card, verify that the
power switch is turned OFF.
Содержание Coral IPx 800 Series
Страница 2: ......
Страница 4: ......
Страница 10: ...vi...
Страница 16: ......
Страница 22: ......
Страница 28: ......
Страница 32: ...1 4 Coral IPx 800 Installation Manual Document Description 1 NOTES...
Страница 34: ...1 6 Coral IPx 800 Installation Manual Special Symbols Used in this Document 1 NOTES...
Страница 40: ......
Страница 48: ...2 8 Coral IPx 800 Installation Manual Site Inspection 2 NOTES...
Страница 90: ......
Страница 116: ...3 26 Coral IPx 800 Installation Manual Shared Service and Peripheral Card Test 3 NOTES...
Страница 118: ...3 28 Coral IPx 800 Installation Manual Installation Wrap up 3 NOTES...
Страница 120: ......
Страница 126: ......
Страница 142: ...5 16 Coral IPx 800 Installation Manual Protection Devices 5 NOTES...
Страница 150: ...5 24 Coral IPx 800 Installation Manual Terminal Data Communication Ports RS 232E 5 NOTES...
Страница 182: ...5 56 Coral IPx 800 Installation Manual I O RJ 45 Connections Via Rear Panel For Coral Interface Cards 5 NOTES...
Страница 242: ......
Страница 278: ...6 38 Coral IPx 800 Installation Manual Cage Description and Installation 6 NOTES...
Страница 292: ...6 52 Coral IPx 800 Installation Manual Coral IPx 800X Expansion Cage Description 6 NOTES...
Страница 312: ...6 72 Coral IPx 800 Installation Manual System Configuration Options Coral IPx 800 6 NOTES...
Страница 313: ...Coral Cor IPx 800 Installation Manual Chapter 7 Power Supplies 7 1 PS19 DC 7 1 7 2 PS19 DC D 7 17 7 3 PS19 AC 7 39...
Страница 314: ......
Страница 352: ...7 38 Coral IPx 800 Installation Manual PS19 DC D Power Supply Unit with Duplication 7 NOTES...
Страница 368: ......
Страница 372: ...8 4 Coral IPx 800 Installation Manual Common Control Cards 8 NOTES...
Страница 382: ...8 14 Coral IPx 800 Installation Manual Software Authorization Unit SAU 8 NOTES...
Страница 384: ...8 16 Coral IPx 800 Installation Manual MAP 8 NOTES...
Страница 386: ...8 18 Coral IPx 800 Installation Manual LIU 8 NOTES...
Страница 392: ......
Страница 396: ...8 26 Coral IPx 800 Installation Manual HDC Card High Density Control 8 NOTES...
Страница 399: ......