background image

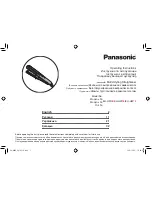
T3 SMOOTH ID

User Guide
Guide de l’utilisateur
Manual del usuario 

1" smart straightening and styling iron
Fer plat et à coiffer intelligent de 25 mm
Plancha inteligente para alisado y peinado 
de 25 mm

Model No./N

o

 de modèle/N.º de modelo

76535, 76536, 76537, 76538, 76539, 77534, 
77535, 76535-CAD, 76536-CAD, 76537-CAD,  
76538-CAD, 76539-CAD, 77534-CA,  
77535-CA

Содержание SMOOTH ID

Страница 1: ...t straightening and styling iron Fer plat et à coiffer intelligent de 25 mm Plancha inteligente para alisado y peinado de 25 mm Model No No de modèle N º de modelo 76535 76536 76537 76538 76539 77534 77535 76535 CAD 76536 CAD 76537 CAD 76538 CAD 76539 CAD 77534 CA 77535 CA ...

Страница 2: ...h by electric shock 1 Always unplug the appliance immediately after using 2 Do not use while bathing 3 Do not place or store the appliance where it can fall or be pulled into a bath tub or sink 4 Do not place in or drop into water or other liquid 5 If the appliance falls into water unplug it immediately Do not reach into the water READ ALL INSTRUCTIONS BEFORE USING When using electrical appliances...

Страница 3: ... from heated surfaces Do not wrap the cord around the appliance 6 Never use while sleeping 7 Never insert any object into the styling iron 8 Do not use outdoors or operate where aerosol spray products are being used or where oxygen is being administered 9 Do not use an extension cord with this appliance 10 This styling iron is hot when in use Do not let eyes and bare skin touch the heated surfaces...

Страница 4: ...rd to fray and possibly break 7 Do not attempt to repair the appliance yourself STORAGE When not in use your styling iron should be disconnected and stored in a safe dry location out of reach of children Do not wrap the cord around the styling iron Allow the cord to hang or lie loose and straight at the point of entry into the styling iron SERVICING OF DOUBLE INSULATED APPLIANCES In a double insul...

Страница 5: ...fied electrician Do not attempt to defeat this safety feature AUTO SHUT OFF After approximately one hour the unit will automatically shut itself off To reactivate the unit press and hold the lit Power Button until the iron vibrates and lights start to cascade up AUTO WORLD VOLTAGE This appliance contains a special electronic circuit that automatically converts it for worldwide usage from 120VAC 60...

Страница 6: ... hold the lit Power Button until the tool vibrates and lights start to cascade up The styling iron will automatically start in HeatID mode The screen will be unlocked and the HeatID icons will light up and blink for you to input your hair profile See page 13 to set your hair profile Note Do not touch the area above the power button when turning the iron ON or OFF The screen will be unlocked the ve...

Страница 7: ...r texture length and color treatment inputs and T3 Smooth ID will automatically tailor your heat setting to help protect against heat damage and deliver one pass results OPERATING INSTRUCTIONS T3 SMOOTH ID IDENTIFYING YOUR HAIR PROFILE TEXTURE Run one hair strand between your fingers Can you barely feel and see the strand Select Fine hair texture Can you feel the strand but it does not feel very t...

Страница 8: ...tion Keep your hand away from the Power Button to avoid unintended interface activation during styling If interface is not responsive Ensure you are only touching a single area of the interface at a time If contact is made with more than one area at the same time the tool may not respond Ensure the screen is unlocked To unlock screen quickly double tap the Power Button If tool is still unresponsiv...

Страница 9: ...eat settings using the Manual Mode OPERATING INSTRUCTIONS T3 SMOOTH ID SWITCH TO MANUAL MODE If first time use Tap the Power Button once after turning on the tool You will hear a beep The HeatID icons will go away and the Temperature Panel will appear If second time use The styling iron will immediately begin heating up to your last used heat setting To manually adjust the heat 2 Tap the Power But...

Страница 10: ...ps and the lights turn solid the iron has reached your heat selection and is ready to use OPERATING INSTRUCTIONS T3 SMOOTH ID TEMPERATURE GUIDE For optimal results select the right heat setting for your hair type See temperature guide below to determine your heat setting We suggest starting at a lower setting and building your way up as needed If your hair is color treated or damaged reduce temper...

Страница 11: ...nd day styles with less heat Refresh Mode automatically reduces your previously saved heat setting to help protect your hair boost shine and reduce frizz on second day retouches OPERATING INSTRUCTIONS T3 SMOOTH ID Note The styling iron will heat up to your last saved heat setting when turned on again OPERATING INSTRUCTIONS T3 SMOOTH ID CORRECT T3 THERMATOUCH TECHNOLOGY Advanced insulation technolo...

Страница 12: ...into another clip leaving a 1 2 section out to begin styling HOW TO USE YOUR T3 SMOOTH ID 3 Glide iron through in the direction of hair growth at a speed slower than when brushing hair Continue working with thin sections repeating steps 2 and 3 until hair is fully styled Slow down for perfect results in a single glide Fine hair Glide iron at 2 3 inches per second Medium Hair Glide iron at 2 inches...

Страница 13: ...UPPLIER S DECLARATION OF CONFORMITY 47 CFR 2 1077 COMPLIANCE INFORMATION 24 25 ENGLISH ENGLISH T3 Micro will repair or replace at our option T3 products for twenty four 24 months from the date of purchase if they are defective in workmanship or materials This limited warranty does not cover 1 damage due to misuse or abuse such as incorrect voltage supply dropping or failure to follow enclosed inst...

Страница 14: ...ct to the following two conditions 1 this device may not cause harmful interference and 2 this device must accept any interference received including interference that may cause undesired operation No change or modification to this equipment shall be made without the express written approval of the responsible party as defined in the FCC s rules 26 27 ENGLISH ENGLISH ...

Страница 15: ...T Pour réduire les risques de décès par électrocution 1 Toujours débrancher l appareil immédiatement après l avoir utilisé 2 Ne pas l utiliser en prenant son bain 3 Éviter de déposer ou d entreposer l appareil dans un endroit où il pourrait tomber dans une baignoire ou un lavabo 4 Ne pas immerger ou plonger l appareil dans l eau ou tout autre liquide 5 Si l appareil tombe dans l eau le débrancher ...

Страница 16: ...et dans le fer à coiffer 8 Ne jamais utiliser à l extérieur ou faire fonctionner dans des milieux exposés à des produits aérosols vaporisateurs ou à de l oxygène sous pression CONSIGNES DE SÉCURITÉ IMPORTANTES 8 Ne jamais utiliser à l extérieur ou faire fonctionner dans des milieux exposés à des produits aérosols vaporisateurs ou à de l oxygène sous pression 9 Ne jamais utiliser de fil de rallonge...

Страница 17: ...lui ci ou de le tordre surtout près de la fiche de raccordement Le cordon pourrait s user voire se rompre 7 Ne pas essayer de réparer l appareil soi même RANGEMENT Lorsqu il n est pas utilisé le fer à coiffer doit être débranché et rangé dans un endroit sûr sec et hors de la portée des enfants Ne pas enrouler le cordon d alimentation autour du fer à coiffer Laisser pendre le cordon à partir de son...

Страница 18: ...muniquer avec un électricien qualifié Ne pas essayer de contourner cette mesure de sécurité ARRÊT AUTOMATIQUE Après environ une heure de fonctionnement continu l appareil s éteint automatiquement Pour le rallumer appuyez sur le bouton de mise en marche et maintenez le enfoncé jusqu à ce que le fer vibre et que les témoins lumineux commencent à s allumer en série RÉGULATEUR DE TENSION UNIVERSEL Cet...

Страница 19: ...ppareil vibre et que les témoins lumineux commencent à s allumer en série Le fer à coiffer démarre automatiquement en mode HeatID L écran sera déverrouillé et les icônes HeatID s allumeront et clignoteront pour que vous puissiez entrer votre type de cheveux Voir page 39 pour définir votre type de cheveux Remarque Ne touchez pas l espace situé au des sus du bouton de mise en marche lorsque vous all...

Страница 20: ...e mise en marche lorsque vous allumez ou éteignez le fer Dès la deuxième mise en marche de l appareil celui ci se réchauffera selon les derniers réglages sélectionnés Pour ajuster les réglages suivre les instructions à la page 41 INSTRUCTIONS DE FONCTIONNEMENT T3 SMOOTH ID MODE HeatID Entrez vos données de texture longueur et couleur de cheveux et T3 Smooth ID adaptera automatiquement votre niveau...

Страница 21: ...la première utilisation Appuyez sur chaque icône pour sélectionner les données du profil capillaire désiré Les icônes cesseront de clignoter lors de la première pression et votre sélection s éclaircira à mesure que vous continuerez à appuyer Fins Moyens Rêches 1 SÉLECTIONNER LA TEXTURE DES CHEVEUX Courts Mi longs Longs 2 SÉLECTIONNER LA LONGUEUR DES CHEVEUX Coloration Sans coloration 3 TRAITEMENT ...

Страница 22: ...eau Si votre appareil ne se met pas en marche Maintenez le bouton de mise en marche enfoncé pendant trois secondes Éviter de toucher les surfaces au dessus du bouton de mise en marche lorsque vous mettez l appareil en marche Si l appareil ne répond toujours pas débranchez le attendez 15 secondes puis branchez le de nouveau 2 3 4 RÉSOLUTION DE PROBLÈMES INSTRUCTIONS DE FONCTIONNEMENT T3 SMOOTH ID S...

Страница 23: ...cônes HeatID disparaîtront et le panneau de température apparaîtra 1 Déverrouillez d abord le fer à coiffer en appuyant deux fois sur le bouton d alimentation Vous entendrez un son de déverrouillage INSTRUCTIONS DE FONCTIONNEMENT T3 SMOOTH ID 1 SÉLECTIONNER LE NIVEAU DE CHALEUR Pour augmenter la chaleur appuyez sur le haut du panneau de température Pour diminuer la chaleur appuyez sur le bas du pa...

Страница 24: ...e jusqu à votre température de rafraîchissement PRÊT À L EMPLOI Appuyez sur le bouton Mode Rafraîchissement Vous entendrez un bip et le panneau de température deviendra bleu Les voyants s allumeront en série jusqu à votre température de rafraîchissement QUITTER LE MODE RAFRAÎCHISSEMENT Appuyez deux fois sur le bouton d alimentation pour déverrouiller l écran Appuyez sur le bouton de Mode Rafraîchi...

Страница 25: ...NOLOGIE T3 THERMATOUCH La technologie d isolation avancée rend les poignées du fer à coiffer plus confortables à tenir Cependant comme tout autre appareil de coiffage à chaud ce fer à coiffer doit être utilisé avec prudence Évitez de toucher les côtés des baguettes du fer à coiffer où se trouvent les plaques chauffantes INCORRECT RÉINITIALISATION Pour remettre le fer aux paramètres d usine déverro...

Страница 26: ...omme une réparation ou une tentative de réparation Pour faire une demande de service sous garantie suivez les directives sur le site www T3Micro com warranty info ou appe lez nous au 866 376 8880 pour obtenir plus de détails Vous devrez fournir une preuve d achat CETTE GARANTIE LIMITÉE EST VALIDE SEULE MENT SI LE PRODUIT EST ACHETÉ CHEZ UN DÉTAILLANT DE PRODUITS T3 AUTORISÉ ET SI LE NUMÉRO DE SÉRI...

Страница 27: ...eignant l appa reil l utilisateur est encouragé à essayer de corriger les interférences en suivant l un ou plusieurs des conseils suivants Réorienter ou déplacer l antenne de réception Éloigner l appareil du récepteur Brancher l appareil sur une prise d alimen tation différente de celle où le récepteur est branché Demander l aide d un revendeur ou d un technicien radio ou télévision qualifié DÉCLA...

Страница 28: ... ESTÁN CONEC TADOS INCLUSO SI ESTÁN APAGADOS Para reducir el riesgo de muerte por descarga eléctrica 1 Siempre desconecte el aparato inmediatamente después de usarlo 2 No lo use mientras se baña 3 No coloque o guarde el aparato donde pueda caerse o jalarse hacia una tina o lavamanos 4 No lo coloque o deje caer en agua u otro líquido 5 Si el aparato cae al agua desconéctelo de inmediato No meta las...

Страница 29: ...o en la plancha para el cabello 8 No lo use al aire libre ni lo haga funcionar donde se estén utilizando productos en aerosol spray o donde se esté administrando oxígeno 9 No utilice una extensión eléctrica con este aparato INSTRUCCIONES IMPORTANTES DE SEGURIDAD 10 Esta plancha para el cabello está caliente cuando está en uso No deje que los ojos y la piel expuesta entren en contacto con las super...

Страница 30: ... posiblemente se rompa 7 No intente reparar el aparato usted mismo ALMACENAMIENTO Cuando no esté en uso debe desconectar su plancha para el cabello y guardarla en un lugar seguro y seco fuera del alcance de los niños No enrolle el cable alrededor del aparato de la plancha para el cabello Deje que el cable cuelgue o quede suelto y recto en el punto de entrada a la plancha para el cabello MANTENIMIE...

Страница 31: ...erse en cascada VOLTAJE UNIVERSAL AUTOMÁTICO Este aparato contiene un circuito electrónico especial que lo convierte automáticamente para poder ser usado en todo el mundo de 120 V CA 60 Hz a 240 V CA 50 Hz Simplemente enchúfelo en la toma de corriente del lugar en donde se encuentra y utilícelo como de costumbre El aparato se ajustará automáticamente a la corriente local Sin embargo es posible que...

Страница 32: ...a que el aparato vibre y las luces comiencen a encenderse en cascada La plancha para el cabello se iniciará automáticamente en el modo HeatID La pantalla se desbloqueará y los indicadores de HeatID se iluminarán y parpadearán para que introduzca su perfil de cabello Consulte la página 65 para configurar su perfil de cabello Nota No toque la parte que se encuentra arriba del botón de encendido al e...

Страница 33: ...rse inmediatamen te según el ajuste de calor configurado anteriormente Para modificar los ajustes siga las instrucciones de la página 67 MODO HeatID Introduzca la textura la longitud y el tratamiento de color de su cabello la T3 Smooth ID ajustará automáticamente su configuración de temperatura para ayudar a protegerlo contra el daño por calor y obtener resultados en una sola pasada INSTRUCCIONES ...

Страница 34: ... su perfil de cabello Los indicadores dejarán de parpadear la primera vez que los toque y su selección se hará más brillante a medida que continúe tocando Fino Medio Grueso 1 SELECCIONAR TEXTURA Corto Medio 2 Sin tratamiento 3 INSTRUCCIONES DE USO T3 SMOOTH ID 5 LISTA PARA USAR Una vez que la plancha para el cabello suena y las luces se encienden ya se ha alcanzado su configuración HeatID y está l...

Страница 35: ...herramienta no se enciende Asegúrese de mantener pulsado el botón de encendido durante 3 segun dos completos Evite tocar el área que se encuentra arriba del botón de encendido cuando encienda la herramienta Si la herramienta aún no enciende desenchúfela espere 15 segundos y vuelva a enchufarla 2 3 4 SOLUCIÓN DE PROBLEMAS INSTRUCCIONES DE USO T3 SMOOTH ID Si los problemas continúan después de lleva...

Страница 36: ...l Escuchará un pitido Desaparecerán los indicadores de HeatID y aparecerá el panel de temperatura 1 Primero desbloquee la plancha para el cabello pulsando rápidamente dos veces el botón de encendido Escuchará un sonido de desbloqueo INSTRUCCIONES DE USO T3 SMOOTH ID 1 SELECCIONAR NIVEL DE CALOR Para aumentar el calor Pulse la parte superior del panel de temperatura Para disminuir el calor Pulse la...

Страница 37: ...volverá azul Las luces se encenderán en cascada y se calentará hasta la temperatura de refrescamiento LISTA PARA USAR Pulse el botón Modo Refrescar Escuchará un pitido y el panel de temperatura se volverá azul Las luces se encenderán en cascada y se calentará hasta su temperatura de refrescamiento SALIR DEL MODO REFRESCAR Pulse dos veces el botón de encendido para desbloquear la pantalla Toque el ...

Страница 38: ...OTH ID CORRECTO TECNOLOGÍA T3 THERMATOUCH La avanzada tecnología de aislamiento hace que los brazos de la plancha sean más cómodos de sostener Sin embargo como cualquier otro aparato para peinar con calor esta plancha debe ser usada con precaución Evite tocar el lado de los brazos de la plancha donde las placas están calientes INCORRECTO RESTABLECER Para restablecer la plancha a la configuración o...

Страница 39: ...a pedir servicio bajo esta garantía visite www T3Micro com warranty info para enviar una solicitud de garantía o llámenos al 866 376 8880 para recibir instrucciones detalladas Se le pedirá que proporcione un comprobante de compra ESTA GARANTÍA LIMITADA SOLO ES VÁLIDA SI EL PRODUCTO SE COMPRA CON UN VENDE DOR AUTORIZADO DE PRODUCTOS T3 Y SI NO SE HA RETIRADO O MODIFICADO DE NINGUNA MANERA EL NÚMERO...

Страница 40: ...narse encendiendo y apagando el equipo se le sugiere al usuario que intente corregir la inter ferencia tomando al menos una de las siguientes medidas cambiar la orientación o la ubicación de la antena receptora aumentar la separación entre el equipo y el receptor conectar el equipo en una toma de corriente que esté en un circuito diferente al que está conectado el receptor consultar al distribuido...

Страница 41: ...80 81 ESPAÑOL ESPAÑOL ...

Страница 42: ...82 83 ESPAÑOL ESPAÑOL ...

Страница 43: ... a shower bathtub washbasin or other vessel filled with water Never place the appliance in water or any other liquid MODEL NO NO DE MODÈLE N º DE MODELO 76535 76536 76537 76538 76539 77534 77535 76535 CAD 76536 CAD 76537 CAD 76538 CAD 76539 CAD 77534 CA 77535 CA ADVERTENCIA No utilice el aparato cerca de una ducha bañera lavabo u otro recipiente lleno de agua Nunca coloque el aparato en agua o en ...

Отзывы: