5
installation manual
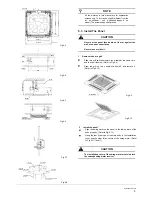
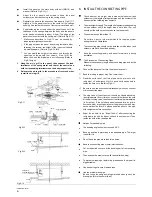
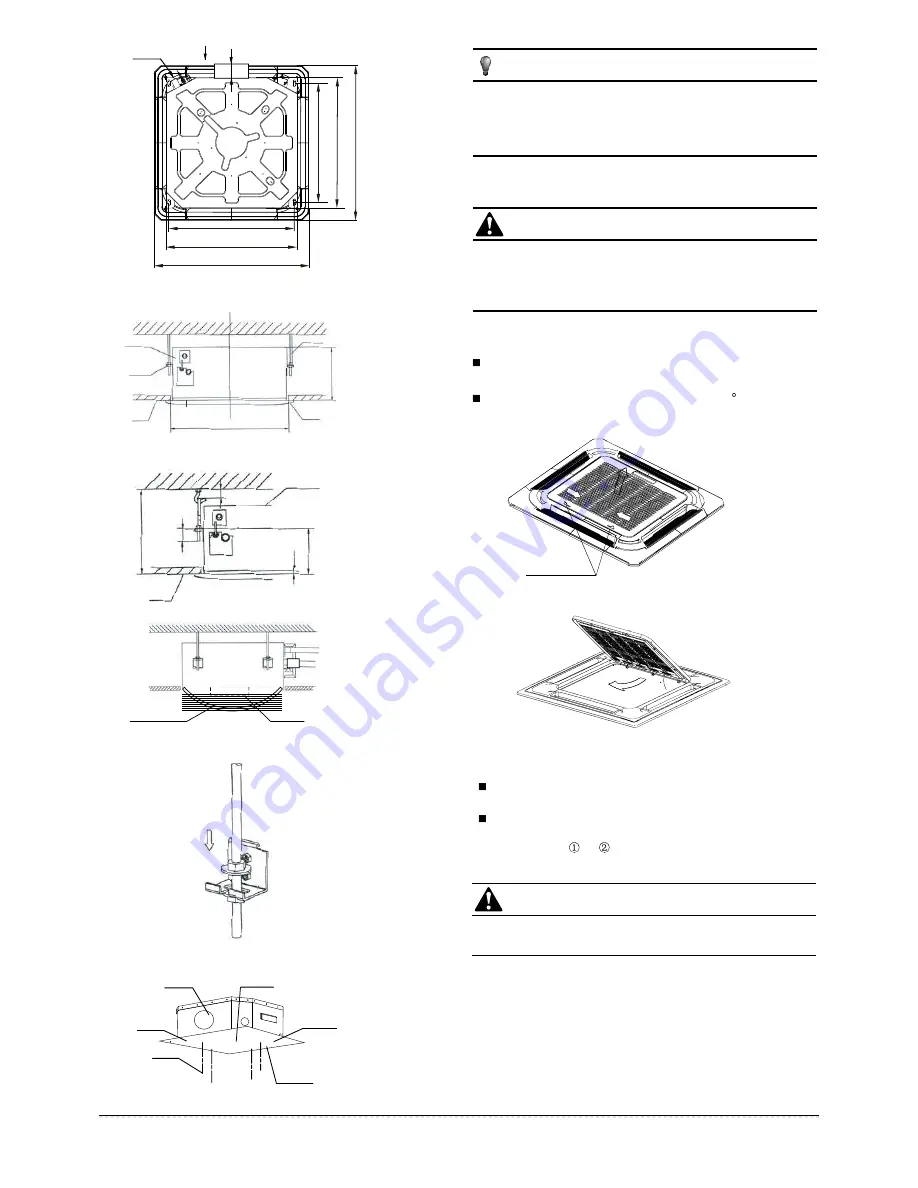
Central hole
Hook hole
Installation paper board
Body
Fixing hole
installation paper board
5
2
3
(H
o
o
k-l
o
ca
ti
o
n
)
5
7
0
(Bo
d
y)
6
4
7
(Pa
n
e
l)
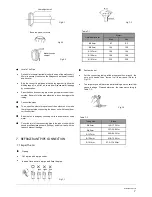
Drain side
(Unit: mm)
545(Hook-location)
570(Body)
647(Panel)
Fig.5-3
Fig.5-4
Fig.5-5
Fig.5-6
Fig.5-7
Fig.5-8
Fig.5-9
Fig.5-10
All the pictures in this manual are for explanation
purpose only. They may be slightly different from the
air
conditioner
you
purchased(depend
on
model).The actual shape shall prevail.
NOTE
A
L
2 1
- 0
1
6 7
1
4
3
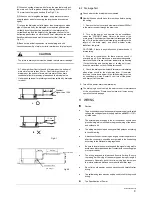
Colourless
trans parent pipe
Ceiling
Body
Ceiling
Panel
Hook
A
0 6
2
Nut
Body
600
) t
h g i
e h
g n i
l i
e c (
H
Horizontal
indicator
4 5
5.3 Install The Panel
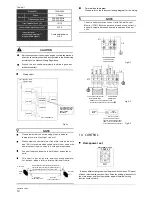
Remove the air-in grill.
Never put the panel face down on floor or against the
wall, or on uneven surfaces.
Never crash or strike it.
Slide two grill switches toward the middle at the same time,
and then pull them up.
(Refer to Fig.5-9)
Draw the grill up to an angle of about 45, and remove it.
(Refer to Fig.5-10)
1
CAUTION
Screw M5x16
(Accessory)
Grid switch
The installation cover of the swing motor must sink into
the corresponding water receiver.
Install the panel
Align the swing motor on the panel to the tubing joints of the
body properly.
( Refer to Fig.5-11)
Hang the four fixed rope of the main body to the installation
cover and the other three covers of the swing motor:
(Refer
to Fig.5-11 and )
2
CAUTION
6
0

