


- 20 -
EN
9I03
Make sure ...
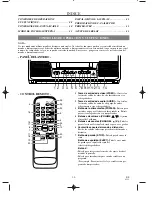
•
TV/VCR power is turned on.
•
Insert a cassette tape with its erase prevention tab
in place. (If necessary, rewind or fast forward the
tape to the point at which you want to begin
recording.)
NOTE:
This unit will ONLY record and view the
same channel.
RECORDING
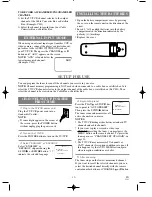
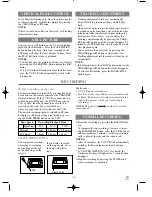
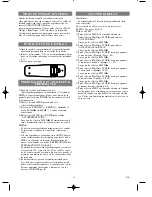
ERASE PREVENTION
You can prevent acciden-
tal erasing of recording
by breaking off the tab
on the back edge of the
cassette.
Tab
Plastic Tape
Before recording, make sure:
The desired channel is selected by pressing the num-
ber buttons on the remote control or the CHANNEL
Up/Down button. (If the TV/VCR is connected to a
cable box or satellite box, the TV/VCR must be on
CH3 or CH4, then the channel to be recorded is
selected on the cable box or satellite box. )
There is a tape with its safety tab into the VCR.
The desired recording speed is selected in SP(stan-
dard play) or SLP(super long play) mode by press-
ing the TAPE SPEED button on the VCR.
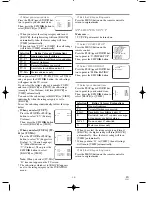
Tape Speed
Recording/Playback Time
Type of tape
T60
T120
T160
SP mode
1 hour
2 hours
2-2/3 hours
SLP mode
3 hours
6 hours
8 hours
NORMAL RECORDING
1)Begin the recording by pressing the RECORD but-
ton.
To temporarily stop recording or resume it, press
the PAUSE/STILL button. After the VCR has been
in Pause mode for 5 minutes, it will stop automati-
cally to protect the tape and the video head.
NOTES:
•
After five minutes, the TV/VCR will automatically
switch to the Recording mode to prevent tape
damage.
•
If “CLOSED CAPTION (ON)” is selected, the
On-Screen Display will appear for 5 seconds, then
disappear.
2)Stop the recording by pressing the STOP button
when recording is completed.
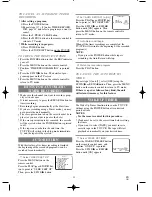
If you decide to record
on the tape again, cover
the hole with plastic
tape.
•
Tracking adjustment will be set automatically
(Digital Tracking function) when you start play-
back.
•
However when playing pre-recorded tapes or tapes
recorded on units other than your own, noise lines
(black and white streaks) may appear on the play-
back picture. If this occurs, you can adjust the
tracking control manually by pressing the CHAN-
NEL
K
or
L
button until the streaks disappear. To
return to the DTR function, stop the tape once and
start playback again.
•
You can reduce the noise lines by pressing the
CHANNEL
K
or
L
button in slow mode, too.
Tracking adjustment in Slow mode will not be set
automatically.
NOTE:
•
In Still mode, press the SLOW button and press the
CHANNEL
K
or
L
button until streaks disappear.
To return to Still mode, press the PAUSE/STILL
button again.
TRACKING ADJUSTMENT
In the Pause/Still mode only, when the picture begins
to vibrate vertically, stabilize the picture by pressing
the CHANNEL
K
or
L
button.
NOTE:
If there are video noise lines on the screen, see Tracking
Adjustment section.
VERTICAL HOLD CONTROL
STILL PICTURE
You can view a still picture on the TV screen during
playback (the Still mode). Press the PAUSE/STILL
button during playback. Only tapes recorded in the
SLP mode will show the least amount of lines. Press
the PLAY button to return to playback.
NOTES:
•
You can advance the picture one frame at a time by
pressing the PAUSE/STILL button during the Still
mode.
•
If it is left in the Still mode for more than five min-
utes, the TV/VCR will automatically switch to the
Stop mode.