


8
V1.0
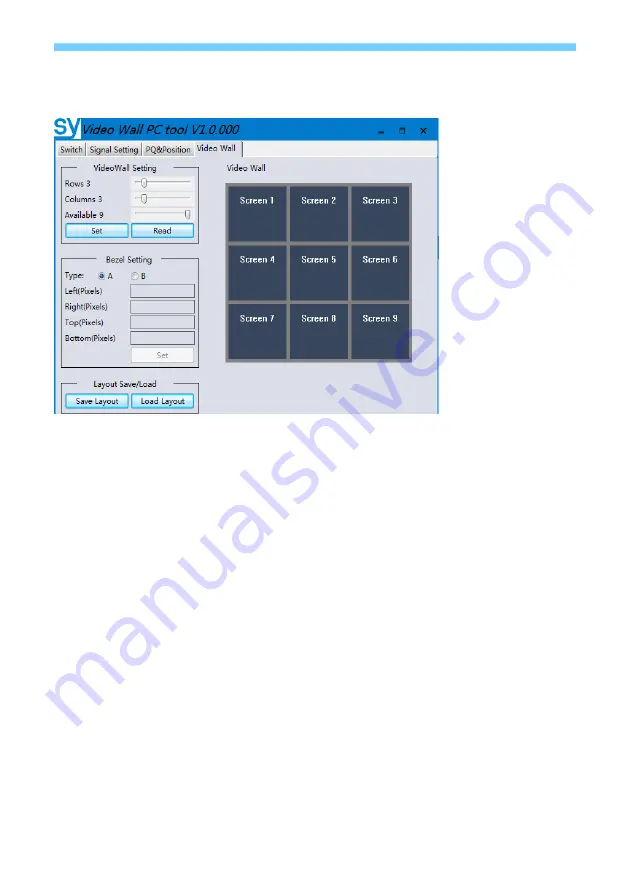
Video Wall tab on the PC tool
The Video Wall tab is used to configure a group of outputs to function as a video wall.
1.
Use the Video Wall Setting controls to change how the displays are arranged on the
Video Wall tab:
a.
Adjust the Rows and Columns sliders to change the displayed screen arrangement to
permit proper Drag-and-Select of the desired screens for the video wall.
b.
Change the Available slider to set how many outputs will be used for the Video Wall.
c.
Click the Set button to change the Screen configuration on the Video Wall tab.
2.
Use the left mouse button to drag-select the screens that will be set for video wall mode.
The selected screens will be shown as bright blue.
3.
Use the right mouse button to open a menu.
4.
Select Screen Stitching from the menu to program the video wall mode. The selected
screens will now be shown as bright green.
5.
To change the displayed image: right-click on the respective Screen window to open the
pop-up menu and select the desired input from the Input Select menu option.
Repeating steps 2 to 5 above with a different set of outputs allows the creation of a second video
wall. However, changing the Rows, Columns and Available sliders will automatically delete the
current video wall set up when the Set button is clicked.
The following example shows a more unusual video wall set-up of two video walls with 1x3 and
2x2 configurations:
Содержание VWP24-18G
Страница 14: ...sy uk 14 V1 0...