background image

15

2.12 Entering text

An on-screen keyboard is displayed for entering your contacts (telephone book
entries), for writing an SMS/MMS or for entering a website address in your
internet browser. Click on the corresponding letters in order to write your text. 
•  With the 

key you can switch between upper and lower case letters (in order

to set it to “only upper case letters” hold the 

key down).

To enter blank spaces press the  

key down.   

To enter a full stop click on 

(to the right of the space key). Hold this key

down for a moment in order to call up a table with special characters. Drag
your finger to the desired symbol and then lift it off of the screen. The symbol
will be entered. 

•  To enter a comma, click on  

(to the left of the space key). If you hold the key

down for a moment the entry options will be displayed (

Input

languages/Android key settings

). 

To delete characters and symbols, press 

.

•  In order to move the cursor, click on the text and pull the mark to the desired

location using your finger.

With the 

key you will switch the keyboard to numbers. 

Press 

to insert a line-feed.

2.13 Connecting your mobile phone to a computer

You can connect your mobile phone to a computer in order to transfer data back
and forth. When connecting both units using an USB cable you can select
connection mode and other options.

Note

: During active USB connection some of the mobile phone’s functions, which

access the memory, (i.e. camera, media player, etc.) are not accessible. 

Содержание eSmart M2

Страница 1: ...eSmart M2 Mobile phone Operating instructions...

Страница 2: ...roper function Hearing aid compatibility This telephone is equipped with T Coil coupler making it compatible with most popular hearing aids Due to the wide range of hearing aids available there is no...

Страница 3: ...hone 10 2 2 Select Open an Element 10 2 3 Scrolling Swiping 10 2 4 Enlarge image 10 2 5 The screen 11 2 6 Screen elements 11 2 7 Status bar Quick access menu 12 2 8 Screen lock 13 2 9 The touch keys 1...

Страница 4: ...ng quick dial buttons 21 6 Calls list 22 7 SMS MMS 23 7 1 Writing and sending messages 23 7 2 Reading deleting messages 24 8 SOS Emergency call 25 8 1 Sequence of an emergency call 25 8 2 Cancelling t...

Страница 5: ...hnical data 32 Tips on the battery 33 Intended use 33 Areas of use 33 Safety information 33 Power adapter plug 35 Disposal 35 Maintenance 35 Declaration of Conformity 36 Trademarks 36 Guarantee 37 Ind...

Страница 6: ...key 6 Back touch key 7 Home touch key 8 Touch screen Display 9 On Off key Important Before beginning please read the safety information on page 33 1 2 3 4 5 6 7 8 9 11 12 13 14 15 16 10 10 Volume butt...

Страница 7: ...om side of the phone and pulling the cover up Possible risk of swallowing small parts The SIM card can be removed Small children could swallow it Please make sure that the SIM card is not bent or scra...

Страница 8: ...ay attention to the position of the bevelled corner In addition the device supports the simultaneous operation of two SIM cards This enables you to use cards from two different networks and or countri...

Страница 9: ...y while the phone is charging The phone could be damaged as a result When first starting your phone charge the battery for at least 4 hours Some batteries only reach their full capacity after multiple...

Страница 10: ...the PIN or PIN2 incorrectly three times in a row you will be prompted to enter the PUK or the PUK2 code Please contact your mobile phone company if you do not know these codes If you press down the On...

Страница 11: ...on your phone for the first time you will be guided by an assistant You ll see a Welcome screen Choose the language you want and touch the arrow to continue Note To complete the setup process it s be...

Страница 12: ...into contact with water Do not touch the screen if the glass is broken 2 2 Select Open an Element Click on the element to open it 2 3 Scrolling Swiping Slide your finger across the screen in the dire...

Страница 13: ...ation is set to on and available Tapping the alarm clock icon opens the alarm clock settings 3 Quick dial Tapping an icon if no contact is stored yet opens the contacts list to select an entry If a co...

Страница 14: ...irectory with all apps stored on the phone If you download apps from the playstore they will be stored in this directory FM Radio starts the radio function On the very first start tap the magnifying g...

Страница 15: ...the left in the direction to the phone receiver icon the camera icon lights up and you can take a photo directly If you drag the lock symbol to the right in the direction to the camera icon the phone...

Страница 16: ...ll setting of earpiece and loudspeaker volume Boost key Whilst in a call press the Boost key to activate or de activate the receiver Boost volume Receiver volume boost up to 40dB Caution this mobile p...

Страница 17: ...ft it off of the screen The symbol will be entered To enter a comma click on to the left of the space key If you hold the key down for a moment the entry options will be displayed Input languages Andr...

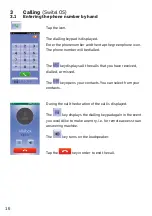
Страница 18: ...ed The key displays all the calls that you have received dialled or missed The key opens your contacts You can select from your contacts During the call the duration of the call is displayed The key d...

Страница 19: ...he top right corner to edit the entry 3 3 Incoming calls An incoming call is indicated with the set ringtone active audio profile and on the display screen If the caller is entered in your contact lis...

Страница 20: ...on for approx 3 seconds You will hear a siren and the emergency call will be sent to the emergency number s specified The emergency call button also works when the screen lock is on For configuring th...

Страница 21: ...p the upper entry field and enter the christian name and in the field below the name If you want to attach a photo to the entry tap the picture area and select a photo Tap the field for the first tele...

Страница 22: ...displayed Tap the icon on the right hand side of each entry to view the details Tap in the top right corner to edit the entry Tap to save the entry 4 3 Deleting contacts In order to delete contacts t...

Страница 23: ...entry from your contacts you want to assign If more than one telephone number is stored to that contact select the desired phone number by tapping on it 5 2 Using deleting quick dial buttons Tap an as...

Страница 24: ...scroll to the desired entry Tap the Options touch key and tap Delete Mark the entries you want to delete and tap in order to delete the entries or tap to exit without deleting or Tap the icon on the...

Страница 25: ...his is saved in your contacts or enter the telephone number for the recipient Alternatively tap and select an entry from your contacts Tap and enter the text of the message Tap to assign an attachment...

Страница 26: ...isting messages is opened Tap the desired message to open it Tap the desired message and hold your finger down for approx 3 seconds Select from the options to view the message to copy the senders phon...

Страница 27: ...red the second is dialled and so on All emergency numbers max 5 will be dialled one after another If you have only entered one emergency number it will be dialled repeatedly If necessary this process...

Страница 28: ...selct an entry After having entered all phone numbers tap Save Entering public authorities such as the Police Department Fire Department or Rescue Coordination Centres is not permitted This is a purel...

Страница 29: ...S In addition you can select whether your GPS coordinates GPS activation in Switel OS Settings Advanced settings Location should be transmitted together with the emergency SMS green tick enabled Compl...

Страница 30: ...Android Hotspot with your phone Select the font size for the display Select a tone for notifications e g SMS MMS Select a ringtone for incoming calls Access to the native Android settings For detaile...

Страница 31: ...ed Bluetooth devices is shown 3 Now perform the necessary steps on the device which you want to connect with your eSmart M2 These can be found in the device s user guide 4 After a short time appears T...

Страница 32: ...camera is shown respectively Tap in order to take a photo or Tap in order to record a video The duration of the recording is displayed To end video recording press the red button The stored photos vi...

Страница 33: ...Advanced settings Accounts Add account Google to log in using a Google account or to create a new account 2 Tap on Or create a new account to create a new account and follow the instructions to finali...

Страница 34: ...el Rear 8 M pixel Autofocus Display 5 0 12 7cm qHD 960x540 pixel Sensor accelerometer proximity lighting WiFi IEEE 802 11b g n 2G GPRS 3G WCDMA HSPA 4G FDD LTE Bluetooth 4 0 Battery Li Ion 3 8V 3200 m...

Страница 35: ...any repair work yourself Areas of use Do not use the phone in prohibited areas Switch the phone off in the vicinity of medical equipment e g in hospitals Do not use the phone in petrol stations or nea...

Страница 36: ...e national laws and regulations Always maintain a distance of at least 15 cm to implanted heart pacemakers to prevent any possible interference If you have had a pacemaker implanted do not carry the p...

Страница 37: ...c waste Batteries represent a hazard to health and the environment Never open damage or swallow batteries or allow them to pollute the environment They may contain toxic ecologically hazardous heavy m...

Страница 38: ...o the free download available on our web site www switel com Trademarks The Android logo Google Google Maps Google Mail YouTube Google Play Store and Google Talk are trademarks of Google Inc Bluetooth...

Страница 39: ...e caused as a result of improper handling or operation normal wear and tear incorrect positioning or storage improper connection or installation or Acts of Gods and other external influences are exclu...

Страница 40: ...ling 16 Calls list 22 Camera 30 Charging the battery 7 Contacts 19 Creating an account 31 D Declaration of Conformity 36 Delivery Contents 5 Dialling from your contacts calls list 17 Disposal 35 E Edi...

Страница 41: ...y Call 18 Insert SIM Card s and Battery 5 Intended use 33 M Maintenance 35 P Phonebook 19 Power adapter plug 35 Q Quick access menu 12 Quick dial 21 S Safety information 33 Screen elements 11 Screen l...

Страница 42: ...40 T Technical data 32 The side keys 13 The touch keys 13 Tips on the battery 33 Turning On Off your Mobile Phone 8 Turning the screen 14 U Updating the firmware 31...

Страница 43: ...Service In the case of technical questions please use the service form on our website http www switel com en product information technical support Version 1 1 10 2017...

Отзывы: