

Hardware Installation
2
Rack-Mounting and Preparing Disk Drives
Caution!
Warning!
Only qualified server personnel should
install and service this product in order
to avoid risk of injury from electrical
shock and energy hazard.
Observer all ESD (Electro-static Discharge)
procedure during installation to avoid
damage to the system and other
components.
•
NVR2000 Network Video Recorder
•
•
•
•
•
•
•
Unpacking list
Quick installation guide
Client Installation CD/DVD
Slide Rails
Slide Bracket
Cable Tie
Power Cord
Tools Required
Accessories
Flat blade
screwdriver
Phillips
screwdriver
Anti-static
wrist strap
1.
Measure the distance between the front and the rear rack posts.
2. Attach a short bracket to the front side of the right outer rail
and a long bracket to the rear side of the right outer rail.
3. Adjust the short and long brackets to match
the rails to rack posts.
Adjusting the rack mounting rails
1.
chassis rails with the front of the rack rails.
2. Slide the chassis into the rack rails, keeping
the pressure even on both sides (you may have
to depress the locking tabs when inserting).
3. When fully inserted into rack, you should hear a
click sound made by locking tabs.
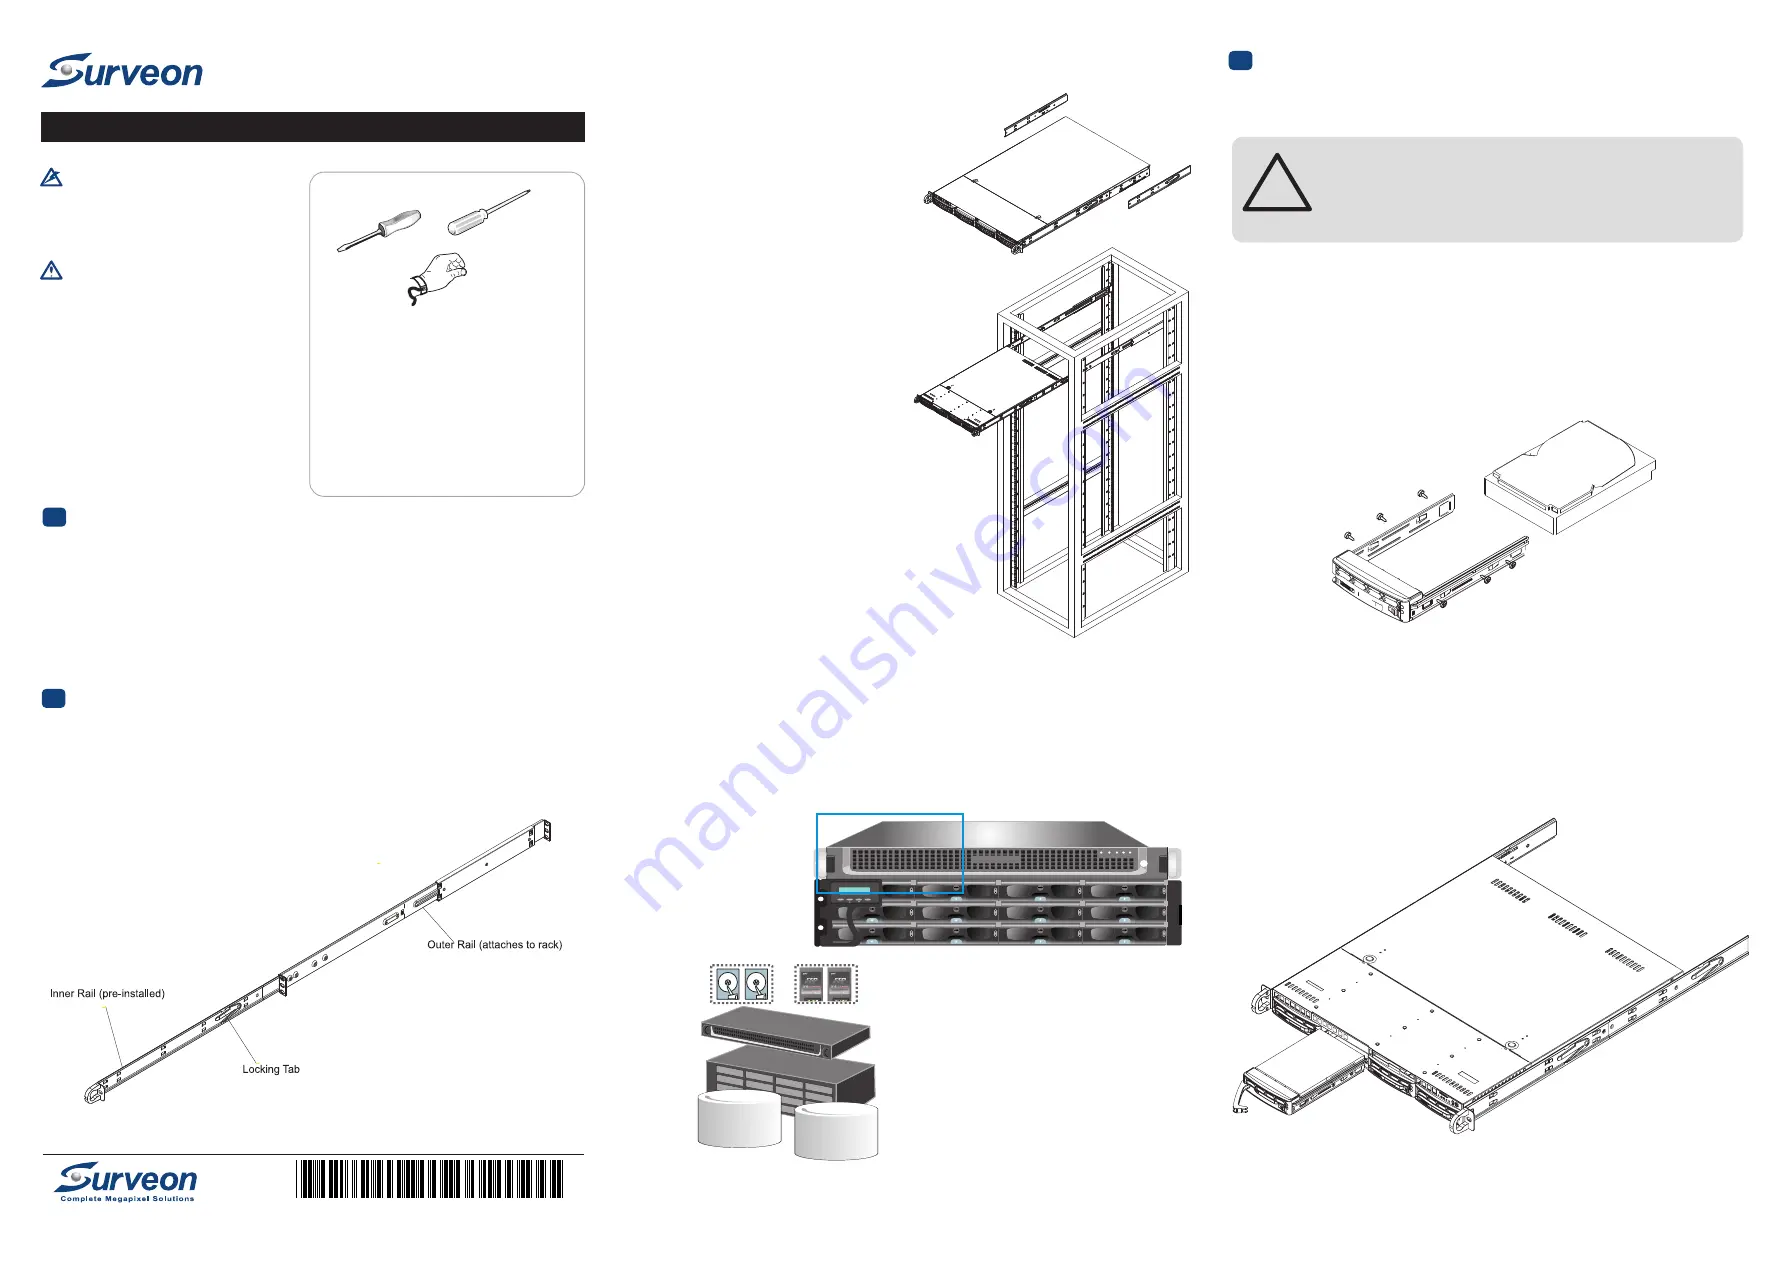
Installing the enclosure to the rack
Install the server by lining up the rear of the
vpool2
vpool3
vpool1
SSD
accelerator
The NVR2000 series requires at least two disk drives to be installed, to ensure RAID 1
configuration and to install the NVR OS in the first partition of the first virtual pool.
We recommend you to install the first two drives in slot #1 and #2.
The order of the drives does not matter.
Preparing the Disk Drives
ESC
ENT
PWR
BUSY
MUTE
ATTEN
Slot #1 (left) to #2 (right)
1
the outer rail w/ 2 screws, and the long bracket
to the rear side of the outer rail w/ 3 screws.
2. Repeat the process to install another outer rail.
Attaching the rack mounting rails to the enclosure
. Secure the short bracket to the front side of
Accessing the Drive Bays
Please power-down the NVR2000 before accessing the drive bays.
Drive Bay Installation/Removal
Mounting a Serial ATA Drive in a Drive Carrier
The SATA drives are mounted in drive carriers to simplify their installation and
removal from the chassis. These carriers also help promote proper airflow for the
system. For this reason, even empty carriers without drives installed must remain in
the chassis.
1. Install a new SATA drive into the carrier with the printed circuit board side facing
down so that the mounting holes align with those in the carrier.
2. Secure the drive to the carrier with six screws
.
Use caution when working around the SATA backplane. Do not
touch the backplane with any metal objects and make sure no
ribbon cables touch the backplane. Also, regardless of how
many SATA drives are installed, all four drive carriers must
remain in the chassis to maintain.
!
3
Installing/Removing
SATA
Drives
1. To
remove
a
carrier
,
push
the
release
button
located
beside
the
drive
LEDs.
2. Swing
the
colored
handle
fully
out
and
use
it
to
pull
the
unit
straight
out
.
NVR2000
QUICK INSTALLATION GUIDE
Q M0 N V R 2 E 2 R 1 1
© by Surveon Technology, Inc. All rights reserved.
Preparing
for
Setup
The
box
should
include
two
sets
of rail
assemblies
,
six
rail
mounting
brackets
and
the
mounting
screws
you
will
need to
install
the
system
into
the
rack
.
Please check the package
content and follow the instruction below.
1
Unpack the subsystem


