SuperServer 1029GP-TR User's Manual
40
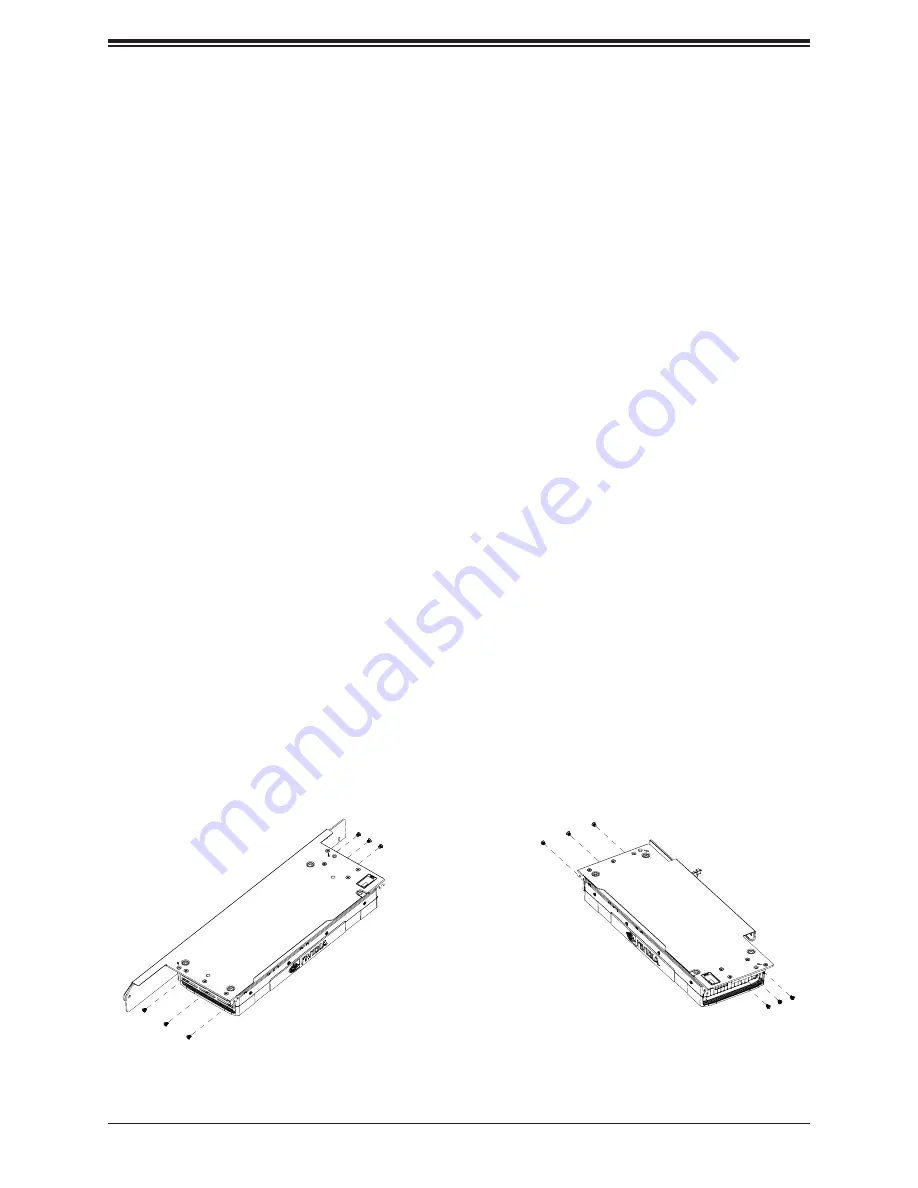
Figure 3-10. Installing GPUs into the Brackets
Installing GPUs
The system supports up to three double-width graphics processor unit (GPU) cards, which are
mounted in brackets to fit into the PCI-E slots (two in the front, one in the rear of the chassis).
NVIDIA P40/P100/V100/coprocessor GPUs are supported. The GPUs may be already
preinstalled. Use the procedure below if a GPU card must be replaced. See the NVIDIA
website for more details on the GPU specifications.
Installing Graphics Cards
1. Remove power from the system as described in Section 3.1 and remove the cover as
described in Section 3.2.
2. Identify the left and right brackets and graphics cards as illustrated below.
3. Insert the graphics cards into the brackets, aligning the mounting holes in the cards
with those in the brackets, as shown in the figure below. The NVIDIA universal bracket
(MCP-240-11803-0N) supports all NVIDIA GPU cards.
4. Secure each card to the bracket using the screws that are included for this purpose.
Keplers: Remove the bracket on the end of the GPU, add a washer (included in kit)
between the plate and the PCB for each screw, then attach the GPU to the bracket.
5. Carefully position each bracket in the chassis, aligning the four mounting holes in the
top and side of each bracket with the corresponding mounting holes in the chassis. Pay
attention to the airflow arrows to install each card into the correct side of the chassis
6. Secure the bracket to the chassis by using the screws provided.
7. After a GPU card is installed, you must connect it to one of the following power headers
on the motherboard: JPW3, JPW4, JPW6, or JPW7.


