1
Wi-Fi LED Controller Hub Setup
WIFI-CON
User Manual
Part Number:
Important: Read all instructions prior to installation.
WIFI-CON
1 - Wi-Fi LED Controller Hub
1 - USB cord
1 - Free Wireless Device App (download)
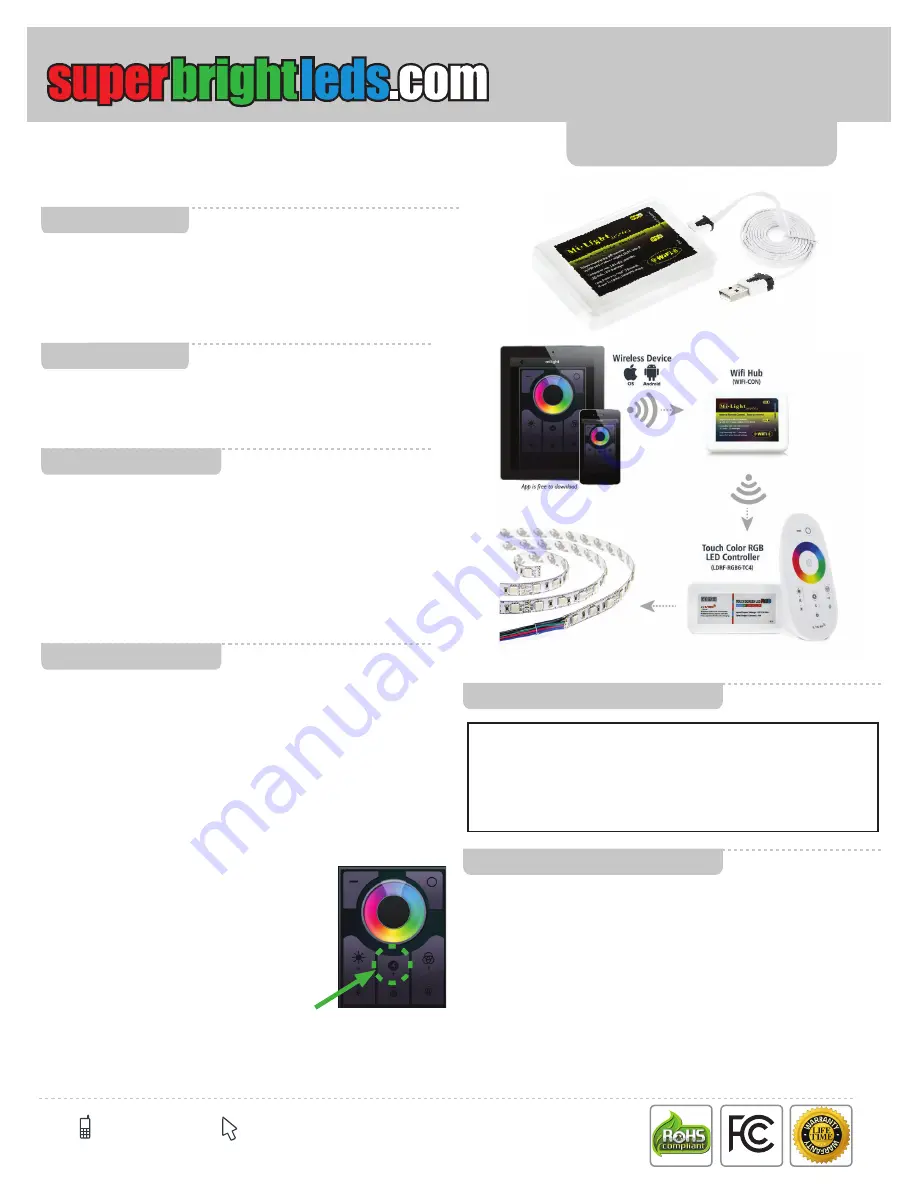
This Wi-Fi LED Controller Hub is compatible with all 2.4GHz RF LED
Wi-Fi Controllers from superbrightleds.com. After completing this simple
setup using just your smartphone or tablet, and with a Wi-Fi compatible
LED Controller, you can have complete Wi-Fi control of all of your Wi-Fi
LED lights in your home.
Go to page 3, 6 if using WIFI-CON Wi-Fi LED Controller Hub and LED
lights with your existing wireless home network. This method will allow
the user to use their existing home Wi-Fi network and also wirelessly
access and control your LEDs at the same time.
Go to page 2, 4 if using WIFI-CON Wi-Fi LED Controller hub as a
standalone wireless router to control your LED lights. If the same smart
device connects to your home Wi-Fi network, you will need to switch to
the “milight” network to control the LEDs.
The Wi-Fi LED Controller Hub requires smart device to strips/bulbs (ex.
E27RF-RGB6-TC4) pairing to begin initial operation and to help eliminate
interference from other nearby units.
If you wish to control several strips/bulbs from a single smart device, the LED
lights (strips/bulbs) fi rst must be synced to the Wi-Fi LED Controller Hub.
When power is fi rst applied or the controller is not connected to Wi-Fi, the
“LINK” LED will be off , and the “SYS” LED will blink a slow, steady pace.
When Wi-Fi controller is connected directly to your phone’s wi-fi or on your
home Wi-Fi network, the “LINK” LED will be on, and the “SYS” LED will blink
a slow, steady pace.
When controller is reset, all lights will blink rapidly after holding the reset
button for fi ve seconds. After the reset has been applied, only “SYS” LED
blinks a slow, steady pace.
If sync procedure was successful any connected light strips or
bulbs should blink twice slowly and remote will immediately
be functional. .
Sync-ing Procedure:
1. Power all compatible LED lights (strips or bulbs), to an outlet or socket
controlled by a switch. Turn power to socket or outlet off . If there is no
externally controlled switch to outlet, unplug LED lights from power
source.
2.
With the power off , grab the smart device, and
have app opened to your specifi c controller’s
interface (or “monitor”). See page 2 image 6 for
reference.
3. Switch on power to bulbs or strips or plug in
power source if your set up does not have a
switch.
4. Within 3 seconds of connecting power, press
controller’s sync button once on smart device.
(ex. E27RF-RGB6-TC4)
FCC Statement
Status LEDs (“SYS” and “LINK”)
Important
Sync Smart Device
Parts Included
Description
This device complies with part 15 of the FCC Rules. Operation is subject to
the following two conditions: (1) This device may not cause harmful
interference, and (2) This device must accept any interference received,
including interference that may cause undesired operation. Any changes or
modifications in construction of this device which are not expressly approved
by the party responsible for compliance could void the user’s authority to
operate the equipment.
Note: This equipment has been tested and found to comply with the limits for
a Class B digital device, pursuant to part 15 of the FCC Rules. These limits
are designed to provide reasonable protection against harmful interference in
a residential installation. This equipment generates, uses and can radiate
radio frequency energy and, if not installed and used in accordance with the
instructions, may cause harmful interference to radio communications.
However, there is no guarantee that interference will not occur in a particular
installation. If this equipment does cause harmful interference to radio or
television reception, which can be determined by turning the equipment off
and on, the user is encouraged to try to correct the interference by one or
more of the following measures:
–Reorient or relocate the receiving antenna.
–Increase the separation between equipment and receiver.
–Connect the equipment into an outlet on a circuit different from that to which
the receiver is connected.
–Consult the dealer or an experienced radio/TV technician for help.
866-590-3533
Wi-Fi
RF


