background image


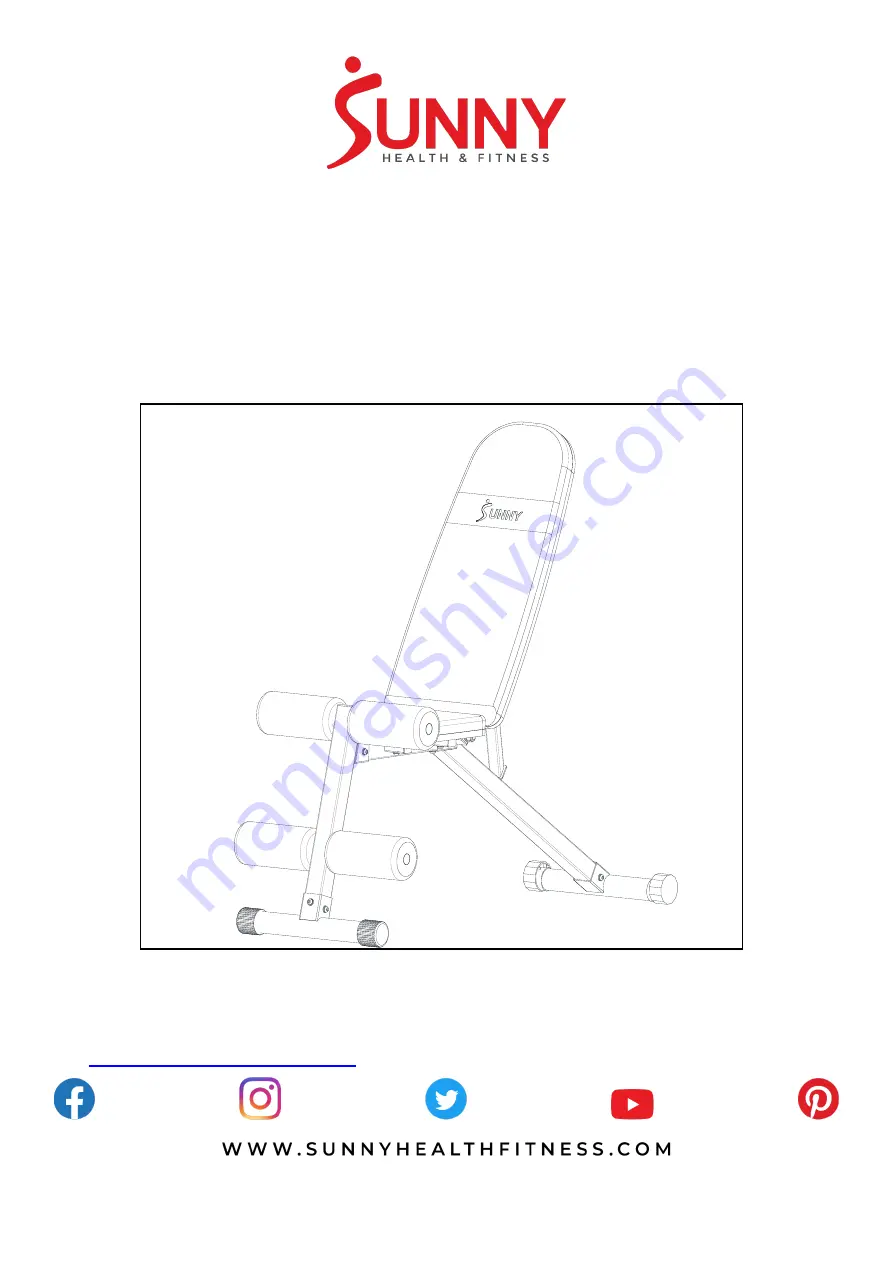
ADJUSTABLE INCLINE / DECLINE 

WEIGHT BENCH 

SF-BH620038 

USER MANUAL 


IMPORTANT!

  Please  retain  owner’s  manual  for  maintenance  and  adjustment  instructions.  Your 

satisfaction is very important to us,

 PLEASE DO NOT RETURN UNTIL YOU HAVE CONTACTED 

US

[email protected]

 or 1- 877 - 90SUNNY (877-907-8669). 


Содержание SF-BH620038

Страница 1: ...038 USER MANUAL IMPORTANT Please retain owner s manual for maintenance and adjustment instructions Your satisfaction is very important to us PLEASE DO NOT RETURN UNTIL YOU HAVE CONTACTED US support sunnyhealthfitness com or 1 877 90SUNNY 877 907 8669 ...

Страница 2: ...he equipment The equipment is designed for adult use only 4 Use the equipment on a solid flat level surface with a protective cover for your floor or carpet To ensure safety the equipment should have at least 2 feet 60 CM of free space all around it 5 Ensure that all nuts and bolts are securely tightened before using the equipment The safety of the equipment can only be maintained if it is regular...

Страница 3: ...0 11 11 12 13 13 13 13 14 14 14 16 16 16 16 14 14 14 6 17 18 18 18 18 19 19 20 21 22 21 22 22 21 20 2122 21 22 20 21 22 20 20 21 22 21 22 23 21 22 23 21 22 21 22 23 21 22 23 21 22 23 21 22 23 21 22 23 21 23 21 22 22 21 23 21 23 23 21 22 15 15 24 ...

Страница 4: ...upport sunnyhealthfitness com or 1 877 90SUNNY 877 907 8669 No Description Spec Qty No Description Spec Qty 1 Main Frame 1 13 Round End Cap 25 1 5 4 2 Front Support Tube 1 14 Square End Cap 30 30 1 5 8 3 Rear Support Tube 1 15 Alloy Wrap 25 12 5 10 4 4 Stabilizer Tube 2 16 Sponge 100 200 4 5 Backrest Support Tube 2 17 Hex Bolt M12 150 2 6 Seat Support Tube 1 18 Flat Washer 24 12 5 2 0 4 7 Foam Rod...

Страница 5: ...h Adjustable End Caps No 11 to the Main Frame No 1 using 3 Hex Socket Head Bolts No 23 3 Spring Washers No 21 and 3 Flat Washers No 22 Tighten and secure with Allen Wrench No 24 Then attach the Stabilizer Tube No 4 with End Caps No 10 to the Front Support Tube No 2 using 3 Hex Socket Head Bolts No 23 3 Spring Washers No 21 and 3 Flat Washers No 22 Tighten and secure with Allen Wrench No 24 STEP 2 ...

Страница 6: ...16 8 5 1 5mm 4PCS 24 6mm 1PC 22 22 21 21 20 6 9 20 2 7 7 16 16 16 16 STEP 3 Attach the Seat No 9 to the Seat Support Tube No 6 using 4 Hex Socket Head Bolts No 20 4 Spring Washers No 21 and 4 Flat Washers No 22 Tighten and secure with Allen Wrench No 24 STEP 4 Insert the 2 Foam Rods No 7 into the top bottom holes of the Front Support Tube No 2 Attach 4 Sponges No 16 onto the two ends of the 2 Foam...

Страница 7: ... on the Stabilizer Tube No 4 ADJUSTING THE ANGLE The bench has 7 different angle settings To adjust the angle of the bench Lift the Backrest No 8 up and place the Rear Support Tube No 3 on the desired hole of the Main Frame No 1 Then gently lower the Backrest No 8 back down ADJUSTING THE FOAM ROD Remove 1 Sponge No 16 from the bottom Foam Rod No 7 then slide bottom Foam Rod No 7 into the hole A or...

Страница 8: ... Brackets etc Replace any worn or torn parts immediately Check and ensure the equipment is levelled at all time Check and tighten all adjustment pins knobs regularly WEEKLY MAINTENANCE Use damp cloth on plastic parts only use dry cloth on metal frames Inspect the metal frame structure of the equipment Version 1 1 ...

Страница 9: ...8 ...

Отзывы: