background image

15

Care + Maintenance

m

ATTENTION! 

Before performing any cleaning 

or maintenance, remove the battery from the battery 

compartment. Never touch the moving blades.

m

WARNING! 

To ensure safety and reliability, all repairs 

should be performed by a qualified service technician.

m

WARNING! 

Never spray or clean the hedge shears  

with water.

1.  Clean the hedge shears with a dry towel, particularly 

the ventilation slits, after each use, or use a brush in the 

event of heavy soiling. Spray the blades with lightweight 

machine oil after each use.

2.  Store the hedge trimmer in the blade cover provided. 

Store the hedge trimmer in a dry location out of the reach 

of children.

3.  When servicing, use only identical replacement parts. Use 

of any other parts can create a hazard or cause product 

damage. Please contact an authorized Snow Joe

®

 +  

Sun Joe

®

 dealer or call the Snow Joe

®

 + Sun Joe

®


customer service center at 1-866-SNOWJOE   

(1-866-766-9563) for all replacement parts and 

accessories for your product.  

Lubricate the Blades

For easier operation and longer blade life, lubricate the hedge 

trimmer blades before and after each use.

1.  Stop the motor and remove the battery.
2. 

Lay the hedge trimmer on a flat surface. Apply lightweight 

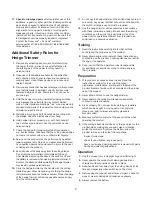
machine oil along the edge of the top blades (Fig. 14). 

If you will be using the hedge trimmer for an extended  

period, it is advisable to stop work intermittently in order to 

re-oil the blade.
NOTE: Do not oil while the hedge trimmer is running.

1.  Stop the motor and remove the battery.
2.  Lubricate the hedge trimmer as described above.
3.  Insert the battery and resume use.

Sharpening the Blades

The blade must be re-sharpened if cutting performance and 

behavior begin to deteriorate (i.e. if blades frequently snag  

on branches).

1.  Start the hedge trimmer, then stop when the cutter blade 

and the guard are slightly offset. This will allow clearance 

for the file between cutter teeth and guard teeth (Fig. 15).

2.  Stop the motor and remove the battery. Clamp the blade 

in a vise.

3.  File the exposed cutting surface of each blade tooth with 

a smooth round file. Be sure to retain the original angle of 

the tooth when filing.

4.  Remove the blade from the vise, and power on the motor 

until the unsharpened edges of the remaining blade teeth 

are exposed.

5.  Remove the battery and repeat the sharpening procedure 

as necessary.

m

WARNING! 

Do not operate the hedge trimmer with dull 

or damaged cutting blades. This may cause overload and will 

give unsatisfactory cutting results.

Cleaning the Hedge Trimmer

1.  Stop the motor and remove the battery. 
2.  Clean dirt and debris from the body of the hedge trimmer 

using a damp cloth and mild detergent.

NOTE: Do not use any strong detergents on the plastic housing 

or the handle. These parts can be damaged by certain aromatic 

oils such as pine and lemon, and by solvents such as kerosene.

Storage

1.  Stop the motor and remove the battery.
2.  Clean the hedge trimmer thoroughly before storing. 
3.  Always place the blade cover on the blade before storing 

or transporting the hedge trimmer. Use caution to avoid 

the sharp teeth of the blade.

4.  Store the hedge trimmer indoors, in a dry place that is 

inaccessible to children. Keep away from corrosive agents 

such as garden chemicals and de-icing salts.

5.  Always store the hedge trimmer in a place that is 

inaccessible to children. The ideal storage temperature is 

between 50ºF and 86ºF (10ºC and 30ºC).

Fig. 14

Fig. 15

Cutter tooth

Guard tooth

Содержание iON100V-24HT-CT

Страница 1: ...ly Do not wear loose clothing or jewelry as such articles can become caught in moving parts Wear a protective covering to contain long hair Wearing rubber gloves and substantial non slip footwear is recommended when working outdoors 7 Avoid accidental starting Do not carry the hedge trimmer with your finger on the switch Make sure the switch is off before inserting the battery mCAUTION Moving part...

Страница 2: ...onal injury 10 Carry the hedge trimmer by the handle with the cutting blade stopped When transporting or storing the hedge trimmer always keep the blades covered Proper handling of the hedge trimmer will reduce possible personal injury from the cutter blades 11 Do not use the hedge trimmer if the switch does not turn it on and off Any power tool that cannot be controlled with the switch is dangero...

Страница 3: ...on and noise exposure risks 1 Only use the product as intended by its design and these instructions 2 Ensure that the product is in good condition and well maintained 3 Use correct attachments for the product and ensure they are in good condition 4 Keep tight grip on the handles grip surface 5 Maintain this product in accordance with these instructions and keep it well lubricated where appropriate...

Страница 4: ... Keep the cord away from heat oil and sharp edges Make sure the cord will not be stepped on tripped over or subjected to damage or stress when the charger is in use Do not use the charger with a damaged cord or plug Replace a damaged charger immediately Do not use an extension cord unless it is absolutely necessary Using the wrong damaged or improperly wired extension cord poses a risk of fire and...

Страница 5: ...cess The battery packs must be replaced at the latest when its capacity falls to just 80 of its capacity when new Weakened cells in an aged battery packs are no longer capable of meeting the high power requirements needed for the proper operation of your cordless hedge trimmer and therefore pose a safety risk 5 Do not throw battery packs into an open fire as this poses a risk of explosion 6 Do not...

Страница 6: ...atteries in the charger for days on end 8 Never use or charge batteries if you suspect that it has been more than 12 months since the last time they were charged There is a high probability that the battery pack has already suffered dangerous damage exhaustive discharge 9 Charging batteries at a temperature below 50 F 10 C will cause chemical damage to the cells and may cause a fire 10 Do not use ...

Страница 7: ...understand and follow all instructions in the user manual s before attempting to assemble and operate WARNING Do not expose the unit to rain or wet conditions WEAR EYE AND HEARING PROTECTION For protection against injury wear ear defenders and safety goggles Wear protective gloves and non slip footwear when using the machine and handling debris DANGER ROTATING BLADES Keep hands and feet away from ...

Страница 8: ...y Charger options available at snowjoe com BACK Technical Data Battery Voltage 100 V D C Battery Capacity See page 17 for battery options and specifications Charging Time Max See page 17 for battery options and specifications Battery Runtime Max See page 17 for battery options and specifications Charger Input 100 120 V AC 50 60 Hz 500 W Charger Output 100 V DC 4 A Cutting Length 24 inch 61 cm Cutt...

Страница 9: ...sh button to read off the battery charge level from the LEDs of the battery indicator Fig 1 All 4 level monitoring LEDs are lit Battery charge level is high 3 level monitoring LEDs are lit Battery charge level is decreasing 2 level monitoring LEDs are lit Battery charge level is decreasing Stop work as soon as possible 1 level monitoring LED is lit Battery is flat Stop work IMMEDIATELY and charge ...

Страница 10: ...row To turn off the LED light press the battery push button twice again Fig 3 NOTE This function only comes with iON100V 5AMP battery iON100V 2 5AMP battery is not equipped with the handle or the LED light Charger Operation mWARNING Charge only the iON100V 2 5AMP or the iON100V 5AMP lithium ion battery packs in compatible iON100V RCH battery charger Other types of batteries may cause personal inju...

Страница 11: ...attery is fully charged Fig 6 NOTE If the green light is off while the red light flashes slowly this indicates a temperature abnormality i e that the battery pack is too hot If the green light is off while the red light flashes rapidly this indicates there s something wrong with the charger or the battery Wait for a while and try to reinsert the battery into the charger If the situation still pers...

Страница 12: ...ries not recommended by the manufacturer of this product The use of attachments or accessories not recommended can result in serious personal injury Fig 7 Possible Cause Solution Red Light Steady Green Light Off No load charging There s no battery inserted in the charger Red Light Off Green Light Slowly flashes Normal charging The battery is being charged Red Light Off Green Light Steady Fully cha...

Страница 13: ...8A 8B 8C To rotate the rear handle follow the instruction below 1 Stop the machine Wait until the unit comes to a complete stop 2 Press and hold the handle lock button and rotate the rear handle clockwise or counterclockwise as needed Fig 9 3 Hold the unit as indicated above and resume working Starting Stopping mWARNING Ensure the blade does not touch any objects before turning on the hedge trimme...

Страница 14: ...and balance Do not overreach Wear safety goggles non skid footwear and rubber gloves Hold the unit with both hands with the cutting blades directed away from you Always use the hedge trimmer properly Do not cut too much at one time This can cause the blades to bind which will reduce the cutting efficiency Do not force the hedge trimmer through heavy shrubs This can cause the blades to bind and slo...

Страница 15: ...de must be re sharpened if cutting performance and behavior begin to deteriorate i e if blades frequently snag on branches 1 Start the hedge trimmer then stop when the cutter blade and the guard are slightly offset This will allow clearance for the file between cutter teeth and guard teeth Fig 15 2 Stop the motor and remove the battery Clamp the blade in a vise 3 File the exposed cutting surface o...

Страница 16: ...etely discharged When burned toxic fumes and materials are emitted into the surrounding atmosphere 1 Batteries vary according to device Consult your manual for specific information 2 Install only new batteries of the same type in your product where applicable 3 Failure to insert batteries in the correct polarity as indicated in the battery compartment or manual may shorten the life of the batterie...

Страница 17: ...ge Universal wall bracket with mounting hardware SJWB Fits most Snow Joe Sun Joe tools Model Accessories Item 1 2 3 4 iON100V 2 5AMP iON100V 5AMP 100 V Battery Quick Charger iON100V RCH 100 V 2 5 Ah Lithium Ion Battery Battery Charge Time Max 50 min Battery Runtime Max 90 min 100 V 5 Ah Lithium Ion Battery Battery Charge Time Max 100 min Battery Runtime Max 180 min NOTE Accessories are subject to ...

Страница 18: ...18 NOTES ...

Страница 19: ... the owner s manual Snow Joe Sun Joe will not be responsible for the cost of any unauthorized warranty repairs This warranty does not cover any cost or expense incurred by the purchaser in providing substitute equipment or service during reasonable periods of malfunction or non use of this product while waiting for a replacement part or unit under this warranty Wearing parts like belts augers chai...

Страница 20: ...snowjoe com ...
Отзывы: