CHAPTER
FIVE
5. SET UP THE PIRONMAN
Note:
This Pironman is used in the same way as PC and requires the power button to power on/off.
5.1 Change the
config.txt
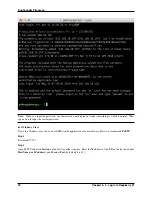
Before you can start using Pironman, you need to configure the power button and the IR receiver.
Open the
/boot/config.txt
file with the following command.
sudo nano
/
boot
/
config
.
txt
Add the following text to the end of the file, noting that there should be no spaces on either side of the
=
.
dtoverlay
=
gpio
-
poweroff,gpio_pin
=
26
,active_low
=
0
dtoverlay
=
gpio
-
ir,gpio_pin
=
13
Press
Ctrl+X
->
Y
->
Enter
to save and exit editing.
5.2 Install
pironman
module
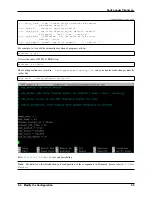
Use the following commands to download and install the
pironman
module.
cd
~
git clone https:
//
github
.
com
/
sunfounder
/
pironman
.
git
cd
~/
pironman
sudo python3 install
.
py
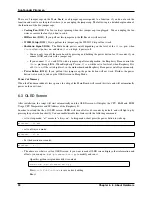
After installation, the program will start automatically. Here are the basic configurations for Pironman.
• The OLED screen will display the CPU, RAM and ROM Usage, CPU Temperature and IP Address of the
Raspberry Pi.
• After 60 seconds, the OLED display goes into sleep mode, and you can wake it up by a short press on the power
button.
• The fan is turned on at 50 degrees Celsius.
• Turn on the WS2812 RGB strip so that it displays in color #0a1aff(blue) and in breath mode (change rate is
50%).
• At this point, you can press and hold for 2 seconds to safely shut down or 10 seconds to forcibly shut down.
23
Содержание Pironman
Страница 1: ...SunFounder Pironman www sunfounder com Nov 01 2022 ...
Страница 2: ......
Страница 4: ...ii ...
Страница 6: ...SunFounder Pironman 2 CONTENTS ...
Страница 10: ...SunFounder Pironman 6 Chapter 2 2 Component List and Assembly Instructions ...
Страница 14: ...SunFounder Pironman your Raspberry Pi Step 7 Click the WRITE button 10 Chapter 3 3 Installing the OS ...
Страница 17: ...SunFounder Pironman 13 ...
Страница 18: ...SunFounder Pironman 14 Chapter 3 3 Installing the OS ...
Страница 30: ...SunFounder Pironman 26 Chapter 5 5 Set up the Pironman ...
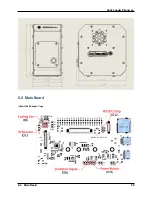
Страница 33: ...SunFounder Pironman 6 2 Main Board About the Jumper Caps 6 2 Main Board 29 ...
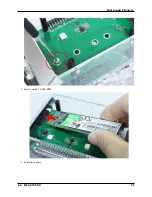
Страница 38: ...SunFounder Pironman 2 Remove the screw for the M 2 SATA SSD 34 Chapter 6 6 About Hardware ...
Страница 39: ...SunFounder Pironman 3 Insert your M 2 SATA SSD 4 Screwed in place 6 8 M 2 SATA SSD 35 ...
Страница 46: ...SunFounder Pironman Step 4 Double click the connection just created 42 Chapter 7 7 Appendix ...
Страница 47: ...SunFounder Pironman Step 5 Enter Username pi and Password raspberry by default 7 1 Remote Desktop 43 ...
Страница 48: ...SunFounder Pironman Step 6 Now you can see the desktop of the Raspberry Pi 44 Chapter 7 7 Appendix ...
Страница 66: ...SunFounder Pironman 2 Select Samba SMB Server 3 Select Install 62 Chapter 7 7 Appendix ...


