

baby touch
2
extra camera
Press and hold the Code
button on back of camera
head until green LED
blinks.
Note:
The Baby Touch 2, #28680, can accept up to four cameras. To order an additional camera
(#28850) please contact our Consumer Relations department by phone at 1-800-268-6237 or via
email at: [email protected].
Please refer to the Table Top or Wall Mounting
section of user manual for set up instructions.
Camera Set Up & Use:
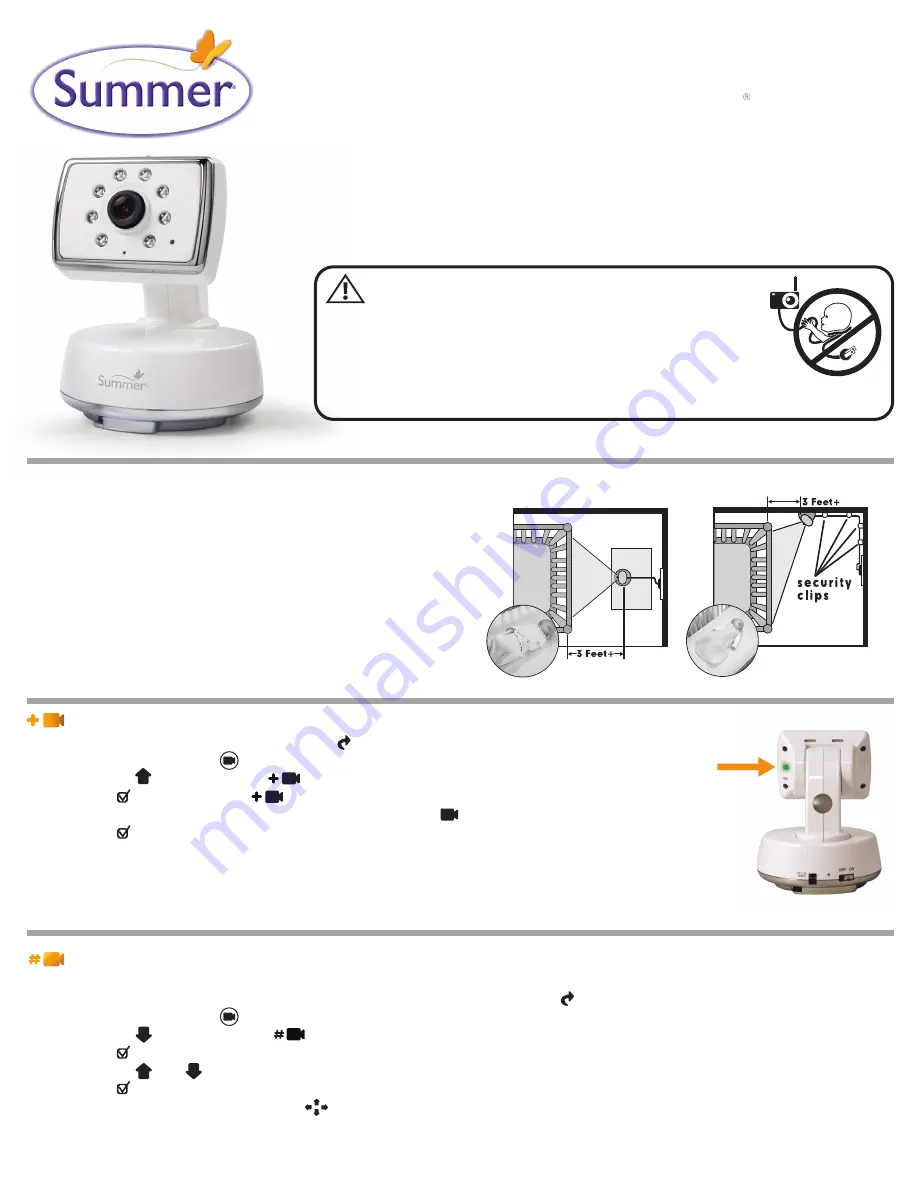
Table Top or Wall Mounting:
Determine a location for the CAMERA that will provide the best view
of your baby in his crib. Place the CAMERA on a flat surface, such as
a dresser, bureau, or shelf (Figure A). Or mount the CAMERA on a
wall (Figure B). NEVER place camera or cords within 3 feet of the crib.
Secure the cord to the wall using the 6 Security Clips included to keep
cord away from baby’s reach.
Be sure to test reception and
CAMERA positioning before mounting to a wall (see "Testing
Your Initial Set Up" section).
Add Camera:
Step 1:
To enter the Feature Control Menu, press ( ) on bottom right hand corner of screen
Step 2:
Press the camera icon ( ) to enter the Camera Menu
Step 3:
Press the arrow to highlight
Step 4:
Press ( ) “SELECT” to enter
Step 5:
The next available camera will automatically be selected ( 2, 3, 4)
Step 6:
Press ( ) “SELECT” and syncing animation between receiver and camera will begin.
Step 7:
Within 20-seconds, press the CODE button on the back of the camera. Once synced,
live video will appear. If this is unsuccessful, you should repeat steps above making sure the
monitor and camera are close enough to each other for syncing.
A
B
STRANGULATION HAZARD
- Children have STRANGLED in cords.
Keep this cord out of reach of children (more than 3 feet (0.9 m)
away from the crib). Use enclosed Security Clips to help secure
cord away from baby’s reach. Never use extension cords with AC
Adapters. Only use the AC Adapters provided.
WARNING:
28850
View Camera:
Note: this option is only available when more than one camera is in use.
Step 1:
To view a specific camera in use, enter the Feature Control Menu by pressing ( ) on bottom right hand corner of screen
Step 2:
Press the camera icon ( ) to enter the Camera Menu
Step 3:
Press the arrow to select the option
Step 4:
Press ( ) “SELECT”
Step 5:
Press the and arrows to highlight the camera you want to view
Step 6:
Press ( ) “SELECT” to view selected camera
Step 7:
To exit camera menus screen, press ( )


