Style selections 0781458 Скачать руководство пользователя страница 1

1

Lowes.com

ITEM #0781458

Questions, problems, missing parts? 

Before returning to your retailer, call our customer

service department at 1-877-888-8225, 8 a.m. - 8 p.m., EST, Monday - Friday.

MODEL#16IN-42-109B

Français p. 17
Español p. 33

ATTACH YOUR RECEIPT HERE

Serial Number

Purchase Date

Style Selections

®


is a registered trademark

of LF, LLC. All Rights Reserved.

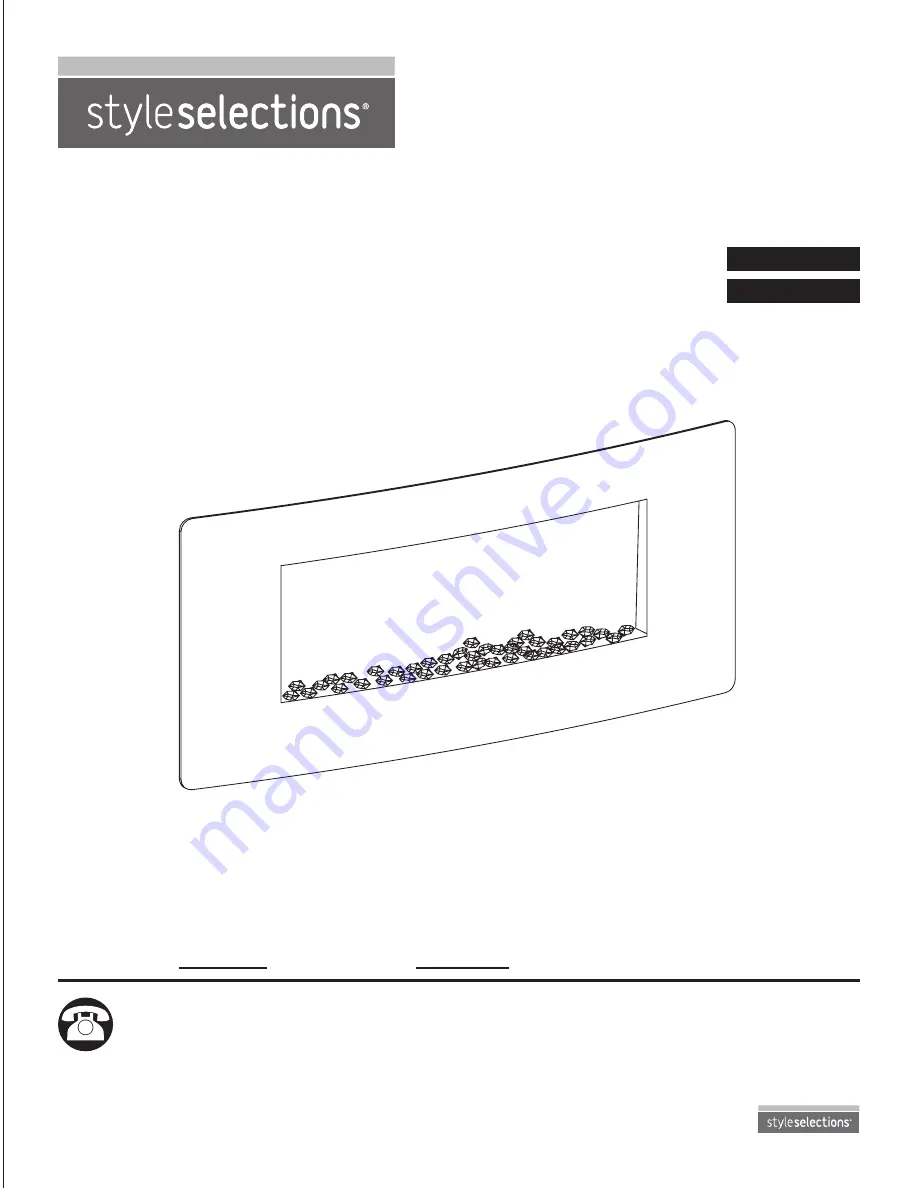
WALL-MOUNT ELECTRIC 

FIREPLACE WITH

BLUETOOTH SPEAKER

EB1656

Содержание 0781458

Страница 1: ...stomer service department at 1 877 888 8225 8 a m 8 p m EST Monday Friday MODEL 16IN 42 109B Français p 17 Español p 33 ATTACH YOUR RECEIPT HERE Serial Number Purchase Date Style Selections is a registered trademark of LF LLC All Rights Reserved WALL MOUNT ELECTRIC FIREPLACE WITH BLUETOOTH SPEAKER EB1656 ...

Страница 2: ...tric Firebox Glass Panel Stand Wind Shield Faux Crystal Rock Log Remote Control Wall Mounting Template PART PART QUANTITY QUANTITY DESCRIPTION DESCRIPTION F D B C C E A H I G HARDWARE CONTENTS shown actual size AA BB CC DD Wall Anchor Qty 4 Screw Qty 4 Bolt Qty 9 Soft pad Qty 4 ...

Страница 3: ...ect to properly grounded outlets only Do not insert or allow foreign objects to enter any ventilation or exhaust openings as this may cause an electric shock or fire or damage the appliance To prevent a possible fire do not block air intakes or exhausts in any manner Do not use on soft surfaces like a bed where openings may become blocked All electrical appliances have hot and arching or sparking ...

Страница 4: ...ents list If any part is missing or damaged do not attempt to assemble the product Estimated Assembly Time 30 minutes Tools Required for Assembly not included Phillips screwdriver electric drill and 1 4 inch drill bit Helpful Tools not included Stud finder Warning Changes or modifications to this unit not expressly approved by the party responsible for compliance could void the user s authority to...

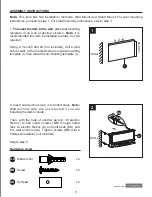
Страница 5: ...holes Note Wall anchors AA are not required if you are installing the item to studs Then with the help of another person lift electric firebox A and insert screws BB through holed tabs on electric firebox A and soft pads DD and into wall anchors AA Tighten screws BB with a Phillips screwdriver not included Hardware Used AA Wall Anchor Screw Soft pad x 4 x 4 x 4 2 BB DD Note This item has two insta...

Страница 6: ...x A upside down From the bottom of the electric firebox A attach wind shield D using bolts CC Tighten with a Phillips screwdriver Hardware Used 4 4 Still from the bottom of electric firebox A attach stands C using bolts CC Tighten with a Phillips screwdriver x 4 Hardware Used With the help of another person turn the unit back upright A D CC ...

Страница 7: ... faux crystals E or rocks F or log G into the base of electric firebox A 6 Carefully hang glass panel B onto electric firebox A as shown securing on the bottom with bolts CC Tighten with Phillips screwdriver Assembly is now complete CC Bolt x 2 Hardware Used E F E G A A B CC ...

Страница 8: ...g from the adapter must be securely connected to a permanent ground such as a properly grounded outlet box The adapter should only be used if a proper 3 slot receptacle is not available A 15 amp circuit is required to operate this appliance If the breaker trips when the appliance is running you may need to move the appliance to another location or unplug other appliances that are on the same circu...

Страница 9: ...the color of the flame At the eighth press of the button the setting will return to the start of the cycle at the default state 5 5 Heater Press to activate the heater function The system will start the temperature at 65ºF Pressing the button once will result in one beep and a steady 65ºF temperature Another press of the button will result in 2 beeps and increase the temperature to 80ºF and anothe...

Страница 10: ... Lock Press and hold the CHILD LOCK button for 4 seconds to activate the function When child lock is on there is a red lock mark on the right of the screen and all the functions are disabled Press and hold the button again for 4 seconds to unlock 8 8 Light Press to activate the back spotlight function One press will have an orange spotlight effect then blue then purple then gradient colors The fif...

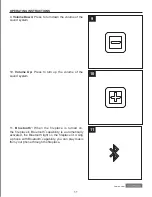
Страница 11: ...n up the volume of the sound system OPERATING INSTRUCTIONS 11 11 Bluetooth When the fireplace is turned on the fireplace s Bluetooth capability is automatically activated the Bluetooth light on the fireplace lit Using a phone with Bluetooth capability you can play music from your phone through the fireplace ...

Страница 12: ...3 13 USB IN Insert USB from connecting device to play music through fireplace When the function is on the USB light is on OPERATING INSTRUCTIONS 14 14 Mode Press this button to switch between Bluetooth USB and AUX functions Without any connection for 5 minutes the sound system will automatically go into standby mode press any button to re activate ...

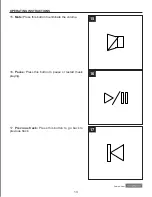
Страница 13: ...com 15 16 15 Mute Press this button to eliminate the volume 16 Pause Press this button to pause or restart music playing 17 17 Previous track Press this button to go back to previous track OPERATING INSTRUCTIONS ...

Страница 14: ... OPERATING INSTRUCTIONS MODE CARE AND MAINTENANCE Use a clean dry cloth to clean the fireplace To remove fingerprints or other marks from glass window of electric insert use clean damp cloth Clean metal surfaces of electric insert with a clean damp cloth making sure not to push dust or debris into any air intake or exhaust vents Do not use abrasive cleaners or spray liquids on any part of the appl...

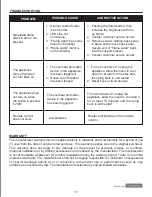
Страница 15: ...is set too low 2 LED strip not functioning 3 Flame wand has come loose from bracket 4 Flame wand motor is not functioning Simulated flame effect is dim or not present The appliance turns off and will not turn back on The appliance does not turn on when the button is pushed to ON Remote control does not work WARRANTY The manufacturer warrants this item against defects in materials and workmanship f...

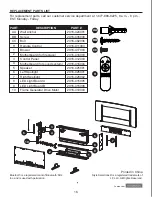
Страница 16: ... Bolt Remote Control Blower Motherboard for fireplace Control Panel Motherboard for sound system Speaker Left Spotlight Right Spotlight LED Light Board A LED Light Board B Flame Generator Drive Motor 2016 424001 2016 406008 2016 402006 2016 411003 2016 417003 2016 416003 2016 412003 2016 416004 2016 425001 2016 426001 2016 426002 2016 415005 2016 415006 2016 419003 PART PART DESCRIPTION MODE 7 1 1...

Страница 17: ...taillant communiquez avec notre service à la clientèle au 1 877 888 8225 entre 8 h et 20 h HNE du lundi au vendredi MODÈLE 16IN 42 109B JOIGNEZ VOTRE REÇU ICI Numéro de série Date d achat Style Selections est une marque déposée de LF LLC Tous droits réservés FOYER ÉLECTRIQUE À MONTAGE MURAL AVEC BLUETOOTH INTÉGRÉ ...

Страница 18: ...trique Panneau de verre Pied Pare vent Faux cristal Pierre Bûche Télécommande Gabarit de montage mural PIÈCE PIÈCE QUANTITÉ QUANTITÉ DESCRIPTION DESCRIPTION F D B C C E A H I G QUINCAILLERIE INCLUSE grandeur réelle AA BB CC DD Cheville d ancrage Qté 4 Vis Qté 4 Boulon Qté 9 Tampon doux Qté 4 ...

Страница 19: ... similaire Placez le cordon dans un endroit peu passant où il ne risque pas d être accroché Pour débrancher l appareil réglez d abord toutes les commandes à la position OFF arrêt puis retirez la fiche de la prise Branchez le cordon uniquement sur une prise correctement mise à la terre N insérez jamais un objet quel qu il soit dans les ouvertures de ventilation ou de sortie d air de l appareil afin...

Страница 20: ...t de l utilisateur de se servir de cet appareil REMARQUE Cet appareil a été testé et déclaré conforme aux limites imposées aux appareils numériques de classe B conformément à l alinéa 15 du règlement de la FCC Ces limites sont destinées à assurer une protection raisonnable contre les interférences nuisibles dans un environnement résidentiel Cet appareil génère utilise et peut émettre de l énergie ...

Страница 21: ...une perceuse électrique munie d un foret de 1 4 pouces non inclus percez un avant trou dans chacun des coins marqués du gabarit de montage mural I puis jetez le gabarit I 2 Insérez les chevilles d ancrage AA dans les trous prépercés Remarque Les chevilles d ancrage AA ne sont pas nécessaires si vous fixez l article aux montants Ensuite avec l aide d une autre personne soulevez le foyer électrique ...

Страница 22: ...envers À partir du dessous du foyer électrique A fixez le pare vent D à l aide des boulons CC Serrez avec un tournevis cruciforme Quincaillerie utilisée 4 4 Toujours à partir du dessous du foyer électrique A fixez le pied C à l aide des boulons CC Serrez avec un tournevis cruciforme x 4 Quincaillerie utilisée Avec l aide d une autre personne placez l article à l endroit A D CC ...

Страница 23: ... G dans la base du foyer électrique A 6 Installez délicatement le panneau de verre B sur le foyer électrique A tel qu il est illustré en fixant la partie inférieure à l aide de boulons CC Serrez les à l aide d un tournevis cruciforme L assemblage est terminé CC Boulon x 2 Quincaillerie utilisée E F E G A A B CC MUR ...

Страница 24: ... terre verte de l adaptateur doit être solidement branchée sur une mise à la terre permanente comme une boîte de sortie correctement mise à la terre L adaptateur ne doit pas être utilisé si une prise à 3 fentes appropriée est disponible Cet appareil doit être utilisé sur un circuit de 15 ampères Il est possible que vous ayez à déplacer l appareil ou à débrancher d autres appareils se trouvant sur ...

Страница 25: ...fiera la luminosité et la couleur de la flamme La huitième fois que vous appuyez sur le bouton le réglage revient au début du cycle à l état par défaut 5 5 Radiateur appuyez sur ce bouton pour activer le radiateur La température initiale sera de 18 3 C Si vous appuyez sur le bouton une seule fois vous entendrez un signal sonore et la température sera réglée à 18 3 C Appuyez une deuxième fois et vo...

Страница 26: ...ver cette fonction Lorsque la fonction de sécurité enfant est activée un cadenas rouge s affiche à la droite de l écran et toutes les fonctions sont mises hors tension Appuyez de nouveau sur le bouton et tenez le enfoncé pendant 4 secondes pour désactiver cette fonction 8 8 Lumière appuyez sur ce bouton pour activer le projecteur arrière Appuyez une fois pour avoir une lumière orange deux fois pou...

Страница 27: ...augmenter le volume du système de son INSTRUCTIONS DE FONCTIONNEMENT 11 11 Bluetooth lorsque le foyer est allumé la fonction Bluetooth est automatiquement activée ainsi que le voyant Bluetooth qui se trouve sur le foyer Vous pouvez faire jouer la musique de votre téléphone sur le foyer s il est doté de la fonction Bluetooth ...

Страница 28: ...ez le câble USB de votre appareil pour faire jouer votre musique sur le foyer Lorsque la fonction est activée le voyant USB est allumé INSTRUCTIONS DE FONCTIONNEMENT 14 14 Mode appuyez sur ce bouton pour basculer entre les fonctions Bluetooth USB et AUX Si rien n est connecté au système de son celui ci passera automatiquement en mode veille Appuyez sur n importe quel bouton pour le réactiver ...

Страница 29: ...ur ce bouton pour mettre le son en sourdine 16 Pause appuyez sur ce bouton pour arrêter la musique ou recommencer la piste en cours 17 17 Piste précédente appuyez sur ce bouton pour revenir à la piste précédente INSTRUCTIONS DE FONCTIONNEMENT ...

Страница 30: ...N Nettoyez le foyer à l aide d un linge sec Pour ôter les traces de doigts et autres marques sur la fenêtre de verre du foyer électrique encastrable utilisez un linge propre et humide Nettoyez les surfaces en métal du foyer électrique à l aide d un linge propre et humide en faisant bien attention de ne pas repousser la poussière ou les débris dans une ouverture d aération ou une sortie d air N uti...

Страница 31: ... gradateur est trop faible 2 La barrette de DEL ne fonctionne pas 3 La tige de flammes s est détachée du support 4 Le moteur de la tige de flammes ne fonctionne pas L effet de flamme simulé est faible ou inexistant L appareil s éteint et ne peut être remis en marche L appareil ne se met pas en marche lorsque le bouton est à la position ON marche La télécommande ne fonctionne pas GARANTIE Le fabric...

Страница 32: ...nde Ventilateur Carte mère pour le foyer Panneau de commande Carte mère pour le système de son Haut parleur Projecteur de gauche Projecteur de droite Tableau lumineux à DEL A Tableau lumineux à DEL B Moteur du générateur d effet de flamme 2016 424001 2016 406008 2016 402006 2016 411003 2016 417003 2016 416003 2016 412003 2016 416004 2016 425001 2016 426001 2016 426002 2016 415005 2016 415006 2016 ...

Страница 33: ...to de Servicio al Cliente al 1 877 888 8225 de lunes a viernes de 8 a m a 8 p m hora estándar del Este MODELO 16IN 42 109B ADJUNTE SU RECIBO AQUI Número de serie Fecha de compra Style Selections es una marca registrada de LF LLC Todos los derechos reservados CHIMENEA ELÉCTRICA DE MONTAJE EN LA PARED CON ALTAVOZ BLUETOOTH ...

Страница 34: ...drio Base Protector contra viento Cristal de imitación Roca Leños Control remoto Plantilla de montaje en la pared PIEZA PIEZA CANTIDAD CANTIDAD DESCRIPCIÓN DESCRIPCIÓN F D B C C E A H I G ADITAMENTOS se muestran en tamaño real AA BB CC DD Ancla de expansión de pared Cant 4 Tornillo Cant 4 Perno Cant 9 Almohadilla suave Cant 4 ...

Страница 35: ...etire el enchufe del tomacorriente Conecte solo a tomacorrientes con la debida puesta a tierra No introduzca objetos extraños ni permita que entren en las aberturas de ventilación o escape ya que pueden provocar descargas eléctricas incendios o daños en el electrodoméstico Para evitar incendios no bloquee las entradas ni salidas de aire de manera alguna No use sobre superficies blandas como una ca...

Страница 36: ...amentos No intente ensamblar el producto si falta alguna pieza o si estas están dañadas Tiempo estimado de ensamblaje 30 minutos Herramientas necesarias para el ensamblaje no se incluyen Destornillador Phillips taladro eléctrico con broca de 1 4 pulg Herramientas útiles no se incluyen Detector de vigas Advertencia los cambios o modificaciones a esta unidad que no estén expresamente aprobados por l...

Страница 37: ...ed AA si va a instalar el artículo en vigas Luego con la ayuda de otra persona levante la chimenea eléctrica A e inserte los tornillos BB en las pestañas con orificios de la chimenea eléctrica A a través de la almohadillas suaves DD hasta que pasen por las anclas de extensión para pared AA Apriete los tornillos BB con un destornillador Phillips no se incluye Aditamentos utilizados AA Ancla de expa...

Страница 38: ...inferior de la chimenea eléctrica A fije el protector contra viento D con pernos CC Apriete con un destornillador Phillips Aditamentos utilizados 4 4 Desde la parte inferior de la chimenea eléctrica A fije las bases C con pernos CC Apriete con un destornillador Phillips x 4 Aditamentos utilizados Con la ayuda de otra persona coloque la unidad nuevamente en posición vertical A D CC ...

Страница 39: ...s F o los leños G en la base de la chimenea eléctrica A 6 Cuelgue cuidadosamente el panel de vidrio B en la chimenea eléctrica A como se muestra asegurando la parte inferior con pernos CC Apriete con un destornillador Phillips El ensamblaje está terminado CC Perno x 2 Aditamentos utilizados E F E G A A B CC PARED ...

Страница 40: ...uras El enchufe verde de puesta a tierra que sale del adaptador se debe conectar de forma permanente a tierra como a una caja de salida correctamente puesta a tierra El adaptador solo se debe usar si no hay disponible un receptáculo de 3 ranuras Es necesario un circuito de 15 amperios para operar este electrodoméstico Si el interruptor de circuito se activa cuando el electrodoméstico está en funci...

Страница 41: ...era el color de la llama Cuando presiona el botón por octava vez la configuración volverá al inicio del ciclo en el estado predeterminado 5 5 Calentador presione para activar la función de calentador El sistema iniciará con la temperatura en 18 3 C Presione el botón una vez producirá un pitido y una temperatura uniforme de 18 3 ºC Si presiona el botón otra vez se producirán 2 pitidos y aumentará l...

Страница 42: ...ionado el botón CHILD LOCK DISPOSITIVO DE BLOQUEO PARA NIÑOS durante 4 segundos para activar la función Cuando el dispositivo de bloqueo para niños está activado hay una marca de un candado rojo a la derecha de la pantalla y se deshabilitan todas las funciones Vuelva a presionar el botón durante 4 segundos para desbloquear 8 8 Luz presione para activar la función de reflector posterior Presione un...

Страница 43: ...para subir el volumen del sistema de sonido INSTRUCCIONES DE USO 11 11 Bluetooth Cuando la chimenea están encendida su capacidad Bluetooth se activa automáticamente y se enciende la luz Bluetooth de la chimenea Con un teléfono con capacidad Bluetooth puede reproducir música desde su teléfono a través de la chimenea ...

Страница 44: ...UX 13 13 ENTRADA USB Inserte un dispositivo USB para reproducir música mediante la chimenea Cuando la función está activada se enciende la luz USB INSTRUCCIONES DE USO 14 14 Modo presione este botón para cambiar entre las funciones Bluetooth USB y AUX Sin ninguna conexión durante 5 minutos el sistema de sonido entrará automáticamente en modo de espera presione cualquier botón para reactivarlo ...

Страница 45: ...ilenciar presione este botón para eliminar el volumen 16 Pausa presione este botón para pausar o reanudar la reproducción de música 17 17 Pista anterior presione este botón para volver a la pista anterior INSTRUCCIONES DE USO ...

Страница 46: ...ONES DE USO MODE CUIDADO Y MANTENIMIENTO Use un paño limpio y seco para limpiar la chimenea Para limpiar las huellas dactilares u otras marcas de la ventana de vidrio del accesorio eléctrico use un paño limpio y húmedo Limpie las superficies de metal del accesorio eléctrico con un paño limpio y húmedo sin arrojar polvo ni desechos en las ventilas de entrada o salida de aire No utilice limpiadores ...

Страница 47: ... activó 1 El botón regulador se ajustó demasiado bajo 2 La tira del LED no funciona 3 La varita de fuego se soltó de la abrazadera 4 El motor de la varita de fuego no funciona El efecto de simulación de llama es débil o inexistente El electrodoméstico se apaga y no se vuelve a encender El electrodoméstico no se enciende al presionar el botón ON encendido El control remoto no funciona GARANTÍA El f...

Страница 48: ...Tornillo Perno Control remoto Soplador Tablero madre para la chimenea Panel de control Tablero madre para el sistema de sonido Altavoz Luz direccional izquierda Luz direccional derecha Tablero de luz LED A Tablero de luz LED B Motor de accionamiento del generador de llamas 2016 424001 2016 406008 2016 402006 2016 411003 2016 417003 2016 416003 2016 412003 2016 416004 2016 425001 2016 426001 2016 4...

Отзывы: