STROM
-
LIMITED
www.stromltd.com
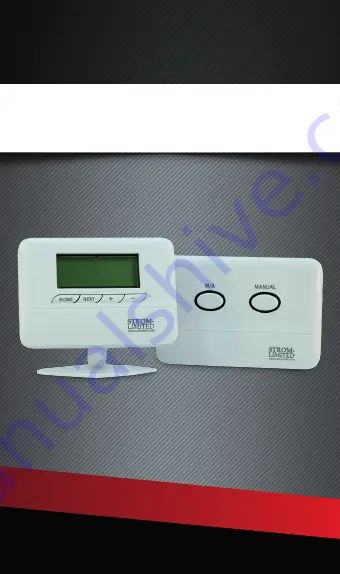
RF Programmable Thermostat
SSRTPR06
STROM LIMITED
2017
Страница 1: ...STROM LIMITED www stromltd com RF Programmable Thermostat SSRTPR06 www stromltd com STROM LIMITED 2017 ...
Страница 2: ... Layout 6 Thermostat Display Layout 7 Built In Heating Programmes 8 Personalised Heating Programmes 9 Programming Your Thermostat 10 Reviewing The Current Schedule 10 Changing The Current Schedule 11 Temporary Overrides 12 Temperature Boost 12 Enabling Manual Mode 12 Disabling Manual Mode 12 Holiday Mode 13 Resetting The Controller 14 Product Guarantee Terms 15 ...
Страница 3: ...ing View 21 Electrical Wiring Schematic 21 Controller Commissioning 22 Setting The Time Date 22 Setting The Backlight Timeout 22 Testing Re Pairing The Controller Receiver 23 Advanced Functions 24 Energy Saving Settings 25 Service Landlord Function 26 Enabling The Service Function 26 Enabling The Service Phone Number 26 Setting The Service Interval 27 Setting The Service Notification Period 27 Set...
Страница 4: ...f once this set temperature has been reached So a programmable room thermostat lets you choose what times you want the heating to be on and what temperature it should reach while it is on It will allow you to select different temperatures in your home at different times of the day and days of the week This means you can save money and energy by not heating your home unnecessarily Your thermostat a...
Страница 5: ...ry day The control allows you to choose between 4 and 6 timed events per day Events and temperatures should be designed to coincide with when you are in the property and awake When extra heat is required you can simply override the temperature for that given time event by turning up the thermostat Where you require a more permanent override you can set the control to manual where it will disable t...
Страница 6: ...MITED THERMOSTAT BUTTON LAYOUT Controller Display Home Selector Next Selector Adjustment Selectors Day Selector Copy Selector Holiday Selector Battery Compartment Function Slider 1 2 3 4 5 6 7 8 9 1 2 3 4 9 5 8 6 7 USER GUIDE HOLIDAY ...
Страница 7: ... Active Mode Notifier Is Lit Calling For Heat Notification Active When Lit Current Event Number Current Date Energy Saving Modes Active Mode Is Lit Set Temperature 11 12 13 14 15 16 17 18 19 20 21 11 12 15 16 18 19 21 22 USER GUIDE 17 13 14 20 Battery Level Indicator 22 MO TU WE TH FR SA SU AUTO ALL DAY OFF SER MAN HOLIDAY DS OS OST TPI SET AM PM o C o C 23 Wireless Indicator 23 ...
Страница 8: ...00 16 o C 17 00 21 o C 22 30 7 o C Sat Sun 7 30 20 o C 9 30 20 o C 10 00 20 o C 12 00 20 o C 17 00 20 o C 22 30 15 o C 7 Day Default Program EVENT 1 EVENT 2 EVENT 3 EVENT 4 EVENT 5 EVENT 6 Mon 6 30 20 o C 8 30 16 o C 10 00 16 o C 12 00 16 o C 17 00 21 o C 22 30 7 o C Tue 6 30 20 o C 8 30 16 o C 10 00 16 o C 12 00 16 o C 17 00 21 o C 22 30 7 o C Wed 6 30 20 o C 8 30 16 o C 10 00 16 o C 12 00 16 o C...
Страница 9: ... temperatures recorded on the control Zone 1 Heating Program 24 Hour or 5 2 Day or 7 Day EVENT 1 EVENT 2 EVENT 3 EVENT 4 EVENT 5 EVENT 6 Mon Tue Wed Thu Fri Sat Sun If you are using a second programmable thermostat in a second zone please also complete Zone 2 Heating Program 24 Hour or 5 2 Day or 7 Day EVENT 1 EVENT 2 EVENT 3 EVENT 4 EVENT 5 EVENT 6 Mon Tue Wed Thu Fri Sat Sun PERSONALISED HEATING...
Страница 10: ... the programming mode of the controller 5 2 Day The controller will alternate between flashing MO TU WE TH and FR and then flashing SA and SU 7 Day The controller will flash only one day at a time 24 Hour All 7 days will flash at the same time 3 Press the NEXT button 4 The controller responds by showing you the first time event and temperature for the day s highlighted at the top of the screen Pre...
Страница 11: ...ough the time and temperature events Day The controller will highlight the days the current event applies to in the DAY OF THE WEEK section Event Number The controller will show the event number is the EVENT NUMBER section Time The controller will show the time of the event in CURRENT TIME section This time will change to reflect the events as you cycle through with the NEXT button Temperature The...
Страница 12: ...g Manual Mode You can take the controller out of its programmed settings and put the controller into manual mode This mode disables the timed events and relies purely on temperature control to call for heat This function will stay engaged until manually disabled this is not recommended for long durations as it is very inefficient 1 Move the FUNCTION SLIDER to MAN 2 You can change the set temperatu...
Страница 13: ...HOME SELECTOR Confirmation that the Holiday Mode is active can be seen the the illumination of HOLIDAY in the CURRENT OPERATING MODE section The controller is now in Holiday Mode and has disabled all heating functions until the function is either cancelled or the number of days has run out To cancel holiday mode premature simply press the HOLIDAY SELECTOR again In the event of a power cut while yo...
Страница 14: ...that you ensure that the programming information has been completed on page 9 using the review procedure on page 10 To reset your control simply 1 Locate the reset button on the controller as below 2 Using a pin press the reset button until the display goes blank 3 This has now reset the time on the control unit 4 Press the Home and button at the same time and press reset again 5 The screen will n...
Страница 15: ...ars if the product has been installed and maintained in accordance with these instructions and original proof of purchase has been retained We recommend keeping the installation invoice or electricians installation certificate to prove if necessary that the product was installed by a qualified electrician This guarantee is a parts only guarantee This guarantee specifically excludes Damage caused b...
Страница 16: ...nder your product warrenty null and void CONTROLLER SPECIFICATION TECHNICAL DETAIL SPECIFICATION Power Supply 2 x 1 5V AA Type Lithium Batteries Programming 7 Day 5 2 Day or 24 Hours Number Of Events 4 or 6 Per Day Material Thermoplastic Dimensions HxWxD 88mm x 123mm x 25mm TECHNICAL DETAIL SPECIFICATION Power Supply 90 260VAC 50 60Hz Switch Capacity 230VAC 6 2 A SPDT Volt Free Contacts Wireless R...
Страница 17: ...6 amps Must incorperate a Class A switch having seperation of at least 3mm in all poles We recommend a cable size of between 1 0mm2 and 1 5mm2 must be used Where mounting to a metal surface always ensure that the metal is earthed This product is not suitable for mounting on a back box Maintenance should be carried out by a qualified heating and electrical engineer on every part of the heating and ...
Страница 18: ...keeps your home warm without wasting energy Do not place your thermostat next to external doors or other sources of drafts Do not place your thermostat on external walls or unusually cold surfaces Do not place your thermostat above or immediately next to a heat source 1 5m Above Floor Level Try to place your thermostat approximately 1 5m above ground level to get the best reading ...
Страница 19: ...rect size and shape do not force the receiver onto the old backplate Ensure that the wiring configuration is the same on the old backplate as is required for the new one Ensure that when affixed to the old backplate the back of the receiver is not exposed at any point 4 If in doubt please replace the backplate for the new one supplied and wire in accordance with WIRING DIAGRAM 5 Ensure you have su...
Страница 20: ...tion that the back of the receiver once affixed to the backplate is not exposed and that the surface is ideally non metalic and suitable for wall fixings that will firmly support the receiver and prevent accidental removal 4 Once the suitable position has been found using a pencil mark the fixing positions on the wall and use a suitably sized drill bit for the wall plugs care should be taken to en...
Страница 21: ...ns AC supply has been isolated We recommend that all wiring is done with 1 0mm2 or 1 5mm2 cabling and that care is taken to ensure good connection with the terminals Backplate wiring view Electrical wiring schematic INSTALLATION GUIDE WIRING DIAGRAM NEUTRAL LIVE COMMON HEATING OFF HEATING ON 1 2 3 N L Neutral Live Fused 6A Max COM NO NC ...
Страница 22: ...eted on page 9 7 Leave the FUNCTION SLIDER set to AUTO 8 Leave a copy of these instructions with the controller for the homeowner Setting the time and date is really easy to do just follow these steps 1 Move the FUNCTION SLIDER to TIME DATE 2 Using the ADUSTMENT SELECTORS set the correct details using the NEXT button you can cycle between Hours Minutes Day Month and Year 3 Once completed please pr...
Страница 23: ...hold the M A until the Manual light begins to flash green approximately 10 seconds 2 On the Thermostat move the FUNCTION SLIDER to OFF 3 On the Thermostat press hold the HOME FUNCTION button and the HOLIDAY FUNCTION button until PAIR is displayed on the Thermostat 4 The Thermostat will confirm the link by displaying PAIR YES and the Manual green light on the receiver will stop flashing If this doe...
Страница 24: ...t between on or off Setting TPI The controller will display TPI You can select either 3 cycles 6 cycles or off Setting the thermostat sensitivity The controller will display SWING You can set the temperature sensitivity of the controller from between 0 5o C and 2 0o C Setting the temperature calibration The controller will display ADJ You can set the temperature sensitivity of the controller from ...
Страница 25: ... start but this time manipulates the stop time for a homes heating What Is TPI Chronoproportional Control Reducing energy costs and carbon emissions is within reach when fitting thermostats with TPI TPI or Chronoproportional Controls is a load compensator as it works by ensuring the boiler on time is reduced to a minimum and balances the boiler heat output with the heat loss This reduces the net t...
Страница 26: ...e code use the ADJUSTMENT SELECTORS using the DAY SELECTOR to move to the next digit once the code has been entered press the NEXT SELECTOR to confirm Below is a description of the functions and what they do To cycle through the options please use the NEXT SELECTOR you can amend the options using the ADJUSTMENT SELECTORS When entering digits Below is a description of the functions and what they do...
Страница 27: ...g service overdue restrictions The controller will display TYPE There are 3 different settings that will vary the type of restriction on the controller until the servicing has been completed SETTING 0 No restrictions on the heating system after the service due date has passed SETTING 1 The schedule is disabled and the controller can only be run in manual mode for a maximum of 1 hour after the serv...
Страница 28: ...STROM LIMITED www stromltd com STROM LIMITED UNIT 3 RCM BUSINESS CENTER OSSETT WF5 9ND TELEPHONE 0333 344 24 74 EMAIL SALES STROMLTD COM ...