STREAMIT INTERNET RADIO
User’s manual
May 2008
Version 1.0
7
E
N
G
L
IS
H
2 Installation
This section of the manual will cover the installation of your SIR internet radio starting from how to
mount and connect your device, to configuration.
2.1 Rack mount
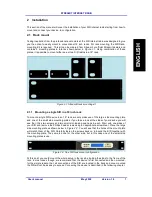
Taking inspiration from the professional audio market, the SIR internet radio was designed to give
you the option to easily mount in conventional 19 inch racks. For rack mounting, the SIR Rack-
mounting Kit is required. This kit can be ordered from Streamit or official Streamit dealers and
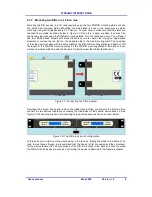
contains 5 mounting plates in total as shown below in Figure 2.1. Using combination of these
plates, it is possible to mount either one or two SIR radios in a 19” rack.
Figure 2.1: Streamit Rack-mounting kit
2.1.1 Mounting a single SIR in a 19 inch rack
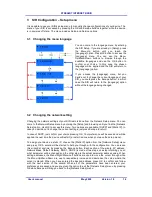
To mount a single SIR device in an 19’’ rack, we only make use of the large side mounting plate
and one of the small side mounting plates. If you take a look at the sides of your device you will
see that it has two screws and two small slot-looking openings in each. Start with one sides of
your SIR and remove the Phillips-head screws using an appropriate screwdriver. Place the large
side mounting plate as shown below in Figure 2.2. You will see that the holes of the mount plate
will match them of the SIR. Carefully fasten the screws back on to bound the SIR together with
the mounting plate. The same is done for the other side, but in this case one of the small side
mounting plates is use.
Figure 2.2: One SIR rack mount configuration
At this point you could mount the whole setup in the rack by bolting the sides to the frame of the
rack. In most cases though, we recommend that the device is first connected and then mounted;
for the simple reason that, all connections of the SIR are located in the back and once mounted
the SIR will not be as easy to access. Connecting the device is described in the following chapter.


