


LIST OF ILLUSTRATIONS
FIGURE
TITLE
PAGE
1
Model Optima 112 Freezer .................................................................................... 1
2
Specifications ........................................................................................................ 1
3
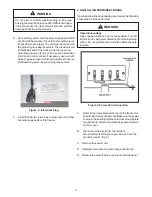
Warning Label Locations ....................................................................................... 3
4
Leveling ................................................................................................................. 4
5
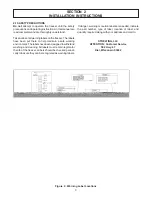
Space and Ventilation Requirements ..................................................................... 4
6
Electrical Plug ....................................................................................................... 5
7
Installing Tray and Cover ........................................................................................ 5
8
Power Cord Connection ......................................................................................... 5
9
Controls ................................................................................................................. 7
10
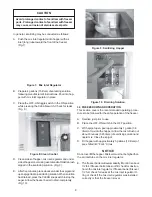
Mix Inlet Regulator ................................................................................................. 9
11
Clean Control ......................................................................................................... 9
12
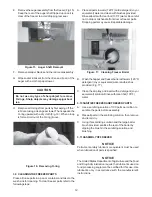
Sanitizing Hopper .................................................................................................. 9
13
Draining Solution ................................................................................................... 9
14
Dispensing Product ............................................................................................... 10
15
Removing Mix Inlet Regulator ................................................................................. 10
16
Draining Mix ..........................................................................................................11
17
Removing Front Door ............................................................................................. 11
18
Auger Shaft Removal ............................................................................................. 12
19
Removing O-ring ....................................................................................................12
20
Cleaning Freezer Barrel ......................................................................................... 12
21
Exploded View of Auger ......................................................................................... 13
22
Mix Inlet Regulator .................................................................................................13