background image

6

Maintenance

Maintenance

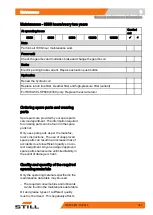
Checking the seat belt

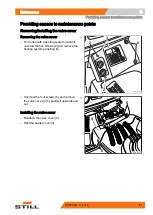
6327_342-009

1

2

3

– Pull out the belt (3) completely and check

for wear.

The belt must not be frayed or cut. The

stitching must not be loose.
– Check whether the belt is dirty.
– Check whether parts are worn or damaged,

including the attachment points.

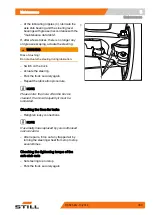
– Check the buckle (1) to ensure that it locks

in properly.

When the belt tongue (2) is inserted, the belt

must be held securely.

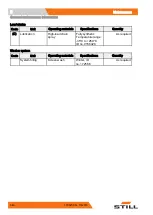
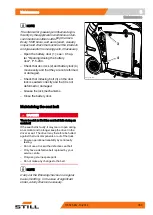
7090_342-005

1

4

– The belt tongue (2) must release when the

red button (4) is pressed.

– The automatic blocking mechanism must

be tested at least once a year:

– Park the forklift truck on level ground.
– Pull out the belt with a jerk.
The automatic blocking mechanism must

block extension of the belt.
– Tilt the seat at least 30 ° (if necessary,

remove the seat).

– Slowly extend the belt.
The automatic blocking mechanism must

block extension of the belt.

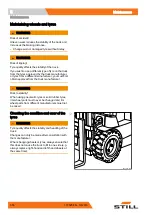
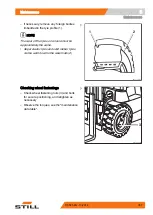
Cleaning the seat belt

– Clean the seat belt as necessary, but

without using chemical cleaning materials

(a brush will suffice).

Replacement after an accident

As a rule, the seat belt must be changed after

an accident.

354

170525 EN - 10/2016

Содержание RX60-16

Страница 1: ...Original instructions Electric forklift truck RX60 16 RX60 18 RX60 20 6311 6313 6315 170525 EN 10 2016 ...

Страница 2: ......

Страница 3: ...ce g Address of manufacturer and contact details STILL GmbH Berzeliusstraße 10 22113 Hamburg Germany Tel 49 0 40 7339 0 Fax 49 0 40 7339 1622 Email info still de Website http www still de 170525 EN 10 2016 I ...

Страница 4: ......

Страница 5: ...ntal considerations 11 Packaging 11 Disposal of components and batteries 11 2 Introduction Use of truck 14 Proper usage 14 Proper use during towing 14 Impermissible use 14 Place of use 15 Parking in temperatures below 10 C 16 Using working platforms 16 Residual risk 17 Residual dangers residual risks 17 Special risks associated with using the truck and attachments 18 Overview of hazards and counte...

Страница 6: ... handling consumables 39 Permissible consumables 39 Oils 39 Hydraulic fluid 40 Battery acid 41 Disposal of consumables 42 Emissions 43 4 Overviews General view of truck 48 General view of driver s compartment 50 Operating devices and display elements 52 Display operating unit 52 Operating devices for hydraulic and traction functions 54 Multi lever 55 Double mini lever 56 Three way mini lever 57 Fou...

Страница 7: ...ergency off function 101 Zero adjustment of the load measurement variant 101 Checking the vertical lift mast position variant for correct function 103 Driving 104 Safety regulations when driving 104 Roadways 106 Setting the drive programme 108 Reducing speed with a raised load variant 109 Selecting the drive direction 110 Actuating the drive direction switch multiple lever version 111 Actuating th...

Страница 8: ...ion with reversible fork arms variant 152 Working with loads 154 Safety regulations when handing loads 154 Before taking up load 155 Load measurement variant 156 Picking up loads 159 Danger area 160 Transporting pallets 161 Transporting suspended loads 161 Load pick up 162 Transporting loads 166 Setting down loads 167 Driving on ascending and descending slopes 169 Driving on lifts 169 Driving on l...

Страница 9: ... hazard warning system on and off 203 Switching direction indicators on and off 204 Switching the double working spotlights on and off 206 Operating the windscreen wiper washer 208 FleetManager variant 208 Accident recorder variant 209 Driver restraint systems variants 209 Cab operation 210 Opening the cab door 210 Closing the cab door 211 Opening the side windows 211 Closing the side windows 211 ...

Страница 10: ...rgency hammer 275 Emergency lowering 275 Emergency operation of the electric parking brake 277 Handling the battery 279 Safety regulations when handling the battery 279 Opening closing the battery door 283 Disconnecting the battery male connector 285 Maintaining the battery 286 Checking the battery condition acid level and acid density 288 Checking the battery charge status 289 Charging the batter...

Страница 11: ...are parts and wearing parts 341 Quality and quantity of the required operating materials 341 Lubrication plan 343 Maintenance data table 344 Safety regulations for maintenance 347 General information 347 Working on the hydraulic equipment 347 Working on the electrical equipment 347 Safety devices 348 Set values 348 Lifting and jacking up 348 Working at the front of the truck 349 Providing access t...

Страница 12: ...cking the cable terminals 371 Checking the hydraulic oil level of the hydraulic battery carrier 371 Lubricating the slide elements 372 Oiling the catch rails 372 Checking the lift cylinders and connections for leaks 374 Checking fork arms 375 Checking the reversible fork arms 375 Checking the double pedal 376 Checking the battery changeover frame 376 7 Technical data Dimensions 378 VDI datasheet 3...

Страница 13: ...1 Foreword ...

Страница 14: ...ructions provide the necessary information to do this Read and observe the information provided before commissioning the truck This will prevent accidents and ensure that the warranty remains valid CE Symbol CE labelling The manufacturer uses CE labelling to indi cate that the truck complies with the standards and regulations valid at the time of marketing This is confirmed by the issued EC declara...

Страница 15: ... 22113 Hamburg Germany We declare that the Industrial truck according to these operating instructions Model according to these operating instructions conforms to the latest version of the Machinery Directive 2006 42 EC Personnel authorised to compile the technical documents See EC compliance declaration STILL GmbH 170525 EN 10 2016 3 ...

Страница 16: ...1 Foreword Your truck Accessories Key for key switch 2 pieces Key for cab variant Hexagon socket wrench for emergency lowering Battery replacement frame 4 170525 EN 10 2016 ...

Страница 17: ...acturer from the nameplate in the space provided Production number Year of manufacture Please quote the production number during all technical enquiries Each truck comes with a set of operating instructions These instructions must be stored carefully and must be available to the driver and operating company at any time The storage location is specified in the Overviews chapter If the operating inst...

Страница 18: ...elopment of trucks These operating instructions are subject to change and any claims based on the information and or illustrations contained in them cannot be asserted Please contact your authorised service centre for technical support relating to your truck Copyright and trademark rights These instructions must not be reproduced translated or made accessible to third par ties including as excerpt...

Страница 19: ... German implementation of the EU work ing equipment directive BG Berufsgenossenschaft German insurance company for the company and employees BGG Berufsgenossenschaftlicher Grundsatz German principles and test specifications for occupational health and safety BGR Berufsgenossenschaftliche Regel German rules and recommendations for occupational health and safety DGUV Berufsgenossenschaftliche Vorschr...

Страница 20: ...at the workplace LpAZ Average continuous sound pressure level in the driver s compartment LSP Load centre of gravity Distance of the centre of gravity of the load from the front face of the fork backs MAK Maximum workplace concentration Maximum permissible air concentrations of a substance at the workplace Max Maximum Highest value of an amount Min Minimum Lowest value of an amount PIN Personal Id...

Страница 21: ...kwards 3 right 2 and left 4 refer to the installation position of the parts as seen from the driver s compartment the load is to the front Schematic views 6210_003 062 View of functions and operations This documentation explains the usually sequential chain of certain functions or oper ations Schematic diagrams of a counterbal ance truck are used to illustrate these proce dures NOTE These schemati...

Страница 22: ...rating statuses and values in the display of the display operating unit are examples and partly dependent on the truck equipment As a result the displays shown of the actual operating statuses and values can vary Information that is not relevant for descriptions is not shown 10 170525 EN 10 2016 ...

Страница 23: ...f properly after delivery of the truck Disposal of components and batteries The truck is composed of different materials If components or batteries need to be replaced and disposed of they must be disposed of treated or recycled in accordance with regional and national regulations NOTE The documentation provided by the battery manufacturer must be observed when dispo sing of batteries ENVIRONMENT ...

Страница 24: ...1 Foreword Environmental considerations 12 170525 EN 10 2016 ...

Страница 25: ...2 Introduction ...

Страница 26: ... be exceeded see also the chapter entitled Before picking up a load Proper use during towing This truck is suitable for the occasional towing of trailers and is equipped with a towing device for this purpose This occasional towing may not exceed 2 of the daily operating time If the truck is to be used for towing on a more regular basis the manufacturer should be consulted The regulations regarding...

Страница 27: ...n public roads it must conform to the existing national regula tions for the country in which it is being used The ground must have an adequate load capacity concrete asphalt and a rough surface Routes work areas and aisle widths must conform to the specifications in these operating instructions see the Routes chapter Driving on upward and downward gradients is permitted provided the specified data ...

Страница 28: ... authorities NOTE Please observe the definition of the following responsible person operating company Parking in temperatures below 10 C CAUTION Batteries can freeze If the truck is parked in an ambient temperature below 10 C for an extended period the batteries will cool down The electrolyte may freeze and damage the batteries The truck is then not ready for operation When the ambient temperature ...

Страница 29: ...on incident or breakdown etc WARNING All persons that are in the vicinity of the truck must be instructed regarding these risks that arise through use of the truck In addition we draw attention to the safety regulati ons in these operating instructions Risks can include Escape of consumables due to leakages rupture of lines and containers etc Risk of accident when driving over difficult ground such...

Страница 30: ...ncorrect operation and losing stability can never be excluded The loss of stability can be avoided or min imised by the following actions Always secure the load against slipping e g by lashing Always transport unstable loads in suitable containers Always drive slowly when cornering Drive with the load lowered Even with sideshifts align the load as centrally as possible with the truck and transport...

Страница 31: ...al risk time the truck is used in a manner that falls outside the scope of normal use and in cases where the driver is not certain that he can use the truck correctly and without the risk of acci dents 170525 EN 10 2016 19 ...

Страница 32: ...h key only for authorised persons O Truck not in a safe condition Recurrent testing and rectification of defects O German Ordinance on Industrial Safety and Health BetrSichV Risk of falling when using working platforms Compliance with national regulations different national laws O German Ordinance on Industrial Safety and Health BetrSichV and employer s liability insurance associations Impaired vis...

Страница 33: ...th and labour protection law ArbSchG Impermissible usage improper usage Note the German Ordinance on Industrial Safety and Health BetrSichV the operating instructions and the German Engineering Federation VDMA rules O When fuelling a Diesel Note the German Ordinance on Industrial Safety and Health BetrSichV the operating instructions and the German Engineering Federation VDMA rules O b LPG Note Ge...

Страница 34: ...BetrSichV and employers liability insurance association regulation 104 When parking LPG trucks Note the German Ordinance on Industrial Safety and Health BetrSichV employers liability insurance association regulation 104 and the operating instructions O German Ordinance on Industrial Safety and Health BetrSichV and employers liability insurance association regulation 104 With driverless transport s...

Страница 35: ...n must be appointed NOTE Please observe the definition of the following responsible persons operating company and driver The construction and equipment of the truck correspond to the Machinery Directive 2006 42 EC and are therefore marked with CE labelling These elements are therefore not included in the hazard assessment At tachments possess their own CE labelling and likewise are not included for...

Страница 36: ...so be taken into consideration The conditions of use for trucks are broadly similar in many plants so the hazards can be summarised in one overview Observe the information provided by the relevant employers liability insurance association on this subject 24 170525 EN 10 2016 ...

Страница 37: ...3 Safety ...

Страница 38: ...ineer or a person who fulfils the following requirements A completed vocational qualification that demonstrably proves their professional expertise This proof should consist of a vocational qualification or a similar document Professional experience indicating that the qualified person has gained practical experience of industrial trucks over a proven period during their career During this time this p...

Страница 39: ...n trained in accordance with BGG General Employers Liability Insurance Association Act 925 Observe the national regulations for your country Driver rights duties and rules of be haviour The driver must be trained in his rights and duties The driver must be granted the required rights The driver must wear protective equipment protection suit safety footwear safety helmet industrial goggles and glov...

Страница 40: ...the aforementio ned substances are not permitted to perform work of any kind on or with the truck Prohibition of use by unauthorised persons The driver is responsible for the truck during working hours He must not allow unautho rised persons to operate the truck When leaving the truck the driver must secure it against unauthorised use e g by pulling out the key 28 170525 EN 10 2016 ...

Страница 41: ...hange to its structural state can affect the handling and stability of the truck which in turn can lead to accidents You should therefore contact your service centre beforehand Changes that will adversely affect stability load capacity and safety systems among other things must not be made without the manufacturer s approval The truck can only be converted with written approval from the manufactur...

Страница 42: ...ery and all connections to the electronic control cards are disconnected Contact the authorised service centre on this matter DANGER Risk of explosion from additional holes in the battery hood Explosive gases can escape and lead to potentially fatal injuries if they explode Sealing holes with plugs is not sufficient to prevent gas from escaping Do not drill any holes in the battery hood DANGER Risk...

Страница 43: ...o do so the operating company must fulfil the following prerequisites Construction documents test documents and assembly instructions associated with the change must be archived and remain accessible at all times Check that the capacity rating plate decal in formation hazard warnings and the operating instructions are consistent with regard to the changes and modify if necessary The change must be ...

Страница 44: ... load may only be mounted on the overhead guard if the structural design has been tested and the manufacturer has given approval Seek advice from the authorised service centre for the mounting of roof loads Warning regarding non original parts Original parts attachments and accessories are specially designed for this truck We specifically draw your attention to the fact that parts attachments and a...

Страница 45: ...nal headlights etc is only permitted with the manufacturer s written approval All electrical system interventions must be documented Even if they are removable roof panels may not be removed as they are designed to protect against small falling objects Tyres DANGER Risk to stability Failure to observe the following information and instructions can lead to a loss of stability The truck may tip over...

Страница 46: ...oes not cause the truck to tilt to one side e g always replace right hand and left hand wheels at the same time Changes must only be made following consultation with the manufacturer If the type of tyre used on an axle is changed for example from superelastic tyres to pneu matic tyres the load diagram must be changed accordingly Contact the authorised service centre on this matter Medical equipmen...

Страница 47: ... tempe ratures over 80 C and heavy contamination Damaged or defective gas springs must be changed immediately Contact the authorised service centre WARNING Accumulators are under high pressure Improper installation of an accumulator results in an elevated risk of injury Before starting work on the accumulator it must be depressurised Contact the authorised service centre Length of the fork arms DA...

Страница 48: ... Essentials for safe operation picked up These other loading units then fall over when the load is raised For help with selecting the correct fork arms contact the authorised service centre 36 170525 EN 10 2016 ...

Страница 49: ...r two inspections have been carried out The inspection date is indicated by an adhe sive label on the truck Arrange for the service centre to perform periodic safety inspections on the truck Observe guidelines for checks carried out on the truck in accordance with FEM 4 004 The operator is responsible for ensuring any defects are remedied without delay Contact your service centre NOTE Observe the ...

Страница 50: ...ked separately Test values for the drive battery Component Recommended test voltage Measurements Nominal voltage UBatt Test values 50 VDC 24 V 1200 100 VDC 48 V 2400 Battery 100 VDC Batt Batt Battery tray 80 V 4000 Test values for the entire truck Nominal voltage Test voltage Test values for new trucks Minimum values over the duration of the service life 24 V 50 VDC Min 50 k 24 k 48 V 100 VDC Min ...

Страница 51: ...ble substances that are necessary for operation see Chapter Maintenance data table P 6 344 Oils DANGER Oils are flammable Follow the statutory regulations Do not allow oils to come into contact with hot engine parts No smoking fires or naked flames DANGER Oils are toxic Avoid contact and consumption If vapour or fumes are inhaled move to fresh air immediately In the event of contact with the eyes rin...

Страница 52: ...ved immediately with oil binding agents and disposed of according to the regulations ENVIRONMENT NOTE Oil is a water polluting substance Always store oil in containers that comply with the applicable regulations Avoid spilling oils Spilt oil should be removed immediately with oil binding agents and disposed of according to the regulations Dispose of old oils according to the regula tions Hydraulic...

Страница 53: ...se appropriate personal protective equipment e g protective gloves industrial goggles skin protection and skin care products ENVIRONMENT NOTE Hydraulic fluid is a water polluting substance Always store hydraulic fluid in containers that comply with regulations Avoid spills Spilt hydraulic fluid should be removed immediately with oil binding agents and disposed of according to the regulations Dispose ...

Страница 54: ...Follow the statutory regulations ENVIRONMENT NOTE Dispose of used battery acid in line with the applicable regulations Disposal of consumables ENVIRONMENT NOTE Materials that accumulate during repair maintenance and cleaning must be collected properly and disposed of in accordance with the national regulations for the country in which the truck is being used Work must only be carried out in areas ...

Страница 55: ...tment LpAZ Measurement uncertainty KpA 70 dB A 4 dB A The values were determined in the test cycle on an identical machine from the weighted values for operating conditions and idling Time proportions Lifting 18 Idling 58 Driving 24 However the indicated noise levels at the truck cannot be used to determine the noise emissions at workplaces according to the most recent version of Directive 2003 10...

Страница 56: ... 7 m s2 0 459 m s2 Tests have indicated that the amplitude of the hand and arm vibrations on the steering wheel or the operating devices in trucks is less than 2 5 m s2 There are therefore no measure ment guidelines for these measurements The individual vibration load on the driver over the course of a working day must be determined by the operating company in accordance with Directive 2002 44 EC ...

Страница 57: ...ygen and hydrogen oxyhydrogen gas This gas mixture is explosive and must not be ignited Make sure that there is always sufficient ventilation in working areas that are fully or partially enclosed Keep away from open flames and flying sparks Do not smoke Observe the safety regulations for handling the battery 170525 EN 10 2016 45 ...

Страница 58: ...3 Safety Emissions 46 170525 EN 10 2016 ...

Страница 59: ...4 Overviews ...

Страница 60: ... 9 1 Lift mast 2 Overhead guard 3 Driver s compartment 4 Traction electronics 5 Towing device 6 Steering axle 7 Battery 8 Drive axle with traction motor 9 Tilt cylinder 10 Fork arms 11 Fork carriage 12 Lift cylinders NOTE The truck equipment may differ from the equipment shown 48 170525 EN 10 2016 ...

Страница 61: ...Overviews 4 General view of truck 170525 EN 10 2016 49 ...

Страница 62: ...4 Overviews General view of driver s compartment General view of driver s compartment 8 9 6 7 2 0 1 3 5 75 h 2 234 7 12 15 1 2 3 4 5 6 7 8 9 10 11 12 13 14 6321_003 132_V3 50 170525 EN 10 2016 ...

Страница 63: ...tions 6 Emergency off switch only in multiple lever version 7 Storage compartment 8 Bottle holder for max 0 5 l bottles 9 Compartment and storage location for operating instructions 10 Driver s seat 11 Accelerator pedal 12 Brake pedal 13 Alarm horn foot switch 14 Steering column adjustment lever NOTE The truck equipment may differ from the equipment shown 170525 EN 10 2016 51 ...

Страница 64: ...travel display 15 Power rating display 16 Time display digital 17 Not assigned 18 Rotating beacon display 19 Interior light display 20 Rear window heating display 21 Interior light rotating beacon button 22 Rear window heating button 23 Menu change button 24 Lighting button 25 Blue Q button 26 Rear window wiper button NOTE The buttons 5 21 22 and the corresponding indicators 6 7 18 19 20 are assig...

Страница 65: ...Overviews 4 Operating devices and display elements If you have any questions please contact your authorised service centre 170525 EN 10 2016 53 ...

Страница 66: ...ifferent versions of the operating devices are available for operating the truck s hydraulic and traction functions The truck can be equipped with the following operating devices Multiple lever Double mini lever Triple mini lever Quadruple mini lever Joystick 4Plus Fingertip Mini console 54 170525 EN 10 2016 ...

Страница 67: ...lever for attachments with 5th function variant 5 5th function function switch variant 6 Drive direction switch NOTE In the dual pedal version variant the truck is equipped with a signal horn button instead of the drive direction switch NOTE If the truck is equipped with a clamping attach ment the 5th function function switch is used to actuate the clamp locking mechanism 170525 EN 10 2016 55 ...

Страница 68: ...nction key F2 4 Drive direction turn indicator cross lever 5 Function key 5th function 6 Attachments cross lever 7 Emergency stop switch 8 Signal horn button NOTE Depending on the specification various electric attachment parts can be controlled via function keys 2 and 3 Changes must only be made by the authorised service centre 56 170525 EN 10 2016 ...

Страница 69: ...on turn indicator cross lever 5 Function key 5th function 6 Auxiliary hydraulics 1 operating lever 7 Auxiliary hydraulics 2 operating lever 8 Emergency stop switch 9 Signal horn button NOTE Depending on the specification various electric attachment parts can be controlled via function keys 2 and 3 Changes must only be made by the authorised service centre 170525 EN 10 2016 57 ...

Страница 70: ... 5 Drive direction turn indicator cross lever 6 Function key 5th function 7 Auxiliary hydraulics 1 operating lever 8 Auxiliary hydraulics 2 operating lever 9 Emergency stop switch 10 Signal horn button NOTE Depending on the specification various electric attachment parts can be controlled via function keys 3 and 4 Changes must only be made by the authorised service centre 58 170525 EN 10 2016 ...

Страница 71: ...r the basic hydraulic functions 3 Pictograms for the 5th hydraulic function and the clamp locking mechanism variant 4 Pictograms for the 3rd 4th hydraulic functions 5 LED for clamp locking mechanism variant 6 Slider for the 4th hydraulic function e g reach frame forwards backwards 7 Vertical rocker button for the drive direction 8 Shift key F 9 Signal horn button 170525 EN 10 2016 59 ...

Страница 72: ...t hand turn indicator button 6 Button for 5th function 7 Emergency stop switch 8 Attachments operating lever 9 Attachments operating lever 10 Tilt operating lever 11 Lift lower operating lever 12 Travel direction switch NOTE Depending on the specification various electric attachment parts can be controlled via function keys 1 and 2 Changes must only be made by the authorised service centre 60 17052...

Страница 73: ...rating devices and display elements 7311_003 056 1 2 1 Travel direction switch 2 Direction indicator switch Mini console The mini console is located on the steering column below the steering wheel 170525 EN 10 2016 61 ...

Страница 74: ...4 Overviews Identification points Identification points Overview 5 6210_003 028_V2 DANGER 62 170525 EN 10 2016 ...

Страница 75: ...t stand underneath the fork Do not stand on the fork 8 Warning sign Risk of short circuit due to shearing 10 Decal information Parking brake released 11 Decal information Parking brake applied 12 Manufacturer s label text 13 Decal information Driving with dual pedal operation variant 14 Decal information Lifting gear attachment point 15 Decal information Lifting gear attachment point 16 Decal info...

Страница 76: ...13 Hamburg Tel 01804 784 55 24 Ihr STILL Service Nächste Prüfung 733906 BATTERIESERVICE 20xx Regelmäßige Prüfung FEM 4 004 nach nationalen Vorschriften basierend auf den EG Richtlinien 2009 104 EG 99 92 EG Die Prüfplakette ersetzt nicht das Prüfprotokoll Nächste Prüfung 56344391019 Mitglied der Fédération Européene de la Manutention STILL GmbH Hamburg 64 170525 EN 10 2016 ...

Страница 77: ...t stand underneath the fork Do not stand on the fork 8 Warning sign Risk of short circuit due to shearing 10 Decal information Parking brake released 11 Decal information Parking brake applied 12 Manufacturer s label text 13 Decal information Driving with dual pedal operation variant 14 Decal information Lifting gear attachment point 15 Decal information Lifting gear attachment point 16 Decal info...

Страница 78: ...rien Nr year année Baujahr Rated capacity Capacité nominale Nenn Tragfähigkeit Battery voltage Tension batterie Batteriespannung Rated drive power Puissance motr nom Nenn Antriebsleist Unladen mass Masse à vide Leergewicht max min see Operating instructions voir Mode d emploi siehe Betriebsanleitung kg kg kg kg kg kW V 66 170525 EN 10 2016 ...

Страница 79: ...pacité nominale Nenn Tragfähigkeit Battery voltage Tension batterie Batteriespannung Rated drive power Puissance motr nom Nenn Antriebsleist Unladen mass Masse à vide Leergewicht max min see Operating instructions voir Mode d emploi siehe Betriebsanleitung kg kg kg kg kg kW V 1 2 3 4 5 6 7 8 9 10 11 12 6210_921 003_V2 1 Type 2 Production number 3 Year of manufacture 4 Tare weight in kg 5 Max permi...

Страница 80: ...ction number contains the following coded information 1 Production location 2 Model 3 Year of manufacture 4 Sequential number 7094_003 098 1 2 3 4 5 1 Tare weight in kg 2 Permitted total weight in kg 3 Permitted front axle weight in kg 4 Permitted rear axle weight in kg 5 Payload in kg StVZO Road Traffic Licensing Regulations information This label includes information on the weight and load distri...

Страница 81: ...5 Operation ...

Страница 82: ...There is a risk of falling when working on high parts of the truck Use only the steps provided on the truck Do not stand on truck components or use them to help you climb onto the truck Use suitable equipment 1 2 6210_000 002 Prior to start up ensure that the truck is safe to be operated The fork arms must be secured against lifting and shifting The locking devices 1 of the fork arms must not be d...

Страница 83: ... The battery cover must be securely closed The latches of the battery lock and battery cover must not be damaged or deformed The maintenance lids must be closed Steps must be clean and free of ice Any panes of glass variant e g wind screen must be clean and free of ice Depending on the tyres the truck may be fitted with an antistatic belt The antistatic belt must not be damaged It must also be clea...

Страница 84: ...ficient to prevent gas from escaping Have unused bores in the battery hood sealed by the authorised service centre 6210_341 003 1 2 617584 617584 Nur Wasser sowi e bei Beda rf Sche ibenreiniger mit Frost schu tz auffü llen Scheibenwaschanlage Filling the washer system CAUTION Components may become damaged due to the effects of frost Water expands when it freezes If there is no anti freeze in the wa...

Страница 85: ...istance Renew left and right worn or damaged tyres without delay WARNING Risk of tipping Tyre quality affects the stability of the truck If you wish to use a different type of tyre on the truck from the tyres approved by the truck manufacturer or tyres from a different manufacturer you must first obtain approval from the truck manufacturer WARNING Risk to stability When using pneumatic tyres or sol...

Страница 86: ...nintentional actuation of the steering or operating devices and thus cause the truck or load to move in an uncontrolled fashion Do not adjust the seat or seat backrest while driving Adjust the seat and the seat backrest so that all operating devices can be actuated safely Ensure that the seat and seat backrest are securely engaged WARNING On some equipment variants the amount of head clearance on ...

Страница 87: ...river s seat Lift and hold the lever 1 Push the driver s seat into the desired position Release the lever Ensure that the driver s seat is securely engaged 7094_003 008 2 Adjusting the seat backrest Do not put pressure on the seat backrest while engaging it Lift and hold the lever 2 Push the seat backrest into the desired position Release the lever Ensure that the seat backrest is securely engaged...

Страница 88: ...quipped with electric air suspension that is activated using an electric switch instead of the lever 3 Fully extend the weight adjusting lever 3 Pump it up or down to set the driver s weight Return the weight adjusting lever to the central initial position before each new lift audible click Fully fold in the weight adjusting lever once adjustment is complete NOTE The driver s weight has been selec...

Страница 89: ...bar support moves a convex support cushion into the upper or lower part of the backrest Turn the turning knob 5 up or down until the lumbar support is in the desired position 6321_003 040 6 Adjusting the backrest extension variant Adjust the backrest extension 6 by pulling it out or pushing it into the desired position To remove the backrest extension move it past the end stop by jolting it upward...

Страница 90: ...uation of the steering or the operating devices and thus cause uncontrolled movements of the truck or load Do not adjust the armrest while driving Adjust the armrest so that all operating devices can be actuated safely Ensure that the armrest is securely tightened 7331_342 001 3 1 2 Adjusting the length of the armrest Release the star grip handle 1 by turning it anti clockwise Shift the armrest 2 ...

Страница 91: ...er adjust the steering column while driving Start up Climbing in and out of the truck WARNING Risk of injury when climbing into and out of the truck due to slipping striking parts of the truck or becoming stuck If the footwell cover is very dirty or smeared with oil there is a risk of slipping There is a risk of hitting your head on the post of the overhead guard or of your clothes becoming stuck ...

Страница 92: ...ng in and out of the truck and can be damaged due to misuse Only use the fittings specifically designed for the purpose of climbing into and out of the truck 6210_003 083 1 2 3 4 5 To assist with climbing into and out of the truck the footwell 4 must be used as a step and the handle 1 must be used for support The post of overhead guard 2 can also be used for support Always climb into the truck in a ...

Страница 93: ...damaged Do not crush the battery cable when closing the battery cover Ensure that the battery cable does not come into contact with the battery cover Close the battery door 7321_003 125 1 2 3 Shelves and cup holders WARNING Objects may fall into the footwell and obstruct the pedals which poses a risk of accident Objects to be stored must be of the correct size so that they cannot fall from the she...

Страница 94: ...and operations prior to commissioning must be perfor med without any defects being detected Carry out checks and operations before commis sioning Do not operate the truck if defects have been detected contact the authorised service centre NOTE When the truck is switched on the maximum driving speed is restricted The driving speed limitation is disabled as soon as the truck is steered out of corner...

Страница 95: ... wheel by approximately half a turn I 1 0 5060_003 029_V2 Insert switch key 1 into the key switch and turn to position I 7312_003 085 This initiates a self test All lamps in the drive direction and turn indicator displays light up briefly 170525 EN 10 2016 83 ...

Страница 96: ...ts 1 Battery charge The available battery capacity is shown in the display field 2 Drive program The current traction program 1 5 appears on the display 3 Power rating The average power consumption and consumption trends are shown in the display field 4 Time The current time appears in the display field NOTE After connecting the battery the correct charging state may not be displayed until the batter...

Страница 97: ...electrical installations and the display and operating unit displays are blocked The function of the hazard warning system variant is guaranteed Enter the five digit driver PIN possible entries from 00000 to 99999 to enable the blocked functions Once the correct driver PIN has been entered the standard displays are shown All of the truck functions are available The access authorisation can be config...

Страница 98: ...ing unit has been changed The authorised service centre can use a diagnostic device to read out the driver PIN and if necessary restore the factory default driver PIN ACCESS CODE input menu The driver enters the five digit driver PIN 00000 to 99999 in this input menu The driver PIN is entered using the buttons 1 The digits entered for the driver PIN 2 are not visible instead being represented by ci...

Страница 99: ...message INVALID appears for a short time When the message goes out the driver PIN can be re entered 8 9 6 7 4 2 0 1 3 5 BQ_024_en_V2 After three invalid entry attempts the mes sage CODE DENIED appears The input is then locked for five minutes before another attempt can be made 170525 EN 10 2016 87 ...

Страница 100: ...s password protected After entering the password the fleet manager can configure general settings for the truck To change the password see the chapter entitled Changing the password Push the drive program selection button 1 and the menu change button 2 at the same time 8 9 6 7 4 2 0 1 3 5 1 2 BQ_030_en_V2 1 2 6 7 3 4 5 ESC PASSWORD appears in the display Enter the four digit password factory default...

Страница 101: ...lecting the driver PIN In the ACCESS CODE menu there are fifty possible driver PINs to choose from The digit sequences can be set or changed in the NEW CODE submenu Once the ACCESS CODE menu has been ac cessed the CODE selection field 2 contains the number 1 The first of the fifty driver PINs can now be defined Use the drive program selection button 1 and the menu change button 4 to select the desired ...

Страница 102: ... 7 3 4 5 8 9 0 BQ_026_en CONFIRM appears in the display The CONFIRM submenu is used to confirm the new driver PIN Enter the new driver PIN for a second time in the CONFIRM field 8 using the buttons 7 If the entry matches the new driver PIN previously entered the system will accept the new driver PIN once the last digit has been entered The display switches back to the ACCESS CODE menu Another driver...

Страница 103: ...nu the message INVALID will appear The message will then disappear after a short time The new driver PIN can be entered in the CONFIRM submenu for further confirma tion 8 9 6 7 4 2 0 1 3 5 BQ_024_en_V2 After three incorrect entries the CODE DE NIED message appears The display switches back to the ACCESS CODE menu The desired driver PIN must be re defined 170525 EN 10 2016 91 ...

Страница 104: ...can only be changed when the parking brake is applied Push the drive program selection button 1 and the menu change button 2 at the same time 8 9 6 7 4 2 0 1 3 5 1 2 BQ_030_en_V2 1 2 6 7 3 4 5 ESC PASSWORD appears in the display Enter the current password using the buttons 1 Confirm the entry by pressing the ENTER button 2 92 170525 EN 10 2016 ...

Страница 105: ...utton 3 to select the PASSWORD menu Confirm your selection by pressing the ENTER button 2 8 9 6 7 4 2 0 1 3 5 1 3 4 BQ_033_en 2 1 PASSWORD PASSWORD LEVEL appears in the display Use the drive program selection button 1 and the menu change button 4 to select the desired PASSWORD LEVEL 2 Confirm your selection by pressing the ENTER button 3 170525 EN 10 2016 93 ...

Страница 106: ...isations can only be reset by the autho rised service centre Enter the new desired password using the buttons 1 The digits entered are shown in plain text in the NEW CODE field 4 Confirm your selection by pressing the ENTER button 3 In the NEW CODE field appears briefly The new password is confirmed To correct the new password push the ESC button 2 The display switches back to PASS WORD PASSWORD LEVEL ...

Страница 107: ...F2 6210_003 095 1 1 1 1 1 Operating the signal horn Push the signal horn button 1 The signal horn sounds NOTE The signal horn is used to warn people against imminentdangeror toannounceyour intention to overtake 170525 EN 10 2016 95 ...

Страница 108: ...pen or remove the doors you must use an alternative suitable restraint system e g a seat belt 7311_003 048 1 2 3 Fastening the seat belt DANGER Risk to life when driving without a seat belt If the truck tips over or crashes into an obstacle and the driver is not wearing the seat belt the driver may be thrown from the truck The driver could slide under the truck or collide with an obstacle There is...

Страница 109: ... permits sufficient freedom of movement on the seat Click the belt tongue 2 into buckle 1 Check tension of the seat belt It should be close to the body 6210_342 005 Fastening on a steep slope The automatic blocking mechanism prevents the belt from being extended whenever the truck is on a steep gradient It is not possible to pull the seat belt any further out of the belt retractor Move away careful...

Страница 110: ...elt out with the usual force Using increased force pull the seat belt around 10 15 mm out of the retractor to disengage the blocking mechanism Slowly allow the seat belt to retract again Protect the seat belt from dirt for example by covering it Malfunction due to cold If the buckle or belt retractor is frozen thaw them out and dry them thoroughly to prevent recurrence CAUTION The seat belt may be...

Страница 111: ...int system and offer no protection from the consequences of the truck tipping over Close the cab door before operation If the door is open or has been removed use a comparably secure restraint system We recommend that you always use the seat belt 1 5060_003 015 Checking the brake system for correct function DANGER If the brake system fails the truck is insufficiently braked or not braked at all so ...

Страница 112: ...s in spite of an actuated parking brake contact your service centre 5060_003 031 1 Checking the steering system for correct function DANGER If the hydraulics fail there is a risk of accident as the steering characteristics have changed Do not operate the truck if it has a defective steering system Operate steering wheel 1 The steering play while stationary must not be more than two finger widths NO...

Страница 113: ... display and operating unit shows the message EMERGENCY OFF SWITCH period ically Brake the truck to a standstill by actuating the brake pedal NOTE In trucks with an electric parking brake the electric parking brake will be applied as soon as the truck comes to a stop Pull out turn the emergency off switch 1 The truck performs an internal self test and is then ready for operation again Zero adjustm...

Страница 114: ...e fork to a height of 300 800 mm 6210_003 071_V2 2 1 Keep button 1 for the zero adjustment pressed for at least four seconds the zero adjustment 2 symbol will appear in the display NOTE During the following process the fork carriage must be lowered slightly and then stopped abruptly While doing so the fork must not touch the ground otherwise the zero adjustment will not be accurate To stop the low...

Страница 115: ...to switch on the comfort feature lift mast vertical position Function display 2 must appear in the display Tilt the lift mast backwards The lift mast must tilt back fully and move gently as far as the end stop Tilt the lift mast forward The lift mast must tilt forwards and stop in the vertical position Release the operating device to tilt and actuate again The lift mast must tilt forwards fully an...

Страница 116: ...topping suddenly turning quickly and overtaking at dangerous or blind spots must be avoided Initial driving practice must be carried out in an empty space or on a clear roadway The following are forbidden during driving Allowing arms and legs to hang outside the truck Leaning the body over the outer contour of the truck Climbing out of the truck Moving the driver s seat Adjusting the steering colu...

Страница 117: ...e sure that the driving lane is clear When transporting goods that impair visibility the driver must drive the truck in reverse If this is not possible a second person acting as a guide must walk in front of the truck In this case the driver must only move at walking pace and with extra care The truck must be stopped immediately if eye contact with the guide is lost Rear view mirrors are only to b...

Страница 118: ...nsions of the load For pallets these are Aisle width mm Model Type With pallet 1000x1200 crosswise With pallet 800x1200 lengthwise RX60 16 6311 3408 3607 RX60 18 6313 3439 3638 RX60 20 6315 3449 3648 The truck may only be used on roadways that do not have excessively sharp bends excessively steep gradients or excessively narrow or low entrances Driving on gradients WARNING Driving up and down long...

Страница 119: ...mponents may project beyond the truck contour Trucks are often required to drive through very narrow or very low spaces such as aisles or containers The dimensions of the trucks are designed for this purpose However movable parts may project beyond the truck contour and be damaged or torn off Examples of such components include A folding roof panel in the driver s cab Cab doors LPG cylinders that ...

Страница 120: ... locations The operating company and its representatives must ensure that unauthorised third parties do not enter the working area NOTE Please note the definition of operating com pany in the sense of responsible persons Hazard areas Hazard areas on roadways must be marked by standard traffic signs or if necessary by additional warning signs Setting the drive programme The driving and braking charac...

Страница 121: ... backwards 80 90 100 110 120 Deceleration forwards backwards 80 90 100 110 120 Reversing forwards backwards 80 90 100 110 120 Brake retardation electric brake booster 60 70 80 90 100 7321_003 052_en_V2 Reducing speed with a raised load variant This function variant reduces the speed of the truck with a raised load 170525 EN 10 2016 109 ...

Страница 122: ... truck decelerates and is then accelerated again in the opposite direction reversing The indicator for the selected drive direction forwards 1 or reverse 2 lights up on the display and operating unit Neutral position If the truck is stopped for an extended period select the neutral position to prevent the truck from suddenly starting if the accelerator pedal is pressed inadvertently Briefly select ...

Страница 123: ...ting the drive direction P 5 110 For the forwards drive direction push the drive direction switch 1 downwards For the backwards drive direction push the drive direction switch upwards 5060_003 096 F1 F2 1 Actuating the drive direction switch mini lever version For the forwards drive direction push the cross lever 1 forwards For the backwards drive direction push the cross lever backwards 170525 EN...

Страница 124: ...for the drive direction 1 upwards A For the reverse drive direction push the vertical rocker button for the drive direction 1 downwards B F1 F1 F2 F2 5060_003 097 1 Actuate the drive direction switch fingertip version For the forwards drive direction push the drive direction switch 1 forwards For the backwards drive direction push the drive direction switch backwards 112 170525 EN 10 2016 ...

Страница 125: ...r s seat Fasten the seat belt Activate the available restraint systems Observe the information in the chapter entitled Safety regulations when driving The driver s seat is equipped with a seat switch This checks whether the driver s seat is occupied If it is not occupied or in the case of malfunction of the seat switch the truck cannot be moved and all lift functions are locked out In such a case ...

Страница 126: ...or pedal is released the truck decelerates NOTE The truck can briefly be stopped on upward or downward gradients without actuating the parking brake electric brake The truck begins to creep downwards slowly DANGER Risk of accident due to brake failure The electric brake only functions while the key switch is switched on the emergency off switch has not been actuated and the parking brake is release...

Страница 127: ...act your authorised service centre Starting drive mode dual pedal version variant DANGER Being trapped under a rolling or tipping truck could cause fatal injuries Sit down on the driver s seat Fasten the seat belt Activate the available restraint systems Observe the information in the chapter entitled Safety regulations when driving The driver s seat is equipped with a seat switch This checks whet...

Страница 128: ...d operating unit NOTE Depending on the equipment an acoustic signal variant may sound a warning during reverse travel the warning light variant may light up or the hazard warning system variant may flash The truck will travel in the selected drive direc tion The speed is controlled by the accelera tor pedal position When the accelerator pedal is released the truck decelerates NOTE The truck can be ...

Страница 129: ...from actuated accelerator pedal Actuate the accelerator pedal for the opposite direction The truck will travel in the selected drive direction NOTE In the event of an electrical fault with the accelerator the drive unit is shut down The electric brake service brake causes the truck to decelerate The truck cannot be driven again until the accelerator pedal has been released and then actuated again ...

Страница 130: ... by 50 and that the drive torque has decreased to 50 of the normal level a component failure may have occurred Bring the truck to a standstill using the brakes Use the parking brake if necessary to assist in this process Notify the authorised service centre Do not operate the truck again until the service brake has been repaired DANGER At speeds that are too high there is a danger that the truck c...

Страница 131: ...NGER There is a risk of being run over if the truck rolls away and therefore a danger to life The truck must not be parked on a slope In emergencies secure with wedges on the side facing downhill Only leave the truck when the parking brake is applied NOTE Once the parking brake is released the previously selected drive direction is retained and is shown on the drive direction indicator NOTE If you...

Страница 132: ...nger possible The drive direction indicator 2 on the display and operating unit goes out 6210_494 002 Releasing the parking brake Pull the parking brake lever 1 down fully out of the middle position In the lower lever position pull out the lever knob and then guide the parking brake lever up fully NOTE The parking brake lever swivels to the upper position automatically by means of spring force and...

Страница 133: ...NOTE The electric parking brake can be activated or released only if the battery male connector has been connected and the key switch is switched on Stop the truck As soon as the driver leaves the seat the seat switch is released and the parking brake is applied The LED 2 in the push button for the parking brake lights up continuously The electric parking brake is applied automat ically in the fol...

Страница 134: ...ble for the parking brake the parking brake is not always fully applied However under the following circumstances the parking brake is always fully applied The truck is stationary on a slope and can roll away easily The parking brake is automatically applied fully The driver wishes to fully apply parking brake and does so by pressing the push button for the parking brake The driver switches off th...

Страница 135: ...ton The message RELEASE PARKING BRAKE appears in the display Releasing the electric parking brake after the truck has been switched on 6210_003 050_V4 2 1 The parking brake cannot be released by pressing the accelerator pedal immediately after switching on the truck The electric parking brake must be released using the push button 1 The parking brake is then released as normal during operation by ...

Страница 136: ...rake manually Press push button 1 The parking brake will make a noise when it is applied and the LED 2 lights up continuously The parking brake is applied automatically 6311_003 031_en_V2 If the electric parking brake is applied the message PARKING BRAKE ACTIVE ap pears in the display for 5 seconds 124 170525 EN 10 2016 ...

Страница 137: ...oving Actuation by the driver Press push button 1 The truck is braked moderately Depending on the situation driving is possible again after the button has been released If the truck is at a standstill you will hear the parking brake engage and the LED 2 illuminates with a steady light Actuation triggered automatically Cause Effect When the driver leaves the driver s seat After a short wait the tru...

Страница 138: ...when the parking brake is not applied This function is active in the following situati ons The electric parking brake has not been applied The electric parking brake has been applied but has not been applied correctly as a result of a malfunction In both cases the function intervenes as follows If the driver tries to switch off the truck when the parking brake is not applied or the parking brake i...

Страница 139: ...nually See the chapter entitled Emergency operation of the electric parking brake If necessary use wheel chocks to prevent the truck from rolling away Have the parking brake repaired by an authori sed service centre NOTE If it is necessary to switch off a truck with a faulty parking brake see the chapter entitled Switching off a truck with a faulty electrical parking brake It is essential that whe...

Страница 140: ...e truck if it has a defective steering system Steer the truck by turning the steering wheel 1 accordingly Turning the steering wheel in the direction of arrow A steers the truck in drive direction A Turning the steering wheel in the direction of arrow B steers the truck in drive direction B For turning radius information see Chap ter Technical data P 377 128 170525 EN 10 2016 ...

Страница 141: ...nction there still is a risk of tipping Before using this function familiarise yourself with the change to the driving and steering characteristics of the truck DANGER Increased risk of tipping if the Curve Speed Control function is disabled If the controller fails while the truck is in motion or if the controller is disabled the truck will no longer automatically brake when steering Do not turn o...

Страница 142: ... means that the load cannot be lifted above a preset height This function uses a sensor that is welded on at the factory at the required lift mast limit height Once attached the height cannot be easily changed Application If the ceiling of the building is lower than the maximum lift height of the truck this variant can prevent the lift mast from accidentally hitting the ceiling which can result in...

Страница 143: ...den and a load can be lifted to the truck s maximum lift height To switch the automatic lift cut out back on Press the F1 1 button again Lift mast vertical position variant Description If the truck is equipped with the lift mast vertical position comfort feature variant the driver can put down goods such as paper rolls vertically with precision and thus avoid damage when unloading The tilt cylinde...

Страница 144: ...ture consists of the following individual functions Display of the lift mast vertical position Automatic approach towards the lift mast vertical position Gentle running in to the end stops F1 F1 F2 F2 F1 F2 6210_003 092 1 2 4 5 3 The lift mast vertical position comfort feature is only available as a variant if the truck is equipped with one of the following operating devices Double mini lever 1 Tr...

Страница 145: ...Tilt the lift mast forwards using the corre sponding operating device The lift mast stops automatically as soon as the prese lected setting is reached for the lift mast vertical position If the comfort feature is switched off the lift mast tilts forwards past the lift mast vertical position without stopping If the lift mast is tilted backwards it moves past the lift mast vertical position without ...

Страница 146: ...forwards and stops as soon as the vertical position is reached The arrow above the bar shown on the screen of the display and operating unit represents the lift mast vertical position Tilting the lift mast forwards beyond the vertical position Release the operating device for tilting and actuate again The lift mast is tilted beyond the vertical position up to the end stop The current mast tilt is ...

Страница 147: ...d frequently the lift mast vertical position should be calibrated 6210_003 070_en_V2 1 2 3 Calibrating the lift mast vertical position Set the lift mast to the required position Press and hold the button 1 for the lift mast vertical position for at least five seconds The message VERTICAL POSITION will appear on the display Storing the mast position Press the drive program selection button 3 The cur...

Страница 148: ...ast or load may be higher than the fork carriage Note the heights of ceilings and entrances 6210_810 002 2 3 Hi Lo lift mast variant During lifting the inner lift cylinder moves up to free lift 3 and then the outer lift cylinders raise the inner lift mast up to the max height 2 NOTE When lifting above the free lift the fork car riage always remains at the upper edge of the extending lift mast DANG...

Страница 149: ...equence may occur i e the inner lift mast may extend before the free lift is complete As a result the overall height is exceeded and damage may occur in passageways or from low ceilings An incorrect extension sequence may for instance result from The hydraulic oil temperature being too low Blocking of the fork carriage in the inner lift mast Blocking of the free lift cylinder Blocking of the chain...

Страница 150: ...on If the fork carriage rollers in the lift mast become blocked due to contamination lift the fork carriage until the chains are under tension again Remove the contamination before resuming work WARNING Risk of injury Observe the safety regulations for working on the lift mast see the chapter entitled Working at the front of the truck Lifting system operating devices The operation of the lifting s...

Страница 151: ... stands up from the driver s seat or exits the truck All hydraulic functions are disabled in this case Lift the load Lower the load Tilt the lift mast Auxiliary hydraulic functions To ensure that the hydraulics blocking function does not lock as well the operating device must be in the neutral position for the Lifting function Enabling the hydraulic blocking function The hydraulic blocking functio...

Страница 152: ...tion has been triggered If the truck hydraulics are disabled by the ex haust valve of the hydraulic blocking function either permanently or due to a technical fault it is possible to lower a raised load at the valve block See the chapter entitled Emergency lowering 140 170525 EN 10 2016 ...

Страница 153: ...ting system from the driver s seat Lifting lowering the fork carriage To lift fork carriage Move the lift lower operating lever 1 in the direction of the arrow B To lower fork carriage Move the lift lower operating lever 1 in the direction of the arrow A Tilting the lift mast To tilt the lift mast forwards Move the tilt operating lever 2 in the direction of the arrow C To tilt the lift mast backwa...

Страница 154: ...erate the lifting system from the driver s seat Lifting lowering the fork carriage To lift fork carriage Move the lift mast 360 lever 1 in the direction of arrow B To lower fork carriage Move the lift mast 360 lever 1 in the direction of arrow A Tilting the lift mast To tilt the lift mast forwards Move the lift mast 360 lever 1 in the direction of arrow C To tilt the lift mast backwards Move the l...

Страница 155: ...te the lifting system from the driver s seat Lifting lowering the fork carriage To lift fork carriage Move the lift mast 360 lever 1 in the direction of arrow B To lower fork carriage Move the lift mast 360 lever 1 in the direction of arrow A Tilting the lift mast To tilt the lift mast forwards Move the lift mast 360 lever 1 in the direction of arrow C To tilt the lift mast backwards Move the lift...

Страница 156: ...em from the driver s seat Tilting the lift mast To tilt the lift mast forwards Move the lift mast operating lever 1 in the direction of the arrow A To tilt the lift mast backwards Move the lift mast operating lever 1 in the direction of the arrow B Lifting lowering the fork carriage To lift fork carriage Move the lift lower operating lever 2 in the direction of arrow D To lower fork carriage Move ...

Страница 157: ... regulations for handling loads Only operate the lifting system from the driver s seat 6210_003 089 1 A B Lifting lowering the fork carriage To lift the fork carriage Pull the joystick 4Plus 1 backwards B To lower the fork carriage Push the joystick 4Plus 1 forwards A 6210_003 090 D C 2 Tilting the lift mast To tilt the lift mast forwards Tilt the horizontal rocker button 2 to the left C To tilt t...

Страница 158: ...o move the fork carriage to the left Push the joystick 4Plus 1 to the left E To move the fork carriage to the right Push the joystick 4Plus 1 to the right F NOTE The symbols on the joystick 4Plus indicate the direction of movement of the lift mast or the fork carriage 146 170525 EN 10 2016 ...

Страница 159: ...or handling loads Only operate the lifting system from the driver s seat Lifting lowering the fork carriage To lift fork carriage Pull the lift lower operating lever 1 backwards To lower fork carriage Push the lift lower operating lever 1 forwards Tilting the lift mast To tilt the lift mast forwards Push the tilt operating lever 2 forwards To tilt the lift mast backwards Pull the tilt operating le...

Страница 160: ... the fork is a danger area Always wear protective gloves and safety footwear when changing the fork arms Ensure that no one stands in the danger area Do not pull on the fork arms The fork arms must always be carried by two people if necessary use a hoist NOTE For installation and removal a transport pallet is recommended for supporting the fork arms The pallet size depends on the fork arm size use...

Страница 161: ...rriage on a pallet Push the fork arms onto the fork carriage from the outside towards the centre Pull the locking lever 1 upwards and push the fork arms into the required position Ensure that the locking lever snaps into place Fit and tighten the locking screw 2 DANGER There is a risk to life caused by a falling load or fork Tighten the locking screw after every fork replacement It is not permitte...

Страница 162: ...nd safety footwear WARNING There is a risk of tipping The weight and dimensions of the fork extension affect the stability of the truck The permissible weights stated on the capacity rating plate must be reduced in proportion to the actual load distance Observe load capacity see the Before picking up a load chapter NOTE If the truck is equipped with the load measu rement comfort feature a zero adj...

Страница 163: ...nsion is on the fork arm Always secure the fork extension with a securing bolt Always secure the securing bolt with a linch pin Remove the linch pin 3 from the securing bolt 2 Remove the securing bolt from the fork extension 1 Push the fork extension onto the fork arms until it is flush with the fork back Insert the securing bolts located behind the fork back fully into the fork extension Insert th...

Страница 164: ...ork extension variant cannot be secured against slipping Do not use a fork extension variant WARNING Risk of accident from the truck tipping over When driving the centre of gravity of the load 2 must not be higher than 600 mm above the ground The truck may tip forwards when driving or braking Only drive with a load centre of gravity up to a max of 600 mm above the ground NOTE If the truck is equip...

Страница 165: ...reversible fork arms The mast is lifted and tilted in the same manner Only work in reverse operation using reversible fork arms Do not use a fork extension variant If the load measurement comfort feature is available perform a zero adjustment of the load measurement To drive raise the load centre of gravity 2 to a max of 600 mm above the ground Observe the information in the section entitled Trans...

Страница 166: ...spended loads or raised fork arms Never exceed the maximum load indicated on the capacity rating plate Otherwise stability cannot be guaranteed DANGER Risk of accident from falling or crushing Do not step onto the forks Do not lift people Never grab or climb on moving parts of the truck DANGER Risk of accident from a falling load When transporting small items attach a load safety guard variant to ...

Страница 167: ...f applicable The position of the capacity rating plate can be found in the chapter entitled Identification points WARNING The figures show examples Only the capacity rating plates on the truck are valid The attachment of additional weights to increase load capacity is prohibited DANGER Risk to life from the truck losing stability Never exceed the maximum loads shown These values apply to compact and...

Страница 168: ...eeded Observe the special capacity rating plate infor mation shown on the truck and the attachment Load measurement variant Description Knowing the weight of the load to be trans ported gives the driver greater security If the truck is equipped with the load measure ment variant comfort feature the weight of the lifted load can be measured and shown in the display and operating unit Load measureme...

Страница 169: ...p loads CAUTION If the weight determined by a load measurement exceeds the permissible residual load capacity of the truck the truck cannot be operated safely Set down and reduce load immediately If necessary use another truck with sufficient load bearing capacity NOTE Accurate load measurement is only possible under the following conditions The hydraulic oil is at normal operating temperature The ...

Страница 170: ...highlighted in black NOTE If the truck is equipped with mini levers or fingertip operation the F1 button can also be pressed as an alternative NOTE During the following process the fork carriage must be lowered slightly and then stopped abruptly While doing so the fork must not touch the ground otherwise the load measurement will not be accurate To stop the lowering procedure quickly release the op...

Страница 171: ...ficiently far apart and are positioned as far as possible under the load If possible the load should rest on the back of the fork The load must not protrude too far over the fork tips nor should the fork tips protrude too far out from the load Loads are to be picked up and transported as close to the middle as possible DANGER Risk of accident from a falling load When transporting small items attach...

Страница 172: ...ck its working equipment its load carrying equipment e g attachments or the load Also included are the areas where loads could fall or working equipment could fall or be lowered DANGER Risk of injury Do not step on the fork DANGER Risk of injury Do not step under the raised forks DANGER People may be injured in the danger area of the truck The danger area of the truck must be completely clear of a...

Страница 173: ...ly and carefully positioned loads may be transported 6210_001 007 Transporting suspended loads Before transporting suspended loads con sult the national regulatory authorities in Germany the employer s liability insurance associations National regulations may place restrictions on these operations Contact the relevant authorities DANGER Suspended loads that begin to swing can result in the followi...

Страница 174: ...able so that accompa nying persons can guide suspended loads and prevent the loads from swinging Take particular care to ensure that there is no one in the drive direction in the driving lane If despite this the load begins to swing ensure that no person is placed at risk DANGER Risk of accidents When transporting hanging loads never perform or end driving and load movements abruptly Never drive o...

Страница 175: ...annot move or fall Store the load so that the specified aisle width is not reduced by protruding parts 6210_800 005 Approach the racking carefully brake gently and stop just in front of the racking 6210_800 006 Position the forks Set lift mast to vertical Lift the fork carriage to the stacking height CAUTION Component damage possible When inserting the fork into the racking ensure that the racking ...

Страница 176: ...800 008 Lift the fork carriage until the load is resting entirely on the forks DANGER Risk of accidents Beware of any people in the danger area CAUTION Component damage possible Ensure that the roadway behind you is clear Move backwards carefully and slowly until the load is clear of the racking Brake gently DANGER Never tilt the lift mast with a raised load due to the risk of tipping Lower the lo...

Страница 177: ...Operation 5 Working with loads 5060_003 102 Lower the load while maintaining ground clearance 5060_003 101 Tilt the lift mast backwards The load can be transported 170525 EN 10 2016 165 ...

Страница 178: ...cident Driving with a raised load and the lift mast tilted forward is not permitted Only drive with the load lowered Lower the load until ground clearance is reached not over 300 mm Only drive with the lift mast tilted backwards 6210_800 013 Drive slowly and carefully round corners NOTE Observe the information in the chapter entitled Steering Always accelerate and brake gently NOTE Observe the inf...

Страница 179: ...e lift mast forwards with a raised lifting accessory when it is directly above the stack When the lift mast is tilted forward take particular care to ensure that the truck does not tip forwards and that the load does not slip WARNING Risk of accident from a falling load If the fork or the load remains suspended during lowering the load may fall When removing from stock move the truck far enough ba...

Страница 180: ...o vertical Lift the load to the stacking height Drive the truck towards the rack carefully 6210_800 016 Lower the load until it rests securely on the rack DANGER Risk of accident Beware of any people in the danger area Ensure that the roadway behind you is clear Move the truck back until the fork arms can be lowered without touching the stack Lower the fork while maintaining ground clearance Tilt ...

Страница 181: ...rmitted to put items into stock or to remove them from stock while on an ascending or descending slope The forklift truck should not be parked on a slope In case of emergency secure the truck with chocks 5060_003 071 Driving on lifts The driver is only allowed to use this truck on lifts with a sufficient load capacity and for which the operating company see Chap ter Definition of responsible persons...

Страница 182: ...itch ing it off P 5 321 Determine the unit weights by reading the truck nameplate and if necessary the attachment variant nameplate and if necessary by weighing the load to be lifted Add the determined unit weights to obtain the actual total weight of the truck Tare weight 1 Max permissible battery weight 2 Ballast weight variant 3 Net weight of attachment variant Weight of the load to be lifted 1...

Страница 183: ...d can support the load of the truck Type Modèle Typ Serial no No de série Serien Nr year année Baujahr Rated capacity Capacité nominale Nenn Tragfähigkeit Battery voltage Tension batterie Batteriespannung Rated drive power Puissance motr nom Nenn Antriebsleist Unladen mass Masse à vide Leergewicht max min see Operating instructions voir Mode d emploi siehe Betriebsanleitung kg kg kg kg kg kW V 1 3...

Страница 184: ...ion of the attachment and the visibility from the driver s position with and without a load must be checked by a competent person If the visibility is deemed insufficient visual aids such as mirrors a camera monitor system etc must be used In addition it is essential that the warnings below are observed CAUTION Attachments must be CE certified If the truck is not fitted with an attachment specific res...

Страница 185: ...fore installation Never grab or climb on moving parts of the truck 7090_900 001 Hydraulic connection Before installing the attachment release the pressure from the hydraulic system CAUTION Risk of damage to components Open connections of plug connectors can become dirty The plug connectors can become stiff and dirt can enter the hydraulic system Once the attachment has been disassembled attach the...

Страница 186: ...stalled by au thorised personnel in accordance with the information provided by the manufacturer and supplier of the attachments After each instal lation the attachment must be checked for correct function prior to initial commissioning NOTE The pressure release procedure is dependent on the operating devices for controlling the hydraulic functions see the chapter entitled Lifting system operating...

Страница 187: ...rd warning system variant NOTE Press the button for switching on the hazard warning system even if the truck is not equip ped with a hazard warning system Switching on the hazard warning system prevents the electrical system from being switched off even if the key switch is subsequently swit ched off Switch off the key switch Actuate the operating lever 1 for control ling the hydraulic functions r...

Страница 188: ...ctive operating devices see the relevant sections in this chapter WARNING Use of attachments can give rise to additional hazards such as a change in the centre of gravity additional danger areas etc Attachments must only be used for their intended purpose as described in the relevant operating instructions Drivers must be taught how to operate the attachments Loads may only be picked up and transp...

Страница 189: ... the pictograms on the operating devices NOTE All the attachments described fall into the category of equipment variants Please see the respective operating instructions for an exact description of the respective movements actions of the attachment fitted 170525 EN 10 2016 177 ...

Страница 190: ...er part of the pictogram 7311_862 001 2 3 6 4 7 9 10 5 8 Note the following attachment functions and pictograms 2 Move side shift frame or fork for wards backwards 3 Move sideshift to the left right 4 Adjust fork arms open close 5 Swivel lift mast or fork to the left right 6 Release clamp load retainer 7 Push off pull in load 8 Open close clamps 9 Turn to the left right 10 Tip shovel over tip shov...

Страница 191: ...and bottom parts of the pictograms on the operating levers always show the function that is activated by that lever The top part of the pictogram shows that the attachment is equipped with the 5th function The meanings are as follows Move the operating lever forwards The attachment moves in the direction shown in the centre part of the pictogram Move the operating lever backwards The attachment mo...

Страница 192: ...load retainer 6 Push off pull in load 7 Turn to the left right 8 Tip shovel over tip shovel back 9 Swivel lift mast or fork to the left right 10 Open close clamps NOTE The pictograms shown correspond to the attachments fitted to this truck at the factory If an attachment with other functions is fitted the pictograms must be checked for the correct representation and changed if necessary Contact the ...

Страница 193: ...llowing Move the attachments 1 cross lever in the direction of the arrow A The attachment moves in accordance with the pictogram in position A Move the attachments 1 cross lever in the direction of the arrow B The attachment moves in accordance with the pictogram in position B Move the attachments 1 cross lever in the direction of the arrow C The attachment moves in accordance with the pictogram i...

Страница 194: ... or fork to the left 10 Swivel lift mast or fork to the right 11 Release load retainer 12 Clamp load retainer 13 Push off the load 14 Pull in the load 15 Open clamps 16 Close clamps 17 Rotate to the left 18 Rotate to the right 19 Tip shovel over 20 Tip shovel back NOTE The pictograms shown correspond to the attachments fitted to this truck at the factory If an attachment with other functions is fitt...

Страница 195: ...e 5th hydraulic function via the cross lever The pictograms on the attachments cross lever show the respective functions that are activated by this lever This essentially involves the following Actuate the 5th function 1 function key and move the attachments 2 cross lever in the direction of arrow E The attachment moves in accordance with the pictogram in position E Actuate the 5th function functi...

Страница 196: ... or fork to the left 10 Swivel lift mast or fork to the right 11 Release load retainer 12 Clamp load retainer 13 Push off the load 14 Pull in the load 15 Open clamps 16 Close clamps 17 Rotate to the left 18 Rotate to the right 19 Tip shovel over 20 Tip shovel back NOTE The pictograms shown correspond to the attachments fitted to this truck at the factory If an attachment with other functions is fitt...

Страница 197: ...ivated by these levers This essentially involves the following Move the operating lever 1 towards A The attachment moves in accordance with the pictogram in position A Move the operating lever 1 towards B The attachment moves in accordance with the pictogram in position B Move the operating lever 2 towards C The attachment moves in accordance with the pictogram in position C Move the operating lev...

Страница 198: ... or fork to the left 10 Swivel lift mast or fork to the right 11 Release load retainer 12 Clamp load retainer 13 Push off the load 14 Pull in the load 15 Open clamps 16 Close clamps 17 Rotate to the left 18 Rotate to the right 19 Tip shovel over 20 Tip shovel back NOTE The pictograms shown correspond to the attachments fitted to this truck at the factory If an attachment with other functions is fitt...

Страница 199: ...nction key 3 which then allows the 5th hydraulic function to be controlled with the operating lever 1 The pictograms on the operating levers show the respective functions that are activated by these levers The meanings are as follows Actuate the 5th function function key 3 and move operating lever 1 towards E The attachment moves in accordance with the pictogram in position E Actuate the 5th funct...

Страница 200: ... arms close 3 Rotate to the left 4 Rotate to the right NOTE The pictograms shown correspond to the attachments fitted to this truck at the factory If an attachment with other functions is fitted the pictograms must be checked for the correct representation and changed if necessary Contact the authorised service centre if required 188 170525 EN 10 2016 ...

Страница 201: ...unction that is activated by these levers This essentially involves the following Move the operating lever 1 towards A The attachment moves in the direction shown in pictogram A Move the operating lever 1 towards B The attachment moves in the direction shown in pictogram B Move the operating lever 2 towards C The attachment moves in the direction shown in pictogram C Move the operating lever 2 tow...

Страница 202: ... or fork to the left 10 Swivel lift mast or fork to the right 11 Release load retainer 12 Clamp load retainer 13 Push off the load 14 Pull in the load 15 Open clamps 16 Close clamps 17 Rotate to the left 18 Rotate to the right 19 Tip shovel over 20 Tip shovel back NOTE The pictograms shown correspond to the attachments fitted to this truck at the factory If an attachment with other functions is fitt...

Страница 203: ... key 5 which then allows the 5th hydraulic function to be controlled using the operating lever 3 The pictograms on the operating levers show the respective functions that are activated by these levers The meanings are as follows Actuate the 5th function function key 5 and move operating lever 3 towards E The attachment moves in accordance with the pictogram in position E Actuate the 5th function f...

Страница 204: ... arms close 3 Rotate to the left 4 Rotate to the right NOTE The pictograms shown correspond to the attachments fitted to this truck at the factory If an attachment with other functions is fitted the pictograms must be checked for the correct representation and changed if necessary Contact the authorised service centre if required 192 170525 EN 10 2016 ...

Страница 205: ...ograms Operating device Function of the attachment 1 Joystick 4Plus Move sideshift to the left right 2 Joystick 4Plus or slider Adjust fork arms open close 3 Slider Move reach frame or fork carriage forwards backwards 4 Joystick 4Plus or slider Rotate attachment left right 5 Slider Tip shovel over tip shovel back NOTE The pictograms on the joystick 4Plus are attached according to the attachments fi...

Страница 206: ...h function 2 1 6210_003 086 For attachments that are controlled using the 5th hydraulic function the procedures for operation are as follows Press and hold shift key F 1 on the joystick 4Plus Simultaneously actuate the horizontal rocker switch 2 in the direction shown in the pictogram so that the attachment moves accordingly NOTE The pictograms on the joystick 4Plus are attached according to the a...

Страница 207: ... of the pictogram 6210_003 031 2 3 6 4 7 9 10 5 8 Note the following attachment functions and pictograms 2 Move side shift frame or forks forwards backwards 3 Move sideshift to the left to the right 4 Adjust fork arms open close 5 Swivel lift mast or forks to the left to the right 6 Release clamp load retainer 7 Push off pull in load 8 Open close clamps 9 Turn to the left to the right 10 Tip shove...

Страница 208: ...e the corresponding operating lever controls the 5th function The pictogram 3 behind the operating lever shows in the upper and lower parts the function that is activated with this lever The meanings are as follows Move operating lever forwards The attachment moves in the direction of movement shown in the upper part of the pictogram Move operating lever back The attachment moves in the direction ...

Страница 209: ...hed to the 3rd operating lever see adhesive label 6 F1 F1 F2 F2 6210_003 034 7 8 9 Press the function key 7 NOTE The arrow 8 under the function key indicates which operating lever is equipped with the 5th function The 5th function is switched to the 4th operating lever see adhesive label 9 NOTE The movement action of this 5th function can be found in the operating instructions of the fitted attachm...

Страница 210: ...cked for the correct representation and changed if necessary Contact the authorised service centre if required Clamp locking mechanism variant This truck can be fitted with a clamp locking mechanism as a variant This prevents the clamp from opening unintentionally if the operating function is inadvertently triggered DANGER There is a risk of fatal injury from falling loads if the correct function o...

Страница 211: ... ments using multi lever operation and the 5th function F1 F2 6210_003 077 1 2 Double mini lever To release the clamp locking mechanism push the operating lever 1 forwards The LED for button F2 2 lights up as long as the clamp locking mechanism is released NOTE The hydraulic function for opening the clamp is available for one second after the clamp locking mechanism is released After one second th...

Страница 212: ...the clamp pull the operating lever 1 back To operate clamping attachments see the section entitled Controlling attachments using the triple mini lever and the 5th function 6210_003 079 2 1 Quadruple mini lever To release the clamp locking mechanism push the operating lever 1 forwards The LED for button F2 2 lights up as long as the clamp locking mechanism is released NOTE The hydraulic function fo...

Страница 213: ...the handling of the attachments WARNING Risk of accidents Loads may only be picked up and transported with attachments if they are securely attached Where necessary loads should also be secured against slipping rolling falling over swinging or tipping over Note that any change to the position of the load s centre of gravity will affect the stability of the forklift truck Check the capacity rating ...

Страница 214: ... driving lights press the button 1 again The driving lights go out NOTE On the version with StVZO German Road Traffic Licensing Regulations equipment the parking light and the licence plate lamp can be switched on without the key switch being switched on Working spotlights Blue Q_008_V3 1 To switch on the working spotlights front and rear press the button 1 The working spotlights light up To switch...

Страница 215: ...ed on NOTE Pushing the button again switches the rotating beacon off again 5060_003 011_V2 1 2 Switching the hazard warning system on and off Push the button 1 to switch on the hazard warning system All direction indicators and indicator lights 2 flash NOTE Pushing the button again switches the hazard warning system off again NOTE The hazard warning system can also be switched on without the key sw...

Страница 216: ... on the direction indicators by moving the corresponding drive direction turn indicator cross lever 1 to the left or right 2 3 5060_003 012_V2 The direction indicators and the correspon ding direction indicator lights 2 or 3 flash Switch off the direction indicators by moving the cross lever to the centre position 204 170525 EN 10 2016 ...

Страница 217: ...ators by moving the corresponding turn indicator button 1 to the left or to the right Turn off the direction indicators by pushing the other turn indicator button Mini console version 5060_003 046 1 Switch on the direction indicators by moving the turn indicator switch 1 to the left or to the right 170525 EN 10 2016 205 ...

Страница 218: ... and a lower working spotlight 3 The upper working spotlight illuminates the working area at great lift heights the lower working spotlight illuminates the working area directly in front of the truck Depending on the equipment the upper working spotlights can be switched on off automatically or manually Switching the upper working spotlights on off manually NOTE The upper working spotlights can be...

Страница 219: ...t two seconds NOTE In these two seconds a maximum of two lifts can take place so that the working spotlights do not switch on each time a precise adjust ment is made If more lifts are carried out during this time the upper working spotlights will remain switched off NOTE The upper working spotlights are switched off automatically when the truck is driven for longer than one second and faster than ...

Страница 220: ...rm the relevant service centre Operating the windscreen wiper washer 7312_003 171_V3 1 2 Push button 1 to actuate the front wind screen wiper washer variant Push button 2 to actuate the rear wind screen wiper washer variant Repeated pressing of the respective button switches between the operating stages in the sequence specified shown below Button actuation Operating stage Off 1st time on 2nd time ...

Страница 221: ... sensor records data in the event of an accident This data can be electronically read out and evaluated For further informa tion contact your STILL service centre Driver restraint systems variants Different driver restraint systems are available as variants for this truck The description and operation for these systems can be found in the separate Driver restraint systems operating instructions 17...

Страница 222: ... in the engaged position Opening the cab door from the outside 6321_003 061_V3 4 5 2 1 3 Insert the key in the door lock 5 unlock and remove the key Pull the door handle 4 and release the door lock Open the cab door 3 by pulling outwards Opening the cab door from the inside Take hold of the handlebar 2 and latch 1 Press the latch in and push the cab door outwards 210 170525 EN 10 2016 ...

Страница 223: ...de window Press the handle 3 together and slide the rear side window 2 forwards Opening the front side window The front side window 1 can be opened in the same way as the rear side window 6321_003 141_V2 3 1 2 Closing the side windows WARNING There is a risk of crushing between the window frame and side window from the side windows slipping inadvertently during travel Make sure that the handle eng...

Страница 224: ...ation 7312_003 013 7 8 Operating the interior lighting 6311_003 013_V2 2 1 Switch the interior lighting 7 on or off using the switch 8 or button 1 The interior lighting symbol 2 appears in the display 212 170525 EN 10 2016 ...

Страница 225: ...1 and the loudspeakers 2 are an equipment variant If the truck is equipped with a radio and loudspeakers they are integrated into the roof lining The description and operation can be found in the separate operating instructions for the radio WARNING The driver s attention is adversely affected by operating the radio or listening to excessive volume while driving or handling loads There is a risk o...

Страница 226: ... cans or gas cartridges to the flow of hot air 0 1 2 3 0 1 2 3 1 2 6210_345 001 Rotate the blower switch 1 clockwise to the desired blower position The blower is in operation and runs at the speed level selected by the blower switch 1 DANGER The heating system overheats if the hot air cannot escape from it There is a risk of fire The heating system may only be switched on if the blower is running an...

Страница 227: ...ystem is in operation The air is heated up to the heating level set by the heating level switch 2 Selecting blower settings Setting blower to low Set blower switch 1 to level 1 Setting blower to medium Set blower switch 1 to level 2 Setting blower to high Set blower switch 1 to level 3 Setting heating levels Set heating system to low 50 Set heating level switch 2 to level 1 Set heating system to m...

Страница 228: ... first Only turn the blower off when the heating system is switched off Rotate the heating level switch 2 anticlock wise to heating level 0 The heating system is out of order Rotate the blower switch 1 anticlockwise to blower position 0 The blower is out of order Change fuses DANGER Using the wrong fuses can result in short circuits There is a risk of fire Only use fuses with the prescri bed nominal...

Страница 229: ...dow 1 is an equipment variant To unlock and open the roof window rotate the handle 2 in an anti clockwise direction and use it to push the roof window upwards The roof window is held in the open position by means of gas springs 3 To close and lock the roof window pull the roof window downwards using the handle and rotate the handle in a clockwise direction 6210_003 107 2 1 Clipboard variant The cl...

Страница 230: ...e Overloading can lead to component damage on the truck The sum of the actual towed load and the actual load on the fork must not exceed the rated capacity If the existing towed load corresponds to the rated capacity of the truck no load may be transported on the fork at the same time The load can be distributed between the fork and the trailer Check the load distribution and adjust it to correspo...

Страница 231: ...rating time If the truck is to be used for towing on a more regular basis the manufacturer should be consulted Coupling pin in the counterweight Coupling the trailer DANGER If you briefly leave the truck to couple or uncouple the trailer there is a risk to life caused by the truck rolling away and running you over Apply the parking brake Lower the forks to the ground Switch off the key switch and r...

Страница 232: ...ecuring bush are lost or destroyed during towing the trailer will work loose and become uncontrollable This causes a risk of accident Use only original coupling pins that have been checked carefully Ensure that the coupling pin is correctly inserted and secured Insert the coupling pin into the counter weight press downwards against the spring pressure and turn 90 the coupling pin is locked in this...

Страница 233: ... between the truck and trailer DANGER Never jack up the truck on the tow coupling or use it for crane lifting The tow coupling is not designed for this and could be deformed or damaged This could cause the truck to fall with potentially fatal consequences Use the tow coupling only for towing For jacking up and crane loading use only the designated lifting points DANGER The tow coupling is not desi...

Страница 234: ...g due to its overhang The tow coupling can damage the racking or the tow coupling itself when manoeuvring If there is a collision with the tow coupling test the tow coupling for damage such as cracks A damaged tow coupling must not be used again Always manoeuvre carefully and with sufficient room In the case of a collision test the tow coupling for damage Replace tow coupling if damaged if necessar...

Страница 235: ...for a tow bar eye in accordance with DIN 74054 bore diameter 40 mm Take measures to prevent the trailer from rolling away e g use wheel chocks 1 Adjust the tow bar eye of the tiller so that it is at the centre of the towing jaws 3 7321_003 064 2 Pull out the safety handle 3 Push the hand lever 2 upwards DANGER Persons may become trapped between the truck and trailer When hooking up ensure that no ...

Страница 236: ... RO 243 by hand DANGER Risk of injury from hand becoming trapped Do not reach into the coupling pin area If for example a tow rope is to be secured in the tow coupling use only a suitable device to close the tow coupling e g assembly lever Use a suitable device e g assembly lever to push the coupling pin up The coupling pin is released from the latch and the tow coupling then closes automatically ...

Страница 237: ...ER People can become trapped between the truck and trailer When hooking up ensure that no one is between the truck and trailer CAUTION When being coupled the tow bar eye must engage in the middle of the coupling jaw Failure to follow these instructions could result in damage to the coupling jaw or to the tow bar eye Ensure that the tow bar eye enters the coupling jaw centrally Move the truck back ...

Страница 238: ... Remove any items used to prevent the trailer from rolling away Tow the trailer Closing model RO 244 A by hand DANGER Risk of injury from hand becoming trapped Do not reach into the coupling pin area If for example a tow rope is to be secured in the tow coupling only actuate the tow coupling via the closing lever 1 Press the closing lever 1 downwards as far as it will go The tow coupling is closed...

Страница 239: ...nd lever 5 upwards The tow coupling is opened DANGER People can become trapped between the truck and trailer When hooking up ensure that no one is between the truck and trailer Slowly move the truck back DANGER If the coupling pin drops out during towing the trailer will work loose and can no longer be controlled There is a risk of accident A protruding safety handle means that the tow bar eye has...

Страница 240: ...RO 841 is intended for a tow bar eye in accordance with DIN 74054 bore diameter 40 mm Take measures to prevent the trailer from rolling away e g use wheel chocks Push the hand lever 7 upwards until it snaps into place DANGER People may be trapped between truck and trailer When hooking up ensure that no one is between the truck and trailer CAUTION When being coupled the tow bar eye must engage in t...

Страница 241: ...wly drive the truck forwards until the tow bar eye and towing jaws are disconnected Close the tow coupling 7090_900 011 Towing trailers Drivers who are towing a trailer for the first time must practise driving with a trailer in a suitable area When passing through narrow road areas entrances gates etc observe the dimen sions of the trailer and load When towing multiple trailers ensure a sufficient m...

Страница 242: ...5 Operation Trailer operation NOTE Please observe the definition of the following responsible persons operating company and driver 230 170525 EN 10 2016 ...

Страница 243: ...ipment Furthermore the display operating unit is heated As another variant the truck can be equipped with a driver s cab with a heating system Types of application There are two different types of cold store application for the truck distinguished by two different temperature ranges Type of application 1 Constant deployment in temperature range 5 C brief deployment down to 10 C 2 Alternating betwe...

Страница 244: ...ch time as the condensation water has drained off and the truck has dried off Depending on the weather this will take at least 30 minutes WARNING Risk of injury If water condensation freezes in the cold store do not try to free blocked parts with your hands Drive the truck for approx 5 minutes and actuate the brake several times to ensure operational safety Actuate all hydraulic lifting functions ...

Страница 245: ...es At temperatures below 10 C the battery cannot be fully charged with the usual charging parameters Charge the battery fully before each shift During the gassing phase always top up with distilled water The distilled water will mix with the battery acid so that it does not freeze Water top up systems must not be used at temperatures below 0 C as this could cause the systems and the water present ...

Страница 246: ...w long the truck can be driven if the operating situation of the last 30 minutes is maintained 2 Drive program Displays the number of the selected drive program To change the drive program refer to the section entitled Setting the drive program The Blue Q icon appears when the Blue Q function is switched on refer to the section entitled Blue Q efficiency mode 3 Power rating The power rating indicat...

Страница 247: ...display must be avoided Cease work with the truck immediately Charge the batteries immediately NOTE To prevent deep discharge certain restric tions variant can be activated e g slow lifting Consult the authorised service centre on this matter Power trends indicator Symbol Energy consumption trend Significant increase 50 Increase up to 50 Slight increase up to 30 No change Slight decrease up to 30 D...

Страница 248: ... in good time 7 Operating hours Displays the total operating hours completed by the truck The hour meter starts running as soon as the truck is driven or the working hydraulics are actuated 8 Total distance Displays the total distance driven in kilometres 9 Daily kilometres Displays the kilometres driven for the day NOTE Ask the authorised service centre about the speed driven indicator NOTE Have ...

Страница 249: ...e adjusted in the CONFIGU RATION menu Turn the key switch to position I Press the drive program button 1 and the menu change button 2 at the same time The display changes to the PASSWORD menu Press the return key 3 The display changes to the CONFIGURA TION menu The following settings are possible and can be found in the corresponding chapter Setting the date and time Resetting the daily kilometres...

Страница 250: ...e Battery charging Drive program Hour meter Odometer Daily hour meter Daily odometer Speed Steering angle Load Time Hydraulic system Exh gas purifier Coolant temperature Fuel level Blue Q Power rating average Power rating trend Symbols for warning messages Description Symbol Parking brake Actuate seat switch Safety belt Battery acid level Neutral warning message 238 170525 EN 10 2016 ...

Страница 251: ...ns For the auxiliary equipment the following symbols for the soft key functions are used on the left in the display Description Symbol Empty field No display General function key OFF General function key ON Rear working spotlight OFF Rear working spotlight ON Front working spotlight OFF Front working spotlight ON Windscreen heating OFF Windscreen heating ON Rear window heating OFF Rear window heati...

Страница 252: ... used on the left of the display Description Symbol Empty field No display ESC button to return to the main menu ENTER button to confirm OK button to confirm RES button to reset Button to return to the main menu Button to return to the previous edit field Scroll button to scroll up Scroll button to scroll down Scroll button to count up Scroll button to count down Status LEDs of the function keys for a...

Страница 253: ...ypad The available inputs and the positions of the keys are shown for inputting digits ESC and ENTER BQ_037 1 2 6 7 3 4 5 ESC Keys for the digits 1 to 7 and the ESC and ENTER keys for inputting the fleet manager password 1 2 6 7 3 4 5 8 9 0 BQ_038 Keys for digits 0 to 9 for inputting the driver PIN access code 170525 EN 10 2016 241 ...

Страница 254: ...ee levels Confirm the time set by pressing the Return key 4 Use the arrow key 3 to exit the menu and return to the next higher level NOTE The date is set in a similar manner 8 9 0 6 7 4 3 5 7312_003 055_en_V4 1 2 3 4 Resetting the daily kilometres and daily operating hours The daily number of kilometres and daily operating hours displays can be reset to zero Switch to the CONFIGURATION menu see Cha...

Страница 255: ...pressing Return key 4 The LANGUAGE menu appears Press drive program button 1 or menu change button 2 until the desired language appears in the display Confirm your selection by pressing the Return key 4 Use arrow key 3 to exit the menu and return to the next higher level Soft key button for operating various equipment variants There are two soft key columns available on the display operating unit W...

Страница 256: ...ey column The required soft keys are now active and the functions assigned to them can be switched on and off using the corresponding soft key buttons 2 NOTE In order to shift between the individual menus of the display operating unit press the Menu change button 1 for approx 1 second NOTE The functions of the two soft key columns depend on the individual equipment of the truck Therefore the soft ...

Страница 257: ...f up to approx 40 m lower speeds are reached than would be the case if the efficiency mode was not activated Blue Q has no influence on Maximum speed Climbing capability Traction Braking characteristics NOTE The Blue Q efficiency mode can be swit ched on and off in the STANDARD and FI XED FLEX operating modes If the FIXED operating mode is configured in the display operating unit the Blue Q button has...

Страница 258: ...ting X No shutdown for StVZO Road Traffic Licensing Regulations equipment Switching efficiency mode Blue Q on and off NOTE The Blue Q efficiency mode can be swit ched on and off in the STANDARD and FI XED FLEX operating modes If the FIXED operating mode is configured in the display operating unit the Blue Q button has no func tion and the Blue Q efficiency mode is swit ched on permanently For informati...

Страница 259: ... se lected to activate the Blue Q efficiency mode STANDARD Blue Q is turned off whenever the truck is commissioned The driver can use the Blue Q button to switch efficiency mode on and off at any time while the truck is being operated FIXED Blue Q is switched on permanently when ever the truck is commissioned and during truck operation The driver cannot turn effi ciency mode off FIXED FLEX Blue Q is ...

Страница 260: ...enu change button 2 until op tion BLUE Q CONFIGURATION appears Confirm your selection by pressing the Return key 4 The BLUE Q CONFIGURATION menu appears Press drive program button 1 or menu change button 2 until the desired effi ciency mode appears in the display Confirm the set efficiency mode with Return button 4 Use arrow key 3 to exit the menu and return to the next higher level 248 170525 EN 10 2...

Страница 261: ...ime according to the event In the case of successive events the respec tive messages are displayed one after another on the display After a few seconds the display will alternate between the last shown operating display and the message The frequency of alternation depends on the type of event If a message appears follow these operat ing instructions Once the event is remedied the message will disa...

Страница 262: ...celerator configuration is invalid Truck cannot be driven Notify your authorised service centre BRAKE SENSOR A3016 A3017 Sensor fault truck can only be driven at emergency mode speed Notify your authorised service centre CONFIGURATION A2111 A3801 A3812 Parameterisation error drive unit and hydraulic drive not functioning Notify your authorised service centre SEAT SWITCH A302 Seat switch has not bee...

Страница 263: ...annot be driven Notify your authorised service centre SURVEILLANCE A2801 A2802 A2808 A2809 A2810 A2815 Drive unit not functioning Release accelerator pedal If this error occurs sporadically it can be tolerated If the operational capacity is impaired notify your authorised service centre SURVEILLANCE A2803 A2806 Drive direction is set to neutral Reselect the drive direction If this error occurs spo...

Страница 264: ...ce centre BATTERY CHANGER A5931 Plausibility error with potentiometer for hydraulic battery carrier Notify your authorised service centre CONTROL UNIT A3305 CIO not functioning Notify your authorised service centre PARKING BRAKE OIL PRESSURE A3043 Parking brake oil pressure too low the drive unit is locked If this message remains permanently displayed notify your authorised service centre PARKING ...

Страница 265: ...s on the side facing downhill NOTE The truck is equipped with a negative spring operated brake Switching off the truck will block the multi disc brakes in the drive wheel units after a few minutes However the truck can still roll until the drive wheel units are blocked For this reason the parking brake must always be applied before you leave the truck If you park the truck without applying the par...

Страница 266: ...splay the truck will remain stationary The accelerator must be checked Notify the authorised service centre SWITCH OFF TRUCK message If the message SWITCH OFF THE TRUCK appears on the display the switching off of the truck is verified Press the corresponding softkey on the display and operating unit to switch off the truck or cancel the operation PARKING BRAKE ACTIVE message If the electric parking...

Страница 267: ...e safety risks Lower the load fully before leaving the truck 7312_003 071_en_V2 The fork is not lowered If the fork is above the height sensor the key switch is turned off and the seat vacated the LOWER FORKS message appears in the display variant An optional signal tone sounds Lower the fork to the ground The message LOWER FORKS disappears STEERING message If the STEERING message appears in the d...

Страница 268: ... VERTICAL POSITION appears on the display calibration of the vertical lift mast position has been activated Save the mast position or cancel the calibration 7312_003 072_en_V3 REFERENCE CYCLE message If the fork was lowered after the truck was switched off the control electronics do not know the position of the fork when the truck is restarted The truck will only travel at a reduced driving speed ...

Страница 269: ...nt ensures that if the seat belt is not being used or is being used incorrectly the truck will only drive slowly or optionally will not drive at all Depending on the configuration selected the working hydraulics functions lifting tilting are either available as normal slowed down or not available at all The SAFETY BELT message with the restric ted driving and lifting functions is triggered by the f...

Страница 270: ...ating unit to continue or to cancel the operation SEAT SWITCH message The truck is equipped with a seat switch If the SEAT SWITCH message appears the driving functions and the working hydraulics are blocked The SEAT SWITCH message is triggered by the following situations The seat switch is not actuated while the accelerator pedal or steering wheel is actuated The seat switch is not actuated while ...

Страница 271: ...r s seat and fasten the seat belt The truck can be driven again without restric tions 7325_003 054_en_V2 F1 F2 The seat switch is not actuated while the operating device for the working hydraulics is actuated An operating device for the working hydraulics is actuated even though no one is sitting in the driver s seat The message SEAT SWITCH appears on the display The working hydraulics functions c...

Страница 272: ...ed NOTE The operating time is adjustable If the key switch is switched on the parking brake is released and the driver does not leave the seat before the set operating time is exceeded and if neither the operating devices for the working hydraulics nor the accelerator pedal are actuated during this time SEAT SWITCHappears on the display The truck will not move Depending on the configuration the wor...

Страница 273: ...he message NOT VALID appears on the display an incorrect driver PIN has been entered when entering the access code Once the message goes out enter the driver PIN again Drive specific messages Message PARKING BRAKE OIL PRESSURE If the following message appears in the display when the accelerator pedal is actuated PARKING BRAKE OIL PRESSURE the service brake of the truck is not ready for use The driv...

Страница 274: ...or is not shut correctly The truck will not move Close the battery door LIFT HEIGHT message Speed limitation with a raised load variant This function makes sure that the truck can only move slowly when a load is lifted DANGER Risk of accident Before using this function familiarise yourself with the altered driving characteristics of the truck Optionally the truck can have altered acceleration beha...

Страница 275: ...vel at a reduced driving speed Lower the fork load to just above the ground The truck can now be driven again with no speed limitation 6210_003 055_en_V3 Lifting the load while driving If you are travelling with the load during a stacking unstacking operation and lift the load while travelling the flashing message LIFT HEIGHT appears briefly in the display The truck will travel slowly or will be bra...

Страница 276: ...uck Type Modèle Typ Serial no No de série Serien Nr year année Baujahr Rated capacity Capacité nominale Nenn Tragfähigkeit Battery voltage Tension batterie Batteriespannung Rated drive power Puissance motr nom Nenn Antriebsleist Unladen mass Masse à vide Leergewicht max min see Operating instructions voir Mode d emploi siehe Betriebsanleitung kg kg kg kg kg kW V 1 3 2 6210_001 016_V2 Determining t...

Страница 277: ...olling away by placing a wheel chock in front of each front wheel and behind each back wheel 1 Park the truck securely CAUTION Risk of component damage If you remove the battery male connector when the key switch is switched on under load an arc will be produced This can lead to erosion at the contacts which considerably shortens their service life Switch off the key switch before the battery male...

Страница 278: ...hing straps 1 to both sides of the truck and lash the truck to the rear 6210_003 048_V2 2 1 Attach lashing straps 1 to the coupling pin 2 or loop around the coupling pin and lash the truck to the side DANGER Shifting of the load caused by the lashing straps slipping The truck must be lashed securely so that it cannot move during transportation Make sure that the lashing straps are tightened secure...

Страница 279: ...e is a risk of acci dent If a rigid connection has not been used for power transmission in two directions during towing the truck may drive into the towing vehicle when the towing vehicle brakes For safety reasons only a tested tow bar may be used Use a tested tow bar CAUTION If the drive of the truck between the drive motor and the drive axle is not interrupted the drive may be damaged Place the ...

Страница 280: ...es CAUTION If the truck is not steered while it is being towed it may veer out in an uncontrolled manner The truck being towed must also be steered by a driver The driver of the truck being towed must sit in the driver s seat and fasten the seat belt before towing Where possible activate the restraint systems provided Set down load and lower fork arms close to the ground Place the drive direction ...

Страница 281: ...nly be laden by persons with sufficient experience in the suitable harnesses and hoists Type Modèle Typ Serial no No de série Serien Nr year année Baujahr Rated capacity Capacité nominale Nenn Tragfähigkeit Battery voltage Tension batterie Batteriespannung Rated drive power Puissance motr nom Nenn Antriebsleist Unladen mass Masse à vide Leergewicht max min see Operating instructions voir Mode d emp...

Страница 282: ...devices if necessary DANGER If the hoists and harnesses fail and cause the truck to fall the consequences are potentially fatal Use only hoists and harnesses with sufficient load capacity for the determined loading weight Only use the truck s designated lifting points Make sure that harnesses such as hooks shackles belts etc are only used in the indicated load direction The harnesses must not be da...

Страница 283: ...e truck hangs level when lifting it Connect the lifting straps to the lifting eye and insert the safety device 7 CAUTION Incorrectly fitted harnesses may damage attach ment parts Pressure from the harnesses can damage or destroy attachment parts when the truck is lifted If attachment parts are in the way e g lighting rear window trademark emblem etc these must be removed before loading Secure harne...

Страница 284: ...f switch is actuated Actuating the emergency off switch will disconnect the drives from the power supply The truck will not be held on a slope by the electric brake To brake actuate the service brake CAUTION Actuating the emergency off switch 1 or discon necting the battery male connector 2 shuts down the electrical functions of the truck Only use this safety feature in an emergency or in order to...

Страница 285: ...lectric parking brake is applied as soon as the truck comes to a stop The electric brake does not function during the first part of brake pedal travel To brake the truck using the mechanical brake the brake pedal must be pushed down further The truck can only be held on a slope using the mechanical brake not the electric brake No power steering effect the steering forces are increased by the remain...

Страница 286: ...ling to adjust speed when cornering can cause the truck to tip over If the truck starts to tip over do not leave the truck under any circumstances This increases the danger of being hit by the truck Do not release your seat belt Never jump off the truck You must adhere to the rules of behaviour if the truck tips over Rules of behaviour if truck tips over Hold onto the steering wheel with your hand...

Страница 287: ... face and cause damage to skin and eyes through cuts When a pane of glass is smashed the face should be turned away and covered with the crook of the free arm Protect the face when smashing a pane of glass Pull the emergency hammer out of its support mounting at the handle Using one of the two metal tips on the head of the emergency hammer hit the pane of glass with force until it breaks Emergency...

Страница 288: ...ch turn the emergency lowering screw 2 on the valve block 5 a maximum of 1 5 revolutions to loosen it For the multiple lever version B Using the hexagon socket wrench 1 turn the emergency lowering screw 4 on the valve block 3 a maximum of 1 5 revolutions to loosen it WARNING The load is lowered The lowering speed is regulated by unscrewing the emergency lowering screw Note the following list For b...

Страница 289: ...3 051_V3 Emergency operation of the electric parking brake WARNING The truck can roll away when the parking brake is released Emergency operation of the parking brake can be initiated only when the fork is lowered and the truck is switched off In emergency operation or during transport without a battery the electric parking brake can be operated manually via the hand wheel Lower the forks to the g...

Страница 290: ...elubrication device To apply the parking brake rotate the hand wheel clockwise until the force needed increases markedly and the truck is held securely The effort required is not great To release the parking brake rotate the hand wheel anticlockwise a maximum of 5 revolutions until the hand wheel can be turned easily After manual operation the hand wheel is to be returned to its latch position and...

Страница 291: ...s for the charging station or battery charger and for the battery The following safety regulations must be observed when maintaining charging and changing the battery Maintenance personnel Batteries may be charged maintained or changed only by properly trained personnel in accordance with the instructions of the manufacturer of the battery battery charger or truck The handling instructions for the...

Страница 292: ... When charging and maintaining the battery observe the manufacturer s maintenance instructions for the battery and battery charger Fire protection measures DANGER Risk of explosion due to flammable gases During charging the battery releases a mixture of oxygen and hydrogen oxyhydrogen gas This gas mixture is explosive and must not be ignited There must be no flammable mate rials or spark forming ope...

Страница 293: ...ct the sta bility of the truck When replacing the battery the weight ratios must not be changed The battery weight must remain within the weight range speci fied on the nameplate Do not remove or change the position of ballast weights Note the battery weight Service the battery The cell covers of the battery must be kept dry and clean Terminals and cable shoes must be clean lightly coated with batt...

Страница 294: ... contact with the battery door CAUTION Potential for damage to the male battery connector If the battery male connector is disconnected or connected while the key switch is switched on or the battery charger is under load an arc will be produced at the battery male connector This can lead to erosion at the contacts and can considerably shorten the service life of the contacts Switch off the key sw...

Страница 295: ...ing the battery door 6311_003 006 1 A Push release button 1 for the battery door and open the battery door forwards at grip position A until the interlock engages 2 6311_003 007 The latch 2 must engage so that the battery door cannot close by itself 170525 EN 10 2016 283 ...

Страница 296: ... nothing should come between the battery door and the edge of the chassis Carefully close the battery door Only close the battery door if the battery cable is not in the way WARNING Risk of accident due to the battery door opening An unlocked battery door may open if the truck decelerates sharply If the battery door opens while driving there is risk of damage from a collision Ensure that the batte...

Страница 297: ...nto the engaged position Ensure that the battery door is shut se curely Disconnecting the battery male connector CAUTION Risk of component damage If you remove the battery male connector while the key switch is switched on under load an arc will be produced This can lead to corrosion at the contacts which considerably shortens their service life Do not disconnect the battery male connector while t...

Страница 298: ... into contact with the battery door Close the battery door Maintaining the battery DANGER Risk to life Observe the chapter Safety regulations for handling the battery WARNING Battery acid is toxic and corrosive Observe the safety regulations in the Battery acid chapter NOTE Battery maintenance is carried out in accor dance with the battery manufacturer s opera ting instructions The operating instr...

Страница 299: ... 5 Handling the battery dition acid level and acid density Checking the battery charge status Charging the bat tery and Equalising charge to prevent a deep discharge of the battery together 170525 EN 10 2016 287 ...

Страница 300: ...d leaks Have defective batteries repaired by the authorised service centre 6321_003 126 1 2 Open filler cap 1 and check the acid level For batteries with caged cell plugs the liquid must reach the bottom of the cage For batteries without caged cell plugs the liquid must reach a height of approx 10 to 15 mm above the lead plates Top up missing fluid with distilled water only Clean the battery cell co...

Страница 301: ...arge the batteries immediately Do not leave batteries in a discharged or partly discharged state Apply the parking brake Switch on the key switch Read the charging state 1 from the display Charge a discharged or partly discharged battery NOTE The battery charge displays shows the avai lable battery capacity as a segmented bar graph in 10 increments Approx every 10 seconds the display switches betw...

Страница 302: ...otective structures fully e g fabric covered cab Open the battery door completely 6210_606 004 2 Disconnect the battery male connector 2 by pulling the handle Do not place any metal objects or tools on the battery Keep away from open flames and do not smoke Check the battery cable for damage and have it replaced by the authorised service centre if necessary DANGER Explosive gases are generated duri...

Страница 303: ...xplosion The battery cover must be kept open during charging to ensure adequate ventilation After charging CAUTION Risk of component damage If the battery charger plug is disconnected from the battery male connector while the battery charger is switched on an arc is produced This can lead to erosion at the contacts which considerably shortens their service life Switch off the battery charger befor...

Страница 304: ...ble does not come into contact with the battery cover 6210_600 001 Close the battery door When doing so ensure that no cables are crushed between the chassis and the battery door The battery door must be locked otherwise the CLOSE THE DOOR error message will appear on the display and the truck will not drive Equalising charge to prevent a deep discharge of the battery Lead acid batteries must be c...

Страница 305: ...ualising charge takes up to 2 hours Please refer to the operating instruc tions from the manufacturer of the battery charger Ending the equalising charge The equalising charge ends automatically If the battery is required during this process you can interrupt the equalising charge by pressing the stop button on the battery charger Please refer to the operating instruc tions from the manufacturer o...

Страница 306: ...5 Operation Handling the battery Disconnect the battery male connector from the battery charger plug Insert the battery male connector fully into the plug connection on the truck 294 170525 EN 10 2016 ...

Страница 307: ... 17 km h for technical reasons Contact the authorised service centre regarding this matter General information on battery replacement CAUTION Components may be damaged by the lifting acces sory and battery rolling away The lifting accessory and battery may roll away uncontrollably if the battery is not removed on a level smooth floor with sufficient load bearing capacity Follow the operating instruc...

Страница 308: ...606 011 A B Replacing the battery using a forklift truck Preparation WARNING Risk of accident The load capacity of the truck used must at least match the battery weight see battery identification plate Before taking up the battery adjust the fork arms to match the cutout in the chassis A Move the fork arms together selecting the maximum possible distance The fork arms must not be moved under the ba...

Страница 309: ...n lead to corrosion at the contacts which considerably shortens their service life Do not disconnect the battery male connector while the key switch is switched on 6210_606 004 2 Disconnect the battery plug 2 DANGER WARNING Risk of crushing shearing No one must stand directly next to the battery or between the battery and the truck when removing and inserting the battery CAUTION Risk of damage Pos...

Страница 310: ...n the battery and the chassis above Position the fork arms horizontally CAUTION Risk of damage Lower the battery immediately if it knocks against the chassis above Remove battery from battery compartment slowly Transporting and setting down the battery WARNING Risk of injury The battery must be transported very carefully i e at low speed using slow steering movement and careful braking The battery...

Страница 311: ...he battery is inserted the load carrying equipment is at a right angle to the forklift truck The gaps are maintained for the entire time that the battery is being inserted and that the battery is inserted to a sufficient depth DANGER DANGER Risk of crushing shearing While inserting the battery avoid putting your hands between the battery and the chassis CAUTION Risk of damage Position the battery c...

Страница 312: ... connector with the key switch switched on Make sure that the key switch is switched off before connecting the battery male connector 6210_003 011 5 6 Close the battery lock 6 Insert the battery male connector 5 fully into the plug connection on the truck 6210_606 010 A B Release the battery door A Close the battery door B CAUTION The battery door must securely engage i e in the second detent posi...

Страница 313: ...uctions for the lifting gear The lifting gear should be vertical when lifting so that no lateral pressure is applied to the tray Lift the battery from the roller channel Ensure that there is sufficient distance from the battery door Set the battery down carefully Do not place or allow slack lifting gear to fall on the battery cells 6210_003 013 a a a a Changing the battery using lift trucks Prepara...

Страница 314: ... the battery door WARNING Risk of injury Open the battery door until the door lock 1 engages and the door cannot close by itself CAUTION Risk of component damage If you remove the battery male connector while the key switch is switched on under load an arc will be produced This can lead to corrosion at the contacts which considerably shortens their service life Do not disconnect the battery male c...

Страница 315: ...t truck when removing or inserting the battery CAUTION Risk of damage Position the battery cable on the battery in such a way that it cannot be crushed either when removing or inserting the battery or when closing the battery door 6210_606 005 3 4 Open the battery lock 3 NOTE If the battery lock cannot be opened by hand the tow coupling bolt 4 can be used as a lever extension 170525 EN 10 2016 303...

Страница 316: ...battery compartment slowly Transporting and setting down the battery WARNING Risk of injury The battery must be transported very carefully i e at low speed using slow steering movement and careful braking The battery must not be transported over longer distances using the methods mentioned here Transport the battery to the intended storage space CAUTION Risk of damage The battery must be stored on...

Страница 317: ...The gaps are maintained for the entire time that the battery is being inserted and that the battery is inserted to a sufficient depth DANGER DANGER Risk of crushing shearing When inserting do not allow your hands to come between the battery and the chassis CAUTION Risk of damage Position the battery cable on the battery in such a way that it cannot be crushed either when removing or inserting the b...

Страница 318: ... connector with the key switch switched on Make sure that the key switch is switched off before connecting the battery male connector 6210_003 011 5 6 Close the battery lock 6 Insert the battery male connector 5 fully into the plug connection on the truck 6210_606 010 A B Release the battery door A Close the battery door B CAUTION The battery door must securely engage i e in the second detent posi...

Страница 319: ...y shortens their service life Do not disconnect the battery male connector while the key switch is switched on 6210_606 004 2 Disconnect the battery plug 2 DANGER WARNING Risk of crushing shearing There must be nobody standing directly next to the battery or between the battery and the truck when removing and inserting the battery CAUTION Risk of damage Position the battery cable on the battery in...

Страница 320: ...ariant on floors with hard surfaces 6210_003 017 3 Moving out the battery Fold out the crank 3 for the mechanical battery carrier 6210_003 018 3 4 Lower the support by turning the crank anti clockwise Fully extend the roller channel 4 NOTE The roller channel must be horizontal 308 170525 EN 10 2016 ...

Страница 321: ...move on its own once the battery lock has been opened Under no circumstances try to hold onto the battery The battery rolls out onto the battery carrier and is held in place by the extension frame NOTE If the battery lock cannot be opened by hand bolt 7 of the tow coupling can be used as a lever extension Pull the battery 8 fully out of the truck Taking up the battery Transfer the battery with the...

Страница 322: ...ing the crane When doing so ensure that the entire battery tray is contained within chassis profile 9 Insert the battery fully CAUTION Risk of damage to components When retracting the battery ensure that battery cable 10 does not become crushed 6210_003 022 6 Close the battery lock 6 immediately 310 170525 EN 10 2016 ...

Страница 323: ...03 023 4 Fully insert the roller channel 4 6210_003 024 3 11 Raise support 11 as far as it will go by turning crank 3 Carry out a visual check to ascertain whether the support roller has been raised as far as it will go 170525 EN 10 2016 311 ...

Страница 324: ...ector Insert the battery male connector fully into the plug connection on the truck 6210_606 010 A B Release the battery door A Close the battery door B CAUTION The battery door must securely engage i e in the second detent position NOTE The battery door can only be closed with the battery lock applied Replacing the battery with the hydraulic battery carrier DANGER The battery weight and its dimen...

Страница 325: ... the battery in the truck must be charged 6210_003 016 Emergency stop when moving the battery When working with the hydraulic battery carrier it may not be possible to reach the emergency off switch In an emergency disconnect the battery male connector CAUTION Risk of component damage If you remove the battery male connector while the key switch is switched on under load an arc will be produced Th...

Страница 326: ...5 Operation Handling the battery 6321_003 074 Extending the battery hydraulically Apply the parking brake 6321_003 075 Make sure that there is no load on the seat 314 170525 EN 10 2016 ...

Страница 327: ...extends The battery male connector must remain in reach as an emergency off mechanism Place it beside the counterweight and outside the extension area 6321_003 077 Press the extend push button until the carriage has reached its end position During the extension procedure the support also extends automatically CAUTION Risk of component damage When extending the carriage the battery cable may collid...

Страница 328: ...pen terminals or connectors CAUTION Risk of component damage If you remove the battery male connector while the key switch is switched on under load an arc will be produced This can lead to corrosion at the contacts which considerably shortens their service life Switch off the key switch before the battery male connector is disconnected Only disconnect the battery male connector while the key swit...

Страница 329: ... their service life Do not connect the battery male connector with the key switch switched on Make sure that the key switch is switched off before connecting the battery male connector 6210_003 026 Plug in the battery plug Then switch on the key switch WARNING Risk of injury Personnel must stand beside the counterweight outside the retraction area CAUTION Risk of component damage When retracting t...

Страница 330: ...he carriage is restricted by obstacles release the push button WARNING Risk of crushing Never reach under the battery to remove obstacles Extend the battery tray again Lift the battery using the crane again swivel the battery to the side and remove the obstacle NOTE If the motor protection function has triggered The motor protection function is meter controlled After retracting and extending 5 tim...

Страница 331: ...y door must securely engage i e in the second detent position Messages and errors during use of the hydraulic battery carrier Error code Cause Remedy 5920 The unit is overheated Allow the truck to cool down for 1 hour 5910 Notify the authorised service centre 5930 Notify the authorised service centre 5931 Notify the authorised service centre 170525 EN 10 2016 319 ...

Страница 332: ...tery support is not fully retracted Press the Retract battery push button until the support is fully retracted Notify the authorised service centre if this step is not successful CLOSE THE DOOR The battery door is not closed properly Close the battery door 320 170525 EN 10 2016 ...

Страница 333: ...s been applied DANGER There is a risk of fatal injury from a falling load or parts of the truck being lowered Lower the load fully before leaving the truck CAUTION Batteries may freeze If the truck is parked in an ambient temperature of below 10 C for an extended period the batteries will cool down The electrolyte may freeze and damage the batteries The truck will then not be ready for operation A...

Страница 334: ...hapter entitled General instructions for controlling attachments Turn the switch key to the left and remove it 6321_003 144 1 F1 F1 F2 F2 1 1 1 Press the emergency off switch 1 NOTE Switch keys FleetManager cards variant FleetManager transponder chips variant and the PIN code for access authorisation variant must not be handed over to other persons unless explicit instructions to this effect have ...

Страница 335: ...wn for more than two months the truck may suffer corro sion damage If the truck is parked in an ambient temperature of below 10 C for an extended pe riod the batteries cool right down The electrolyte may freeze and damage the batteries Store the truck in a dry clean frost free and well ventilated environment Carry out the following measures before shut down NOTE Store only fully charged batteries ...

Страница 336: ...y door see chapter entitled Checking the battery interlock and battery door Apply a suitable contact spray to all exposed electrical contacts CAUTION Risk of component damage If you remove the battery male connector when the key switch is switched on under load an arc will be produced This can lead to erosion at the contacts which considerably shortens their service life Switch off the key switch ...

Страница 337: ...r permeable material e g cotton Cover the truck to protect against dust If the truck is to be shut down for even longer periods contact the authorised service centre to find out about additional measures Recommissioning after storage If the truck has been in storage for longer than six months it must be carefully checked before being recomissioned As in the annual inspection this check should also ...

Страница 338: ...ng Commission the truck see chapter Com missioning During commissioning the following must be checked in particular Drive control steering Brakes service brake parking brake Lifting system lifting accessories load chains mounting NOTE For further information see the truck work shop manual or contact the authorised service centre 326 170525 EN 10 2016 ...

Страница 339: ...There is a risk of injury due to falling when climbing onto the truck When climbing onto the truck you can get stuck or slip on components and fall Higher points on the truck should only be accessed using the appropriate equipment Adhere strictly to the following steps Use only the steps provided to climb onto the truck Use equipment such as stepladders or platforms to reach inaccessible areas Pre...

Страница 340: ...ay ignite in the vicinity of hot components e g drive units Adhere strictly to the following steps Regularly remove all deposits accumula tions of foreign materials in the vicinity of hot components DANGER Flammable fluids can be ignited by hot components on the truck causing a risk of fire Adhere strictly to the following steps Do not use flammable fluids for cleaning Note the manufacturer s guidelin...

Страница 341: ... often the truck is cleaned the more frequently it must be lubricated 6210_600 005 Cleaning the electrical system WARNING Danger of electric shocks due to residual capacity Never reach into the electrical system with your bare hands CAUTION Cleaning electrical system parts with water can damage the electrical system Cleaning electrical system parts with water is forbidden Do not remove covers etc ...

Страница 342: ...ives such as benzine When using a steam jet do not use addi tional cleaning agents Remove any water in the chain links using compressed air immediately after cleaning Move the chain several times during this procedure Immediately after drying the chain spray it with chain spray Move the chain several times during this procedure For chain spray specifications see the Main tenance data table chapter ...

Страница 343: ...bjects with sharp edges Clean the windows NOTE Cleaning can be done using a commercially available glass cleaner 6210_001 029 After washing Carefully dry truck e g with compressed air Sit on the driver s seat and start up the truck in accordance with regulations CAUTION Danger of short circuits If any moisture has penetrated into the motors despite the precautionary measures taken this must first b...

Страница 344: ...5 Operation Cleaning 332 170525 EN 10 2016 ...

Страница 345: ...6 Maintenance ...

Страница 346: ...ersonnel in accordance with the instructions from the manufacturers of the battery battery charger and truck The handling instructions for the battery and the operating instructions for the battery charger must be followed Maintenance work without special qualifications Simple maintenance work e g checking the hydraulic oil level may be carried out by untrained personnel A qualification like that of...

Страница 347: ...ervals are defined for standard use Shorter maintenance intervals can be defined in consultation with the operating company depending on the application conditions of the truck The following factors may necessitate shorter maintenance intervals Contaminated poor quality roads Dusty or salty air High levels of air humidity Extremely high or low ambient tempera tures or extreme changes in temperature ...

Страница 348: ...6 Maintenance General maintenance information 336 170525 EN 10 2016 ...

Страница 349: ...or wear and check the air pressure Check wheels for damage and check the tightening torques Power unit Drive axle Check mounting check for leaks and clean cooling fins Gearbox oil and multi disc brake Check oil level Steering Check steering system for correct function and for leaks Check that the steering wheel is firmly attached and check the turning handle for damage Steering axle Check that it is...

Страница 350: ...ulics Check hydraulic system for condition correct function and leaks Check the hydraulics blocking function ISO valve Check oil level Lift mast Check mast bearings for damage and lubricate Check the tightening torque Check mast profiles for damage and wear and lubricate Check load chains for damage and wear adjust and lubricate Check lift cylinders and connections for damage and leaks Check guide ...

Страница 351: ...00 Check attachments for wear and damage observe manufacturer s maintenance instructions Check trailer coupling for wear and damage observe manufacturer s maintenance instructions General Read out error numbers and delete list Reset maintenance interval Check labelling for completeness Test drive the truck 170525 EN 10 2016 339 ...

Страница 352: ...6 Maintenance General maintenance information 340 170525 EN 10 2016 ...

Страница 353: ... provided by our spare parts service department The information required for ordering parts can be found in the spare parts list Only use spare parts as per the manufac turer s instructions The use of unapproved spare parts can result in an increased risk of accidents due to insufficient quality or incor rect assignment Anyone using unapproved spare parts shall assume unlimited liability in the eve...

Страница 354: ...erent manufacturers cannot be avoided drain the old oil thoroughly Before carrying out lubricating work filter changes or any work on the hydraulic system carefully clean the area around the part involved When topping up working materials use only clean containers 342 170525 EN 10 2016 ...

Страница 355: ...the lift mast C Load chains D One lubricating nipple each on both lift mast bearings 1 See the following chapter Maintenance data table under this Code for the respective lubricant specification This lubrication plan describes the series production truck with standard equipment For maintenance points on variant trucks see the relevant chap ter and or instructions provided by the manufacturer 170525...

Страница 356: ...als Specifications Quantity Insulation resistance DIN EN 1175 VDE 0117 For further information refer to the workshop manual for the truck in question Controls joints Code Unit Operating materials Specifications Quantity High pressure grease ID no 0147873 As required Lubrication Oil SAE 80 MIL L2105 API GL4 As required Dual pedal operation High pressure grease ID no 0147873 As required Hydraulic syst...

Страница 357: ...ng materials Specifications Quantity A Axle stub bearing spherical bearing High pressure grease ID no 0147873 As required Wheel nuts screws Torque wrench 210 Nm Axle stub nut Torque wrench 310 Nm Drive axle Code Unit Operating materials Specifications Quantity Wheel nuts screws Torque wrench 210 Nm Wheel gear Gearbox oil SAE 80 MIL L2105 API GL4 Brakes ATF oil Shell Donax TX ID no 170106 1 l Lift ma...

Страница 358: ...ials Specifications Quantity C Lubrication High load chain spray Fully synthetic Temperature range 35 C to 250 C ID no 0156428 As required Washer system Code Unit Operating materials Specifications Quantity System filling Screen wash Winter ID no 172566 As required 346 170525 EN 10 2016 ...

Страница 359: ...b and secure the lift mast to prevent it tilting backwards unintentionally Observe the maximum lift height of the lift mast and compare the dimensions from the technical data with the dimensions of the hall into which the truck is to be driven These steps are taken to prevent a collision with the ceiling of the hall and to avoid any damage caused as a result Working on the hydraulic equipment The ...

Страница 360: ...repairs and when changing hydraulic and electrical compo nents These are listed in the appropriate sections Lifting and jacking up DANGER There is a risk to life if the truck tips over If not raised and jacked up properly the truck may tip over and fall off Only the hoists specified in the workshop manual for this truck are allowed and are tested for the necessary safety and load capacity Only have...

Страница 361: ...entre CAUTION Possibility of damage to the ceiling Note the maximum lift height of the lift mast Securing the lift mast against tilting backwards A hardwood beam with a cross section of 120 x 120 mm is required The length of the hardwood beam must approximately correspond to the width of the fork carriage b3 To avoid impact injuries the hardwood beam must not protrude beyond the outer contour of t...

Страница 362: ...NGER Risk of accident This work must only be performed by an authorised service technician Arrange for an authorised service technician to remove the lift mast Securing the lift mast against falling off DANGER Risk of accident This work must only be performed by an authorised service technician Arrange for an authorised service technician to secure the lift mast 350 170525 EN 10 2016 ...

Страница 363: ...62 002 Removing the valve cover For trucks with a heating system variant unscrew the five screws 2 and remove the heating system panelling 3 6321_003 052 5 5 4 Unscrew the four screws 5 and remove the valve cover 4 by pulling it upwards and out Installing the valve cover Reattach the valve cover 4 Refit the heater cover 3 170525 EN 10 2016 351 ...

Страница 364: ...ng the battery interlock and battery door DANGER A malfunction of the battery interlock and battery door can cause the battery door to open and the battery could possibly fall out when the truck is tilted or during sharp deceleration If the battery falls out there is a danger of being crushed If the interlock is deformed damaged or difficult to move inform STILL Service immediately Do not operate t...

Страница 365: ... and that it is not deformed or damaged Grease the lock mechanisms Close the battery door Maintaining the seat belt DANGER There is a risk to life if the seat belt fails during an accident If the seat belt is faulty it may tear or open during an accident and no longer keep the driver in the driver s seat The driver may therefore be hurled against the truck components or out of the truck Ensure ope...

Страница 366: ... tongue 2 must release when the red button 4 is pressed The automatic blocking mechanism must be tested at least once a year Park the forklift truck on level ground Pull out the belt with a jerk The automatic blocking mechanism must block extension of the belt Tilt the seat at least 30 if necessary remove the seat Slowly extend the belt The automatic blocking mechanism must block extension of the ...

Страница 367: ...er s seat with attached restraining belt and fastening Check the controls for correct operation Check the condition of the seat e g wear on the upholstery and secure fastening to the hood WARNING Risk of injury Have the seat repaired by the service centre if you identify any damage during the checks 170525 EN 10 2016 355 ...

Страница 368: ...er you must first obtain approval from the truck manufacturer WARNING Risk to stability When using pneumatic tyres or solid rubber tyres rim wheel parts must never be changed and rim wheel parts from different manufacturers must not be mixed 6311_003 004 Checking the condition and wear of the tyres WARNING Tyre quality affects the stability and handling of the truck Changes can only be made after c...

Страница 369: ...he tyres on an axle must be approximately the same Super elastic tyres and solid rubber tyres can be worn down to the wear mark 2 6210_460 004 3 Checking wheel fastenings Check wheel fastening nuts 3 and bolts for secure positioning and retighten as necessary Observe the torques see the maintenance data table 170525 EN 10 2016 357 ...

Страница 370: ...ng 1 and tie rod joint 2 for play and wear Check the steering cylinder 3 for leaktight ness traces of oil NOTE In the case of excessive play or wear have your service centre change the relevant parts Lubricating the steering axle ENVIRONMENT NOTE Dispose of old grease and contaminated devices in accordance with the national regulations for the country in which the truck is being used 358 170525 EN...

Страница 371: ...n the truck Actuate the steering Park the truck securely again Repeat the lubrication procedure NOTE Please note the more often the truck is cleaned the more frequently it must be lubricated Checking the lines for leaks Retighten leaky connections NOTE Have faulty lines replaced by your authorised service centre After repairs force out any trapped air by turning the steering wheel from stop to sto...

Страница 372: ...e battery For information on checking the battery see the chapter entitled Checking the battery condition acid level and acid density Checking the fuses DANGER Hazard from electrical current Take care when handling residual capacity may be present Before starting the following mainten ance work Park the truck securely Disconnect the battery male connector 360 170525 EN 10 2016 ...

Страница 373: ...derably shortens their service life Switch off the key switch before the battery male connector is disconnected Do not disconnect the battery male connector while the key switch is switched on except in an emergency 6210_604 001 1 Fuses for standard equipment and equipment variants are located in the rear part of the control electronics 1 Open the cover Remove the cover from the control electron i...

Страница 374: ...tion not all fuses will be present in the truck CAUTION Water in the electrical system can cause damage to components In order to protect the electrical system against ingress of water the cover must be closed Refit the cover after these tasks have been completed Connect the battery male connector Carry out a functional test Replacing fuses DANGER Hazard from electrical current Take care when handl...

Страница 375: ...n short circuits Only use fuses with the prescribed nominal current NOTE Depending on the equipment not all fuses will be present in the truck 6210_604 001 1 Fuses for standard equipment and equipment variants are located in the rear part of the control electronics 1 Open the cover Remove the cover from the control electron ics Replace the blown fuse see the section entitled Fuse assignment CAUTIO...

Страница 376: ...c oils are hazardous to your health and are under pressure during operation Note the safety regulations in the Hydraulic fluid chapter CAUTION Risk of damage to components Remove connector for drive unit 1 2 6210_700 002 Unscrew breather filter 1 Check the oil level on the oil dipstick The oil level must be between the markings 2 If the oil level is too low pour hydraulic oil of the correct specifica...

Страница 377: ...GR 237 should be complied with Deviating national laws are to be taken into account Check pipe and hose connection screw joints for leaks traces of oil Hose lines must be changed if The outer layer has been breached or becomes brittle with tears They are leaking There are unnatural deformations e g bubble formation or buckling A fitting is detached from the hose A fitting is badly damaged or corrode...

Страница 378: ...4 NOTE Spray the roller track evenly from a distance of approx 15 20 cm Wait approx 15 minutes until the equipment is ready to use again 6210_900 002 Maintenance for trucks used in cold stores On trucks used in cold stores variant check all rollers and chains in the lift mast for ease of movement once a week Greasing the automatic tow coupling NOTE Wear to moving parts can be significantly reduced ...

Страница 379: ...sing the lubricating nipple 1 in accordance with the maintenance data table see Chapter Maintenance data table P 6 344 Close the coupling by raising the coupling pin with a suitable tool For journeys with a rigid drawbar trailer lubricate the underside of the tow bar eye and the supporting surface on the coupling 7321_003 092 Determine the wear on the coupling pin The diameter of the spherical par...

Страница 380: ...ance data table P 6 344 Grease coupling pin tow bar eye and its supporting surface 7321_003 094 Model RO 245 Lubricate via the points provided for this purpose lubricating nipple opened cou pling in accordance with the maintenance data table see Chapter Maintenance data table P 6 344 Grease the supporting surface for the tow bar eye 368 170525 EN 10 2016 ...

Страница 381: ...s purpose lubricating nipple opened cou pling in accordance with the maintenance data table see Chapter Maintenance data table P 6 344 Grease the supporting surface for the tow bar eye 6321_003 091 1 2 Maintaining the heater Loosen the fixing screw 1 and remove the cover 2 170525 EN 10 2016 369 ...

Страница 382: ... 6321_003 092 3 Check the filter mat 3 for soiling If the filter mat is grey in colour replace it NOTE Change the filter mat at least every 2 months 6321_003 093 4 Clean the fresh air inlet 4 of dust and dirt 370 170525 EN 10 2016 ...

Страница 383: ...ables 6311_003 010_V2 1 Checking the hydraulic oil level of the hydraulic battery carrier WARNING Hydraulic oils are hazardous to your health and are under pressure during operation Note safety regulations for working with hydrau lic oils see Chapter Hydraulic fluid P 3 40 Checking the hydraulic oil level Park the truck securely see Chap ter Parking the truck securely and switch ing it off P 5 321 ...

Страница 384: ...and remove the battery see Chapter Replacing the battery with the hydraulic battery carrier P 5 312 Remove dirt and contaminated lubricant residues Lubricate the slide elements and guide rails 2 in accordance with the maintenance data table see Chapter Maintenance data table P 6 344 Reinstall the battery Oiling the catch rails WARNING Risk of injury If the battery carrier is not at a sufficiently s...

Страница 385: ... must be swung out fully and locked in position after lubrication NOTE The catch rails of the support rollers are loca ted beneath the battery carrier If necessary use a mirror to gain a better view Park the forklift truck on level ground 6210_003 007 Remove the battery see Replacing the battery with the hydraulic battery carrier Place the battery next to the truck so that the battery male connect...

Страница 386: ...rs are swung all the way out and are locked in position If the support rollers are fully swung out and locked reinstall the battery If the support rollers do not swing out correctly or are not in the locked position inform your authorised service centre 7094_810 004 Checking the lift cylinders and connections for leaks WARNING Risk of injury Observe safety regulations for working on the lift mast ...

Страница 387: ...he original thickness CAUTION Worn fork arms should always be replaced in pairs Check the securing mechanism 3 for proper operation The locking screw 2 that prevents dislodg ing must be present Checking the reversible fork arms NOTE This check is only required for reversible fork arms variant Check the outside of the fork bend 1 for cracks Contact your service centre 170525 EN 10 2016 375 ...

Страница 388: ...ate Check that the support and springs of the double pedal mechanism are securely positioned Check that all screws are sealed with locking varnish Checking the battery changeover frame The screw joints and welded seams of the battery changeover frame must be subjected to a visual inspection 376 170525 EN 10 2016 ...

Страница 389: ...7 Technical data ...

Страница 390: ...7 Technical data Dimensions Dimensions 1 Seat is adjustable 90 mm 2 Fork spacing is adjustable 378 170525 EN 10 2016 ...

Страница 391: ...equipped with a different lift mast attachment or driver protection structure this value is only a guide value If necessary the centre of gravity S must be determined on an individual basis for each truck VDI datasheet Characteristics Model RX60 16 RX60 18 RX60 20 Type number 6311 6313 6315 Manufacturer STILL GmbH STILL GmbH STILL GmbH Drive Electric Electric Electric Operation Seated Seated Seate...

Страница 392: ...50 10 200 50 10 Rear tyre size 16x6 8 16x6 8 16x6 8 Number of front wheels x driven 2x 2x 2x Number of rear wheels x driven 2 2 2 Front track width b10 mm 932 942 942 Rear track width b11 mm 865 865 866 Basic dimensions Model RX60 16 RX60 18 RX60 20 Type number 6311 6313 6315 Tilt of lift mast fork carriage forwards α degrees 3 3 3 Tilt of lift mast fork carriage backwards β degrees 8 8 8 Height w...

Страница 393: ...ork carriage width b3 mm 980 980 980 Ground clearance with load under lift mast m1 mm 90 90 90 Ground clearance at centre of wheelbase m2 mm 123 123 123 Aisle width for pallet 1000 x 1200 crosswise Ast mm 3439 3439 3449 Aisle width for pallet 800 x 1200 longitudinal Ast mm 3638 3638 3648 Turning radius Wa mm 1883 1883 1883 Smallest pivot point distance b13 mm 538 5 538 5 538 5 Performance data Mod...

Страница 394: ... Acceleration time without load s 4 0 4 1 4 2 Service brake Electr mech Electr mech Electr mech Elec motor Model RX60 16 RX60 18 RX60 20 Type number 6311 6313 6315 Traction motor power rating at S2 60 min kW 2x5 5 2x5 5 2x5 5 Lift motor power rating at 15 ED kW 11 11 11 Battery according to DIN 43531 35 36 A B C no DIN 43536 A DIN 43536 A DIN 43536 A Battery voltage U V 80 80 80 Battery capacity K...

Страница 395: ...0 Type number 6311 6313 6315 Sound pressure level LpAZ driver s compartment 2 dB A 70 70 70 Human vibration acceleration according to EN 13059 m s2 0 7 0 7 0 7 Tow coupling DIN type model Bolt Bolt Bolt 2 Without cab Values differ with cab 170525 EN 10 2016 383 ...

Страница 396: ...seat and the seat suspen sion must be set to this driver s requirements Due to the individual nature of height and body weight as well as the wide variety of types of driver s seat and overhead guard the minimum head clearance must be ensured in every truck The driver s compartment has been designed taking ergonomics in the workplace into account and in accordance with EN ISO 3411 In general from ...

Страница 397: ...he battery weight against the information on the nameplate Only use a battery tray that is closed at the bottom NOTE Battery specifications according to DIN 43536 cells in accordance with DIN EN 60254 2 80 V circuit B The battery weight can be found on the nameplate of the battery RX60 16 6311 RX60 18 6313 RX60 20 6315 Battery compartment dimensions mm Battery designation Capacity Ah Length Width H...

Страница 398: ...7 Technical data Battery specifications the authorised service centre regarding this matter 386 170525 EN 10 2016 ...

Страница 399: ...10 A 5 Option board solenoid valve on the attachment F23 10 A 6 CPP RPP roof F26 25 A 7 CPP RPP seat F27 25 A 8 MMS option board F29 15 A 9 CPP RPP front F28 10 A 10 Proportional technology F25 10 A 11 U4 voltage converter F15 10 A Solenoid valve on attachment F15 10 A 12 U1 voltage converter F14 15 A U1 U2 voltage converter F14 30 A 48 V working spotlight F14 15 A 13 SU MCU F11 10 A 14 Horn F12 1...

Страница 400: ...signment 8 9 0 6 7 4 2 1 3 5 F1 F2 7312_003 042 75 h 2 234 7 12 15 1 2 3 Fuse assignment equipment vari ants 1 5th hydraulic function 24 48 V F1 10 A 2 Variant e g MMS F3 10 A 3 Variant e g light F2 10 A 388 170525 EN 10 2016 ...

Страница 401: ...er and the 5th function 183 Controlling using the four way mini lever and the 5th function 191 Controlling using the three way mini lever and the 5th function 187 Controlling via the joystick 4Plus 193 Controlling with a quadruple mini lever 189 Controlling with a triple mini lever 185 Controlling with fingertip 195 Controlling with fingertip and 5th function 196 Controlling with multi lever operati...

Страница 402: ...375 Checking the cable terminals 371 Checking the charge status 289 Checking the double pedal 376 Checking the driver s seat 355 Checking the emergency off function 101 Checking the lift cylinders and connections for leaks 374 Checking wheel fastenings 357 Clamp locking mechanism Releasing 198 Cleaning the electrical system 329 Cleaning the truck 327 Cleaning the windows 331 Climbing into the truc...

Страница 403: ...es 238 Display operating unit Standard display elements 84 Disposal Battery 11 Components 11 Documentation scope 5 Double mini lever 56 Lifting lowering the fork carriage 142 Tilting the lift mast 142 Driver rights duties and rules of behaviour 27 Driver s cab Use 99 Drivers 27 Driving on ascending and descending slopes 169 Driving lights Switching on and off 202 Driving on gradients 106 Driving o...

Страница 404: ...aks 365 Checking the oil level 364 I Identification points 62 Impermissible use 14 Information for carrying out mainte nance 334 Maintenance timeframe 335 Information symbols 6 Insulation testing 37 Drive battery test values 38 Truck test values 38 Insurance cover on company premises 29 Interior lighting 212 Issue date of the operating instructions 6 J Jacking up 348 Joystick 4Plus 59 Fork carriage...

Страница 405: ...urement 156 Description 156 Execution 157 Zero adjustment 101 Lubricating the joints and controls 352 M Maintaining the heater 369 Maintenance data table 344 Battery 344 Controls joints 344 Drive axle 345 Electrical system 344 General lubrication points 344 Hydraulic battery carrier 345 Hydraulic system 344 Lift mast 345 Load chains 346 Steering axle 345 Tyres 345 Washer system 346 Maintenance for...

Страница 406: ... suspension 76 Moving 75 Switching the seat heater on and off 78 Multi lever 55 Lifting lowering the fork carriage 141 Tilting the lift mast 141 N Nameplate 67 Neutral position 110 O Oils 39 Opening the cab door 210 Opening the side windows 211 Opening closing the battery door 283 Operating company 26 Operating devices for hydraulic and traction functions 54 Operating materials Quality and quantit...

Страница 407: ...fety regulations for maintenance General information 347 Safety devices 348 Set values 348 Working on the electrical equip ment 347 Working on the hydraulic equip ment 347 Safety regulations for working on the lift mast 349 Safety regulations when driving 104 Safety regulations when handing loads 154 Safety regulations when handling the battery 279 Battery weight and dimensions 281 Fire protection...

Страница 408: ... working platforms 16 V Valve cover Installing 351 Removing 351 Variants Access authorisation with PIN code 85 Accident recorder 209 Automatic lift cut out 130 Clamp locking mechanism 198 Clipboard 217 FleetManager 208 Fork extension 150 Heating system 214 Hi Lo lift mast 136 Lift mast vertical position 131 Lifting systems 130 Load measurement 156 Push up roof window 217 Radio 213 Reducing speed w...

Страница 409: ...uipment 347 Working on the hydraulic equipment 347 Working spotlights Automatically switching on off 207 Lift height controlled switching on off 207 Manually switching on off 206 Switching on and off 202 206 Z Zero adjustment of the load measure ment 101 170525 EN 10 2016 397 ...

Страница 410: ......

Страница 411: ......

Страница 412: ...STILL GmbH 170525 EN 10 2016 ...

Отзывы: