56
28.
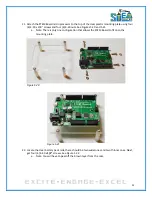
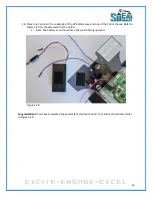
Place one Velcro on the underside of the 9V battery case and one of the Pi-Bot chassis. Refer to
Figure 5.28 for the placement of the Velcro.
a.
Note: The battery case should have the switch facing upwards.
Figure 5.28
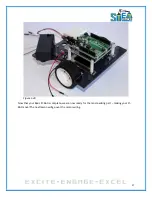
Congratulations
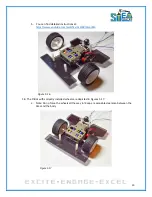
! You have completed the assembly of the Basic Pi-Bot! Your Pi-Bot should look similar
to Figure 5.29.
Содержание Pi-Bot v2.00
Страница 67: ...67 Figure 6 15 ...
Страница 78: ...78 UltraSonicSensorTestwithLED Program ...
Страница 80: ...80 ObstacleAvoidance Program ...
Страница 82: ...82 ObstacleAvoidancewithLED Program ...
Страница 83: ...83 ObstacleAvoidancewithLED Program CONTINUED ...
Страница 90: ...90 Download and run the following program LineFollowing Program ...
Страница 91: ...91 LineFollowing Program CONTINUED ...
Страница 94: ...94 AdvancedLineFollowing Program CONTINUED ...
Страница 95: ...95 AdvancedLineFollowing Program CONTINUED ...
Страница 96: ...96 AdvancedLineFollowing Program CONTINUED ...
Страница 110: ...Appendix B Complete Pi Bot Wiring Schematic ...


