


5
To view manuals, videos, drivers, downloads, technical drawings, and more visit www.startech.com/support
5.
Snap the
HDD
or
SSD
down into the other side of the tray.
Make sure that the
SATA Connector
on the
HDD
or
SSD
lines up with the
SATA Port
in the
Drive Bay
.
6.
Slide the
Drive Tray
into the
Drive
Enclosure
.
7.
Repeat steps 3 - 4 to install a second
Drive
.
8.
Use the
Hex Key
and the four
Removable Screws
that were
removed in step 1 to reattach the
Front Panel
to the
Drive
Enclosure
.
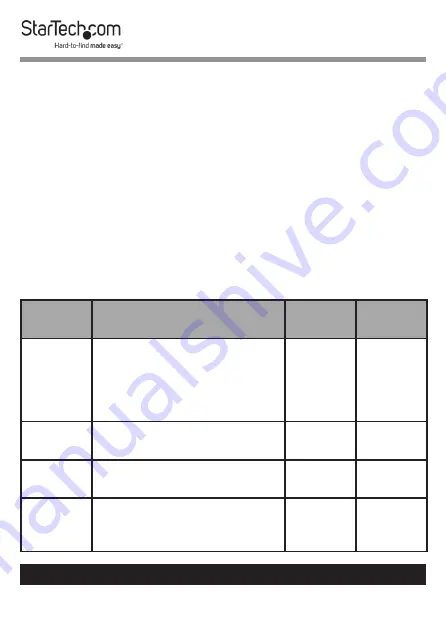
Set the RAID Dip Switches
To set the
RAID Configuration
, use the table below and set the
Raid Switches
located on the back of the
Drive
Enclosure
.
RAID
Mode
Description
Switch
1
Switch
2
GUI
Allows access to both
Drives
individually.
(Enabled
Software-Based
Raid
and
Clear Hardware
Raid
)
Off
Off
RAID 0
Striping
: Improves
Drive
performance
Off
On
RAID 1
Mirror
: Creates a duplicate
Drive
on the second
Drive
On
Off
SPAN
Creates a large
Single
Drive Volume
that consists
of both
Drives
On
On


