24
and the abrasive strip must be replaced.
1. Heed all warnings and use extreme caution when performing this cleaning
operation.
2. Set the conveyor belt speed control knob to lowest feed setting. Avoid
contact with conveyor feed belt.
3. Open the protective dust cover to expose the sanding drum and abrasive
strip.
4. Use a long belt cleaning stick to distance your hands from the rotating
drum.
5. Turn on the machine, grip the belt cleaning stick with two hands, rest the
cleaning stick on the casting which houses the sanding drum. Gently lower
the cleaning stick onto the rotating drum, moving the cleaning stick from
side to side to remove the impacted sawdust. (See Figure20.)
6. When cleaning is completed, remove the stick, turn off the machine, and
close and latch the protective dust cover.
CONVEYOR FEED BELT REPLACEMENT
Common causes which require replacement of the conveyor feed belt are:
normal wear and tear, inadvertent contact with the sanding drum abrasive
during operation, teats caused by mis-tracking of the conveyor feed belt, or
excessive build-up of non-removable film.
The following steps describe how to remove and replace the conveyor feed
belt when necessary.
1. Disconnect the machine from the power source.
2. Using the Height Adjustment Handle, raise the sanding drum to its highest
position (roughly 3” above the conveyor belt table).
3. Using a Phillips type screwdriver, remove the 2 screws and star washers
securing the front nip guard to the variable speed control box. Then
remove the front nip guard by sliding it to the left and off the outboard drive
roller bushing. (See Figure 21 for reference.)
Содержание MM3126
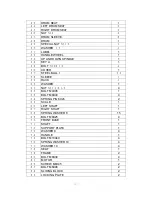
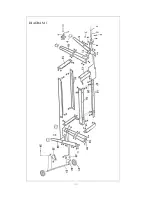
Страница 31: ...30 DIAGRAM 1 ...
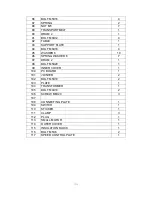
Страница 32: ...31 DIAGRAM 2 ...


