12
SECTION 5
OPERATION
5.1 SYSTEM START
-
UP
ATTENTION:
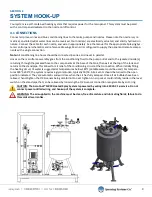
Before starting the system for the first time, be sure to follow all instructions on the drawings
and in the
“
System Hook Up
”
Section of this manual. Always check all electrical, hydraulic, and pneumatic
connections before powering on the system or turning on air and water supply.
WARNING: The heating circuit and all fluid delivery lines should be flushed prior to connecting to
nozzles and running the system.
5.2 FILLING THE HEATING CIRCUIT
1.
Begin by turning the disconnect switch to the
“
On
”
position.
2.
Apply power to the system using the
“
Power On
”
pushbutton. The Amber indicator will light up.
3.
Prior to the system being run for the first time, the heating circuit must be filled with conditioning fluid. DI water is
acceptable for temperatures of 180°F and below. For temperatures of 180°F
-
200°F, a 50/50 mixture of propylene
(or ethylene) glycol to DI water must be used.
4.
Connect the conditioning fluid source to the ¼
”
NPT (F) valve at the top of the standpipe.
5.
To fill the reservoir, open the valve and adjust the regulator. The regulator should be set to 5psi. The over
-
pressurization valve past the regulator will open at 10psi.
6.
Open the air purge vents on the return line and pump; these will automatically purge air out of the water line.
7.
As conditioning fluid fills the reservoir, loosen the 1/2G level sensor connection recognizable by an O
-
ring (bottom
connection on the stand pipe).
8.
Allow the fluid and air mixture to escape from the loosened connection until no air bubbles are seen; hand
-
tighten
the sensor to begin building pressure.
9.
Once the small, yellow light on the sensor is lit, allow the system to continue to fill for several minutes. Wait until
the inlet regulator at the top of the standpipe levels off at a pressure, making sure it is adjusted to 5psi at a no
-
flow
condition.
10.
Turn the pump on by using the selector switch on the system control panel. If the standpipe fluid level drops below
the level sensor, the pump will automatically be turned off and the Pump On light will be off.
11.
As the system continues to fill, the pump should resume operation. When the pump is running, water pressure at
the outlet of the pump should be approximately between 20
-
35psi.
12.
During the fill operation if the water pressure does not exceed about 20psi, make sure all the air vents are open.
Once all air is purged out of the system, the pressure at the pump outlet should remain steady.
If pressure surges on the regulator of the return reservoir, or a large amount of water is relieved out the over flow
check valve after shutting the pump off, then air may still present in the system.
13.
Repeat the purge process described above, and potentially try the following:
14.
Find the conditioning lines highest point and loosen the fitting until liquid is consistently leaking.
15.
Then tighten the fitting. Loosen the point level sensor on the heated system return tube to release any air trapped.
16.
Retighten the sensor when complete.
17.
Excess fluid in the system will be relieved when the system is heated to your highest operating temperature.
Note
: Less than 10psi could indicate air in the system, or low fluid level.
WARNING: Relieving air from the conditioning line should never be done when the system is hot; when reliev-
ing, fluid can be dispensed onto surrounding objects and people.
Содержание AutoJet AccuCoat MV10
Страница 1: ...1 ML00MV10HTSYS spray com AccuCoat MV10 Heated System OWNER S MANUAL...
Страница 10: ...10...


