General Safety Information
Coalescing filters are utilized in a variety of
air system applications. Because the
coalescing filter and other components
(compressor, spray gun, filter, regulator,
hoses, etc.) make up a high pressure
pumping system, the following safety
precautions should be observed at all times.
1. Read the instruction manuals for each
component carefully before attempting to
assemble, disassemble, or operate your
particular system.
2. Do not exceed the pressure rating of any
component in the system.
3. Protect material lines and air lines from
damage or puncture.
4. Never point a spray gun at oneself or any
other person. Accidental discharge may
result in serious injury.
5. Check hoses for weak or worn condition
before each use, making certain that all
connections are secure.
6. Release all pressures within the system
before attempting to service any
component.
Water vapors will pass
through these units
and could condense into liquid form
downstream as air temperature drops.
Install an air dryer if water vapors could
have a detrimental effect on the
application.
Materials
Body: Zinc
Bowl: Polycarbonate
Element: Synthetic fiber and polyurethane
foam
Elastomers: Neoprene and nitrile
Installation
1. Shut OFF air pressure. Install filter in air
line vertically (bowl down), with air flow
in direction of arrow on body, upstream
of regulators, lubricators, and cycling
valves, as close as possible to the air supply
when used as a main line filter or as close
as possible to the device being serviced
when used as a final filter.
2. Connect piping to proper ports using pipe
thread sealant on male threads only. Do
not allow sealant to enter interior of unit.
3. Be sure bowl is turned fully clockwise into
body before pressurizing. Tighten hand tight.
4. Install a Speedaire air line filter with a 5
µm element upstream of the coalescing
filter to obtain maximum element service
life.
Operation (See Figure 2)
1. Depress manual drain to expel
accumulated liquids. Keep liquids below
element (Ref. No. 11).
2. Replace filter element when pressure
differential across element exceeds 10 psi.
An excessive pressure drop across a
saturated but uncontaminated element
may indicate operation above maximum
flow rate (CFM). See
Specifications
.
Disassembly (See Figure 2)
1. Filter can be disassembled without
removal from air line.
2. Shut OFF inlet pressure. Reduce pressure
in inlet and outlet lines to zero.
3. Remove bowl by turning
counterclockwise.
4. Disassemble in general accordance with
the item numbers on Figure 2. Do not
remove the drain (Ref. No. 3) unless
replacement is necessary. Remove and
replace only if drain malfunctions or
converting to automatic drain.
Cleaning (See Figure 2)
1. Clean polycarbonate bowl with warm
water only. Clean other parts with warm
water and soap.
2. Rinse and dry parts. Blow out internal
passages in body (Ref. No. 1) with clean,
dry compressed air.
3. Inspect parts. Replace those found to be
damaged. Replace plastic bowl with a
metal bowl if plastic bowl shows signs of
cracking or cloudiness.
Assembly (See Figure 2)
1. Lubricate o-rings and the lip of the auto
drain valve (Ref. No. 8) with o-ring grease.
2. Assemble filter as shown on Figure 2.
Torque Table
Ref. No.
Inch Pounds (N-m)
3 (manual drain)
1.5 to 2.5 (0.17 to 0.28)
5, 10 (bowl)
5 to 10 (0.56 to 1.13)
12 (Element)
5 to 10 (0.56 to 1.13)
Speedaire
®
Coalescing Filters
Refer to Form 5S6040 for General Safety Information and Warranty
Operating Instructions & Parts Manual
4ZL16, 4ZL17
Please read and save these instructions. Read carefully before attempting to assemble, install, operate or maintain the product described. Protect yourself and
others by observing all safety information. Failure to comply with instructions could result in personal injury and/or property damage! Retain instructions for
future reference.
Form 5S6074
®
E
N
G
L
I
S
H
E
S
P
A
Ñ
O
L
F
R
A
N
Ç
A
I
S
Printed in U.S.A.
06530
0708/244/VCPVP
Description
Speedaire coalescing filters remove oil aerosols and submicron solid particles down to 0.01
micron from air supply lines by means of a coalescing filter element. Typical applications
include air bearings, air conveying, high speed air motors, pneumatic instrumentation and
controls, gauging equipment, and spray painting. Units are equipped with a manual drain.
Depress manual drain valve to drain accumulated liquids.
4ZL16
150 psi
125°F
6 cfm
1/8"
Polycarbonate 0.01µm
0.28
4ZL17
150
125
6.5
1/4
Polycarbonate 0.01
0.28
* At 100 psi inlet pressure, saturated element, and 3 to 5 psi pressure drop.
Maximum
Element
Inlet
Maximum
Maximum
Micron
Weight
Model
Pressure
Temperature CFM *
Ports
Bowl
Rating
(lbs)
Specifications
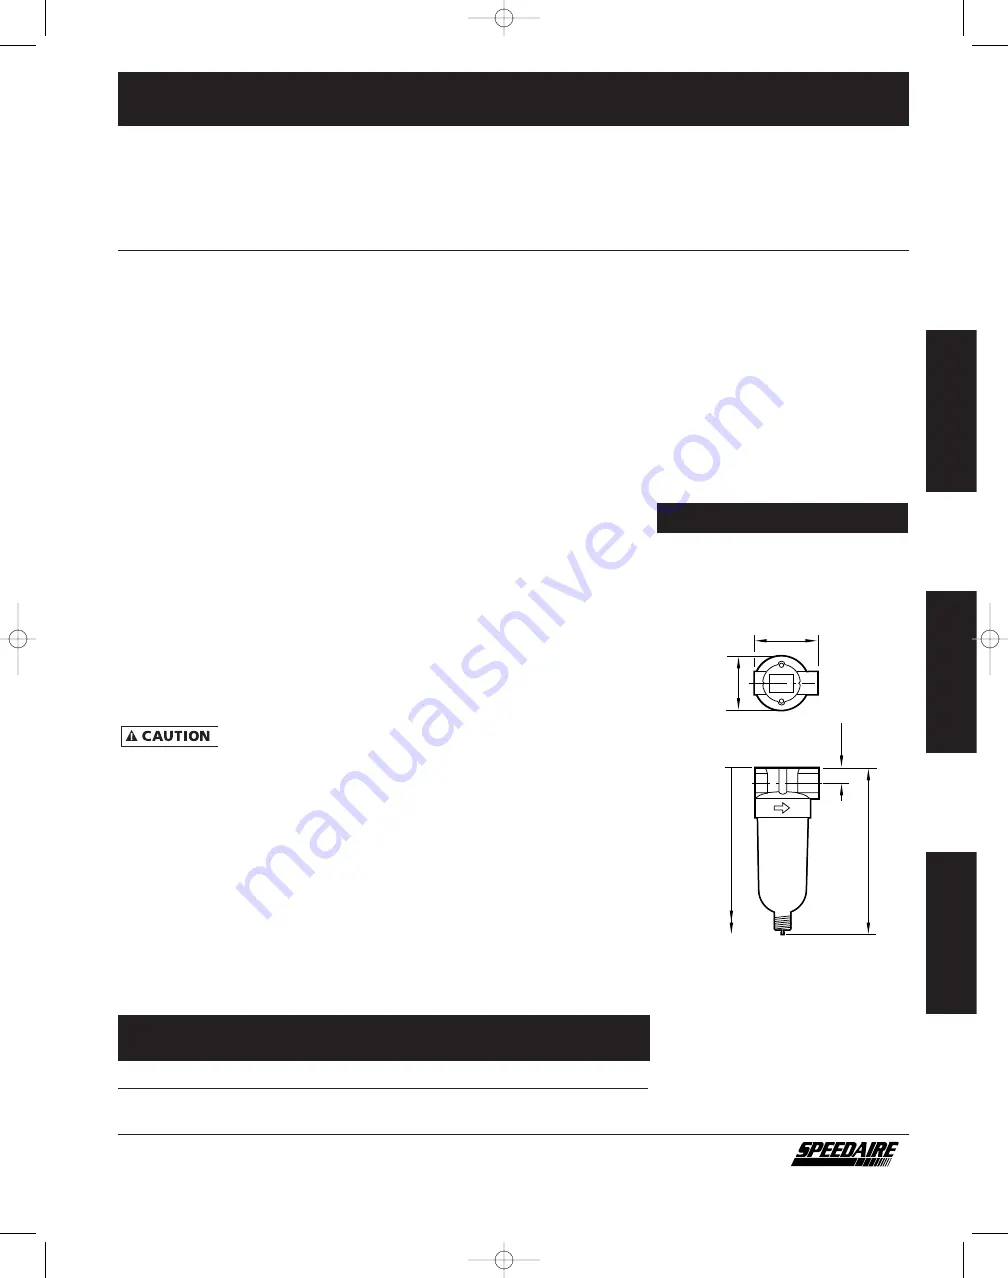
1
.4
5
(3
7
)
1.63 (42)
6
.2
2
(1
5
8
)
*
0
.3
8
(1
0
)
4
.2
5
(1
0
8
)
* Minimum clearance required to remove bowl.
Figure 1 - Dimensions in inches (mm)
5S5317:5S4373
8/30/08 3:55 PM Page 1


