Page 12
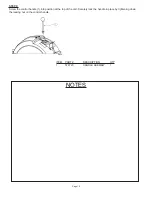
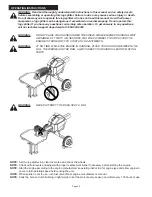
STEP 8:
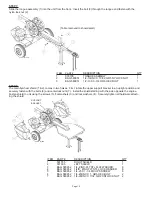
The main flywheel shield (1 & 2) comes in two halves. First, rotate the upper support bracket to an upright position and
securely fasten with the bolts (6) and centerlock nuts (7). Install the shield starting with the side opposite the engine.
Fasten shield to unit using the screws (5), flat washers (3) and lock washers (4). Securely tighten all hardware attach
-
ing the shield.
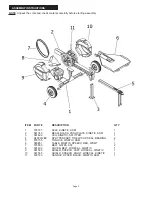
ITEM PART #
DESCRIPTION
QTY
1
581555
RIGHT SHIELD
1
2
581695
LEFT SHIELD
1
3
BAG 580952 1/4, ZINC-PLT STL FLAT WASHER
8
4
BAG 580952 1/4ID, ZINC-PLT STL LOCK WASHER
8
5
BAG 580952 1/4-20 X 1-1/4 PHILIPS SCREW
8
6
BAG 580952 1/4-20UNC X 1, GR5 HEX BOLT
2
7
BAG 580952 1/4-20UNC X 7/32, GR2 CNTLOCK NUT 2
SUPPORT
BRACKET
K1628
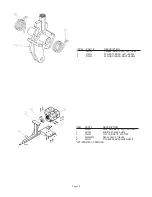
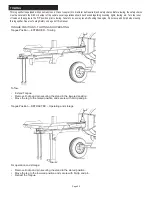
STEP 7:
Slide the tongue assembly (1) into the unit from the front. Insert the bolt (3) through the tongue and fasten with the
nylon lock nut (2).
ITEM
PART
#
DESCRIPTION
QTY
1 578705
TONGUE
ASEMBLY
1
2
BAG 580951 1/2-13UNC X 19/32, GR5 NYLOCK NUT
1
3
BAG 580951 1/2-13 X 3-3/4, GR5 HEX BOLT
1
K1626
(Table removed to show detail.)
Содержание 580899
Страница 2: ......
Страница 4: ......
Страница 28: ...NOTES ...
Страница 29: ......
Страница 32: ......
Страница 34: ......
Страница 58: ...NOTAS ...
Страница 59: ......
Страница 62: ......
Страница 64: ......
Страница 88: ...REMARQUES ...
Страница 89: ......
Страница 90: ......
Страница 91: ......


