Seaich Corporation, LLC. All rights reserved. www.seaich.com | Spacerails, LLC. www.spacerails.com
Page 13
2 ASSEMBLING THE RAILS: READ BEFORE YOU BEGIN
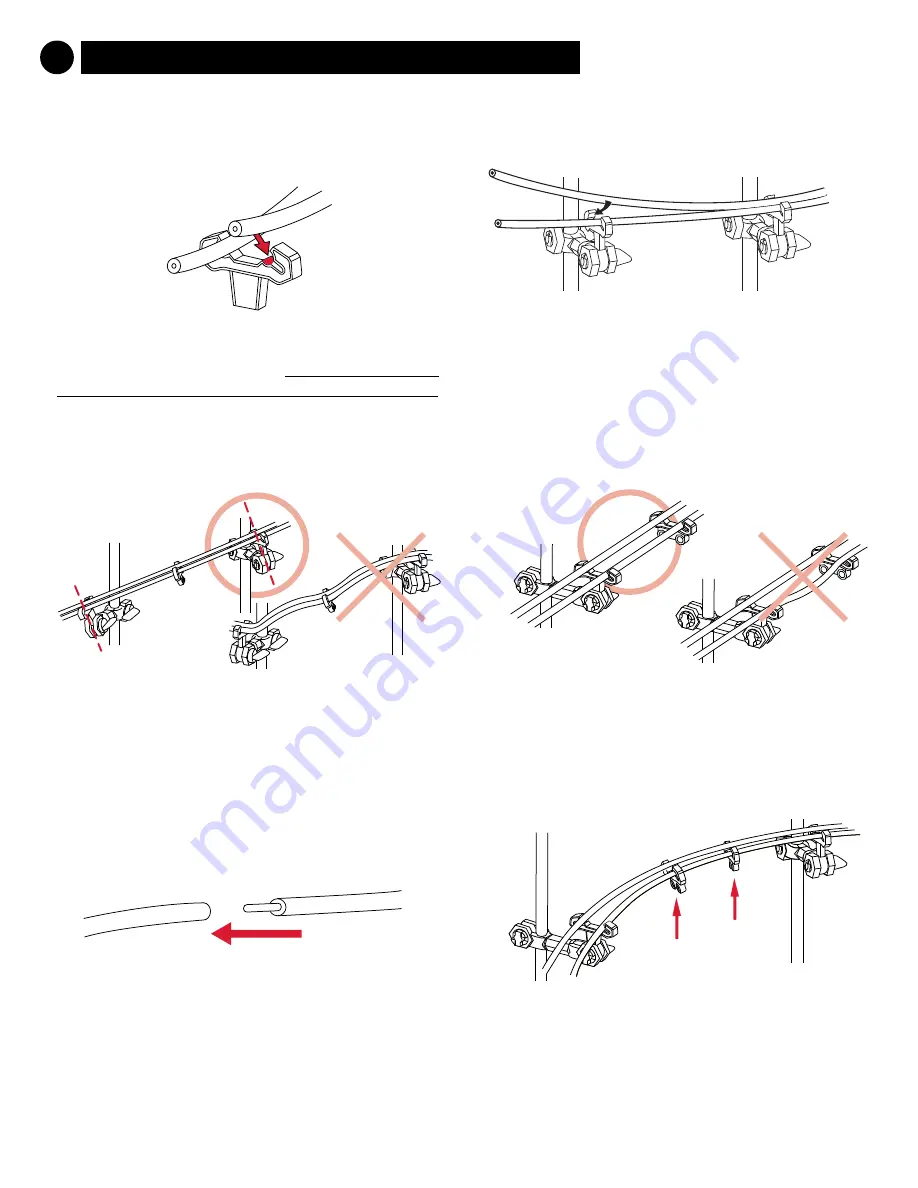
Connecting rails to arms:
To install the rails, press them
into the arm until you hear a click.
Remove rails to
reposition by pulling to center. DO NOT SLIDE RAILS
while still locked in arms or you may break the arms.
Angling the Arms:
Rotate arms on shafts and adjust
the angle of the arms to match the incline the rails will
travel along. See diagrams for rotation positions.
Rail side:
When installing Rails, make sure you keep
each rail always on the inner side or always on the
outer side of each arm as you install. Crossing over
will prevent the Marble from going down the track.
Rail stability:
To maintain stability on longer track
segments, attach Rail Clips between arms, usually one
between each set of arms, but use as needed. Twisting
Rail Clips also changes the angle of the rails.
Rail joining:
To join to pieces together, use Rail
Couplings. You may also use the Rail Couplings to
create custom designs using different lengths.
Smooth rails for efficient travel:
Make sure the rails
connect smoothly and are free of any bumps, twists,
or kinks.


