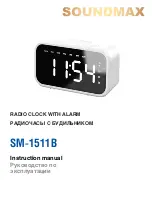
Instruction manual
3
Important safeguards
• The instruction manual contains important
operating and maintenance instructions. For
your safety, it is necessary to refer to the
manual. Keep the manual for future use.
• Do not hit or drop the unit
.
• Do not
e
xpose the unit to vibration, direct
sunlight, too high or low temperatures or
humidity.
• Do not disassemble the unit yourselves
.
Refer servicing to qualified service personnel
.
All the illustrations in this manual are
schematic images, which may differ from
actual objects.
Power supply
• The unit operates on an internal
rechargeable Li-ion battery and 220V mains
via a DC adapter (not included)
.
• The battery can be recharged with the
provided USB charging cable. Before first
plugging the appliance check that voltage
indicated on the rating label corresponds
to the mains voltage in your home.
• Insert the charging cable into the
DC
IN
socket on the unit.
• Connect the charging cable to the power
• For best results, try to fully charge the
battery before each use. If the battery is
drained, please allow it to recharge for a few
hours.
General operations
adapter
(not included)
. Plug the
adapter to the power source.
•
Press and hold the
ON
button
to switch the unit on.
Press and hold it
again
to switch off.
B
rightness
/Time & Temperature
• Press
the M button to switch to the
Setting the
clock
to set the
alarm hour
. Press the
SET
button
once
it
is set.
• Press the
|<<
and
>>|
buttons
to set the
alarm minute
.
Press the SET
button once it is set.
• Press the
|<< and >>| buttons
Setting the
alarm
• Press the
button
repeatedly
to
select
among
the
4
levels of
screen
brightness
(100%/50%/25%/0%)
.
• Press
and hold
the
button
to
switch
between the 12h or 24h time display modes
.
•
Press the button twice to switch between
Celsius and Fahrenheit in temperature
display.
clock mode.
•
The LED charge indicator will light on
when the unit is charging. Once the
charging is complete the LED will turn off.
• Press
and hold SET to start setting
the time and date. The year indication will
start to flash.
Use the |<< and >>| buttons
to set the year and press SET to confirm and
go to the next setting. You can hold the |<<
and >>| buttons when setting to speed up.
Repeat accordingly to set the month, day,
hour and minute.
to set
one of
the
5
alarm signals
.
Press
the SET button once it is set to finish and
exit the alarm settings.
• Press the
|<< and >>| buttons
• Press
the M button to switch to the
clock mode.
•
In the clock mode press >>| to
cycle through the 3 alarms. When one of the
alarms is selected, press |<< to activate or
deactivate it. Press and hold SET to start
setting the selected alarm.
the following settings:
- Alarm 1: 06:00
- Alarm 2: 13:00
- Alarm 3: 18:00
•
By default, the 3 alarms have
Содержание SM-1511B
Страница 1: ...RADIO CLOCK WITH ALARM SM 1511B Instruction manual...
Страница 2: ......
Страница 8: ...7 Li ion 220 DC IN ON 12 24 F 4 100 50 25 0 SET SET SET SET 5 SET SET...
Страница 10: ...9 1 1 USB 1 FM M TF TF microSD 32 MP3 FAT FAT32 USB...
Страница 15: ...1 2 3 12 4 5 6 7 www soundmax ru QR Java 1801 1802 29 29...
Страница 16: ......


