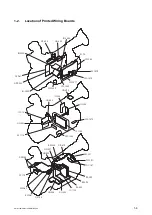

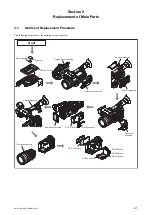


1-7.
Notes on Service
1-7-1.
Actions to Be Taken when Replacing Parts and Boards
Before replacement
The DPR-343 board contains all setting data of the menus (including picture profiles).
Before replacing the DPR-343 board, perform the following procedure to store the setup file in an SxS memory card.
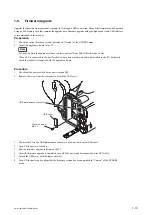
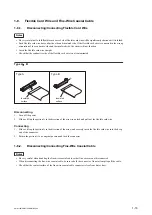
1.
Insert the SxS memory card for storing the setup file into the card slot.
Confirm that the SxS memory card icon corresponding to the slot appears on the screen.
When another SxS memory card is selected, switch the display with the SLOT SELECT button.
2.
Execute Store with Camera Data of the OTHERS menu.
During replacement
1.
When any of the following boards has been replaced, upgrade the firmware.
(
)
The firmware programs stored on the following boards are upgraded collectively.
• DCP-61 board
• DPR-343 board
• IFC-13 board
• KSW-62 board
• RE-298 board
• SWC-54 board
2.
When any of the following boards or part has been replaced, make adjustments again.
For the adjustment method, contact your local Sony Sales Office/Service Center.
• DCP-61 board
• IFC-13 board
• 3.5-inch LCD assembly
• CMOS block
1-7-2.
Actions to Be Taken when the Lens Has Been Replaced
When the lens has been replaced, adjustments including the flange back adjustment are required. For the adjustment
method, contact your local Sony Sales Office/Service Center.
1-7-3.
Notes on Replacing Onboard Parts
• The BI-286/293 boards and parts mounted on the BI-286/293 boards cannot be replaced independently. When the
each board or any part on the board is defective, replace the CMOS block.
• Similarly, part-level replacement is not possible for each board. If onboard parts become defective, replace the
board.
1-7-4.
Backup Battery
When the backup battery is replaced, the date and time in the internal clock need to be set. Refer to "Setting the Clock"
of the "Preparations" in the Operating Instructions.
PMW-160/PMW-150/PMW-EX260
1-15
Содержание XDCAM PMW-160
Страница 1: ...SOLID STATE MEMORY CAMCORDER PMW 160 PMW 150 PMW EX260 SERVICE MANUAL 1st Edition ...
Страница 4: ......
Страница 8: ......
Страница 10: ......
Страница 30: ......
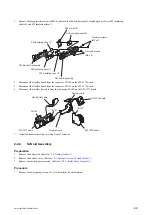
Страница 38: ...3 Install the removed parts by reversing steps of removal PMW 160 PMW 150 PMW EX260 2 8 ...
Страница 92: ......
Страница 128: ......
Страница 130: ......
Страница 131: ......