background image

Connections

5

Connections

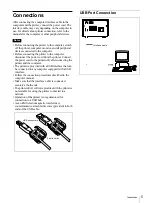
After connecting the computer interface cable to the 
computer and the printer, connect the power cord. The 
interface cable may vary depending on the computer in 
use. For details about printer connection, refer to the 
manuals for the computer or other peripheral devices.

Notes

• Before connecting the printer to the computer, switch 

off the printer, computer, monitor, and all peripheral 
devices connected to the computer.

• Before connecting the printer to the computer, 

disconnect the power cord from the printer. Connect 
the power cord to the printer only after connecting the 
printer and the computer.

• The printer is provided with a USB interface that can 

be connected to any computer equipped with a USB 
interface.

• Follow the connection procedures described in the 

computer manual.

• Make sure that the interface cable is connected 

securely at both ends.

• The printer driver software provided with the printer is 

not suitable for using the printer connected to a 
network.

• Operation of the printer is not guaranteed for 

connection to a USB hub.

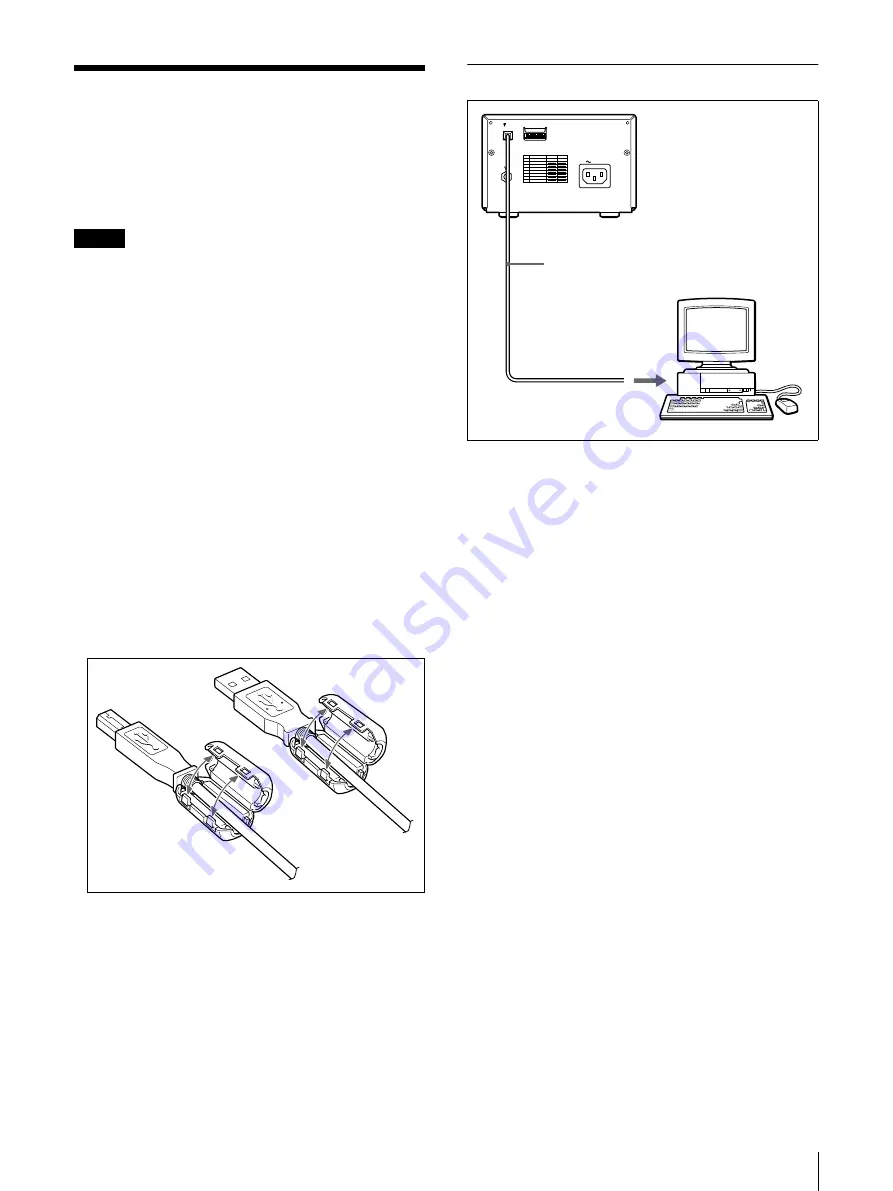
• As an EMI (electromagnetic interference) 

countermeasure, attach ferrite cores (provided) to both 
ends of the USB cable.

USB Port Connection

USB connectors

Ferrite cores

AC IN

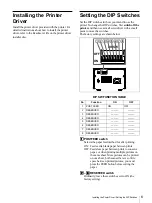
DIP SW

USB

OFF

ON

DIP SW FUNCTION TABLE 

NO FUNCTION

SW-ON

SW-OFF

1
2
3
4
5
6
7
8

RESERVED

RESERVED

RESERVED

RESERVED

POST FEED

RESERVED
RESERVED
RESERVED

OFF

ON

Interface cable

Содержание UP-D895MD

Страница 1: ...nstructions for Use Read all of these instructions carefully These instructions describe how to use this product correctly and safely and provide precautions about how to avoid accidental damage to the printer 2001 Sony Corporation UP D895MD ...

Страница 2: ...mer or connected via an additional protective earth terminal to system ground unless it is certified according to Standard IEC60601 1 Patient Area 3 The leakage current could increase when connected to other equipment 4 This equipment generates uses and can radiate frequency energy If it is not installed and used in accordance with the instruction manual it may cause interference to other equipmen...

Страница 3: ...ement to match the size of the paper Margin Settings Possible Smaller margins can be set to allow printing more images with one roll of paper Error Alarm Function To prevent errors an alarm buzzer tells you when you make a mistake Easy Paper Loading Free access to the door panel allows you to drop paper into the printer for easy loading Table of Contents Getting Started Part Names and Functions 4 ...

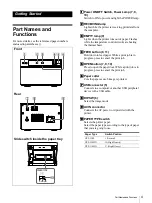
Страница 4: ...oor While a print job is in progress press to cancel the print job F F F F Paper cutter Cuts the paper as each image is printed G G G G USB connector 5 Connects to a computer or another USB peripheral device with a USB cable H H H H DIP SW 6 Select the image mode I I I I AC IN connector Connects the AC power cord provided with the printer J J J J PAPER TYPE switch Selects the printer paper Select ...

Страница 5: ...inter and the computer The printer is provided with a USB interface that can be connected to any computer equipped with a USB interface Follow the connection procedures described in the computer manual Make sure that the interface cable is connected securely at both ends The printerdriversoftwareprovidedwiththe printeris not suitable for using the printer connected to a network Operation of the pr...

Страница 6: ...EED switch Selects the paper feed method for after printing ON Feeds extra blank paper between prints OFF Feeds less paper between prints to conserve paper or when printing multiple pictures on the same sheet More pictures can be printed on one sheet but because there is so little space between printed pictures you must press the FEED button before cutting the paper B B B B H H H H RESERVED switch...

Страница 7: ...re is not higher than 30 C 86 F Store printed pictures in a polypropylene pouch or between sheets of paper that contain no plastic Do not store printed pictures where they will be exposed to direct sunlight or high humidity Do not store printed pictures near volatile liquids or allow the prints to contact any organic volatile liquid cellophane tape or any compound of vinyl chloride To prevent fadi...

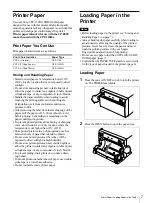
Страница 8: ...irt or dust cannot be used for printing 4 Close the paper door and press on it to shut it Notes Make sure that the paper is loaded straight If it is skewed this could cause the paper to jam If you did not pull out enough paper at Step3 without pulling on the paper press the FEED button on the operation panel to feed some more paper out of the printer Remove label and pull out 15 20 cm about 6 8 in...

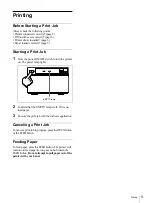
Страница 9: ...rinter on The power lamp lights 2 Confirm that the EMPTY lamp is off If it is on load paper 3 Execute the print job with the software application Canceling a Print Job To cancel a print job in progress press the OPEN button or the FEED button Feeding Paper To feed paper press the FEED button The printer will continue to feed paper as long as you hold down the FEED button Do not attempt to pull pap...

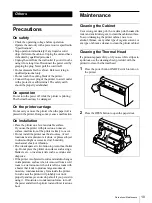
Страница 10: ...s Avoid locations near radiators or air ducts or places subject to direct sunlight or excessive dust humidity mechanical shock or vibration Provide adequate air circulation to prevent heat build up Do not place the printer on surfaces such as rugs blankets etc or near materials such as curtains and draperies If the printer is subjected to wide and sudden changes in temperature such as when it is m...

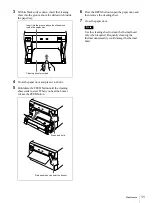
Страница 11: ...ect When you hear the buzzer release the FEED button 6 Press the OPEN button to open the paper door and then remove the cleaning sheet 7 Close the paper door Note Use the cleaning sheet to clean the thermal head only when required Frequently cleaning the thermal unnecessarily could damage the thermal head Insert into the groove above the slide switch inside the paper tray Cleaning sheet provided P...

Страница 12: ...er only Accessories provided Thermal head cleaning sheet K 1 Printer driver Instructions for Use K 1 Ferrite core K 2 Before Using this Printer K 1 Service Contact List K Software License K 1 Media label K 1 USB Interface Data transmission UniversalSerialBusSpecificationRev 1 0 Standard USB Interface Connector Pin Assignment The design and these specifications are subject to change without prior n...

Страница 13: ...job and allow the printer to cool tPaper loaded correctly Paper feeds but printing does not start tPrinter paper loaded with the wrong side up page 7 Paper Jams Jammed paper visible tPress the OPEN button to open the paper door and then gently pull the jammed paper out of the printer Condensation collected in printer tIf the printer has just been brought into a warm room from a cold loca tion cond...

Страница 14: ...Sony Corporation ...
Отзывы: