O
per
at
ion
Before Printing
9
4
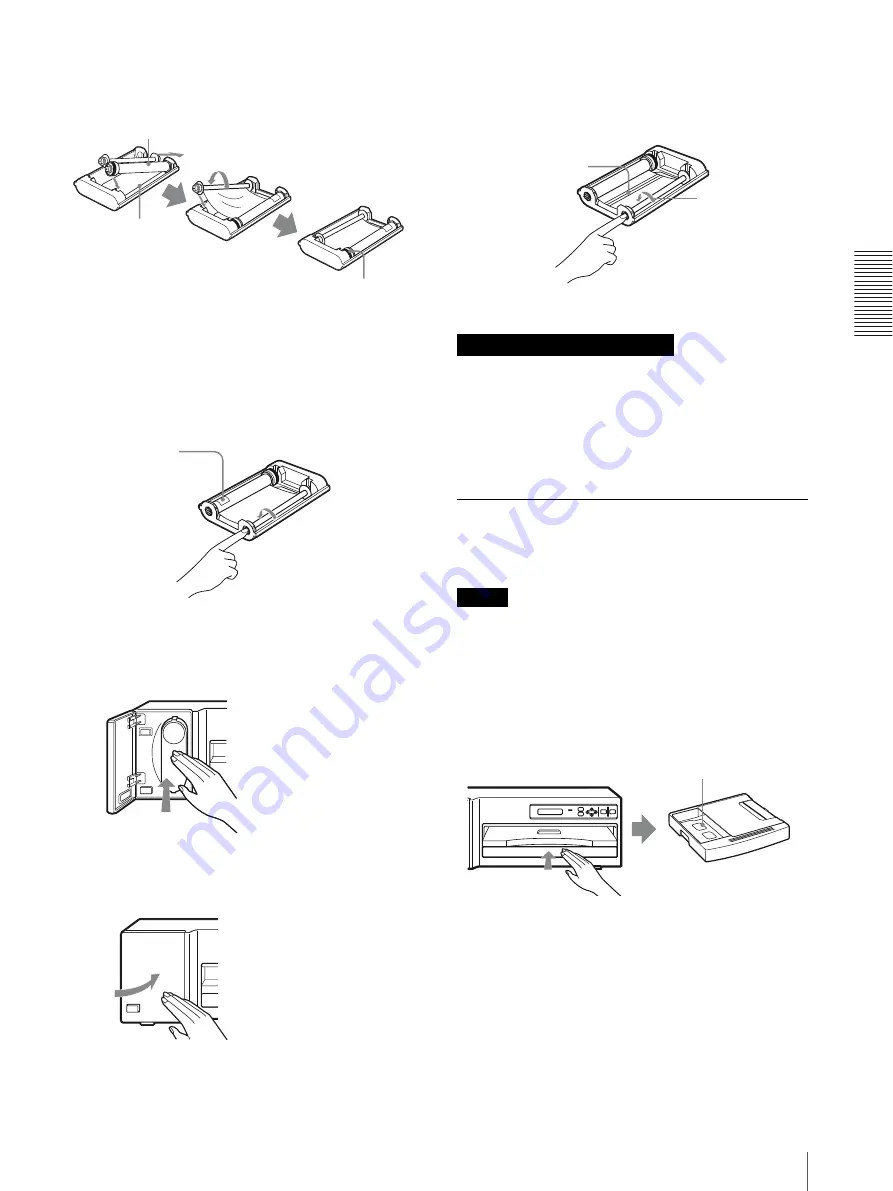
Load the ink ribbon to ink ribbon holder.
5
Remove any slack from the ink ribbon.
If the ribbon is left slack, it may be crumpled and
damaged when inserted.
6
Insert the ink ribbon cassette firmly until it stops.
7
Close the ribbon door.
If your ink ribbon should tear
Repair the tear with transparent tape. There should be no
problem with using the remaining portion of the ribbon.
• Avoid placing the ink ribbon in a location subject to:
– high temperatures
– high humidity
– excessive dust
– direct sunlight
• Store partially used ink ribbon in its original package.
Loading the Paper
Load the paper by the following procedure. Be careful
not to touch the printing surface of the paper.
Note
When loading the paper, do not turn off the power. If you
turn off the power, the image data stored in the memory
will be lost.
1
Press PUSH on the paper tray.
The paper tray is ejected.
1
Load the spool holding the ink ribbon into the right-hand
part of the holder, while pressing in the arrow direction.
2
Fit the other
spool into the
left-hand part of
the holder.
Ink ribbon holder
(supplied)
Bar code
“Start” position
marker
Wind the spool until the
“Start” position marker faces
upward.
SONY mark faces forwards.
Notes When storing ink ribbons
Transparent
tape
Remove any
slack.
Remove the printing surface
protection sheet, if any.
Paper tray


