O
per
a
tio
n
Printing
32
Making Copies of the same image continuously
Press the COPY button, then press it again while the first
paper is printing. When the COPY button is pressed, a
buzzer sounds, and you can copy the first printout
continuously. With each press of the COPY button,
prints only one paper regardless of the paper number set
in the “QTY” menu.
To interrupt copying
To cancel a print job in progress, press the OPEN/
CLOSE button, FEED button or CUT button.
Printing the captured image with
enlargement
When “RSIZ: ON” is set in the “DIGITAL” -
“-RESIZE” menu, you can print out the enlarged image
up to the same size as the printing paper.
Adjusting print image quality
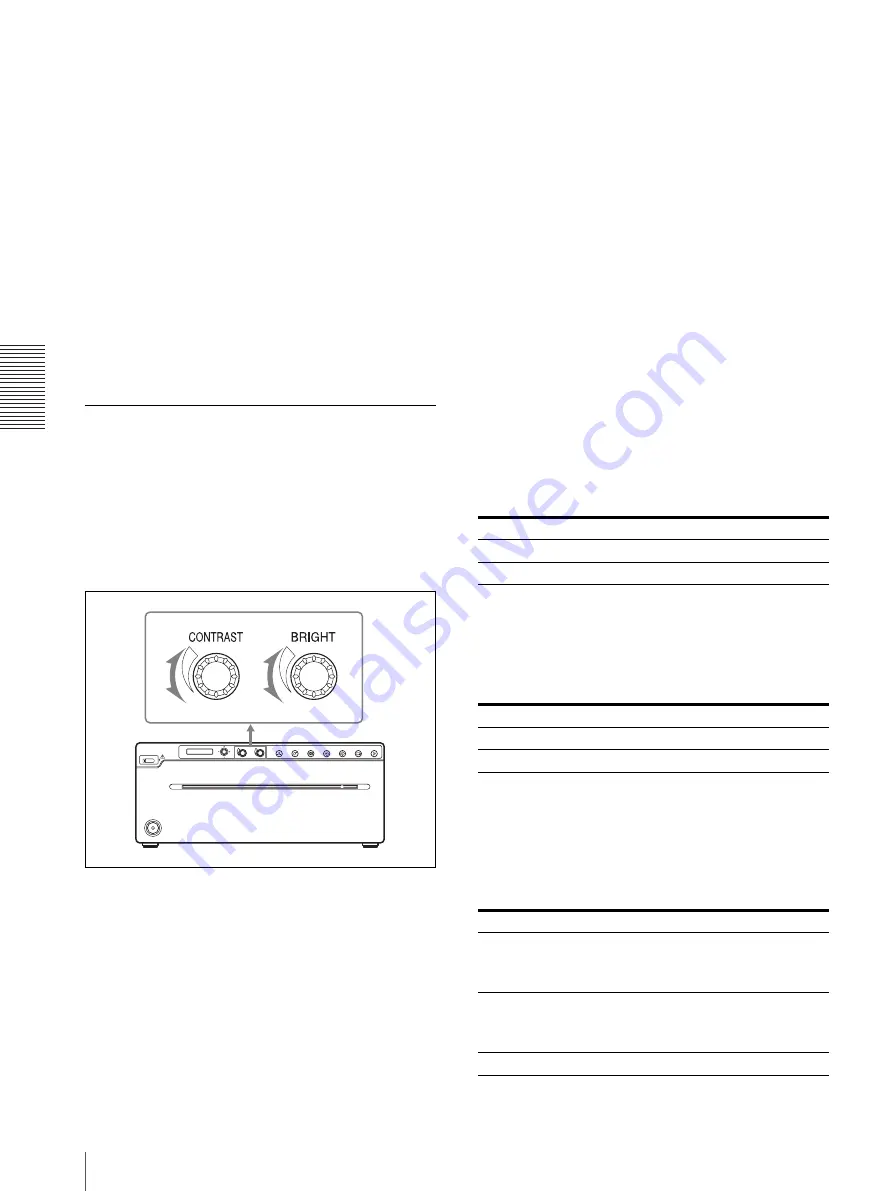
You can adjust print image quality using the
CONTRAST and BRIGHT dials, or by menu operation.
Adjusted settings are stored after the unit is turned off,
and retained until further adjustment is made.
To adjust the contrast or brightness
using the control dials
To adjust the contrast
You can adjust the contrast of printouts using the
CONTRAST dial.
To make the contrast stronger:
Turn the CONTRAST
dial clockwise.
To make the contrast weaker:
Turn the CONTRAST
dial counterclockwise.
To adjust the brightness
You can adjust the brightness of printouts using the
BRIGHT dial.
To make the image brighter:
Turn the BRIGHT dial
clockwise.
To make the image darker:
Turn the BRIGHT dial
counterclockwise.
To lock the brightness and contrast dials
When the menu lever is held down for about 3 seconds,
“LOCK” is displayed on the LCD. In this state, you
cannot change values by operating the dials.
To release the lock, hold down the menu lever for about
3 seconds again.
Even when the dials are locked, however, you can
change values by using the menu.
Adjusting the picture quality using the
menu
You can adjust the print image quality by the “ADJUST”
menu.
To adjust the brightness
You can adjust the brightness of printouts in the
“ADJUST” – “-BRIGHT” menu.
The values you specify using the menu and using the
dial are synchronized.
To adjust the contrast
You can adjust the contrast of the printing image in the
“ADJUST” – “-CONTRA” menu.
The values you specify using the menu and using the
dial are synchronized.
To adjust the gamma
You can change the gamma of printouts in the
“ADJUST” – “-GAMMA” menu.
If an image contains a lot of black or white portions, by
adjusting this setting, you can obtain clearer detail in
those portions.
Contents
Operation/Value
Lighten
Raise the value
Darken
Lower the value
Contents
Operation/Value
Stronger the contrast
Raise the value
Weaker the contrast
Lower the value
Contents
Operation/Value
When you print an image which has many black portions (hard
tone)
GAMMA 3
When you print an image which has many white portions (soft
tone)
GAMMA 2
Normal
GAMMA 1
Содержание UP-971AD
Страница 46: ...Sony Corporation ...


