background image

102

FR

x

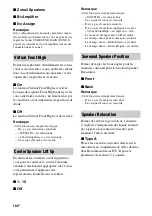
Zone2 Speakers

x

Bi-Amplifier

x

No Assign

Remarque

Si la configuration des enceintes prend en compte 
des enceintes surround arrière, vous ne pouvez pas 
régler les bornes SURROUND BACK (ZONE 2) 
pour le raccordement d’un bi-amplificateur ou une 
connexion dans la zone 2.

Permet de reproduire virtuellement les sorties 
sonores des enceintes avant supérieures même 
dans un environnement sans enceintes avant 
supérieures de gauche et de droite.

x

On

La fonction Virtual Front High est activée. 
Lorsque des signaux Front High sont reçus, les 
sons sont traités comme s’ils étaient émis par 
les enceintes avant supérieures de gauche et de 
droite.

x

Off

La fonction Virtual Front High est désactivée.

Remarque

• Cette fonction est inopérante lorsque :

– Il n’y a pas d’enceintes surround.
– « MULTI IN » est sélectionné.
– « 2ch Analog Direct » est sélectionné.
– Un casque d’écoute est raccordé.

En utilisant les enceintes avant supérieures, 
vous pouvez soulevez le son de l’enceinte 
centrale à une hauteur appropriée sur l’écran, 
vous permettant d’apprécier une 
représentation naturelle sans inconfort.

x

1~10

x

Off

Remarque

• Cette fonction est inopérante lorsque :

– « MULTI IN » est sélectionné.
– Un casque d’écoute est raccordé.
– Il n’y a pas d’enceinte centrale.
– Il n’y a pas d’enceintes supérieures avant et 

« Virtual Front High » est réglé sur « Off ».

– Le mode de champ sonore 2CH est utilisé.
– Le champ sonore pour la musique est utilisé.
– Le champ sonore « Multi Stereo » est utilisé.
– Le champ sonore « Movie Height » est utilisé.

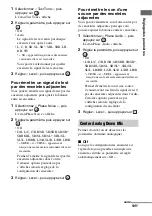
Permet de régler les bons angles pour les 
enceintes surround pour la fonction Speaker 
Relocation.

x

Front

x

Back

Remarque

• Cette fonction est inopérante lorsque :

– Il n’y a pas d’enceintes surround.
– Un casque d’écoute est raccordé.

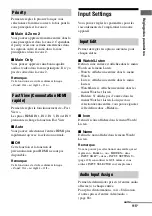
Permet de calibrer la position de l’enceinte 
(l’angle de configuration de chaque enceinte 
par rapport à la position de mesure) pour 
améliorer l’effet surround.

x

Type A

Placez les enceintes surround arrière sur le 
mur arrière en complément de celles décrites 
dans Recommandations ITU-R pour le 
placement d’enceintes 5.1 canaux.

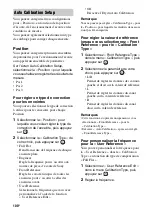
Virtual Front High

Center Speaker Lift Up

Surround Speaker Position

Speaker Relocation

Содержание STR-DA5800ES

Страница 1: ...e read the Quick Setup Guide supplied with the receiver first This allows you to understand the connections and operations flow of the receiver more easily Veuillez d abord lire le guide d installation rapide fourni avec l ampli tuner Ceci vous permettra de comprendre le déroulement des connexions et des opérations du récepteur plus facilement ...

Страница 2: ...ing instructions in the literature accompanying the appliance For customers in the United States Owner s Record The model and serial numbers are located on the rear of the unit Record these numbers in the space provided below Refer to them whenever you call upon your Sony dealer regarding this product Model No Serial No Important Safety Instructions 1 Read these instructions 2 Keep these instructi...

Страница 3: ...and on the user is encouraged to try to correct the interference by one or more of the following measures Reorient or relocate the receiving antenna Increase the separation between the equipment and receiver Connect the equipment into an outlet on a circuit different from that to which the receiver is connected Consult the dealer or an experienced radio TV technician for help CAUTION You are cauti...

Страница 4: ...nd System Manufactured under license from Dolby Laboratories Dolby Pro Logic Surround EX and the double D symbol are trademarks of Dolby Laboratories Manufactured under license under U S Patent No s 5 956 674 5 974 380 5 978 762 6 487 535 6 226 616 7 212 872 7 003 467 7 272 567 7 668 723 7 392 195 7 333 929 7 548 853 other U S and worldwide patents issued and pending DTS HD the Symbol DTS HD and t...

Страница 5: ...yReady content access technology to protect their intellectual property including copyrighted content This device uses PlayReady technology to access PlayReady protected content and or WMDRM protected content If the device fails to properly enforce restrictions on content usage content owners may require Microsoft to revoke the device s ability to consume PlayReady protected content Revocation sho...

Страница 6: ...s HDMI output jacks 22 37 Fast View You can select an HDMI Input method that is faster than the normal selection Fast View HDMI IN 1 IN 2 IN 3 IN 4 and IN 9 jacks support the Fast View function 116 Control for HDMI You can operate the receiver and other equipment in conjunction with each other using the Control for HDMI function 84 115 Preview for HDMI The receiver allows you to display a live pic...

Страница 7: ...ikverein Vienna Two modes to match the position of the sound source to the screen Movie Height and Vocal Height 63 65 Raising the center speaker sounds to an appropriate height Center Speaker Lift Up By using the front high speakers you can lift up the sounds of the center speaker to an appropriate height on the screen This function Center Speaker Lift Up allows you to enjoy natural representation...

Страница 8: ...al display 108 The Pass Through function outputs HDMI signals to the TV even when the receiver is in standby mode 87 Feature Description Page Environment friendly function The Auto Standby function switches the receiver to standby mode automatically if you do not operate the receiver for a specific period of time or when there is no signal input to the receiver 121 More useful You can operate the ...

Страница 9: ...2 Using the Sound Optimizer function 67 Adjusting the equalizer 67 Using the Universal Remote Control Function Selecting the equipment you want to operate 69 Operating the AV equipment 69 Turning off all connected equipment ROOM OFF 71 Making Universal Remote Control settings 71 Using the Home Automation Function Saving various settings for the receiver and recalling those settings all at one time...

Страница 10: ...o the factory default settings 96 Adjusting Settings Using the setting menu 97 Easy Setup 100 Speaker Settings 100 Audio Settings 107 Video Settings 110 HDMI Settings 114 Input Settings 116 Network Settings 117 Internet Services Settings 118 Home Control Settings 119 Zone Settings 120 System Settings 121 Network Update 122 Operating without using the GUI 123 Additional Information Precautions 130 ...

Страница 11: ...to The receiver in zone 2 or zone 3 is turned on The lamp turns off when the receiver is in standby mode and the above settings are off B SPEAKERS A B A B OFF page 48 C SOUND OPTIMIZER page 67 D MEMORY ENTER TUNING page 61 E Remote sensor Receives signals from remote control F 2CH A DIRECT A F D MOVIE HD D C S MUSIC page 62 63 G Display window page 13 Front panel To remove the cover Press PUSH Whe...

Страница 12: ...ge 72 M HDMI OUT A B OFF page 87 N PHONES jack Connects to headphones O TONE Press TONE repeatedly to select the speaker and range Then turn the dial to adjust the bass middle treble level of the speaker P AUTO CAL MIC jack page 100 Connect the supplied optimizer microphone for Auto Calibration to this jack Q iPod iPhone USB port and VIDEO IN jack page 36 53 54 R VIDEO 2 IN jacks page 36 S MULTI C...

Страница 13: ... Back Left SBR Surround Back Right SB Surround Back Example Recording format 5 1 Speaker pattern 3 0 1 Sound Field A F D Auto C INPUT indicator Lights up to indicate the current input AUTO The INPUT MODE is set to AUTO HDMI COAX OPT MULTI MULTI CHANNEL INPUT ARC page 88 D HDMI OUT A B page 87 E SLEEP page 93 F MEM Lights up when the preset memory function is activated G ZONE 2 ZONE 3 page 76 H L F...

Страница 14: ...g Dolby Digital format signals D Dolby Digital D Dolby Digital Plus D EX Dolby Digital Surround EX S DTS HD indicator Lights up when the receiver is decoding DTS HD DTS HD Lights up constantly with the one of the following indicators MSTR DTS HD Master Audio HI RES DTS HD High Resolution Audio T TrueHD Lights up when the receiver is decoding Dolby TrueHD U Dolby Pro Logic indicator Lights up with ...

Страница 15: ... 24 bit decoding DISC DTS ES Discrete 6 1 MTX DTS ES Matrix 6 1 wj NEO X Lights up when DTS Neo X Cinema Music Game decoding is activated wk V FH Lights up when the Virtual Front High feature is enabled so that the sound output from the front speakers can be virtually reproduced even in an environment without front L R speakers ...

Страница 16: ...31 33 34 B RS232C port Used for maintenance and service C ANTENNA section AM ANTENNA jack page 41 FM ANTENNA jack page 41 D LAN ports switching hubs page 45 E UWA C4Z Connect the supplied Lighting Control Adapter UWA C4Z to this port F COMPONENT VIDEO INPUT OUTPUT section page 29 32 34 Y PB PR IN OUT jacks G SPEAKERS section page 27 ...

Страница 17: ...er 12V TRIGGER compliant equipment I VIDEO AUDIO INPUT OUTPUT section page 29 32 33 34 35 AUDIO IN OUT jacks VIDEO IN OUT jacks AUDIO OUT jacks VIDEO OUT jack page 76 ZONE 2 VIDEO OUT jack page 78 An RJ 45 jack used to send a video signal to the equipment in zone 2 Use a CAT5 cable for the connection Used for custom installation For information on how to use this jack consult your dealer Attention...

Страница 18: ... then press ENT MEM to enter the value or track using the numeric buttons wd or press ENT MEM then press the numeric buttons wd to select a preset number to which a station is stored during tuner operation G SEN Accesses the home page of the Sony Entertainment Network SEN a network service provided by Sony H WATCH LISTEN page 52 I PAGE page 69 Allows you to scroll quickly through lists of media J ...

Страница 19: ...ton function to activate the buttons printed in pink V Input buttons Press one of the buttons to select the equipment you want to use When you press any of the input buttons the receiver turns on Press SHIFT wa then press the buttons The special and keys are used mostly for HD channel selection W Numeric buttons Press SHIFT wa then press numeric buttons to input numbers Press numeric buttons to se...

Страница 20: ...able on page 70 for information on the buttons that you can use to control each types of equipment 2 A tactile dot is attached to these buttons 5 VIDEO 2 N CH Use it as a mark of operation 3 Functions are available only for a USB input or a Sony Entertainment Network SEN Note The above explanations are intended to serve as examples ...

Страница 21: ...See the illustration on the right Select the connection according to the jacks on your equipment The receiver has a video conversion function For details see Function for conversion of video signals page 22 See 3 Connecting the video equipment page 31 Connecting the audio equipment See 4 Connecting the audio equipment page 38 Preparing the receiver and the remote control See 8 Preparing the receiv...

Страница 22: ...resolution has been converted may not be output from the COMPONENT VIDEO MONITOR OUT jacks or the HDMI OUT jacks simultaneously If you connect equipment to both the COMPONENT VIDEO MONITOR OUT jacks and the HDMI OUT jacks priority is given to the output from the HDMI OUT jacks Note on Zone 2 HDMI video output Only HDMI IN input signals can be output through the HDMI ZONE 2 OUT jack To display Clos...

Страница 23: ...yback equipment does not correspond to the format For details refer to the operating instructions of the playback equipment Digital audio formats supported by the receiver Audio format Maximumnumber of channels COAXIAL OPTICAL HDMI Dolby Digital 5 1ch a a Dolby Digital EX 6 1ch a a Dolby Digital Plus 7 1ch a Dolby TrueHD 7 1ch a DTS 5 1ch a a DTS ES 6 1ch a a DTS 96 24 5 1ch a a DTS HD High Resolu...

Страница 24: ...ted on a computer may not play The receiver can recognise the following files or folders in USB devices up to folders in the 3rd tree up to 500 files in a single tree The receiver can recognise the following files or folders stored in the DLNA server up to folders in the 18th tree up to 999 files in a single tree Concerning the formats defined in the DLNA guidelines the server is required to offer...

Страница 25: ...d sound in 6 1 channel or 7 1 channel format AFront left speaker BFront right speaker CCenter speaker DSurround left speaker ESurround right speaker FSurround back left speaker GSurround back right speaker JSubwoofer 7 1 channel speaker system using front high speakers You can enjoy vertical sound effects e g Pro Logic IIz mode Neo X mode AFront left speaker BFront right speaker CCenter speaker DS...

Страница 26: ...mum angle page 103 Arrange the surround back speakers spread further back than 90 degrees to operate Speaker Relocation effectively Install the front high speakers at the same angle as that of the front speakers The position should be at a height on or above an extended diagonal line across the screen of a TV or monitor 6 channel speaker system Place the surround back speaker behind the seating po...

Страница 27: ...ont speaker system connect it to the FRONT B terminals You can select the front speaker system you are using with SPEAKERS on the front panel page 11 2 If you connect only one surround back speaker connect it to the SURROUND BACK ZONE 2 L terminals 3 When you connect a subwoofer with an auto standby function turn off the function when watching movies If the auto standby function of the subwoofer i...

Страница 28: ... connection tool ZONE 2 connection Only if you do not use surround back speakers you can assign the SURROUND BACK ZONE 2 terminals F and G to the speakers of zone 2 Set the SURROUND BACK ZONE 2 terminals to Zone2 Speakers in Speaker Connection in the Speaker Settings menu page 102 See Using Multi zone Features page 76 for details on connection and operation in zone 2 Speaker cord connection tool L...

Страница 29: ...Audio cord not supplied CVideo cord not supplied DComponent video cord not supplied EHDMI cable not supplied We recommend that you use a Sony HDMI cable If you connect the receiver to an Audio Return Channel ARC compatible TV s HDMI jack via an HDMI cable this connection is not necessary If you connect the receiver to an Audio Return Channel ARC compatible TV connect it to an HDMI jack designated ...

Страница 30: ...ng optical digital cords insert the plugs straight until they click into place Do not bend or tie optical digital cords Tip The sound of the TV is output from the speakers connected to the receiver if you connect the audio output jack of the TV and the TV IN jacks of the receiver In this configuration set the sound output jack of the TV to Fixed if it can be switched between either Fixed or Variab...

Страница 31: ... an HDMI jack see page 32 AHDMI cable not supplied We recommend that you use a Sony HDMI cable You can connect any equipment with HDMI output jacks to the HDMI IN jacks of the receiver Connections required for watching content recorded on Blu ray Discs or DVDs DVD player Blu ray Disc Player Video audio signals A continued ...

Страница 32: ...ary to connect all the cords Connect cords according to the jacks of your equipment ACoaxial digital cord not supplied BAudio cord not supplied CVideo cord not supplied DComponent video cord not supplied DVD player Blu ray Disc Player Audio signals Video signals or or A B C D ...

Страница 33: ... video game with an HDMI cable If you want to output multi channel surround sound from the receiver use B for the audio connection Notes When connecting optical digital cords insert the plugs straight until they click into place Do not bend or tie optical digital cords Connections required for playing video games PlayStation 3 video game with an HDMI jack A Video audio signals or B C D Audio signa...

Страница 34: ...the receiver only by connecting the satellite tuner cable box with an HDMI cable If you want to output multi channel surround sound from the receiver use B for the audio connection Connections required for watching programs via satellite broadcasting or via a cable TV Satellite tuner Cable box with an HDMI jack Video audio signals or or Audio signals Video signals A B C D E Satellite tuner Cable b...

Страница 35: ...tal cords insert the plugs straight until they click into place Do not bend or tie optical digital cords AAudio cord not supplied BVideo cord not supplied Connections required for watching content recorded on video tapes VCR A B Audio signals Video signals ...

Страница 36: ...audio cord not supplied BHDMI cable not supplied Connections required for watching content via a camcorder To the VIDEO 2 IN jacks Camcorder without an HDMI jack A B Video audio signals Camcorder with an HDMI jack ...

Страница 37: ...c to the receiver using High Speed HDMI cables put on 3D glasses and then play back 3D compatible content The receiver is compatible with 4K signals output through its HDMI output jacks Analog input video signals can be up scaled to 4K The 4K input signals via HDMI IN 1 IN 2 on the rear and IN 9 on the front from a 4K compatible player are output as they are as 4K signals To enjoy 4K images connec...

Страница 38: ...jack see page 39 AHDMI cable not supplied We recommend that you use a Sony HDMI cable You can connect any equipment with HDMI output jacks to the HDMI IN jacks of the receiver Connections required for listening content recorded on Super Audio CDs or ordinary CDs CD player Super Audio CD player A Video audio signals ...

Страница 39: ...channel decoder It is not necessary to connect all the cords Connect cords according to the jacks of your equipment ACoaxial digital cord not supplied BAudio cord not supplied CMonaural audio cord not supplied Note Audio input signals from MULTI CHANNEL INPUT jacks cannot be recorded Tip All the digital audio jacks are compatible with 32 kHz 44 1 kHz 48 kHz 88 2 kHz and 96 kHz sampling frequencies...

Страница 40: ... When you play a Super Audio CD connect the player to the MULTI CHANNEL INPUT or SA CD CD IN jacks or connect a player which can output DSD signals from the HDMI jack to the receiver using an HDMI cable Refer to the operating instructions supplied with the Super Audio CD player If you want to connect several digital devices but cannot find an unused input See Using other video audio input jacks pa...

Страница 41: ... away from the receiver and other equipment Be sure to fully extend the FM wire antenna aerial After connecting the FM wire antenna aerial keep it as horizontal as possible Connections required for listening to the radio FM wire antenna aerial supplied AM loop antenna aerial supplied ...

Страница 42: ...MD deck with digital cords you can connect it to any digital IN jack on the receiver To enable the connection you should assign the jack to an MD deck input in the menu See Using other video audio input jacks page 89 If your turntable has a ground earth wire connect it to the U SIGNAL GND terminal Connections required for listening to the content recorded on MDs cassette tapes or records Turntable...

Страница 43: ...guration such that you can operate multiple devices using one IR REMOTE OUT jack Refer to the operating instructions of the equipment you want to control with the supplied remote control Then connect the IR blaster to an IR REMOTE OUT jack of the receiver and place it above or below the remote sensor of the equipment so that the transmitter of the IR blaster is placed just above or below the remot...

Страница 44: ...e receiver ALighting Control Adapter UWA C4Z supplied Note Do not remove the Lighting Control Adapter while the receiver is turned on Data may be damaged and the receiver may become inoperative When you remove the Lighting Control Adapter make sure that the receiver is turned off not in the Network Standby mode but in the mode where the power of the receiver is turned completely off A ...

Страница 45: ...he device that is connected to the broadband line to communicate with the Internet Some of these devices are integrated with the router Router Use a router compatible with 100 Mbps to enjoy content on your home network We recommend that you use a router equipped with the built in DHCP Dynamic Host Configuration Protocol server This function automatically assigns IP addresses on the LAN The receive...

Страница 46: ...iances such as electric irons fans or TVs to this outlet This may cause a malfunction Press 1 to turn on the receiver You can also turn on the receiver using 1 on the remote control When you turn off the receiver press 1 again STANDBY flashes on the display window Do not disconnect the AC power cord mains lead while STANDBY is flashing This may cause a malfunction To save the power in standby mode...

Страница 47: ...ed When you turn on the receiver for the first time the EULA screen appears on the TV screen Agree to the EULA to proceed to the Easy Setup screen then set up the receiver in accordance with the instructions on the Easy Setup screen You can set up the following functions using the Easy Setup Network Settings Input Settings Home Control Settings Speaker Settings Tip A check mark will be displayed t...

Страница 48: ...edance If you are not sure of the impedances of the speakers refer to the operating instructions supplied with your speakers This information is often on the back of the speaker When you connect speakers all with a nominal impedance of 8 ohms or higher set Speaker Impedance to 8 Ω When connecting other types of speakers set it to 4 Ω When you connect front speakers to both the FRONT A and FRONT B ...

Страница 49: ...hones Operations other than the above are not allowed during the measurement process To set up the receiver manually See Adjusting Settings page 97 10 Setting up connected equipment To output multi channel digital audio check the digital audio output setting on the connected equipment For a Sony Blu ray Disc Player check that Audio HDMI DSD Output Mode Dolby Digital DTS Dolby Digital and DTS are s...

Страница 50: ...edia Player 12 bundled with Windows 7 If you use a Windows 8 based computer the new UI system may not be able to recognize the receiver If this occurs switch the setting to Desktop UI Guide to on screen display operation You can display the menu of the receiver on the TV screen and select the function you want to use on the TV screen by pressing V v B b and on the remote control When you start ope...

Страница 51: ...elects the video or photo source to be input to the receiver or the video or photo content to be delivered via USB jack or a home network page 52 Listen Selects the music source to be input to the receiver or the music content to be delivered via Internet video or a home network page 52 You can also enjoy FM AM radio of the built in receiver Favorites Displays the Internet content added to the Fav...

Страница 52: ...E on the remote control to select zone 2 or zone 3 first ZONE 2 input name or ZONE 3 input name appears on the display window Tips You can adjust the volume differently using the MASTER VOLUME knob on the receiver or the VOL button on the remote control To turn the volume up or down quickly Turn the MASTER VOLUME knob quickly Press and hold the VOL button To make fine adjustment Turn the MASTER VO...

Страница 53: ...rs and video music photo files are listed on the TV screen 5 Press V v B b and to select the file that you want to play The image or sound from the USB device is played on the receiver Notes Do not remove the USB device during operation To avoid data corruption or damage to the USB device turn the receiver off when removing the USB device If you connect a WALKMAN to the receiver operate the WALKMA...

Страница 54: ...s played back on the receiver You can operate the iPod iPhone using the buttons on the remote control For operation details of the iPod iPhone also refer to the operating instructions of the iPod iPhone Made for iPod iPhone models The compatible iPod iPhone models are as follows Update your iPod iPhone with the latest software before using with the receiver Compatible models are as follows iPod to...

Страница 55: ...onnecting them to your home network This receiver can be used as a player and renderer Server Stores and sends files Player Receives and plays files from the server Renderer Receives and plays files from the server and can be operated by another device controller Controller Operates the renderer component Preparations for using the DLNA function Connect the receiver to your home network page 45 Pr...

Страница 56: ...DLNA server Control this receiver using a DLNA controller For details of operation see the operating instructions of the DLNA controller Note Do not operate the receiver with the supplied remote control and a DLNA controller at the same time Tip The receiver is compatible with the Play To function of Windows Media Player 12 that comes standard with Windows 7 This receiver renderer Computer server ...

Страница 57: ...displayed items may differ depending on Internet content providers To display again press DISPLAY A Control display Press V v B b or for playback operations B Playing status bar Status bar cursor indicating the current position playing time duration of the video file C Network condition indicator D Network transmission speed E The next video file name F The currently selected video file name You c...

Страница 58: ...FM AM screen You can select and operate each item on the screen by pressing V v B b and A Band switch page 59 B Frequency indication page 59 C Preset station list page 60 D Preset station name page 60 Item Details Favorites List Displays the Favorites List Add to Favorites Adds Internet content to the Favorites List Remove from Favorites Removes Internet content from the Favorites List IP Content ...

Страница 59: ...ears Note You can set FM Mode in the options menu when the frequency indication is selected or when called for in another situation 3 Select FM Mode then press 4 Select Monaural then press Enter the frequency of a station directly by using the numeric buttons on the remote control 1 Press SHIFT then press D TUNING on the FM AM screen 2 Press the numeric buttons to enter the frequency then press Ex...

Страница 60: ...enu when the frequency indication is selected or when called for in another situation 3 Select Preset Memory then press 4 Select a preset number then press The station is stored as the selected preset number 5 Repeat steps 1 to 4 to program another station You can store stations as follows FM band FM1 to FM30 AM band AM1 to AM30 1 Select Listen from the home menu then press 2 Select FM AM then pre...

Страница 61: ...ver 2 While holding down TUNING press 1 on the receiver 3 Change the current AM tuning scale to 9 kHz or 10 kHz To reset the scale to 10 kHz or 9 kHz repeat the procedure above Changing the AM tuning scale Available options Item Details FM Mode Switches the FM reception mode to stereo or monaural Preset Memory Stores a radio station on a specific preset number Name Input Names a preset station 1 T...

Страница 62: ...rround formats are downmixed to 2 channels 2ch Analog Direct You can switch the audio of the selected input to 2 channel analog input This function enables you to enjoy high quality analog sources When using this function only the volume and front speaker level can be adjusted Sound field Effect Headphone 2ch This mode is selected automatically if you use headphones and when the mode other than 2c...

Страница 63: ...r intended in the mastering process You can select the effect type for HD D C S For details see About the effect type for HD D C S page 64 Movie Height Raises the sound image of the center speaker to the inside of the screen using the front high speakers Suitable especially when the center speaker is placed under a large screen etc Even without front high speakers this processing can be performed ...

Страница 64: ...r is emphasized and a unique acoustic field is created x Theater Factory default setting The Theater setting is suitable for a general living room This setting reproduces the reverberation of sound just like in a movie theater dubbing theater It is most appropriate for watching content recorded on a Blu ray Disc when you want the atmosphere of a movie theater x Studio The Studio setting is suitabl...

Страница 65: ...to watching music content accompanied by a display on a large screen Even without front high speakers this processing can be performed using virtual speakers Jazz Club Reproduces the acoustics of a jazz club Live Concert Reproduces the acoustics of a 300 seat live house Stadium Reproduces the feeling of a large open air stadium Sports Reproduces the feeling of sports broadcasting Portable Audio Re...

Страница 66: ...lected You cannot select 2ch Analog Direct when you play back content via a USB device a home network or Internet video Multi Stereo does not work when multi channel audio signals are being received The sound fields for movie and music may not work depending on the input or the speaker pattern you select or with audio formats The receiver may play back signals at a lower sampling frequency than th...

Страница 67: ...work in the following cases MULTI IN is selected 2ch Analog Direct is being used Headphones are being used The receiver may play back signals at a lower sampling frequency than the actual sampling frequency of the input signals depending on the audio format Tip By using the equalizer function and adjusting all the speakers at one time you can make fine adjustments with the Sound Optimizer Adjustin...

Страница 68: ...t Settings from the home menu then press 2 Select Audio Settings then press 3 Select Equalizer then press 4 Select All then press 5 Select Bass or Treble then press 6 Adjust the gain then press Note Depending on the equalizer setting for each channel the actual levels set with the All EQ Adjustment may be lower or higher than the specified values ...

Страница 69: ...select the equipment you want to operate To select equipment in zone 2 or zone 3 press ZONE SELECT on the receiver ZONE 2 input name or ZONE 3 input name appears on the display window of the front panel You can also press the input buttons on the remote control to select the equipment you want to operate To select equipment in zone 2 or zone 3 press ZONE on the remote control first Operating the A...

Страница 70: ...uttons may not work Equipment Category Button TV Projector Blu ray Disc Player DVD player Game Cable box Disc Changer Satellite Receiver VCR MD Camcorder CD Numeric buttons z z z z z z z GUIDE z z z z z z z Color buttons z z z INFO OPTIONS z z z z z z z RETURN EXIT z z z z z z z V v B b z z z z z z z z z z z z z z m M z z z z z z N X x z z z z z z CH z z z z z z MENU z z z z z z z z PAGE z z z z z...

Страница 71: ...e Control settings With the TV Control or AV Equipment Control wizard you can make settings required for Universal Remote Control of the AV equipment you want to use The remote control is initially set to operate Sony products 1 Press HOME 2 Select Settings then press 3 Select Home Control Settings then press 4 Select TV Control to set up a TV or projector Select AV Equipment Control to set up a p...

Страница 72: ...of the receiver all at one time by a simple one touch operation without switching each setting for Input Calibration Type Sound Field and HDMI Out individually The items for which you can save settings and the default values for each item are as follows Using the Home Automation Function Setting item Value set for 1 Movie Input BD Calibration Type No Change Sound Field HD D C S HDMI Out HDMI OUT B...

Страница 73: ...ovie or 2 Music with the present settings by holding down EASY AUTOMATION 1 or EASY AUTOMATION 2 for 3 seconds in the same way as you do when you select Import Current Settings from the menu HDMI Out No Change No Change No Change No Change Party Mode No Change No Change On No Change Calibration Type No Change No Change No Change No Change Sound Optimizer No Change No Change Off Normal Equalizer Al...

Страница 74: ...ghting device on or off Press to turn on the lighting device so that ON is displayed To turn it off press again so that OFF is displayed Adjust the lighting level Press B b to move the cursor b B to adjust the level for equipment that has a Dimmer function 1 Select Lighting on the home menu The lighting devices available are displayed 2 Press INFO OPTIONS The Lighting Scenes list appears 3 Select ...

Страница 75: ...nt lighting scenes list appears 4 Select the lighting scene you want to edit with V v then press 5 Follow the on screen instructions to set each lighting device Note Do not remove the Lighting Control Adapter while the receiver is turned on Data may be damaged and the receiver may become inoperative When you remove the receiver make sure that all the Lighting Control Adapters have been removed usi...

Страница 76: ...o output to zone 2 Signals from equipment connected to analog input jacks are output through the ZONE 2 VIDEO AUDIO OUT or ZONE 2 OUT component jacks The ZONE 2 VIDEO AUDIO OUT or ZONE 2 OUT component jacks cannot output the signals from HDMI IN jacks To output the HDMI signals use HDMI ZONE 2 OUT jacks To output to zone 3 Only signals from equipment connected to the analog input jacks are output ...

Страница 77: ...OUT jack 3 Making a zone 2 connection using HDMI Outputs HDMI input video audio signals in zone 2 using the HDMI ZONE 2 OUT jack of the receiver Setting the HDMI output in zone 2 may be required page 80 AIR repeater not supplied BSpeakers COther amplifier receiver Main zone Zone 2 TV monitor ZONE 2 AUDIO OUT A B B C STR DA5800ES Remote control IR REMOTE IN ZONE 2 VIDEO OUT Main zone Zone 2 TV moni...

Страница 78: ...5 jack ZONE 2 VIDEO OUT RJ 45 jack is used only for custom installation by a qualified person ZONE 2 VIDEO OUT RJ 45 jack is a jack that sends a source video signal to the component video input for zone 2 For details consult your dealer Attention Do not use this jack for an Ethernet LAN connection Doing so may cause a malfunction The router may be damaged ZONE 2 VIDEO OUT RJ 45 jack connection The...

Страница 79: ...D 11V GREEN Y T RED Pr R RED Pr T 1 Pin No 2 3 4 5 6 7 8 BLUE Pb R BLUE Pb T GREEN Y R GND 11V GREEN Y T RED Pr R RED Pr T 1 2 3 4 5 6 7 8 White Orange Wire color Orange White Green Blue White Blue Green White Brown Brown White Orange Orange White Green Blue White Blue Green White Brown Brown B B C STR DA5800ES Main zone Zone 3 AIR repeater not supplied BSpeakers COther amplifier receiver Remote c...

Страница 80: ...MI signals from the equipment in zone 2 For details see 3 Making a zone 2 connection using HDMI page 77 You can output the signals from HDMI IN jacks to Zone2 equipment via the HDMI ZONE 2 OUT jacks as follows 1 Select Settings from the home menu then press 2 Select HDMI Settings then press 3 Select Zone2 Out then press 4 Select On then press Note When the Zone2 Out function is enabled the followi...

Страница 81: ...ntrol The remote control is basically designed for use in the main zone The zone setting of the remote control is basically for use in zone 2 If you want to use it in zone 3 switch the zone setting of the remote control 1 Press 1 while pressing RM SET UP The AMP and ZONE buttons flash 2 Press ZONE The AMP button goes off the ZONE button keeps flashing and the SHIFT button lights up 3 Press the num...

Страница 82: ...advance page 81 3 Press 1 The zone function is activated 4 Press one of the input buttons on the remote control to select the source signals you want to output 5 Adjust to a suitable volume In the case of illustration 1 1 page 76 adjust the volume using VOL on the remote control In the case of illustration 1 2 page 77 or 2 page 79 adjust the volume using the receiver in zone 2 or zone 3 If you set...

Страница 83: ... and AM from zone 2 or zone 3 select the appropriate zone using the remote control and then press TUNER repeatedly Every time you press the button FM and AM are switched When different programs are selected in multiple zones the input you have selected most recently is given preference 5 Only when SOURCE is selected in zone 2 or zone 3 you can enjoy the content being viewed in the main zone in zon...

Страница 84: ...he Control for HDMI function does not work on a device connected to the HDMI OUT B jack of the receiver When you set Zone2 Out in the HDMI Settings menu to On you cannot use the Control for HDMI function We recommend that you connect the receiver to products featuring BRAVIA Sync Notes The following features may operate with non Sony equipment However compatibility with all non Sony equipment is n...

Страница 85: ...hen you set Pass Through to On or Auto sound and image can be output only from the TV while the receiver remains in standby mode Start playback on the playback equipment To use the One Touch Play function of the camcorder 1 Turn the Control for HDMI function on for both the receiver and your camcorder 2 Connect your camcorder to one of the HDMI IN 1 IN 2 IN 3 and IN 9 jacks page 36 If you use a So...

Страница 86: ...TV Note The sound field may not switch depending on the TV Correspondence table If a Home Theater Control compatible TV is connected to the receiver an icon for Internet based applications appears on the connected TV You can switch an input of the receiver or switch sound fields by using your TV s remote control You can also adjust the level of the center speaker or the subwoofer or adjust the set...

Страница 87: ...to the HDMI OUT A jack even when the receiver is in standby mode If you use this function while Control for HDMI is set to On the input of the receiver is switched in accordance with the operation of the connected equipment even when the receiver is in standby mode When you activate this function make the settings for Pass Through following the steps below 1 Select Settings from the home menu then...

Страница 88: ...dio input mode appears in the display window AUTO Gives priority to digital audio signals when there are both digital and analog connections If there are no digital audio signals analog audio signals are selected When TV input is selected priority is given to the Audio Return Channel ARC signals If your TV is not compatible with Audio Return Channel ARC the digital optical audio signals are select...

Страница 89: ...gn then press 4 Select the audio and or video signals you want to assign to each input Notes If you assign an input to any of the HDMI IN 1 to IN 9 jacks in Video Input Assign or Audio Input Assign the same HDMI input jack is assigned to both the video input and audio input If you want to assign an HDMI IN jack to either the video input or audio input first assign an input to any of the HDMI IN 1 ...

Страница 90: ... a a a a a a a HDMI IN 8 VIDEO 4 a a a a a a a a a a a HDMI IN 9 VIDEO 2 a a a a a a a a a a a Assignable audio input jacks OPTICAL IN 1 GAME a a a a a a a a a a OPTICAL IN 2 SAT CATV a a a a a a a a a a OPTICAL IN 3 TV a a a a a a a a a a COAXIAL IN 1 DVD a a a a a a a a a a COAXIAL IN 2 VIDEO 1 a a a a a a a a a a COAXIAL IN 3 SA CD CD a a a a a a a a a a HDMI IN 1 VIDEO 1 a a a a a a a a a a HD...

Страница 91: ... HDMI IN jack However if you use the One Touch Play function on the equipment connected to the HDMI IN jack the input which has most recently been assigned is preferentially selected Preview for HDMI You can turn on a live picture in picture preview of HDMI inputs connected to this receiver Up to four preview windows are displayed for HDMI IN 1 IN 2 IN 3 IN 4 Input You can select each preview HDMI...

Страница 92: ... When the GUI menu is displayed When Zone2 Out is set to On When Fast View is set to Off This function is made possible by Silicon Image InstaPrevue technology Operating the receiver using a smartphone You can operate the receiver using a smartphone equipped with the ES Remote application software The ES Remote application software can be downloaded from the App Store for iPod touch iPhone or the ...

Страница 93: ...nt 1 Select Watch or Listen from the home menu then press 2 Select the playback equipment then press 3 Prepare the equipment for playing For example insert the video tape you want to copy into the VCR 4 Prepare the recording equipment Insert a blank video tape etc into the recording equipment VIDEO 1 for recording 5 Start recording on the recording equipment then start the playback equipment Switc...

Страница 94: ... the display When the command mode is set to AV1 COMMAND MODE AV1 appears on the display 1 Press 1 while pressing RM SET UP The AMP and ZONE buttons flash 2 Press AMP The ZONE button goes off the AMP button keeps flashing and the SHIFT button lights up 3 Press the numeric button 1 or 2 while the AMP button is flashing When you press 1 the command mode is set to COMMAND MODE AV1 When you press 2 th...

Страница 95: ... Speaker Connection in the Speaker Settings menu page 102 Notes You cannot use the FRONT B terminals for a bi amplifier connection Make the bi amplifier settings before you perform the Auto Calibration function If you make the bi amplifier settings the speaker level balance and equalizer settings of the surround back speakers become invalid and those of the front speakers are used Signals output f...

Страница 96: ... to turn off the receiver 2 While holding down the TONE and 2CH A DIRECT press 1 to turn on the receiver 3 Release the TONE and 2CH A DIRECT after a few seconds The MEMORY CLEARING appears on the display window for a while then changes to MEMORY CLEARED Changes or adjustments made to the settings are now reset to the defaults Note It takes about a few minutes for the memory to be cleared completel...

Страница 97: ... menu mode The setting menu list appears on the TV screen 2 Select the menu item you want then press to access the menu item Example When you select Audio Settings 3 Select the parameter you want then press to enter To return to the previous screen Press RETURN EXIT O To exit the menu Press HOME to display the home menu then press HOME again Adjusting Settings V v B b HOME RETURN EXIT O INFO OPTIO...

Страница 98: ... Center Speaker Lift Up Surround Speaker Position Speaker Relocation Speaker Setup Test Tone Center Analog Down Mix Speaker Impedance Distance Unit Audio Settings page 107 Digital Legato Linear Sound Optimizer Equalizer LFE Time Alignment Subwoofer Muting Dual Mono Dynamic Range Compressor Input name Subwoofer Low Pass Filter A V Sync Decode Priority Sound Field Video Settings page 110 Resolution ...

Страница 99: ...l External Control Network Standby Internet Services Settings page 118 Parental Control Password Parental Control Area Code Internet Video Parental Control Internet Video Unrated Home Control Settings page 71 TV Control AV Equipment Control Lighting Control Lighting Scenes Registration Zone Settings page 120 Zone Control Zone Setup System Settings page 121 Language Auto Standby Settings Lock RS232...

Страница 100: ...tching the distance and level of the right and left speakers You can set this function only after the DCAC measurement process has been completed and the results of the DCAC measurement are saved The setting is valid until you change it Note The previous measurement results will be overwritten and the current results are saved for the currently selected position Please read Notes on Speaker Settin...

Страница 101: ...n Type menu then press 2 Select the parameter you want then press L R Sets the data of the left and right channels to the reference value L Sets the data of the left channel to the reference value R Sets the data of the right channel to the reference value Notes This function works only when you select Front Reference for the Calibration Type Perform Auto Calibration after you set Front Reference ...

Страница 102: ...cy than the actual sampling frequency of the input signals depending on the audio format Lets you adjust each speaker manually You can also adjust the speaker levels after Easy Setup is completed The Speaker Settings are only for the current Position You can make the following settings using the wizard Speaker Pattern Lets you select the speaker pattern for the speaker systems you are using Surrou...

Страница 103: ...being used The Multi Stereo sound filed is being used The Movie Height sound filed is being used Lets you set the correct angles of the surround speakers for the Speaker Relocation function x Front x Back Note This function does not work in the following cases There are no surround speakers Headphones are connected Lets you calibrate speaker positioning configuration angle of each speaker from the...

Страница 104: ...o adjust the distance from the seating position to each speaker You can adjust the distance from the seating position to each speaker front left right center surround left right surround back left right front high left right subwoofer 1 Select the speaker on the screen for which you want to adjust the distance then press 2 Select a Distance then press You can adjust the distance from 1 0 meter to ...

Страница 105: ...ound back speaker s in contrast to the level of the front speakers all at one time 1 Select All Surround Level then press 2 Adjust the level of the rear speakers You can adjust the level from 5 dB to 5 dB in 1 dB intervals Lets you select the test tone type on the Test Tone screen To output a test tone from each speaker You can output a test tone from the speakers in sequence 1 Select Test Tone th...

Страница 106: ...alog downmix settings on or off x Off If the speaker pattern is set so that there is a center speaker this setting is set to Off automatically x On We recommend you set Center Analog Down Mix to On to enjoy digital audio with high quality sound when you do not have a center speaker connected Analog downmix works when you set Center Analog Down Mix to On This setting is also effective to input sign...

Страница 107: ...sound optimizer function page 67 x Off x Low x Normal Lets you adjust the bass middle and treble level for each speaker page 67 for the center speaker only The LFE Time Alignment function allows you to shift the output timing of the LFE channel by 20ms delay to 20ms forward for other channels This function is effective for adjusting content in which the LFE channel phase has a gap from that of oth...

Страница 108: ...t the crossover frequency function x Off Does not activate the low pass filter x On Always activates the low pass filter with a cutoff frequency of 120 Hz Note This function does not work in the following cases MULTI IN is selected 2ch Analog Direct is being used Lets you delay the output of audio to minimize the time gap between audio output and visual display This function is useful when you use...

Страница 109: ...t from the connected player When signals in any other format are received set this item to Auto x Auto Automatically switches the input mode between Dolby Digital DTS or PCM Notes This function does not work in the following cases MULTI IN is selected Analog input mode is selected 2ch Analog Direct is being used Even when Decode Priority is set to PCM the start of the sound may not be output due t...

Страница 110: ...Converting video signals Resolution menu setting HDMI OUT jacks MONITOR COMPONENT VIDEO OUT jacks MONITOR VIDEO OUT jack Direct Auto HDMI IN jacks z COMPONENT VIDEO IN jacks aa z VIDEO IN jacks aa z 480i 576i 480p 576p 720p 1080i 1080p HDMI IN jacks z COMPONENT VIDEO IN jacks ab z VIDEO IN jacks ab z Resolution menu setting HDMI OUT jacks MONITOR COMPONENT VIDEO OUT jacks MONITOR VIDEO OUT jack Di...

Страница 111: ...the Resolution menu Video signals protected by Macrovision are output at the 480p 576p resolution Video signals are not output Notes If you select a resolution which the connected TV does not support in the Resolution menu the images from the TV cannot be output correctly Converted HDMI image output does not support x v Color Deep Color and 3D 480i 576i 480p 576p HDMI IN jacks COMPONENT VIDEO IN j...

Страница 112: ...rotected by Macrovision video signals may be output at the 480p 576p resolution Zone Resolution Zone Resolution menu setting HDMI OUT jacks ZONE 2 COMPONENT VIDEO OUT jacks ZONE 2 VIDEO OUT jack DIRECT HDMI IN jacks z COMPONENT VIDEO IN jacks z VIDEO IN jacks z 480i 576i factory default setting HDMI IN jacks z COMPONENT VIDEO IN jacks a a VIDEO IN jacks a z 480p 576p HDMI IN jacks z COMPONENT VIDE...

Страница 113: ...ack Resolution to 480i 576i or 480p 576p If no picture is output when you play back content via a USB device a home network or Internet video from the Watch Listen menu perform the following procedure 1Select BD as the input for the main zone 2Set Playback Resolution to a lower resolution Playback Resolution HDMI OUT jacks MONITOR COMPONENT VIDEO OUT jacks MONITOR VIDEO OUT jack ZONE 2 COMPONENT V...

Страница 114: ...the subwoofer to 0 dB or 10 dB when PCM signals are input via an HDMI connection You can set the level for each input to which an HDMI input jack is assigned independently x 0 dB x Auto Automatically sets the level to 0 dB or 10 dB depending on the audio stream x 10 dB Lets you set the HDMI audio signals output from the playback equipment connected to the receiver via an HDMI connection x TV AMP T...

Страница 115: ...d is not output from the front high speakers The H A T S function works only when A F D Auto 2ch Stereo or Headphone 2ch is selected Stream information about the H A T S function available Lets you turn the function which controls equipment connected to the HDMI jack using an HDMI cable on or off x Off x On Note This function is enabled only when Zone2 Out is set to Off Lets you output HDMI signal...

Страница 116: ...n Displays an input to both the Watch and Listen menus Hidden Does not display an input to both the Watch and Listen menus When you select an input you can skip an input which is set to Hidden x Icon Sets the icon displayed on the Watch Listen menu x Name Sets the name displayed on the Watch Listen menu Note You cannot select an input which is set to Hidden or HIDDEN in INPUT SKIP in INPUT SETTING...

Страница 117: ...nderer name of the receiver x Auto Access Permission Sets whether or not to allow automatic access from newly detected DLNA controller Lets you set whether or not to accept commands from DLNA controllers Lets you turn the function which controls the receiver from ES Remote on the home network on or off x Off x On Lets you turn on or off the function that activates the switching hubs on the rear of...

Страница 118: ...es Set the function in accordance with the on screen instructions Lets you set whether or not access to allow playback of unrated Internet videos x Allow Allows the playback of unrated Internet videos x Block Blocks the playback of unrated Internet videos Parental Control Password Parental Control Area Code Code Area Code Area 2044 Argentina 2390 New Zealand 2057 Belgium 2427 Pakistan 2090 Chile 2...

Страница 119: ...the device You can also carry out a connection test Lets you set up a Control4 compatible lighting device via the Lighting Control Adapter UWA C4Z so that you can operate the lighting device with the receiver Lets you set up lighting scene control Initially there are 10 preset lighting scenes You can edit and overwrite a preset scene to make a new scene You can set the level of a dimmer of a light...

Страница 120: ...E 3 operations page 82 1 Select the zone for which you want to adjust the volume then press 2 Select Volume then press 3 Adjust the volume then press To preset the volume for main zone zone 2 You can preset the volume of turning the power on for each zone 1 Select the zone for which you want to preset the volume then press 2 Select Preset Volume then press 3 Adjust the volume then press During the...

Страница 121: ...t setting of the HDMI OUT B jack x Main for Zone2 and Zone3 only Lets you link operation of trigger in zone 2 or zone 3 to the TRIGGER OUT MAIN jack System Settings You can customize the settings of the receiver Lets you select the language for the messages on the screen x English x Español x Français x Deutsch Lets you turn the function that switches the main zone to standby mode automatically if...

Страница 122: ...f the receiver Displays the EULA screen on the TV screen Displays the Software License information on the TV screen Network Update You can update and improve the functions of the receiver For information about update functions refer to the following web site http www sony com essupport The GUI and display window of the receiver are turned off and the lamp above the 1 ON STANDBY button flashes in g...

Страница 123: ...dow of the receiver Example When you select SPEAKER SETTINGS 3 Press V v repeatedly to select the menu then press 4 Press V v repeatedly to select the menu item then press The parameter appears in brackets 5 Press V v repeatedly to select the parameter you want then press The parameter is entered and the brackets disappear from the display To return to the previous step Press RETURN EXIT O Using t...

Страница 124: ...L INFO EXIT CAL MATCHING xxx YES NO WARNING CODE xxx 4x FL FR C SL SR SBR SBL SW LH RH 0 1 2 3 4 NO WARNING PHASE INFO xxx xxx FL FR C SL SR SBR SBL SW LH RH OUT IN DIST INFO xxxxxxxxxx FL FR C SL SR SBR SBL SW LH RH LEV INFO xxx xxxxxx dB FL FR C SL SR SBR SBL SW LH RH ERROR CODE xxx 3x F SR SB 0 1 2 3 4 RETRY xxxx YES EXIT CANCEL CAL TYPE xxxxxxxxx FULL FLAT ENGINEER FRONT REF USER REF OFF A P M...

Страница 125: ...dB to 10 0 dB 0 5 dB interval CENTER xxx xdB 20 0 dB to 10 0 dB 0 5 dB interval SURROUND L xxx xdB 20 0 dB to 10 0 dB 0 5 dB interval SURROUND R xxx xdB 20 0 dB to 10 0 dB 0 5 dB interval SUR BACK xxx xdB 20 0 dB to 10 0 dB 0 5 dB interval SUR BACK L xxx xdB 20 0 dB to 10 0 dB 0 5 dB interval SUR BACK R xxx xdB 20 0 dB to 10 0 dB 0 5 dB interval LEFT HIGH xxx xdB 20 0 dB to 10 0 dB 0 5 dB interval...

Страница 126: ...xxxxxxx 1 0 to 10 0 m 1 cm interval 3 3 to 32 9 1 inch interval FRONT R xxxxxxxxx CENTER xxxxxxxxx SURROUND L xxxxxxxxx SURROUND R xxxxxxxxx SUR BACK xxxxxxxxx SUR BACK L xxxxxxxxx SUR BACK R xxxxxxxxx LEFT HIGH xxxxxxxxx RIGHT HIGH xxxxxxxxx SUBWOOFER xxxxxxxxx DISTANCE UNIT xxxxx meter feet FR CROSSOVER xxxHz 40 to 200 10 Hz interval CNT CROSSOVER xxxHz 40 to 200 10 Hz interval SUR CROSSOVER xxx...

Страница 127: ... interval CENTER BASS xxx xdB 10 dB to 10 dB 0 5 dB interval CENTER MID xxx xdB 10 dB to 10 dB 0 5 dB interval CENTER TREB xxx xdB 10 dB to 10 dB 0 5 dB interval SUR SB BASS xxx xdB 10 dB to 10 dB 0 5 dB interval SUR SB TREB xxx xdB 10 dB to 10 dB 0 5 dB interval FH BASS xxx xdB 10 dB to 10 dB 0 5 dB interval FH TREB xxx xdB 10 dB to 10 dB 0 5 dB interval MULTIZONE SETTINGS P VOL MAIN xxx xdB OFF ...

Страница 128: ... COMP xxxx ON AUTO OFF VIDEO SETTINGS RESOLUTION xxxxxxxx DIRECT AUTO 480 576i 480 576p 720p 1080i 1080p ZONE RESO xxxxxxxx DIRECT 480 576i 480 576p 720p 1080i HDMI SETTINGS CTRL FOR HDMI xxx ON OFF PASS THROUGH xxxx ON AUTO OFF H A T S xxx ON OFF ZONE2 OUT xxx ON OFF PRIORITY xxxxxxxxxx MAIN ZONE2 MAIN ONLY AUDIO OUT xxxxxx AMP TV AMP SW LEVEL xxxxx AUTO 10 dB 0 dB FAST VIEW xxxx AUTO OFF SYSTEM ...

Страница 129: ...ver repeatedly Each time you press DISPLAY MODE the display will change as follows Input you selected t Sound field type t Stream information t Input name you entered Stream information may not be displayed When listening to FM and AM radio Station name t Frequency t Sound field type Index name appears only when you have assigned one to the input or preset station Index name does not appear when o...

Страница 130: ...t be changed only at a qualified service shop On heat buildup Although the receiver heats up during operation this is not a malfunction If you continuously use this receiver at a large volume the cabinet temperature of the top side and bottom rises considerably To avoid burning yourself do not touch the cabinet The top of the cabinet may become too hot to touch On placement Place the receiver in a...

Страница 131: ...e top of the receiver may become hot even while the receiver is in standby mode This condition occurs because current is flowing in the internal circuits of the receiver and this is normal There is no picture or an unclear picture appears on the TV screen or monitor regardless of type of picture Select the appropriate input on the receiver page 52 Set your TV to the appropriate input mode Move you...

Страница 132: ...cted for both the main zone and zone 2 and the GUI menu is displayed on the TV in the main zone When the Zone2 Out function is enabled and you select the same HDMI input for both the main zone and zone 2 there may be some interference on the audio and video signals in the main zone and zone 2 To avoid possible interference in the main zone you can place priority on the main zone for HDMI input sel...

Страница 133: ...und from the receiver set to AMP When the Zone2 Out function is enabled and you select the same HDMI input for both the main zone and zone 2 there may be some interference on the audio and video signals in the main zone and zone 2 To avoid possible interference in the main zone you can place priority on the main zone for HDMI input selection page 81 Sound may be interrupted when the sampling frequ...

Страница 134: ...e INPUT MODE to AUTO page 88 HDMI input When 2ch Analog Direct is being used the sound is not output Use other sound field page 62 Check the HDMI connection page 31 33 34 36 Check that you use an HDMI cable that have an HDMI logo authorized by HDMI Licensing LLC Depending on the playback equipment equipment may need to be set up Refer to the operating instructions supplied with the equipment Be su...

Страница 135: ...d the sound is not output Use other sound field page 62 Check the INPUT MODE page 88 Check to make sure the selected audio digital input jack is not assigned to other inputs in Audio Input Assign in the Input Settings menu page 89 Analog 2 channel input Check to make sure the selected audio analog input jack is not assigned to other inputs in Audio Input Assign in the Input Settings menu page 89 T...

Страница 136: ...y The speaker cords may have the short circuit problem A test tone is output from a different speaker than the speaker displayed on the screen The speaker configuration set up is incorrect Make sure that the speaker connections and the configuration match correctly The H A T S function does not work Audio Out is set to TV AMP Select AMP for Audio Out When the A F D mode is set to Multi Stereo the ...

Страница 137: ... audio files on the first partition can be played back Playback is possible up to 4 levels including the ROOT folder The number of files in a folder has exceeded 500 including folders Files that are encrypted or protected by passwords etc cannot be played back If you play back music files stored on a WALKMAN using the receiver move the files to the WALKMAN from a computer by drag drop then save th...

Страница 138: ... or fixed IP address When using a computer check the following The built in firewall settings for the computer s operating system The firewall settings of your security software To check the firewall settings of your security software refer to your security software s Help section Register the receiver with the server For details refer to the instructions supplied with the server Wait for a few mo...

Страница 139: ...r HDMI function does not work Make sure the connected equipment is compatible with the Control for HDMI function Check the Control for HDMI settings on the connected equipment Refer to the operating instructions of the connected equipment If you change the HDMI connection connect disconnect the AC power cord mains lead or there is a power failure repeat the procedures of Preparing for the BRAVIA S...

Страница 140: ...le is other than one of the cases described above and the trouble is not solved even if you wait for a while perform either of the operations below Press 1 on the remote control to turn the receiver off and then on again Hold down 1 on the receiver until the lamp above the button flashes in green to reboot the receiver The Universal Remote Control function does not work Make sure the connections r...

Страница 141: ...problem If any problem persists consult your nearest Sony dealer PROTECTOR The receiver is covered and ventilation holes are blocked The receiver will automatically turn off after a few seconds Remove the object covering the upper panel of the receiver and turn on the power again SPEAKER SHORTED Irregular current is output to the speakers due to a short circuit on the speaker terminals The receive...

Страница 142: ...aker to each of the FRONT HIGH terminals Front high speakers are connected even though surround speakers are not connected Connect the surround speaker s to the SURROUND terminals Code 34 Speakers are not placed in the proper position Speakers or an optimizer microphone on the right or left may be placed wrongly See 1 Installing speakers page 25 and check the speaker position Warning 40 The measur...

Страница 143: ...tion from 250 milliwatts to rated output Amplifier section POWER OUTPUT1 2 Rated Power Output at Stereo Mode 8 ohms 20 Hz 20 kHz THD 0 09 130 W 130 W Reference Power Output at Stereo Mode 4 ohms 20 Hz 20 kHz THD 0 15 130 W 130 W Reference Power Output 8 ohms 1 kHz THD 0 7 FRONT 140 W 140 W FRONT HIGH 140 W 140 W CENTER 140 W SURROUND 140 W 140 W SURROUND BACK 140 W 140 W Reference Power Output 4 o...

Страница 144: ... INPUT SA CD CD MD TAPE TV VIDEO 1 2 DVD SAT CATV GAME 10 Hz 100 kHz 3 dB PHONO Sensitivity 2 5 mV Impedance 50 kohms S N3 90 dB A 20 kHz LPF MULTI CHANNEL INPUT SA CD CD MD TAPE TV VIDEO 1 2 DVD SAT CATV GAME Sensitivity 150 mV Impedance 50 kohms S N3 105 dB A 20 kHz LPF 500 mV IN 1 DVD IN 2 VIDEO 1 IN 3 SA CD CD Coaxial Impedance 75 ohms S N 96 dB A 20 kHz LPF IN 1 GAME IN 2 SAT CATV IN 3 TV Opt...

Страница 145: ...z a 3840 2160p 23 98 24 Hz a 1920 1080p 59 94 60 Hz a a a 1920 1080p 50 Hz a a a 1920 1080p 29 97 30 Hz a a a a 1920 1080p 25 Hz a a a a 1920 1080p 23 98 24 Hz a a a a 1920 1080i 59 94 60 Hz a a a a 1920 1080i 50 Hz a a a a 1280 720p 59 94 60 Hz a a a a 1280 720p 50 Hz a a a a 1280 720p 29 97 30 Hz a a a a 1280 720p 23 98 24 Hz a a a a 720 480p 59 94 60 Hz a 720 576p 50 Hz a 640 480p 59 94 60 Hz a...

Страница 146: ... 420 mm 17 in 7 1 2 in 16 5 8 in width height depth including projecting parts and controls Mass Approx 18 0 kg 39 lb 11 oz Supplied accessories Operating Instructions this manual Quick Setup Guide 1 Optimizer microphone ECM AC1 1 FM wire antenna aerial 1 AM loop antenna aerial 1 AC power cord mains lead 1 Remote control 1 R6 size AA batteries 2 Speaker cord connection tool 1 Lighting Control Adap...

Страница 147: ...lu ray Disc Player 31 C Cable box 34 Calibration Type 101 Camcorder 36 CD player 38 Center Analog Down Mix 106 Center Speaker Lift Up 103 Changing the display 129 Clear receiver 96 Concertgebouw Amsterdam 65 66 Connection Server Settings 117 Connections antenna aerial 41 audio equipment 38 monitor 29 Network 45 speakers 27 video equipment 31 Control for HDMI 115 Crossover Frequency 105 D D C A C D...

Страница 148: ...t 80 120 Listen 52 Live Concert 65 M MASTER VOLUME 12 52 MD deck 42 Menu 51 97 Messages Auto Calibration 142 Error 141 Mid 67 Movie 63 Movie Height 63 Multi Zone 76 Music 65 Musikverein Vienna 65 66 Muting 52 N Name In 102 Name Input 60 Neo X Cinema 63 Neo X Game 65 Neo X Music 65 Network Settings 117 Network Standby 117 Network Update 122 O One Touch Play 85 P Parental Control Area Code 118 Paren...

Страница 149: ...eaker Setup 104 SPEAKER SHORTED 141 SPEAKERS A B A B OFF 11 48 Sports 65 Stadium 65 Subwoofer Level 114 Subwoofer Low Pass Filter 108 Subwoofer Muting 107 Super Audio CD player 38 Surround Back Assign 102 Surround Speaker Position 103 System Audio Control 85 System Information 122 System Power Off 85 System Settings 121 T Tape deck 42 Test Tone 105 TONE 12 96 Treble 67 Tuning 59 60 Turntable 42 TV...

Страница 150: ... qu il est branché à la prise secteur même si l appareil lui même a été éteint Ce symbole est destiné à avertir l utilisateur de la présence d une surface pouvant être très chaude au toucher dans des conditions de fonctionnement normal Pour les clients au Canada Afin de garantir la conformité aux limites d émissions définies par la FCC utilisez des câbles correctement isolés et mis à la terre pour...

Страница 151: ...es de HDMI Licensing LLC aux États Unis et dans d autres pays Le type de police Shin Go R installé dans cet ampli tuner est fourni par MORISAWA COMPANY LTD Ces noms sont des marques commerciales de MORISAWA COMPANY LTD et les droits d auteur de la police sont également la propriété de MORISAWA COMPANY LTD iPhone iPod iPod classic iPod nano et iPod touch sont des marques commerciales de Apple Inc d...

Страница 152: ...res de contenu peuvent vous demander de mettre à jour PlayReady pour accéder à leur contenu Si vous refusez une mise à jour vous ne pourrez pas accéder à un contenu qui nécessite cette mise à jour WALKMAN et le logo WALKMAN sont des marques déposées de Sony Corporation Android est une marque commerciale ou une marque déposée de Google Inc InstaPrevue est soit une marque de commerce déposée ou une ...

Страница 153: ...ransmission 4K 36 87 4K L ampli tuner peut émettre des signaux 4K grâce à ses prises de sortie HDMI 21 36 Fast View Vous pouvez sélectionner une méthode d entrée HDMI qui est plus rapide que la sélection normale Fast View Les prises HDMI IN 1 IN 2 IN 3 IN 4 et IN 9 supportent la fonction Fast View 115 Control for HDMI Vous pouvez commander simultanément l ampli tuner et un autre appareil à l aide ...

Страница 154: ...uipé des options sonores suivantes Trois modes pour reproduire les caractéristiques sonores de salles de concert célèbres Berlin Philharmonic Hall Concertgebouw Amsterdam ou Musikverein Vienna Deux modes pour assortir la position de la source sonore à l écran Movie Height et Vocal Height 62 64 Soulever le son de l enceinte centrale à une hauteur appropriée Center Speaker Lift Up En utilisant les e...

Страница 155: ...onction Pass Through émet des signaux HDMI vers le téléviseur même si l ampli tuner est en mode veille 86 Fonctionnalité Description Page Fonction écologique La fonction Auto Standby bascule automatiquement l ampli tuner en mode veille si vous ne l utilisez pas pendant une durée spécifique ou en cas d absence d entrée de signal vers l ampli tuner 121 Plus utile Vous pouvez commander l ampli tuner ...

Страница 156: ... AM 57 Réaliser des effets sonores Sélection du champ sonore 61 Utilisation de la fonction Sound Optimizer 66 Réglage de l égaliseur 66 Utilisation de la fonction Universal Remote Control Sélection de l appareil que vous voulez actionner 68 Utilisation de l appareil audio visuel 68 Mise hors tension de tous les appareils raccordés ROOM OFF 70 Faire les réglages de la Universal Remote Control 70 Ut...

Страница 157: ...de commande de l ampli tuner et de la télécommande 93 Utilisation d un raccordement bi amplificateur 94 Rétablir les paramètres par défaut définis en usine 95 Réglage des paramètres Utilisation du menu de paramétrage 96 Easy Setup 99 Speaker Settings 99 Audio Settings 106 Video Settings 109 HDMI Settings 113 Input Settings 115 Network Settings 116 Internet Services Settings 117 Home Control Settin...

Страница 158: ...L ampli tuner de la zone 2 ou de la zone 3 est allumé Le témoin s éteint lorsque l ampli tuner est en mode de veille et que les paramètres ci dessus sont réglés sur Off B SPEAKERS A B A B OFF page 47 C SOUND OPTIMIZER page 66 D MEMORY ENTER TUNING page 60 E Capteur de télécommande Capte les signaux de la télécommande F 2CH A DIRECT A F D MOVIE HD D C S MUSIC page 61 62 G Afficheur page 12 Panneau ...

Страница 159: ...B OFF page 86 N Prise PHONES Permet de raccorder un casque O TONE Appuyez plusieurs fois sur TONE pour sélectionner l enceinte et la plage Tournez ensuite le bouton pour ajuster les niveaux des graves moyennes et aigus de l enceinte P Prise AUTO CAL MIC page 99 Raccordez le microphone d optimisation fourni pour Auto Calibration à cette prise Q Port d iPod iPhone USB et prise VIDEO IN page 35 52 53...

Страница 160: ...L Surround arrière gauche SBR Surround arrière droite SB Surround arrière Exemple Format d enregistrement 5 1 Configuration des enceintes 3 0 1 Champ sonore A F D Auto C Indicateur INPUT S allume pour indiquer l entrée actuelle AUTO Le INPUT MODE est défini sur AUTO HDMI COAX OPT MULTI MULTI CHANNEL INPUT ARC page 87 D HDMI OUT A B page 86 E SLEEP page 92 F MEM S allume lorsque la fonction de mémo...

Страница 161: ...er décode les signaux au format Dolby Digital correspondants D Dolby Digital D Dolby Digital Plus D EX Dolby Digital Surround EX S Indicateur DTS HD S allume lorsque l ampli tuner décode du DTS HD DTS HD Reste toujours allumé avec l un des indicateurs suivants MSTR DTS HD Master Audio HI RES DTS HD High Resolution Audio T TrueHD S allume lorsque l ampli tuner décode du Dolby TrueHD U Indicateur Do...

Страница 162: ... DISC DTS ES Discrete 6 1 MTX DTS ES Matrix 6 1 wj NEO X S allume lorsque le décodage DTS Neo X Cinema Music Game est activé wk V FH S allume lorsque la fonctionnalité Virtual Front High est activée de sorte que la sortie sonore des enceintes avant peut être virtuellement reproduite même dans un environnement sans enceintes gauche et droite avant ...

Страница 163: ...ort RS232C Utilisée pour la maintenance et le dépannage C Section ANTENNA Prise AM ANTENNA page 40 Prise FM ANTENNA page 40 D Ports LAN concentrateurs de commutation page 44 E UWA C4Z Raccordez le Lighting Control Adapter UWA C4Z fourni à ce port F Section INPUT OUTPUT COMPONENT VIDEO page 28 31 33 Prises Y PB PR IN OUT G Section SPEAKERS page 26 suite ...

Страница 164: ... 12V TRIGGER I Section INPUT OUTPUT VIDEO AUDIO page 28 31 32 33 34 Prises AUDIO IN OUT Prises VIDEO IN OUT Prises AUDIO OUT Prise VIDEO OUT page 75 Prise ZONE 2 VIDEO OUT page 77 Une prise RJ 45 utilisée pour envoyer un signal vidéo à l appareil en zone 2 Utilisez un câble CAT5 pour la connexion Utilisée pour une installation personnalisée Pour plus d informations sur l utilisation de cette prise...

Страница 165: ...ions F ENT MEM Appuyez sur SHIFT wa et appuyez ensuite sur ENT MEM pour saisir la valeur ou la plage en utilisant les touches numériques wd ou appuyez sur ENT MEM puis sur les touches numériques wd pour sélectionner le numéro préréglé auquel une station est mémorisée lorsque vous utilisez le tuner G SEN Accède à la page d accueil du Sony Entertainment Network SEN un service réseau fourni par Sony ...

Страница 166: ...t ou suivant lors de l utilisation d un iPod iPhone P CH 2 Balaie les canaux sur le dispositif sélectionné Q SOUND FIELD page 61 62 64 EASY AUTOMATION 1 2 page 71 R RM SET UP page 93 S FAVORITES page 56 T LIGHTING page 73 U SHIFT Modifie les fonctions des touches de la télécommande pour activer les touches imprimées en rose V Touches de source d entrée Appuyez sur l une de ces touches pour sélecti...

Страница 167: ...FT wa et ensuite sur DIMMER pour régler la luminosité de l afficheur PREVIEW HDMI page 90 Appuyez sur PREVIEW HDMI pour ouvrir les fenêtres d incrustation d image afin de prévisualiser les entrées des quatre prises HDMI IN 1 Voir le tableau à la page 69 pour obtenir des informations sur les touches que vous pouvez utiliser pour commander chaque appareil 2 Ces touches comportent un point tactile 5 ...

Страница 168: ...ur la droite Sélectionnez la méthode de raccordement correspondant aux prises de votre appareil L ampli tuner possède une fonction de conversion vidéo Pour plus d informations voir Fonction de conversion des signaux vidéo page 21 Voir 3 Raccordement de l appareil vidéo page 30 Raccordement d un appareil audio Voir 4 Raccordement de l appareil audio page 37 Préparation de l ampli tuner et de la tél...

Страница 169: ...Remarque sur la conversion des signaux vidéo Il est possible que les signaux vidéo dont la résolution a été convertie ne soient pas émis simultanément depuis les prises COMPONENT VIDEO MONITOR OUT ou les prises HDMI OUT Si vous raccordez un appareil aux prises COMPONENT VIDEO MONITOR OUT et HDMI OUT les prises HDMI OUT sont prioritaires Remarque à propos de la sortie vidéo HDMI de la zone 2 Seulem...

Страница 170: ... si l appareil lecteur ne correspond pas au format Pour plus de détails consultez le mode d emploi de l appareil lecteur Formats audio numériques pris en charge par l ampli tuner Format audio Nombre maximal de canaux COAXIAL OPTICAL HDMI Dolby Digital 5 1ch a a Dolby Digital EX 6 1ch a a Dolby Digital Plus 7 1ch a Dolby TrueHD 7 1ch a DTS 5 1ch a a DTS ES 6 1ch a a DTS 96 24 5 1ch a a DTS HD High ...

Страница 171: ...modifiés sur un ordinateur peuvent ne pas être lus L ampli tuner peut reconnaître les fichiers ou dossiers suivants dans les appareils USB jusqu à des dossiers situés dans la 3e arborescence jusqu à 500 fichiers dans une seule arborescence L ampli tuner peut reconnaître les fichiers ou dossiers suivants enregistrés dans le serveur DLNA jusqu à des dossiers situés dans la 18e arborescence jusqu à 9...

Страница 172: ...ux ou 7 1 canaux AEnceinte avant gauche BEnceinte avant droite CEnceinte centrale DEnceinte surround gauche EEnceinte surround droite FEnceinte surround arrière gauche GEnceinte surround arrière droite JSubwoofer Système 7 1 canaux utilisant des enceintes avant supérieures Vous pouvez bénéficier d effets sonores verticaux par exemple le mode Pro Logic IIz ou le mode Neo X AEnceinte avant gauche BE...

Страница 173: ...al page 102 Positionnez chaque paire d enceintes surround arrière en les éloignant de plus de 90 degrés pour utiliser efficacement la fonction Speaker Relocation Installez les enceintes avant supérieures au même angle que celui des enceintes avant La position devrait être à une hauteur sur ou au dessus d une ligne diagonale prolongée à travers l écran d un téléviseur ou d un moniteur Système d enc...

Страница 174: ... avant supplémentaires raccordez les aux bornes FRONT B Vous pouvez sélectionner les enceintes avant que vous utilisez avec SPEAKERS sur le panneau avant page 10 2 Si vous ne raccordez qu une enceinte surround arrière raccordez la aux bornes SURROUND BACK ZONE 2 L 3 Si le subwoofer raccordé comporte une fonction de mise en veille automatique désactivez cette fonction pour regarder des films Si la ...

Страница 175: ...ent du cordon d enceinte fourni Raccordement pour la ZONE 2 Seulement si vous n utilisez pas d enceintes surround arrière vous pouvez assigner les bornes SURROUND BACK ZONE 2 F et G aux enceintes de la zone 2 Réglez les bornes SURROUND BACK ZONE 2 à Zone2 Speakers dans Speaker Connection dans le menu Speaker Settings page 101 Pour plus d informations sur les raccordements et les commandes pour la ...

Страница 176: ... audio non fourni CCordon vidéo non fourni D Cordon vidéo composantes non fourni ECâble HDMI non fourni Nous vous recommandons d utiliser un câble HDMI Sony Sivousraccordezl ampli tuner àla prise Audio Return Channel ARC d un téléviseur compatible HDMI à l aide d un câble HDMI cette connexion n est pas nécessaire Si vous raccordez l ampli tuner à un téléviseur compatible à Audio Return Channel ARC...

Страница 177: ...cordons optiques numériques insérez les fiches en les tenant bien droites jusqu au déclic Ne pliez pas et n attachez pas des cordons optiques numériques Conseil Si vous raccordez la prise de sortie audio du téléviseur aux prises TV IN de l ampli tuner vous entendez le son du téléviseur par les enceintes connectées à l ampli tuner Dans cette configuration réglez la prise de sortie audio du télévise...

Страница 178: ...ir page 31 ACâble HDMI non fourni Nous vous recommandons d utiliser un câble HDMI Sony Vous pouvez raccorder n importe quel appareil doté de prises de sortie HDMI aux prises HDMI IN de l ampli tuner Connexions requises pour regarder du contenu enregistré sur des Blu ray Disc ou des DVD Lecteur DVD lecteur Blu ray Disc Signaux audio vidéo A ...

Страница 179: ...pas nécessaire de brancher tous les cordons Branchez les cordons en fonction des prises de votre appareil ACordon coaxial numérique non fourni BCordon audio non fourni CCordon vidéo non fourni DCordon vidéo composantes non fourni Lecteur DVD lecteur Blu ray Disc Signaux audio Signaux vidéo ou ou A B C D ...

Страница 180: ...icanal depuis l ampli tuner uniquement en raccordant le jeu vidéo à l aide d un câble HDMI Si vous souhaitez écouter le son surround multicanal depuis l ampli tuner utilisez B pour la connexion audio Connexions requises pour jouer à des jeux vidéos PlayStation 3 jeu vidéo avec une prise HDMI A Signaux audio vidéo ou B C D Signaux audio Signaux vidéo Jeu vidéo sans prise HDMI Type de jeu vidéo Câbl...

Страница 181: ...ons Branchez les cordons en fonction des prises de votre appareil ACâble HDMI non fourni BCordon optique numérique non fourni CCordon audio non fourni DCordon vidéo non fourni EVidéo composantes non fourni Connexions requises pour regarder des programmes diffusés par satellite ou par câble Tuner satellite décodeur câble avec une prise HDMI Signaux audio vidéo ou ou Signaux audio Signaux vidéo A B ...

Страница 182: ...xion audio Remarques Lors du raccordement de cordons optiques numériques insérez les fiches en les tenant bien droites jusqu au déclic Ne pliez pas et n attachez pas des cordons optiques numériques ACordon audio non fourni BCordon vidéo non fourni Type de tuner satellite ou décodeur câble Câble requis cordon Vidéo Audio Équipé d une prise HDMI A Non équipé d une prise HDMI E ou D B ou C Connexions...

Страница 183: ...rdon audio vidéo non fourni BCâble HDMI non fourni Connexions requises pour regarder du contenu à partir d un caméscope Vers les prises VIDEO 2 IN Caméscope sans prise HDMI A B Signaux audio vidéo Caméscope avec une prise HDMI ...

Страница 184: ...lunettes 3D puis activez la lecture d un contenu compatible 3D L ampli tuner peut émettre des signaux 4K grâce à ses prises de sortie HDMI Des signaux vidéo analogiques reçus peuvent faire l objet d une conversion ascendante jusqu à 4K Les signaux 4K reçus par HDMI IN 1 ou IN 2 à l arrière ou IN 9 à l avant par un lecteur compatible 4K sont émis tels qu ils sont en tant que signaux 4K Pour profite...

Страница 185: ...r page 38 ACâble HDMI non fourni Nous vous recommandons d utiliser un câble HDMI Sony Vous pouvez raccorder n importe quel appareil doté de prises de sortie HDMI aux prises HDMI IN de l ampli tuner Branchements requis pour écouter du contenu enregistré sur des Super Audio CD ou des CD ordinaires Lecteur CD lecteur Super Audio CD A Signaux audio vidéo suite ...

Страница 186: ...saire de brancher tous les cordons Branchez les cordons en fonction des prises de votre appareil ACordon coaxial numérique non fourni BCordon audio non fourni CCordon audio mono non fourni Remarque Les signaux d entrée audio depuis les prises MULTI CHANNEL INPUT ne peuvent pas être enregistrés Conseil Toutes les prises audio numériques sont compatibles avec des fréquences d échantillonnage de 32 k...

Страница 187: ... ampli tuner Pour la lecture d un Super Audio CD raccordez le lecteur aux prises MULTI CHANNEL INPUT ou SA CD CD IN ou raccordez un lecteur qui peut émettre des signaux DSD par la prise HDMI à l ampli tuner en utilisant le câble HDMI Consultez le mode d emploi du lecteur Super Audio CD Si vous désirez raccorder plusieurs dispositifs numériques alors que toutes les prises sont occupées Voir Utilisa...

Страница 188: ...AM à l écart de l ampli tuner et des autres appareils Déployez complètement l antenne fil FM Après avoir raccordé l antenne fil FM maintenez la aussi horizontale que possible Branchements requis pour écouter la radio Antenne fil FM cadre founie Antenne cadre AM founie ...

Страница 189: ...riques vous pouvez la raccorder à n importe quelle prise numérique IN sur l ampli tuner Pour activer la connexion vous devriez assigner la prise à une entrée de platine MD dans le menu Voir Utilisation d autres prises d entrée vidéo audio page 88 Si votre platine tourne disque comporte un fil de terre raccordez le à la borne U SIGNAL GND Branchements requis pour écouter du contenu enregistré sur d...

Страница 190: ...tionner de multiples dispositifs en utilisant une seule prise IR REMOTE OUT Reportez vous au mode d emploi de l appareil que vous voulez actionner avec la télécommande fournie Fixez ensuite le IR blaster à une prise IR REMOTE OUT de l ampli tuner et placez le au dessus ou en dessous du capteur de télécommande de l appareil afin que le transmetteur du IR blaster soit placé juste au dessus ou au des...

Страница 191: ... fourni à l ampli tuner ALighting Control Adapter UWA C4Z fourni Remarque Ne retirez pas le Lighting Control Adapter lorsque l ampli tuner est allumé Des données pourraient être endommagées et l ampli tuner pourrait cesser de fonctionner Lorsque vous retirez le Lighting Control Adapter assurez vous que l ampli tuner est éteint et pas en mode Network Standby mais dans le mode pour lequel il est com...

Страница 192: ...ecté à la ligne large bande pour communiquer avec Internet Certains modems sont intégrés au routeur Routeur Vous devez utiliser un routeur compatible avec des vitesses de transmission de 100 Mbpspour lire du contenu sur votre réseau domestique Nous vous recommandons d utiliser un routeur équipé d un serveur DHCP Dynamic Host Configuration Protocol intégré Cette fonction attribue automatiquement de...

Страница 193: ...s téléviseurs Cela pourrait provoquer un dysfonctionnement Appuyez sur 1 pour allumer l ampli tuner Vous pouvez également allumer l ampli tuner à l aide de la touche 1 de la télécommande Quand vous éteignez l ampli tuner appuyez sur 1 encore une fois STANDBY clignotera sur l afficheur Ne débranchez pas le cordon d alimentation secteur lorsque STANDBY clignote Cela pourrait provoquer un dysfonction...

Страница 194: ... est raccordé l ampli tuner Lorsque vous allumez l ampli tuner pour la première fois l écran du CLUF apparaît sur l écran du téléviseur Acceptez le CLUF pour passer à l écran Easy Setup puis réglez l ampli tuner conformément aux instructions affichées sur l écran Easy Setup Vous pouvez configurer les fonctions suivantes à l aide de l option Easy Setup Network Settings Input Settings Home Control S...

Страница 195: ... dans le menu Speaker Settings page 103 Remarques sur l impédance des enceintes Si vous ne connaissez pas l impédance des enceintes consultez le mode d emploi des enceintes Cette information se trouve souvent au dos des enceintes Lorsque l impédance nominale de toutes les enceintes raccordées est d au moins 8 ohms réglez Speaker Impedance sur 8 Ω Lorsque vous raccordez des enceintes d autres types...

Страница 196: ... mesure Pour régler manuellement l ampli tuner Voir Réglage des paramètres page 96 10 Réglage du matériel raccordé Pour l émission du son numérique multicanal vérifiez le réglage de la sortie audio numérique sur l appareil raccordé Pour un lecteur Blu ray Disc Sony vérifiez que les options Audio HDMI DSD Output Mode Dolby Digital DTS Dolby Digital et DTS sont réglées sur respectivement Auto On Bit...

Страница 197: ...Windows 7 Si vous utilisez un ordinateur équipé de Windows 8 la nouvelle interface utilisateur peut ne pas être capable de reconnaître l ampli tuner Si ceci se produit changez le réglage à Desktop UI Guidepourles opérations à l écran Vous pouvez afficher le menu de l ampli tuner sur l écran du téléviseur et sélectionner la fonction que vous souhaitez utiliser sur l écran du téléviseur en appuyant ...

Страница 198: ...on Watch Sélectionne la source vidéo ou photo à entrer dans l ampli tuner ou le contenu vidéo ou photo à transmettre via une prise USB ou un réseau domestique page 51 Listen Permet de sélectionner la source musicale à entrer dans l ampli tuner ou le contenu musical à transmettre via une vidéo par Internet ou un réseau domestique page 51 Vous pouvez aussi profiter de la radio FM AM intégrée dans l ...

Страница 199: ...ampli tuner ou sur ZONE sur la télécommande pour sélectionner la zone 2 ou la zone 3 ZONE 2 saisir le nom ou ZONE 3 saisir le nom apparaît sur l afficheur Conseils Vous pouvez régler le volume de manière différente à l aide de la touche MASTER VOLUME sur l ampli tuner ou de la touche VOL de la télécommande Pour augmenter ou diminuer rapidement le volume Tournez rapidement le bouton MASTER VOLUME A...

Страница 200: ...s affiche sur l écran du téléviseur 5 Appuyez sur V v B b et pour sélectionner le fichier que vous souhaitez lire L image ou le son émis e par l appareil USB est lu e sur l ampli tuner Remarques Ne retirez pas l appareil USB pendant le fonctionnement Pour éviter la corruption ou l endommagement des données dans l appareil USB éteignez l ampli tuner lors du retrait de l appareil USB Si vous raccord...

Страница 201: ...e des commandes de l iPod iPhone il n est pas nécessaire de passer à l étape 5 5 Appuyez sur V v B b et pour sélectionner le fichier que vous souhaitez lire L image ou le son du iPod iPhone est lu e sur l ampli tuner Vous pouvez commander l iPod iPhone en utilisant les touches sur la télécommande Pour obtenir des détails sur le fonctionnement de l iPod iPhone reportez vous également au mode d empl...

Страница 202: ...es fichiers vidéo musicaux photo sur d autres appareils certifiés DLNA en les raccordant à votre réseau domestique Cet ampli tuner peut être utilisé comme un lecteur et un moteur de rendu Le serveur enregistre et envoie des fichiers Le lecteur reçoit et lit des fichiers à partir du serveur Le moteur de rendu reçoit et lit des fichiers à partir du serveur et peut être commandé par un autre appareil...

Страница 203: ... de fichiers enregistrés sur un serveur DLNA Commandez cet ampli tuner à l aide d un contrôleur DLNA Pour plus de détails sur l opération voir le mode d emploi du contrôleur DLNA Remarque Ne commandez pas l ampli tuner avec la télécommande fournie et un contrôleur DLNA simultanément Conseil L ampli tuner est compatible avec la fonction Lire sur du Windows Media Player 12 fourni en standard avec Wi...

Страница 204: ...s de contenu Internet Pour les afficher à nouveau appuyez sur DISPLAY A Affichage des commandes Appuyez sur V v B b ou pour les opérations de lecture B Barre d état de la lecture Barre d état curseur indiquant la position en cours la durée de lecture la durée du fichier vidéo C Indicateur de condition du réseau D Vitesse de transmission du réseau E Nom du fichier vidéo suivant F Nom du fichier vid...

Страница 205: ...r Écran FM AM Vous pouvez sélectionner et activer chaque élément affiché à l écran en appuyant sur V v B b et A Changement de bande page 58 B Indication de fréquence page 58 C Liste des stations préréglées page 59 D Nom de la station préréglée page 59 Option Détails Favorites List Affiche la Favorites List Add to Favorites Ajoute un contenu Internet à la Favorites List Remove from Favorites Suppri...

Страница 206: ...lée que vous voulez page 59 2 Appuyez sur INFO OPTIONS Le menu d options s affiche Remarque Vous pouvez régler FM Mode dans le menu des options lorsque l affichage des fréquences est sélectionné ou lorsqu une autre situation le demande 3 Sélectionnez FM Mode puis appuyez sur 4 Sélectionnez Monaural puis appuyez sur Vous pouvez saisir directement la fréquence d une station à l aide des touches numé...

Страница 207: ...iche Remarque Vous pouvez régler Preset Memory dans le menu des options lorsque l affichage des fréquences est sélectionné ou lorsqu une autre situation le demande 3 Sélectionnez Preset Memory puis appuyez sur 4 Sélectionnez un numéro préréglé puis appuyez sur La station est mémorisée sur le numéro de station préréglée sélectionné 5 Répétez les opérations des étapes 1 à 4 pour programmer une autre...

Страница 208: ...1 Appuyez sur 1 pour éteindre l ampli tuner 2 Tout en maintenant la touche TUNING enfoncée appuyez sur 1 sur l ampli tuner 3 Basculez l échelle de sélection AM en cours sur 9 kHz ou 10 kHz Pour réinitialiser l échelle sur 10 kHz ou 9 kHz répétez la procédure ci dessus Modification de l échelle de sélection AM 1 TUNING Options disponibles Option Détails FM Mode Change le mode de réception FM à stér...

Страница 209: ...at stéréo 2 canaux downmix 2ch Analog Direct Vous pouvez commuter le son de l entrée sélectionnée en mode analogique 2 canaux Cette fonction vous permet de bénéficier de sources analogiques de haute qualité Lorsque vous utilisez cette fonction seuls le volume et le niveau des enceintes avant peuvent être réglés Champ sonore Effet Headphone 2ch Ce mode est automatiquement sélectionné si vous utilis...

Страница 210: ...ectionner le type d effet pour HD D C S Pour des informations détaillées voir À propos du type d effet pour HD D C S page 63 Movie Height Élève l image sonore de l enceinte centrale à l intérieur de l écran en utilisant les enceintes avant supérieures Approprié particulièrement quand l enceinte centrale est placée sous un grand écran etc Même sans enceintes avant supérieures ce traitement peut êtr...

Страница 211: ...le de doublage est accentuée et un champ acoustique unique est créé x Theater Réglage par défaut défini en usine Le réglage Theater convient à une salle de séjour générale Ce réglage reproduit la réverbération du son exactement comme dans un cinéma une salle de doublage Il convient parfaitement à la visualisation de contenu enregistré sur un Blu ray Disc lorsque vous voulez bénéficier de l ambianc...

Страница 212: ...pour regarder du contenu musical accompagné d un affichage sur un grand écran Même sans enceintes avant supérieures ce traitement peut être exécuté en utilisant des enceintes virtuelles Jazz Club Restitue l acoustique d un club de jazz Live Concert Restitue l acoustique d une live house de 300 places Stadium Restitue l ambiance d un grand stade en plein air Sports Restitue l ambiance d une émissio...

Страница 213: ... sélectionné Vous ne pouvez pas sélectionner 2ch Analog Direct lorsque vous lisez du contenu à l aide d un appareil USB d un réseau domestique ou d une vidéo sur Internet Multi Stereo ne fonctionne pas lorsque des signaux audio multicanaux sont reçus Les champs sonores pour les films et la musique peuvent être inopérants selon l entrée ou la configuration d enceintes que vous sélectionnez ou avec ...

Страница 214: ...Normal ou Low et Off à l aide de SOUND OPTIMIZER sur l ampli tuner Remarques Cette fonction est inopérante lorsque MULTI IN est sélectionné 2ch Analog Direct est utilisé Le casque d écoute est utilisé Selon le format audio il est possible que l ampli tuner lise les signaux à une fréquence d échantillonnage inférieure à la fréquence d échantillonnage réelle des signaux d entrée Conseil En utilisant...

Страница 215: ...nt Vous pouvez ajuster la qualité tonale niveau des graves et des aigus de toutes les enceintes en même temps 1 Sélectionnez Settings dans le menu d accueil puis appuyez sur 2 Sélectionnez Audio Settings puis appuyez sur 3 Sélectionnez Equalizer puis appuyez sur 4 Sélectionnez All puis appuyez sur 5 Sélectionnez Bass ou Treble puis appuyez sur 6 Réglez le gain puis appuyez sur Remarque Selon les r...

Страница 216: ...lectionner l équipement dans la zone 2 ou la zone 3 appuyez sur ZONE SELECT sur l ampli tuner ZONE 2 saisir le nom ou ZONE 3 saisir le nom apparaît sur la fenêtre d affichage du panneau avant Vous pouvez également appuyer sur les boutons de saisie de la télécommande pour sélectionner l équipement que vous souhaitez faire fonctionner Pour sélectionner l équipement dans la zone 2 ou la zone 3 appuye...

Страница 217: ...ouches peuvent ne pas fonctionner Catégorie de l équipement Touche Télévi seur Project eur Lecteur Blu ray Disc DVD Jeu vidéo Décodeur câble Commutateur de disque Récepteur satellite Magnétoscope MD Caméscope CD Touches numériques z z z z z z z GUIDE z z z z z z z Touches de couleur z z z INFO OPTIONS z z z z z z z RETURN EXIT z z z z z z z V v B b z z z z z z z z z z z z z z m M z z z z z z N X x...

Страница 218: ...t Control vous permettent de faire les réglages requis pour la Universal Remote Control de l appareil audio visuel que vous voulez utiliser La télécommande est initialement réglée pour actionner les produits Sony 1 Appuyez sur HOME 2 Sélectionnez Settings puis appuyez sur 3 Sélectionnez Home Control Settings puis appuyez sur 4 Sélectionnez TV Control pour paramétrer un téléviseur ou un projecteur ...

Страница 219: ...ans la scène 1 Movie comme suit vous pouvez modifier tous les réglages de l ampli tunersimultanémentpar simple pression d une touche sans avoir à modifier chaque réglage Input Calibration Type Sound Field et HDMI Out individuellement Les éléments pour lesquels vous pouvez enregistrer des réglages et les valeurs par défaut pour chaque élément sont les suivants Utilisation de la fonction Home Automa...

Страница 220: ...u la télécommande Vous pouvez également écraser le 1 Movie ou la 2 Music et les remplacer par les réglages actuels en maintenant la touche EASY AUTOMATION 1 ou EASY AUTOMATION 2 enfoncée pendant 3 secondes comme vous le faites lorsque vous sélectionnez Import Current Settings dans le menu Volume No Change No Change 10 dB 30 dB HDMI Out No Change No Change No Change No Change Party Mode No Change N...

Страница 221: ...u d éclairage Allumer ou éteindre le dispositif d éclairage Appuyez sur pour allumer le dispositif d éclairage de sorte que ON soit affiché Pour l éteindre appuyez encore une fois sur de sorte que OFF soit affiché Réglez le niveau d éclairage Appuyez sur B b pour déplacer le curseur b B pour ajuster le niveau pour l équipement disposant d une fonction Dimmer 1 Sélectionnez Lighting dans le menu d ...

Страница 222: ... liste des scènes d éclairage actuelles est affichée 4 Sélectionnez la scène d éclairage que vous voulez modifier avec V v et appuyez sur 5 Suivez les instructions à l écran pour régler chaque dispositif d éclairage Remarque Ne retirez pas le Lighting Control Adapter lorsque l ampli tuner est allumé Des données pourraient être endommagées et l ampli tuner pourrait cesser de fonctionner Lorsque vou...

Страница 223: ... raccordement multizone Pour émettre à la zone 2 Les signaux d un appareil raccordé aux prises d entrée analogiques sont émis par les prises de composant ZONE 2 VIDEO AUDIO OUT ou ZONE 2 OUT Les prises de composant ZONE 2 VIDEO AUDIO OUT ou ZONE 2 OUT ne peuvent pas émettre de signaux par les prises HDMI IN Pour émettre les signaux HDMI utilisez les prises HDMI ZONE 2 OUT Pour émettre à la zone 3 ...

Страница 224: ...exion à la zone 2 à l aide de HDMI Émet des signaux d entrée vidéo ou audio HDMI à la zone 2 en utilisant la prise HDMI ZONE 2 OUT de l ampli tuner Le réglage de la sortie HDMI dans la zone 2 peut être requis page 79 ARépéteur infrarouge non fourni BEnceintes CAutre amplificateur ampli tuner Zone principale Zone 2 Ecran téléviseur ZONE 2 AUDIO OUT A B B C STR DA5800ES Télécommande IR REMOTE IN ZON...

Страница 225: ...IDEO OUT prise RJ 45 ZONE 2 VIDEO OUT prise RJ 45 est utilisé uniquement en cas d installation personnalisée par une personne qualifiée ZONE 2 VIDEO OUT prise RJ 45 est une prise qui envoie un signal vidéo source à l entrée vidéo composantes pour la zone 2 Pour plus de détails consultez votre revendeur Attention N utilisez pas cette prise pour une connexion LAN Ethernet Cela pourrait provoquer un ...

Страница 226: ...N Y T RED Pr R RED Pr T 1 N de 2 3 4 5 6 7 8 BLUE Pb R BLUE Pb T GREEN Y R GND 11V GREEN Y T RED Pr R RED Pr T 1 2 3 4 5 6 7 8 Blanc orange Couleur des fils Orange Blanc vert Bleu Blanc bleu Vert Blanc marron Marron Blanc orange Orange Blanc vert Bleu Blanc bleu Vert Blanc marron Marron B B C STR DA5800ES Zone principale Zone 3 ARépéteur infrarouge non fourni BEnceintes CAutre amplificateur ampli ...

Страница 227: ... appareil tel qu un amplificateur de téléviseur ou d audiovisuel est raccordé à la prise HDMI ZONE 2 OUT vous pouvez émettre des signaux HDMI de l appareil dans le zone 2 Pour plus d informations voir 3 Faire une connexion à la zone 2 à l aide de HDMI page 76 Vous pouvez émettre les signaux des prises HDMI IN vers l appareil de la zone2 grâce aux prises HDMI ZONE 2 OUT comme suit 1 Sélectionnez Se...

Страница 228: ... 3 Sélectionnez Priority puis appuyez sur 4 Sélectionnez Main Only puis appuyez sur Changer le réglage de la zone de la télécommande La télécommande est fondamentalement conçue pour l utilisation dans la zone principale Le réglage de la zone de la télécommande est fondamentalement conçue pour l utilisation dans la zone 2 Si vous voulez l utiliser dans la zone 3 modifiez le réglage de la zone de la...

Страница 229: ...e la télécommande à la zone 2 ou la zone 3 à l avance page 80 3 Appuyez sur 1 La fonction de zone est activée 4 Appuyez sur l une des touches de source d entrée de la télécommande pour sélectionner les signaux source que vous souhaitez émettre 5 Réglez le volume du son Dans le cas de l illustration 1 1 page 75 réglez le volume à l aide de VOL sur la télécommande Dans le cas de l illustration 1 2 p...

Страница 230: ...à l aide de la télécommande puis appuyez sur TUNER de façon répétée Chaque fois que vous appuyez sur cette touche cela bascule de FM à AM et inversement Lorsque différents programmes sont sélectionnés dans de multiples zones ce qui a été entré en dernier aura la priorité 5 Vous pouvez apprécier le contenu étant visualisé dans la zone principale dans la zone 2 ou la zone 3 seulement quand SOURCE es...

Страница 231: ...te sur un appareil raccordé à la prise HDMI OUT B de l ampli tuner Lorsque vous réglez Zone2 Out dans le menu HDMI Settings à On vous ne pouvez pas utiliser la fonction Control for HDMI Il est recommandé de raccorder l ampli tuner à des produits compatibles BRAVIA Sync Remarques Les fonctions suivantes peuvent être commandées à l aide d appareils non Sony Toutefois la compatibilité avec tous les a...

Страница 232: ...s sous tension automatiquement et basculé sur l entrée HDMI appropriée Lorsque vous réglez Pass Through sur On ou Auto le son et l image peuvent être émis uniquement par le téléviseur tandis que l ampli tuner reste en mode veille Démarrez la lecture sur l appareil lecteur Pour utiliser la fonction Lecture une touche du caméscope 1 Activez la fonction Contrôle pour HDMI pour l ampli tuner et votre ...

Страница 233: ...a scène sélectionnée sur votre téléviseur Pour plus d informations sur l opération consultez le mode d emploi du téléviseur Remarque Selon le téléviseur il est possible que le champ sonore ne bascule pas Tableau de correspondance Si un téléviseur compatible avec la Commande ducinéma maison estraccordéà l ampli tuner une icône pour les applications basées sur Internet apparaît sur le téléviseur rac...

Страница 234: ...tuner est en mode veille Pass Through Vous pouvez émettre des signaux vidéo et audio d une prise HDMI IN vers le téléviseur raccordé à la prise HDMI OUT A même quand l ampli tuner est en mode veille Si vous utilisez cette fonction alors que Control for HDMI est réglé sur On l entrée de l ampli tuner est modifiée en fonction du fonctionnement de l appareil raccordé même si l ampli tuner est en mode...

Страница 235: ...e signaux audio numériques les signaux audio analogiques sont sélectionnés Lorsque l entrée du téléviseur est sélectionnée les signaux Audio Return Channel ARC sont prioritaires Si votre téléviseur n est pas compatible avec la fonction Audio Return Channel ARC les signaux audio optiques numériques sont sélectionnés Si les fonctions Contrôle pour HDMI de l ampli tuner et du téléviseur ne sont pas a...

Страница 236: ...puyez sur 4 Sélectionnez les signaux audio et ou vidéo que vous voulez affecter à chaque entrée Remarques Si vous affectez une entrée à l une des prises HDMI IN 1 à IN 9 dans Video Input Assign ou Audio Input Assign la même prise d entrée HDMI est affectée à l entrée vidéo et à l entrée audio Si vous voulez affecter une prise HDMI IN à l entrée vidéo ou à l entrée audio affectez tout d abord une e...

Страница 237: ...HDMI IN 7 VIDEO 3 a a a a a a a a a a a HDMI IN 8 VIDEO 4 a a a a a a a a a a a HDMI IN 9 VIDEO 2 a a a a a a a a a a a Prises d entrée audio assignables OPTICAL IN 1 GAME a a a a a a a a a a OPTICAL IN 2 SAT CATV a a a a a a a a a a OPTICAL IN 3 TV a a a a a a a a a a COAXIAL IN 1 DVD a a a a a a a a a a COAXIAL IN 2 VIDEO 1 a a a a a a a a a a COAXIAL IN 3 SA CD CD a a a a a a a a a a HDMI IN 1 ...

Страница 238: ...rée Vous pouvez affecter plusieurs entrées à la même prise HDMI IN Cependant si vous utilisez la fonction Lecture une touche sur l appareil raccordé à la prise HDMI IN l entrée précédente dans sa séquence d entrée d origine est sélectionnée de préférence Prévisualisation pour HDMI Vous pouvez activer une prévisualisation active par incrustation d image à partir d une entrée HDMI raccordée à cet am...

Страница 239: ...hors tension Un format vidéo HDMI non pris en charge est reçu L entrée actuelle n est pas une entrée HDMI Lorsque le menu GUI est affiché Lorsque Zone2 Out est défini sur On Lorsque Fast View est défini sur Off Cette fonction est rendue possible grâce à la technologie Silicon Image InstaPrevue Fonctionnement de l ampli tuner à l aide d un téléphone intelligent Vous pouvez commander l ampli tuner à...

Страница 240: ...minuterie d arrêt bascule sur OFF Enregistrement à l aide de l ampli tuner Vous pouvez enregistrer le son d un appareil vidéo audio à l aide de l ampli tuner Consultez le mode d emploi fourni avec votre appareil enregistreur 1 Sélectionnez Watch ou Listen dans le menu d accueil puis appuyez sur 2 Sélectionnez l appareil lecteur puis appuyez sur 3 Préparez l appareil pour la lecture Insérez par exe...

Страница 241: ...aire doivent utiliser le même mode de commande Si le mode de commande de la télécommande n est pas le même que celui de l ampli tuner vous ne pouvez pas commander l ampli tuner avec la télécommande 1 Appuyez sur 1 pour éteindre l ampli tuner 2 Tout en maintenant la touche 2CH A DIRECT enfoncée appuyez sur 1 pour allumer l ampli tuner Lorsque le mode de commande sélectionné est défini sur AV2 COMMA...

Страница 242: ...ceintes surround arrière vous pouvez utiliser les bornes SURROUND BACK ZONE 2 pour les enceintes avant dans une configuration bi amplificateur Pour raccorder les enceintes Raccordez les prises du côté Lo ou Hi des enceintes avant aux bornes FRONT A et raccordez les prises du côté Hi ou Lo des enceintes avant aux bornes SURROUND BACK ZONE 2 Assurez vous que les ferrures métalliques de Hi Lo fixées ...

Страница 243: ...rsque vous commandez l ampli tuner sans utiliser la GUI réglez SB ASSIGN sur BI AMP dans SPEAKER SETTINGS page 127 Rétablir les paramètres par défaut définis en usine Vous pouvez effacer tous les réglages mémorisés et rétablir les paramètres par défaut définis en usine en procédant comme suit Cette procédure peut également être utilisée pour la configuration initiale de l ampli tuner avant de l ut...

Страница 244: ...ramétrage s affiche sur l écran du téléviseur 2 Sélectionnez l option de menu de votre choix puis appuyez sur pour accéder à l élément de menu Exemple Lorsque vous sélectionnez Audio Settings 3 Sélectionnez le paramètre de votre choix puis appuyez sur pour valider Pour revenir à l écran précédent Appuyez sur RETURN EXIT O Pour quitter le menu Appuyez sur HOME pour afficher le menu d accueil puis a...

Страница 245: ...Front High Center Speaker Lift Up Surround Speaker Position Speaker Relocation Speaker Setup Test Tone Center Analog Down Mix Speaker Impedance Distance Unit Audio Settings page 106 Digital Legato Linear Sound Optimizer Equalizer LFE Time Alignment Subwoofer Muting Dual Mono Dynamic Range Compressor Nom de l entrée Subwoofer Low Pass Filter A V Sync Decode Priority Sound Field Video Settings page ...

Страница 246: ...nal Control Network Standby Internet Services Settings page 117 Parental Control Password Parental Control Area Code Internet Video Parental Control Internet Video Unrated Home Control Settings page 70 TV Control AV Equipment Control Lighting Control Lighting Scenes Registration Zone Settings page 119 Zone Control Zone Setup System Settings page 121 Language Auto Standby Settings Lock RS232C Contr...

Страница 247: ...e la distance entre votre position d écoute et chaque enceinte Calibration Matching Lors de l exécution de Auto Calibration cette fonction fonctionne automatiquement assortissant la distance et le niveau des enceintes droites et gauches Vous ne pouvez configurer cette fonction qu à la fin du processus de mesure DCAC et qu une fois que les résultats de la mesure DCAC ont été sauvegardés Le réglage ...

Страница 248: ... celles des enceintes avant User Reference Sélectionne la fréquence que vous avez personnalisée à l aide de la fonction User Reference Edit Off Désactive l EQ du Auto Calibration Remarque Vous ne pouvez pas régler Calibration Type pour la Position pour laquelle les résultats de mesure n ont pas été enregistrés Pour régler la valeur de référence lorsque vous sélectionnez Front Reference pour le Cal...

Страница 249: ...tionner les caractères un par un Automatic Phase Matching Permet de régler la fonction A P M Automatic Phase Matching dans la fonction D C A C Digital Cinema Auto Calibration page 99 Calibre les caractéristiques de phase des enceintes et garantit un espace surround bien coordonné x Off N active pas la fonction A P M x Auto Active ou désactive automatiquement la fonction A P M Remarques Cette fonct...

Страница 250: ...centrale à une hauteur appropriée sur l écran vous permettant d apprécier une représentation naturelle sans inconfort x 1 10 x Off Remarque Cette fonction est inopérante lorsque MULTI IN est sélectionné Un casque d écoute est raccordé Il n y a pas d enceinte centrale Il n y a pas d enceintes supérieures avant et Virtual Front High est réglé sur Off Le mode de champ sonore 2CH est utilisé Le champ ...

Страница 251: ...e volume de chaque enceinte centrale surround gauche droite surround arrière gauche droite avant supérieure gauche droite caisson de graves 1 Sélectionnez l enceinte sur l écran dont vous voulez régler le niveau puis appuyez sur 2 Sélectionnez Level puis appuyez sur Vous pouvez régler le niveau entre 20 dB et 10 dB par intervalles de 0 5 dB Vous pouvez régler le volume avant gauche de FL 10 0 dB à...

Страница 252: ...und surround arrière et avant supérieures sont aussi automatiquement réglées sur Small Si vous n utilisez pas le caisson de graves les enceintes avant sont automatiquement réglées sur Large Pour régler la fréquence de recouvrement de chaque enceinte Permet de régler la fréquence de recouvrement des graves des enceintes qui ont été placées sur Small dans le menu Size La fréquence de recouvrement me...

Страница 253: ...es adjacentes dans l ordre Certaines options peuvent ne pas s afficher selon le réglage de la configuration des enceintes 3 Réglez Level puis appuyez sur Pour émettre le son d une source par des enceintes adjacentes Vous pouvez émettre le son d une source par des enceintes adjacentes pour que vous puissiez ajuster la balance entre les enceintes 1 Sélectionnez Phase Audio puis appuyez sur L écran P...

Страница 254: ... est une technologie détenue par Sony qui permet de lire des signaux audio numériques de faible qualité et les signaux audio analogiques avec un son de qualité supérieure x Off x Auto 1 Cette fonction est disponible pour les formats audio avec une compression à perte et les signaux audio analogiques x Auto 2 Cette fonction est disponible pour signaux PCM linéaire ainsi que pour les formats audio a...

Страница 255: ...caisson de graves est sélectionnée Permet de sélectionner la langue que vous désirez écouter lors d une émission numérique bilingue si disponible Cette fonctionnalité ne fonctionne qu avec des sources Dolby Digital x Main Sub Le son de la langue principale est émis par l enceinte avant gauche tandis que le son de la langue auxiliaire est émis par l enceinte avant droite x Main Le son de la langue ...

Страница 256: ...fusion audio Remarque Cette fonction est inopérante lorsque MULTI IN est sélectionné Permet de spécifier le mode d entrée du signal numérique reçu aux prises DIGITAL IN ou HDMI IN Vous pouvez régler la fonction pour chaque entrée séparément x PCM Lorsque des signaux de la prise DIGITAL IN sont sélectionnés les signaux PCM sont prioritaires afin d éviter une interruption lorsque la lecture commence...

Страница 257: ...UT OFF Resolution Conversion de signaux vidéo Paramètres du menu Resolution Prises HDMI OUT Prises MONITOR COMPONENT VIDEO OUT Prise MONITOR VIDEO OUT Direct Auto Prises HDMI IN z Prises COMPONENT VIDEO IN aa z Prises VIDEO IN aa z 480i 576i 480p 576p 720p 1080i 1080p Prises HDMI IN z Prises COMPONENT VIDEO IN ab z Prises VIDEO IN ab z Paramètres du menu Resolution Prises HDMI OUT Prises MONITOR C...

Страница 258: ...otégés par Macrovision sont émis à la résolution de 480p ou 576p Les signaux vidéo ne sont pas émis Remarques Si vous sélectionnez une résolution que le téléviseur raccordé ne prend pas en charge dans le menu Resolution les images du téléviseur ne peuvent pas être émises correctement L émission d une image HDMI convertie ne prend pas en charge les options x v Color Deep Color et 3D 480i 576i 480p ...

Страница 259: ...t protégé par Macrovision les signaux vidéo peuvent être émis à la résolution de 480p ou 576p Zone Resolution Paramètres du menu Zone Resolution Prises HDMI OUT Prises ZONE 2 COMPONENT VIDEO OUT Prise ZONE 2 VIDEO OUT DIRECT Prises HDMI IN z Prises COMPONENT VIDEO IN z Prises VIDEO IN z 480i 576i réglage par défaut défini en usine Prises HDMI IN z Prises COMPONENT VIDEO IN a a Prises VIDEO IN a z ...

Страница 260: ...tion sur 480i 576i ou 480p 576p Si aucune image n apparaît lorsque vous lisez du contenu à l aide d un périphérique USB d un réseau domestique ou d une vidéo sur Internet à partir du menu Watch Listen procédez comme suit 1Sélectionnez BD comme source d entrée pour la zone principale 2Réglez Playback Resolution sur une résolution plus basse Playback Resolution Prises HDMI OUT Prises MONITOR COMPONE...

Страница 261: ...Vous pouvez ajuster les paramètres requis pour l appareil raccordé aux prises HDMI Vous permet de régler le niveau du subwoofer sur 0 dB ou 10 dB lorsque des signaux PCM sont entrés via une connexion HDMI Vous pouvez définir le niveau pour chaque entrée à laquelle est affectée une prise d entrée HDMI de manière indépendante x 0 dB x Auto Règle automatiquement le niveau sur 0 dB ou 10 dB en fonctio...

Страница 262: ... lorsqu un Sony SCD XA5400ES est raccordé à l ampli tuner Lors de l exécution de la fonction H A T S le son n est pas émis par les enceintes avant supérieures La fonction H A T S est seulement opérante si vous sélectionnez A F D Auto 2ch Stereo ou Headphone 2ch Informations sur le flux de la fonction H A T S disponible Permet d activer ou de désactiver la fonction qui commande l appareil raccordé ...

Страница 263: ... Zone2 Out est réglé à Off Input Settings Vous pouvez régler les paramètres pour les raccordements de l ampli tuner à un autre appareil Permet de régler les options suivantes pour chaque entrée x Watch Listen Définit si une entrée est affichée dans le menu Watch ou le menu Listen Watch Affiche une entrée dans le menu Watch Listen Affiche une entrée dans le menu Listen Watch Listen Affiche une entr...

Страница 264: ... préalablement l ampli tuner au réseau Pour plus d informations voir 7 Raccordement au réseau page 44 LAN Port Activation Permet de définir l activation ou non de chaque port LAN sur le panneau arrière Parmi les quatre ports LAN sur le panneau arrière vérifiez les ports que vous voulez activer L ampli tuner utilisera les ports activés pour accéder au réseau En désactivant les ports inutilisés vous...

Страница 265: ...st activé et l ampli tuner entre en mode Network Standby lorsqu il est en mode veille Internet Services Settings Permet de définir ou modifier le mot de passe pour la fonction de contrôle parental Un mot de passe vous permet de définir une restriction sur la lecture vidéo sur Internet La lecture de certaines vidéos sur Internet peut être limitée selon la zone géographique Des scènes peuvent être b...

Страница 266: ...e dispositif Vous pouvez aussi effectuer un test de connexion Vous permet d établir une connexion entre un lecteur un BD un DVD un SAT ou un autre type d appareil audio visuel et l ampli tuner par l intermédiaire d un IR blaster de sorte que la télécommande de l ampli tuner puisse actionner le dispositif Vous pouvez aussi effectuer un test de connexion Vous permet de configurer un dispositif d écl...

Страница 267: ...tiver ou désactiver la commande de zone 2 ou zone 3 1 Sélectionnez la zone que vous voulez activer ou désactiver puis appuyez 2 Sélectionnez On ou Off puis appuyez sur On Off Pour sélectionner la source de sortie pour chaque zone Vous pouvez sélectionner la source qui est émise vers la zone Les signaux audio et vidéo sont émis vers la zone 2 alors que seuls les signaux audio sont émis vers la zone...

Страница 268: ...ASTER VOLUME Si vous sélectionnez Off chaque zone est activée selon le même volume que celui qui était en cours lorsque vous avez éteint l appareil pour la dernière fois Remarque Vous ne pouvez pas prérégler le volume dans les cas suivants Les bornes SURROUND BACK ZONE 2 sont utilisées pour les enceintes surround arrière ou les enceintes avant supérieures ou elles sont utilisées avec un raccordeme...

Страница 269: ...rise HDMI OUT B x Main pour Zone2 et Zone3 uniquement Permet de lier l opération de déclenchement dans la zone 2 ou zone 3 à la prise TRIGGER OUT MAIN System Settings Vous pouvez personnaliser les réglages de l ampli tuner Permet de sélectionner la langue pour les messages sur l écran x English x Español x Français x Deutsch Permet d activer ou de désactiver la fonction qui bascule la zone princip...

Страница 270: ...r Remarque L information sur la nouvelle version du logiciel n apparaît pas dans les cas suivants La version la plus récente est déjà en cours d utilisation L ampli tuner ne peut pas obtenir l information à partir d un réseau Permet d effacer des informations personnelles liées à la vidéo sur Internet telles que la liste du contenu sur Internet Favorites List etc Affiche la version logicielle de l...

Страница 271: ...e de la connexion Internet Remarque Évitez d éteindre l ampli tuner ou de déconnecter le câble réseau pendant la mise à jour du logiciel Cela pourrait provoquer un dysfonctionnement Fonctionnement sans la GUI Vous pouvez commander l ampli tuner à l aide de l afficheur de l ampli tuner même si le téléviseur n est pas raccordé à l ampli tuner 1 Allumez l ampli tuner 2 Appuyez sur AMP MENU Le menu ap...

Страница 272: ...V v pour sélectionner l option de menu puis appuyez sur Le paramètre apparaît entre parenthèses 5 Appuyez plusieurs fois sur V v pour sélectionner le paramètre voulu puis appuyez sur Le paramètre est entré et les parenthèses disparaissent de l affichage Pour revenir à l écran précédent Appuyez sur RETURN EXIT O ...

Страница 273: ...O DIST INFO LEVEL INFO EXIT CAL MATCHING xxx YES NO WARNING CODE xxx 4x FL FR C SL SR SBR SBL SW LH RH 0 1 2 3 4 NO WARNING PHASE INFO xxx xxx FL FR C SL SR SBR SBL SW LH RH OUT IN DIST INFO xxxxxxxxxx FL FR C SL SR SBR SBL SW LH RH LEV INFO xxx xxxxxx dB FL FR C SL SR SBR SBL SW LH RH ERROR CODE xxx 3x F SR SB 0 1 2 3 4 RETRY xxxx YES EXIT CANCEL CAL TYPE xxxxxxxxx FULL FLAT ENGINEER FRONT REF US...

Страница 274: ...0 5 dB CENTER xxx xdB 20 0 dB à 10 0 dB intervalle de 0 5 dB SURROUND L xxx xdB 20 0 dB à 10 0 dB intervalle de 0 5 dB SURROUND R xxx xdB 20 0 dB à 10 0 dB intervalle de 0 5 dB SUR BACK xxx xdB 20 0 dB à 10 0 dB intervalle de 0 5 dB SUR BACK L xxx xdB 20 0 dB à 10 0 dB intervalle de 0 5 dB SUR BACK R xxx xdB 20 0 dB à 10 0 dB intervalle de 0 5 dB LEFT HIGH xxx xdB 20 0 dB à 10 0 dB intervalle de 0...

Страница 275: ...xxx 1 0 à 10 0 m intervalle de 1 cm 3 3 à 32 9 intervalle de 1 pouce FRONT R xxxxxxxxx CENTER xxxxxxxxx SURROUND L xxxxxxxxx SURROUND R xxxxxxxxx SUR BACK xxxxxxxxx SUR BACK L xxxxxxxxx SUR BACK R xxxxxxxxx LEFT HIGH xxxxxxxxx RIGHT HIGH xxxxxxxxx SUBWOOFER xxxxxxxxx DISTANCE UNIT xxxxx meter feet FR CROSSOVER xxxHz 40 à 200 intervalle de 10 Hz CNT CROSSOVER xxxHz 40 à 200 intervalle de 10 Hz SUR ...

Страница 276: ...B 10 dB à 10 dB intervalle de 0 5 dB CENTER BASS xxx xdB 10 dB à 10 dB intervalle de 0 5 dB CENTER MID xxx xdB 10 dB à 10 dB intervalle de 0 5 dB CENTER TREB xxx xdB 10 dB à 10 dB intervalle de 0 5 dB SUR SB BASS xxx xdB 10 dB à 10 dB intervalle de 0 5 dB SUR SB TREB xxx xdB 10 dB à 10 dB intervalle de 0 5 dB FH BASS xxx xdB 10 dB à 10 dB intervalle de 0 5 dB FH TREB xxx xdB 10 dB à 10 dB interval...

Страница 277: ...xx MAIN SUB MAIN SUB DEC PRIORITY xxxx AUTO PCM D RANGE COMP xxxx ON AUTO OFF VIDEO SETTINGS RESOLUTION xxxxxxxx DIRECT AUTO 480 576i 480 576p 720p 1080i 1080p ZONE RESO xxxxxxxx DIRECT 480 576i 480 576p 720p 1080i HDMI SETTINGS CTRL FOR HDMI xxx ON OFF PASS THROUGH xxxx ON AUTO OFF H A T S xxx ON OFF ZONE2 OUT xxx ON OFF PRIORITY xxxxxxxxxx MAIN ZONE2 MAIN ONLY AUDIO OUT xxxxxx AMP TV AMP SW LEVE...

Страница 278: ... MODE l affichage change comme suit Entrée sélectionnée t Type de champ sonore t Informations sur le flux t Nom de l entrée que vous avez saisie Les informations sur le flux peuvent ne pas s afficher Lors de l écoute de la radio FM et AM Nom de la station t Fréquence t Type de champ sonore Le nom d index ne s affiche que lorsque vous avez attribué un nom à la source d entrée ou à la station prérég...

Страница 279: ...e de service après vente qualifié Accumulation de chaleur Cet ampli tuner chauffe pendant le fonctionnement mais ceci n est pas une anomalie Si vous utilisez constamment l ampli tuner avec un niveau du son élevé la température du dessus des côtés et du dessous du boîtier augmente considérablement Pour ne pas risquer de vous brûler ne touchez pas le coffret La partie supérieure du boîtier peut deve...

Страница 280: ... phénomène est spécifique à cet amplificateur Il ne s agit pas d un dysfonctionnement Si Control for HDMI ou Network Standby est réglé sur On ou si Pass Through est réglé sur On ou sur Auto le courant pour la zone 2 ou la zone 3 est activé et la partie supérieure de l ampli tuner peut chauffer même lorsque l ampli tuner est en mode veille Cela est dû au courant qui circule à travers les circuits i...

Страница 281: ...prises COMPONENT VIDEO MONITOR OUT est convertie jusqu à 480p 576p Sortie HDMI L émission des signaux vidéo HDMI de l ampli tuner est peut être réglée sur OFF Dans ce cas sélectionnez HDMI A ou HDMI B à l aide de la touche HDMI OUTPUT page 86 Lorsque Zone2 Out est réglé à Off aucun signal ne sera émis par HDMI ZONE 2 Le GUI et les signaux vidéo convertis ne seront pas émis par la prise HDMI ZONE 2...

Страница 282: ...on produit est très faible Assurez vous que les enceintes et l appareil sont correctement raccordés Assurez vous que l ampli tuner et tous les appareils sont allumés Assurez vous que le MASTER VOLUME n est pas sur dB Essayez de le régler sur environ 40 dB Vérifiez que SPEAKERS A B A B OFF n est pas sur OFF page 47 Appuyez sur MUTING sur la télécommande pour désactiver la fonction de coupure du son...

Страница 283: ...n sur l enceinte centrale lorsqu un champ sonore Pro Logic etc est sélectionné Enceinte s centrale s surround surround arrière avant supérieure s Vérifiez que le paramétrage des enceintes est approprié à la configuration à l aide de l option Auto Calibration ou Speaker Connection dans le menu Speaker Settings Puis vérifiez que le son est émis correctement par chaque enceinte à l aide de Test Tone ...

Страница 284: ...us que le téléviseur est compatible avec la fonction Commande du son du système Si le téléviseur n est pas équipé de la fonction Commande du son du système réglez les paramètres Audio Out dans le menu HDMI Settings sur TV AMP si vous voulez écouter le son par le haut parleur du téléviseur et de l ampli tuner AMP si vous voulez écouter le son par l ampli tuner Lorsque vous raccordez l ampli tuner à...

Страница 285: ...nt pas quand la configuration des enceintes est réglée sur 2 0 ou 2 0 1 Le témoin MULTI CHANNEL DECODING ne s allume pas en bleu Assurez vous que l appareil lecteur est raccordé à une prise numérique et que l entrée est correctement sélectionnée sur cet ampli tuner Vérifiez si la source d entrée du contenu en cours de lecture est au format multicanal Vérifiez si l appareil lecteur est paramétré su...

Страница 286: ...n de rappel des stations préréglées est utilisée Préréglez les stations page 59 Appuyez sur DISPLAY MODE sur l ampli tuner de sorte que la fréquence apparaisse sur l afficheur Le périphérique USB n est pas reconnu Éteignez l ampli tuner puis débranchez le périphérique USB Rallumez l ampli tuner et reconnectez le périphérique USB Raccordez le périphérique USB pris en charge Le périphérique USB ne f...

Страница 287: ...envers Raccordez le périphérique USB dans le bon sens Affichage erroné Les données enregistrées dans le périphérique USB sont peut être corrompues Les codes de caractère pouvant être affichés par cet ampli tuner sont les suivants Majuscule A à Z Minuscule a à z Nombres 0 à 9 Symboles _ Les autres caractères peuvent ne pas s afficher correctement Le démarrage de la lecture est très long Le processu...

Страница 288: ...ont la lecture est compatible avec l ampli tuner parmi tous les contenus proposés par le serveur conformément aux directives DLNA Il est possible qu un contenu ne soit pas lu ou affiché même si ce contenu est défini dans les directives DLNA Impossible d accéder à l ampli tuner depuis le contrôleur ES Remote ou du contrôleur DLNA Vérifiez que le contrôleur que vous souhaitez utiliser est réglé sur ...

Страница 289: ... OUT B ou OFF la fonction Contrôle pour HDMI ne fonctionne pas correctement Si vous sélectionnez HDMI OUT A après avoir sélectionné HDMI OUT B ou OFF la fonction Contrôle pour HDMI peut ne pas fonctionner correctement pendant un moment Cela est dû au fait que l appareil raccordé à la prise HDMI OUT A doit reconnaître à nouveau l ampli tuner équipé de la fonction Contrôle pour HDMI Si la fonction C...

Страница 290: ... ampli tuner jusqu à ce que le témoin au dessus de la touche clignote en vert pour redémarrer l ampli tuner La fonction Universal Remote Control est inopérante Assurez vous que les connexions requises sont faites Si le problème est autre qu un des cas décrits ci dessus et que le problème n est pas résolu même si vous attendez un moment effectuez l une des opérations ci dessous Appuyez sur 1 sur la...

Страница 291: ... état de l ampli tuner Pour la résolution du problème voir ci dessous Si le problème persiste adressez vous au revendeur Sony le plus proche PROTECTOR L ampli tuner est recouvert et les orifices d aération sont obstrués L ampli tuner se met automatiquement hors tension après quelques secondes Retirez l objet qui couvre le panneau supérieur de l ampli tuner puis remettez le sous tension SPEAKER SHO...

Страница 292: ...ceintes avant supérieures sont raccordées alors que des enceintes surround ne le sont pas Raccordez la les enceinte s surround aux bornes SURROUND Code 34 Les enceintes ne sont pas placées dans la bonne position Les enceintes ou un microphone d optimisation à droite ou à gauche sont peut être mal placés Reportez vous à 1 Installation des enceintes page 24 et vérifiez la position des enceintes Warn...

Страница 293: ...ale minimum de 130 watts RMS par canal avec pas plus de 0 09 de distorsions harmoniques totales de 250 milliwatts à la sortie nominale Section amplificateur PUISSANCE DE SORTIE1 2 Puissance de sortie nominale en mode stéréo 8 ohms 20 Hz 20 kHz THD 0 09 130 W 130 W Puissance de sortie de référence en mode stéréo 4 ohms 20 Hz 20 kHz THD 0 15 130 W 130 W Puissance de sortie de référence 8 ohms 1 kHz ...

Страница 294: ...ourbe d égalisation RIAA 1 0 dB 20 Hz 20 kHz MULTI CHANNEL INPUT SA CD CD MD TAPE TV VIDEO 1 2 DVD SAT CATV GAME 10 Hz 100 kHz 3 dB PHONO Sensibilité 2 5 mV Impédance 50 kohms S B3 90 dB A filtre passe bas 20 kHz MULTI CHANNEL INPUT SA CD CD MD TAPE TV VIDEO 1 2 DVD SAT CATV GAME Sensibilité 150 mV Impédance 50 kohms S B3 105 dB A filtre passe bas 20 kHz 500 mV IN 1 DVD IN 2 VIDEO 1 IN 3 SA CD CD ...

Страница 295: ...40 2160p à 23 98 24 Hz a 1920 1080p à 59 94 60 Hz a a a 1920 1080p à 50 Hz a a a 1920 1080p à 29 97 30 Hz a a a a 1920 1080p à 25 Hz a a a a 1920 1080p à 23 98 24 Hz a a a a 1920 1080i à 59 94 60 Hz a a a a 1920 1080i à 50 Hz a a a a 1280 720p à 59 94 60 Hz a a a a 1280 720p à 50 Hz a a a a 1280 720p à 29 97 30 Hz a a a a 1280 720p à 23 98 24 Hz a a a a 720 480p à 59 94 60 Hz a 720 576p à 50 Hz a ...

Страница 296: ...mm 17 po 7 1 2 po 16 5 8 po largeur hauteur profondeur parties saillantes et commandes comprises Poids environ 18 0 kg 39 lb 11 oz Accessoires fournis Mode d emploi ce manuel Guide d installation rapide 1 Microphone d optimisation ECM AC1 1 Antenne fil FM 1 Antenne cadre AM 1 Cordon d alimentation secteur 1 Télécommande 1 Piles R6 format AA 2 Outil de raccordement du cordon d enceinte 1 Lighting C...

Страница 297: ... Lift Up 102 Changement de l affichage 130 Commande du cinéma maison 85 Commande du son du système 84 Concertgebouw Amsterdam 64 65 Configuration des enceintes 101 Connection Server Settings 116 Contenu Internet 56 Control for HDMI 114 Cordon d alimentation secteur 45 Coupure du son 51 Crossover Frequency 104 D D C A C Digital Cinema Auto Calibration 99 Decode Priority 108 Décodeur câble 33 Digita...

Страница 298: ...s Auto Calibration 144 Erreur 143 Mid 66 Minuterie d arrêt 92 Mise hors tension du système 84 Movie 62 Movie Height 62 Multi Zone 75 Musikverein Vienna 64 65 Musique 64 N Name In 101 Name Input 59 Neo X Cinema 62 Neo X Game 64 Neo X Music 64 Network Settings 116 Network Standby 117 Network Update 122 P Parental Control Area Code 117 Parental Control Password 117 Pass Through 86 114 Phase Audio 105...

Страница 299: ...1 Speaker Relocation 102 Speaker Settings 99 Speaker Setup 103 SPEAKER SHORTED 143 SPEAKERS A B A B OFF 10 47 Sports 64 Stadium 64 Stations préréglées 59 Subwoofer Level 113 Subwoofer Low Pass Filter 108 Subwoofer Muting 107 Surround Back Assign 101 Surround Speaker Position 102 System Information 122 System Settings 121 T Télécommande 17 19 46 68 70 TONE 11 95 Transcodage 21 Treble 66 Tuner satel...

Отзывы: