Ad
minis
tra
ting t
he Camer
a
Setting the Sensor input/Camera tampering detection/Motion detection — Action input Menu
28
Notes
• If
Automatic configuration
is enabled in the Local
Area Network (LAN) settings of Internet Explorer, the
image may not be displayed. In that case, disable
Automatic configuration
and set the proxy server
manually. For the setting of the proxy server, consult
your network administrator.
• When you install ActiveX control, you should be
logged in to the computer as Administrator.
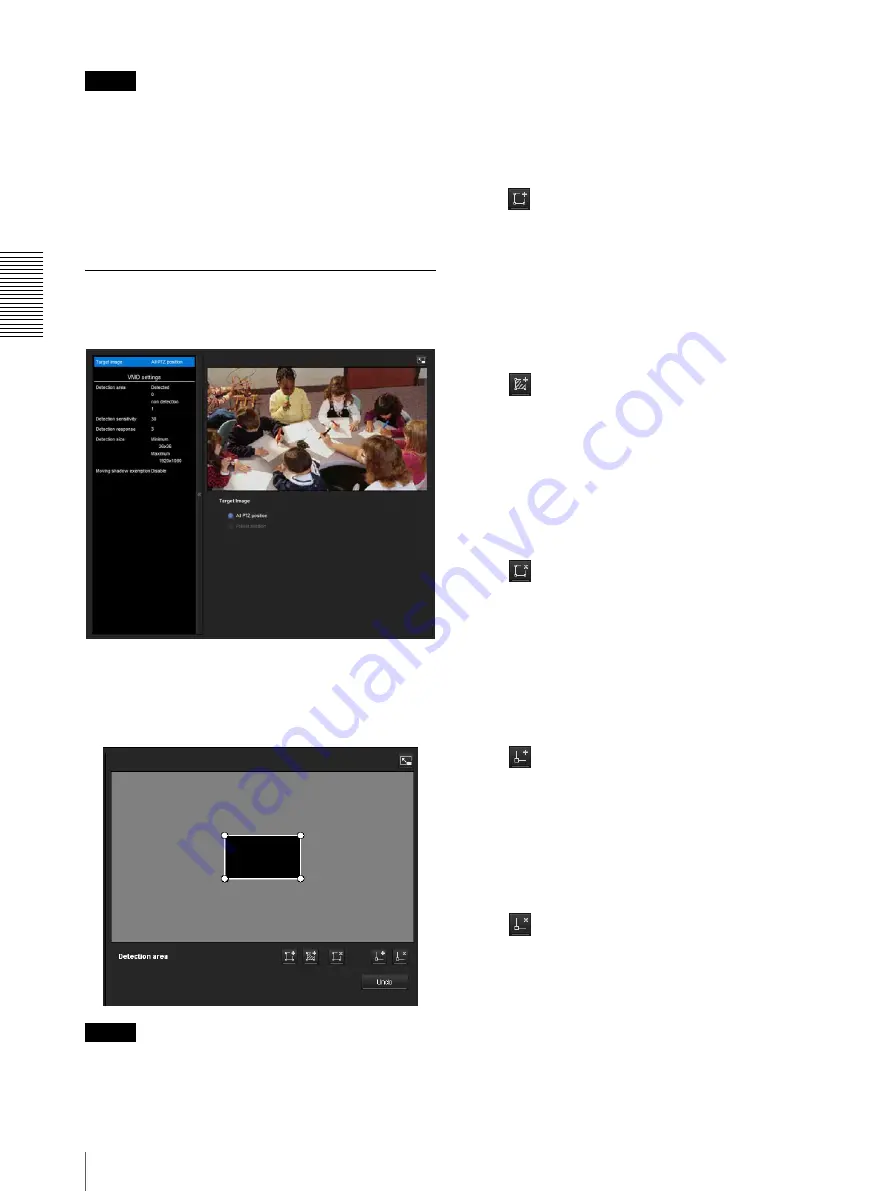
Setting items for motion detection
Use the settings tab to set the conditions for the motion
detection function while observing camera images.
VMD settings
Detection area
Specify the effective scope of motion detection.
Note
The frames shown on the monitor screen are not
displayed on the image files sent or recorded with
motion detection.
Configuring the detection area
The following procedure is used to configure the motion
detection area:
1
Use the following buttons to specify the active
area(s) and inactive area(s).
Add detection area
Clicking this button will add an active area window
in the center of the screen.
When you place the cursor on the area, the cursor
changes to a crossed arrow, which you can drag to
move the area.
When you place the cursor on the vertex of the area,
the cursor changes to
n
, which you can drag to
move the vertex.
Add non detection area
Clicking this button will add an inactive area
window in the center of the screen.
When you place the cursor on the area, the cursor
changes to a crossed arrow, which you can drag to
move the area.
When you place the cursor on the vertex of the area,
the cursor changes to
n
, which you can drag to
move the vertex.
Delete Area
Clicking this button will change the cursor to a
button. While the cursor is a button, click on a part
of the area to delete that area.
After the deletion, the cursor will return to its
original form. To exit this operation, click this
button again.
It is the same function as the button displayed under
VMF settings.
Add vertex
Clicking this button will change the cursor to a
button. In that state, when you click on a part of the
side of the area, a vertex is added to that point. After
the addition, the cursor will return its original form.
To exit this operation, click this button again.
It is the same function as the button displayed in
VMF settings.
Delete vertex
Clicking this button will change the cursor to a
button. In that state, when you click on a part of the
vertex of the area, the vertex added to that point is
deleted. After the deletion, the cursor will return its
original form. To exit this opertion, click this button
again.
It is the same function as the button displayed in
VMF settings.
Содержание SNC-VB600B
Страница 39: ...Sony Corporation ...


