background image

27

GB

Dis

c

/USB Pl

a

y

ba
c

k

x

When playing a USB device

• [ALL USB DEVICES (SHUFFLE)]: 

shuffle all audio files on all USB 
devices.

• [ONE USB DEVICE (SHUFFLE)]: 

shuffle all audio files on a USB device.

• [FOLDER (SHUFFLE)]: shuffle all 

compatible files in the folder on the 
USB device.

Notes

• Shuffle Play cannot be performed for image 

and video files.

• Shuffle Play is canceled when you

– turn off the system.
– open the disc tray.
– perform USB transfer (except REC1 

Transfer).

– transfer music from a disc to a USB device 

(except REC1 Transfer).

– change MEDIA MODE.
– switch the USB memory select.

• Shuffle Play may be canceled when you select 

a folder or a track to play back.


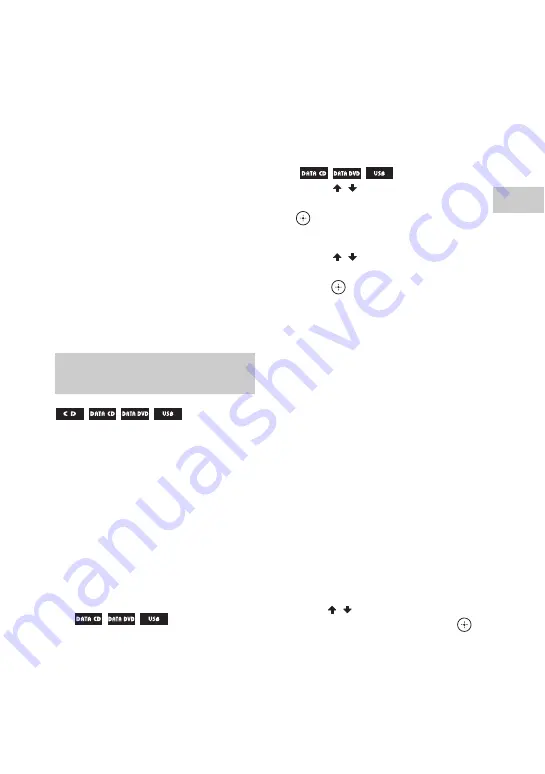
You can make a program of up to 25 steps
in the order you want them to be played 
back.

You can only program the audio tracks 
from the current disc or USB A.

1

For DVD/CD function:

Press DVD/CD.

For USB function:

Press USB repeatedly until “USB A” 
lights up in the display panel.

2

(


 only)

Press MEDIA MODE repeatedly 
to select [MUSIC].

3

When playback is stopped, hold 
down SHIFT, then press PLAY 
MODE repeatedly to select 
[PROGRAM].

4

Press SEARCH.

The Folder List or Track List appears 
on the TV screen.

5

(


 only)

Press 

/

 repeatedly to select 

the folder you want, then press 

.

File List appears on the TV screen.

6

Press 

/

 repeatedly to select 

the track or file you want, then 
press .

The program step number appears on 
the left side of the selected track or file.

7

To program other tracks or 
audio files in the same folder, 
repeat step 6.

To program files on other folders, 
press RETURN to return to Folder List 
and repeat steps 5 and 6.

8

Press 

N

 to start Program Play.

Program List is displayed on the TV 
screen.
When the Program Play ends, you can 
restart the same program by pressing

N

.

To delete a programmed step

1

Use the same procedure as in step 
4 and step 5 of 

Creating your own 

program

.

2

Press 

/

 to select the track or file 

you want to delete, then press 

.

The program step number on the left 
side of the selected track or file 
disappears.

Creating your own program 
(Program Play)

Содержание SHAKE-100D

Страница 1: ...71 11 2 SHAKE 100D SHAKE 88D SHAKE 66D SHAKE 44D Getting Started USB Transfer Tuner Bluetooth Sound Adjustment Disc USB Playback Other Operations Additional Information HOME AUDIO SYSTEM Operating Instructions ...

Страница 2: ...t out in the EMC Directive using a connection cable shorter than 3 meters CAUTION The use of optical instruments with this product will increase eye hazard This appliance is classified as a CLASS 1 LASER product This marking is located on the rear exterior When unpacking or handling a big and or heavy speaker be sure to handle the unit with two or more persons Dropping the unit may cause personal ...

Страница 3: ...respectively and has been certified by the developer to meet Apple performance standards Apple is not responsible for the operation of this device or its compliance with safety and regulatory standards Please note that the use of this accessory with iPod or iPhone may affect wireless performance THIS PRODUCT IS LICENSED UNDER THE MPEG 4 VISUAL PATENT PORTFOLIO LICENSE FOR THE PERSONALANDNON COMMER...

Страница 4: ...nit HCDSHAKE100 1 Speaker system SSSHAKE100P 2 The SHAKE 88D consists of Unit HCD SHAKE88 1 Speaker system SS SHAKE88P 2 The SHAKE 66D consists of Unit HCD SHAKE66 1 Speaker system SS SHAKE66 2 The SHAKE 44D consists of Unit HCD SHAKE44 1 Speaker system SS SHAKE44 2 Icons such as listed at the top of each explanation indicate the type of media that can be used with the function being explained The...

Страница 5: ...stricting playback of the disc Parental Control 28 Viewing information of a disc and USB device 29 Using the Setup Menu 31 USB Transfer Transferring music 34 Tuner Listening to the radio 38 Bluetooth About the Bluetooth wireless technology 39 Setting the Bluetooth audio codecs 39 Connecting a smartphone with one touch NFC 40 Listening to music wirelessly on a Bluetooth device 41 Setting the Blueto...

Страница 6: ...splay panel 48 Changing the illumination pattern and color 49 Using the timers 49 Using optional equipment 50 Deactivating the buttons on the unit Child Lock 50 Setting the automatic standby function 50 Additional Information Troubleshooting 51 Precautions 59 Specifications 60 Language code list 65 Glossary 67 Index 69 ...

Страница 7: ...uper VCD format CD AUDIO CD CD R CD RW in AUDIO CD format DATA CD CD ROM R RW in DATA CD format that contains the following file formats and conforms to ISO 96601 Level 1 Level 2 or Joliet extended format MP3 files2 3 JPEG image files4 MPEG4 video files5 Xvid video files6 DATA DVD DVD ROM R RW R RW in DATA DVD format that contains the following file formats and conforms to UDF Universal Disk Forma...

Страница 8: ...ata part of CD Extra or Mixed CDs CD Graphics disc Super Audio CDs DVD Audio DVD R RW in VR Video Recording mode DATA CD DATA DVD that does not contain MP3 files JPEG image files MPEG4 or Xvid video files DATA CD DATA DVD that is created in Packet Write format DVD RAM A DVD Video with a different region code CPRM Content Protection for Recordable Media compatible DVD R RW recorded in Copy Once pro...

Страница 9: ...ecorded in later sessions can also be played back If later sessions contain AUDIO CD format the system cannot play back this multisession discs If MP3 files and JPEG image files in AUDIO CD format or VIDEO CD format are recorded in the first session only the first session will be played back Your system has a region code printed on the rear of the unit and will only play back a DVD labeled with th...

Страница 10: ...r video files are skipped Files transferred by a device such as a computer may not be played back in the order in which they were transferred The playback order may not be applicable depending on the software used for creating the audio file image file or video file Compatibility with all MP3 WMA AAC encoding writing software recording devices and recording media cannot be guaranteed Compatibility...

Страница 11: ... only For details refer to the operating instructions of the USB device When a USB device is inserted the system reads all the files on the USB device If there are many folders or files on the USB device it may take a long time to finish reading the USB device Do not connect the system and the USB device through a USB hub With some connected USB devices there may be a delay before an operation is ...

Страница 12: ...ations using the remote control but the same operations can also be performed using the buttons on the unit having the same or similar names Unit SHAKE 100D SHAKE 88D SHAKE 66D SHAKE 44D C C F G H B A J P D N M L K I C O C Q E A Q D F H C B J P C N ML R K I O G C C E ...

Страница 13: ...13GB When pressing the buttons press on the printings of the buttons as shown below SHAKE 100D SHAKE 88D SHAKE 66D SHAKE 44D ...

Страница 14: ...Enter the settings go back go forward Select a track or file TUNING Tune to the station you want select folder Select a folder on a data disc or a USB device PRESET Select a preset station Remote control m M rewind fast forward Find a point in a track or file during playback Remote control Watch the Slow motion Play N1 play Start playback X pause Pause playback To resume playback press N x stop St...

Страница 15: ...connected to the A or B port during USB function Unit TUNER BAND Select the TUNER function Select the FM or AM band during TUNER function Unit AUDIO IN Select the AUDIO IN 1 or AUDIO IN 2 function J Remote control sensor K Display panel L REC TO USB B Transfer music to the optional USB device which is connected to the B port M USB B REC PLAY port Connect and transfer to an optional USB device N MI...

Страница 16: ...ptions menu V KEY CONTROL 2 page 48 Change the key to suit your vocal range W ECHO Adjust the microphone echo level X SHIFT1 2 Hold down to activate the buttons printed in pink SCORE Start or stop calculating your vocal score KARAOKE MODE2 page 47 Select the Karaoke Mode Y KARAOKE PON page 48 Turn the KARAOKE PON function on or off Z RETURN Return to the previous menu SETUP2 page 31 Display the Se...

Страница 17: ...B Getting Started Hooking up the system securely SHAKE 100D SHAKE 88D SHAKE 66D SHAKE 44D Getting Started See below D is different depending on the model See below SHAKE 88D SHAKE 100D SHAKE 44D SHAKE 66D ...

Страница 18: ... The sound is output through this system Connect to another audio system to enjoy the Party Chain function page 46 AUDIO IN 2 L R jacks Connect to the audio output jacks of a computer or gaming device The sound is output through this system D Speakers LEFT SPEAKERS and RIGHT SPEAKERS terminals SHAKE 100D SHAKE 88D SHAKE 66D only MID TWEETERS and WOOFERS terminals SHAKE 44D only Connect the speaker...

Страница 19: ...e or mix different types of batteries If you do not use the remote control for a long period of time remove the batteries to avoid damage from battery leakage and corrosion SHAKE 88D SHAKE 66D SHAKE 44D only You can attach the supplied bottom panel to the bottom of the main unit to raise the front panel and to ease the operations 1 Insert the hooks of the bottom panel to the catcher holes on the b...

Страница 20: ...V screen Displayed items may vary depending on country or region 5 Press repeatedly to select a language then press The setting is selected and VIDEO SETUP appears on the TV screen 6 Press repeatedly to select the setting that matches your TV type then press After QUICK SETUP is complete appears on the TV screen the system is ready for playback To change the setting manually See Using the Setup Me...

Страница 21: ... Setting the clock You cannot set the clock in Power Saving Mode 1 Press 1 to turn on the system 2 Hold down SHIFT then press TIMER MENU If PLAY SET appears in the display panel press repeatedly to select CLOCK SET then press 3 Press repeatedly to set the hour then press 4 Press repeatedly to set the minutes then press Changing the display Press DISPLAY repeatedly while the system is turned off De...

Страница 22: ...he playback source or transfer destination USB Memory Select If the USB device has more than one memory for example an internal memory and a memory card you can select which memory to use as a playback source or transfer destination Note You cannot select a memory during playback or transfer Make sure to select a memory before starting playback 1 Hold down SHIFT then press OPTIONS 2 Press to selec...

Страница 23: ...file you want 5 Press to start playback from the selected file Playing from a specific image file slide show 1 Press DVD TUNER MENU Thumbnail picture for the first 16 JPEG image files in the selected folder is displayed on the TV screen If there are more than 16 image files in the selected folder the scroll bar appears at the right 2 Press to select the file you want 3 Press N to start playback fr...

Страница 24: ... TUNER MENU View Folder List or File List SEARCH Press SEARCH again to turn off the Folder List or File List Return to Folder List when in Track List or File List RETURN Locate a point quickly in fast forward or fast reverse Lock Search m or M during playback Each time you press m or M the playback speed changes Watch frame by frame Slow motion Play X then press or Eachtimeyoupress or the playback...

Страница 25: ...format or mode you want DVD VIDEO You can toggle audio format or language when the source contains multiple audio formats or multilingual audio When 4 digits are displayed they indicate a language code See Language code list page 65 to confirm which language the code represents When the same language is displayed two or more times the DVD VIDEO is recorded in multiple audio formats VIDEO CD CD DAT...

Страница 26: ... 7th disc the resume point for the first disc will be deleted To activate this function set MULTI DISC RESUME in SYSTEM SETUP to ON page 34 Note To play back from the beginning of the disc press x twice then press N Using play mode When playback is stopped hold down SHIFT then press PLAY MODE repeatedly x When playing a disc DISC play a disc FOLDER play all MP3 files in the folder on the disc Cann...

Страница 27: ...isplay panel 2 only Press MEDIA MODE repeatedly to select MUSIC 3 When playback is stopped hold down SHIFT then press PLAY MODE repeatedly to select PROGRAM 4 Press SEARCH The Folder List or Track List appears on the TV screen 5 only Press repeatedly to select the folder you want then press File List appears on the TV screen 6 Press repeatedly to select the track or file you want then press The pr...

Страница 28: ...repeats the current chapter DVD VIDEO only TRACK repeats the current track FILE repeats the current video file To cancel Repeat Play Hold down SHIFT then press REPEAT repeatedly to select OFF Notes lights up in the display panel when Repeat Play is set to ALL or DISC lights up in the display panel when Repeat Play is set to TITLE CHAPTER TRACK or FILE You cannot perform Repeat Play with VIDEO CD d...

Страница 29: ...hich PARENTAL CONTROL is set 1 Load the disc and press N The display for entering your password appears on the TV screen 2 Enter your 4 digit password using the numeric buttons then press The system starts playback If you forget your password Remove the disc and repeat steps 1 to 3 of Restricting playback of the disc page 28 When you are asked to enter your password enter 199703 using the numeric ...

Страница 30: ... those characters will be displayed as _ Notes Depending on the source being played some information may not be displayed some characters cannot be displayed Depending on the play mode the information displayed may be different Displaying the audio information DVD VIDEO and video files only Hold down SHIFT then press AUDIO repeatedly during playback When playing a DVD VIDEO For example in Dolby Di...

Страница 31: ...eatedly to select the item you want then press 4 Press repeatedly to select the setting you want then press The setting is selected and setup is completed OSD Switches the language of the on screen display MENU Select the language for the DVD menu AUDIO Switches the language of the sound track When you select ORIGINAL the language given priority in the disc is selected SUBTITLE Switches the langua...

Страница 32: ...ing if your TV uses a DUAL system PAL Change the video signal of an NTSC disc and output it in PAL system NTSC Change the video signal of a PAL disc and output it in NTSC system For details see Changing the color system page 21 PAUSE MODE AUTO The picture including subjects that move dynamically is output with no jitter Normally select this position FRAME The picture including subjects that do not...

Страница 33: ...D VIDEO on which multiple audio formats PCM MPEG audio or Dolby Digital are recorded OFF No priority given AUTO Priority given SCORE MODE Select the scoring mode to rate your singing when in Karaoke Mode BEGINNER 1 Beginner level The score is displayed while singing BEGINNER 2 Beginner level EXPERT 1 Advance level The score is displayed while singing EXPERT 2 Advance level DEMO Demonstration mode ...

Страница 34: ...e default settings For details see Returning the SETUP settings to the default page 57 Transferring music You can transfer music from a sound source to a USB device connected to the B port The audio format of files transferred by this system is MP3 However you can also transfer WMA and AAC files from USB A Notes Do not remove the USB device during transfer or erase operations Doing so may corrupt ...

Страница 35: ...USB USB SELECT repeatedly until USB A lights up in the display panel then connect a USB device you want to transfer to A port 3 For Synchronized Transfer When playback is stopped hold down SHIFT then press PLAY MODE on the remote control repeatedly to select the play mode you want Notes If you start transferring in FOLDER SHUFFLE the selected play mode changes to FOLDER automatically If you start ...

Страница 36: ...MP3 file is created transfer is disabled for the time being If you press REC TO USB B again after a few seconds a new MP3 file can be created 1 Press USB repeatedly until USB A or USB B lights up in the display panel 2 When playback is stopped hold down SHIFT then press OPTIONS 3 Press repeatedly to select USB ERASE then press The Folder List is displayed on the TV screen 4 Press to select a folde...

Страница 37: ...on the USB device reaches the limit If a folder or file that you are trying to transfer already exists on the USB device with the same name a sequential number is added after the name without overwriting the original folder or file You cannot perform the following operations during a transfer Eject the disc Select another track or file Pause playback or find a point in the track or file Change the...

Страница 38: ...until MONO lights up in the display panel To change the AM tuning interval Except for Russian models The default setting for AM tuning interval is 9 kHz or 10 kHz for some areas You cannot change the AM tuning interval in Power Saving Mode Use the buttons on the unit to perform this operation 1 Press TUNER BAND repeatedly to select AM band 2 Press 1 to turn off the system 3 While holding down TUNE...

Страница 39: ... a Bluetooth device 1 Hold down SHIFT then press OPTIONS 2 Press repeatedly to select BT AAC then press 3 Press repeatedly to select BT AAC ON or BT AAC OFF BT AAC ON Enable reception in AAC codec format BT AAC OFF Receive in SBC codec format To exit the options menu hold down SHIFT then press OPTIONS Notes You can enjoy high quality sound if the AAC is selected In case you cannot listen to AAC so...

Страница 40: ...r access it by using the two dimensional code below Data communication fees may be charged Two dimensional code for direct access Use a two dimensional code reader app Notes The app may not be available in some countries regions Depending on your smartphone you can use the NFC function without installing the app In this case the operations and specifications may differ For details refer to the ope...

Страница 41: ...ooth device over a wireless connection Check the information on the website about compatible Bluetooth devices page 11 Pairing is an operation where Bluetooth devices register with each other beforehand Once a pairing operation is performed it does not need to be performed again If your device is an NFC compatible smartphone the manual pairing procedure is not necessary 1 Place the Bluetooth devic...

Страница 42: ...as been completed 1 Press BLUETOOTH on the unit to select Bluetooth function BLUETOOTH appears in the display panel 2 Establish connection with the Bluetooth device Press BLUETOOTH on the unit to connect to the last connected Bluetooth device Perform the Bluetooth connection from the Bluetooth device if the device is not connected Once the connection is established the Bluetooth device name appear...

Страница 43: ...to the system from a paired Bluetooth device in all functions when Bluetooth signal is set to on The Bluetooth signal is turned on by default Use the buttons on the unit to perform this operation Hold down MOVIE GAME and LED COLOR for about 3 seconds BT ON or BT OFF appears in the display panel Notes You cannot perform the following operations when Bluetooth signal is set to off Pairing with Bluet...

Страница 44: ... This feature does not support monaural sound You can only select the Virtual Football mode during AUDIO IN 1 or AUDIO IN 2 function Creating your own sound effect You can raise or lower the levels of specific frequency bands then store the setting in the memory as CUSTOM EQ 1 Hold down SHIFT then press OPTIONS 2 Press repeatedly to select EQ EDIT then press 3 Press repeatedly to adjust the equali...

Страница 45: ...equency bands For example when you want to focus on vocals PAN Create a feeling that the sound is moving around the speakers between left and right channels WAH Create a special effect of Wah wah sound by moving the frequency of a filter up and down automatically 2 Press DJ CONTROL to adjust the effect level To turn off the effect Press the selected effect button again Notes The DJ EFFECT is autom...

Страница 46: ...arty Chain function is activated For details see To select a new Party Host page 47 In this connection the last system must be connected to the first system B If one of the system is not equipped with Party Chain function When you make connection B You can connect the system which is not equipped with Party Chain function at the last system Be sure to select the function which corresponds to the A...

Страница 47: ...en Party Chain function is activated while one of the system in the connection is performing USB transfer the Party Chain function will not be activated on that system and the systems connected after it Party Chain function will only be activated after that system completed or stopped the USB transfer For details on the operations of other systems refer to the operating instructions of the systems...

Страница 48: ...raoke with a stereo recorded track audio file or video file even if it is a non karaoke disc or media by reducing the sound of the vocals Press KARAOKE PON in Karaoke Mode K PON ON appears in the display panel To cancel Karaoke Pon Mode Press KARAOKE PON again When Karaoke Mode is turned on you can use the scoring mode Your score is calculated from a scale of 0 to 99 by comparing your voice with t...

Страница 49: ...time Hold down SHIFT then press SLEEP repeatedly To cancel Sleep Timer press SLEEP repeatedly to select SLEEP OFF Tip To check the remaining time before the system turns off press SLEEP Make sure you have set the clock Play Timer You can wake up to disc tuner or USB device at a preset time Recording Timer You can transfer music from a preset radio station to a USB device at a specified time 1 For ...

Страница 50: ... playing the connected equipment 5 Press VOL repeatedly to adjust the volume Deactivating the buttons on the unit Child Lock You can deactivate the buttons on the unit except 1 to prevent misoperation such as child mischief Hold down x on the unit for more than 5 seconds CHILD LOCK and ON appear in the display panel You can only operate the system using the buttons on the remote control To cancel ...

Страница 51: ...el changes some parts during repair these parts may be retained General The system has entered standby mode This is not a malfunction The system enters standby mode automatically in about 15 minutes when there is no operation or audio signal output page 50 The clock or timer setting is canceled The power cord is disconnected or a power failure occurred Set the clock page 21 and timer page 49 again...

Страница 52: ...emote control closer to the unit Point the remote control at the unit s sensor Replace the batteries R6 size AA Move the unit away from the fluorescent light There is acoustic feedback Reduce the volume Move the microphone away from the speakers or change the direction of the microphone The color irregularity on a TV screen persists Turn off the TV at once then turn it on after 15 to 30 minutes If...

Страница 53: ...pplied with the disc The DATA CD DVD MP3 audio file JPEG image file video file cannot be played back The data is not stored in the desired format The system can play back to a depth of 8 folders only The disc contains more than 300 folders The JPEG image file is larger than 3 072 width 2 048 height in normal mode or more than 3 300 000 pixels in Progressive JPEG mode which is mainly used on the In...

Страница 54: ...d You are using an unsupported USB device Check the information on the website about compatible USB devices page 11 Turn off the system and reconnect the USB device then turn on the system The music data itself contains noise or the sound is distorted Noise may have entered during the transferring process Delete the file and try transferring again The bit rate used when encoding audio files was lo...

Страница 55: ...at are encrypted or protected by passwords cannot be played back Files with DRM Digital Rights Management copyright protection cannot be played back by this system The MP3 PRO audio file can be played back as MP3 audio file This system supports FAT16 and FAT32 but some USB devices may not support all of these FAT For details refer the operating instructions of each USB device or contact the manufa...

Страница 56: ...e possible if other Bluetooth devices are present around the system In this case turn off the other Bluetooth devices Make sure the correct passkey was entered at the Bluetooth device The Bluetooth device cannot detect the unit or BT OFF appears in the display panel Set the Bluetooth signal to BT ON page 43 Connection is not possible The Bluetooth device you attempted to connect does not support t...

Страница 57: ...d back in 2 Press 1 to turn on the system 3 Hold down x and LED COLOR at the same time for about 3 seconds RESET appears in the display panel All user configured settings such as preset radio stations timer and the clock are reset to factory default setting Returning the SETUP settings to the default You can return the SETUP settings except for PARENTAL CONTROL settings to the default settings 1 H...

Страница 58: ...ransfer has no memory media inserted in the USB device NO MUSIC MP3 WMA AAC data does not exist in MUSIC playback mode NO PHOTO JPEG data does not exist in PHOTO playback mode NO STEP All of the programmed steps have been erased NO VIDEO MPEG4 Xvid data does not exist in VIDEO playback mode NOT IN USE You tried to perform a specific operation under conditions where that operation is prohibited NOT...

Страница 59: ...sed for an extended period of time When unplugging the unit always grip the plug Never pull the cord itself Should any solid object or liquid get into the system unplug the system and have it checked by qualified personnel before operating it again AC power cord must be changed only at the qualified service shop On placement Do not place the system in an inclined position or in locations that are ...

Страница 60: ...supports security functions that comply with the Bluetooth specification as a means of ensuring security during communication using Bluetooth technology However this security may be insufficient depending on the setting contents and other factors so always be careful when performing communication using Bluetooth technology Sony cannot be held liable in any way for damages or other loss resulting f...

Страница 61: ... speakers TWEETERS RMS output power reference 500 W 500 W per channel at 5 ohms 1 kHz Inputs AUDIO IN 1 PARTY CHAIN IN L R Voltage 2 V impedance 47 kilohms AUDIO IN 2 L R Voltage 2 V impedance 47 kilohms MIC SHAKE 100D only MIC 1 MIC 2 SHAKE 88D SHAKE 66D SHAKE 44D only Sensitivity 1 mV impedance 10 kilohms A USB B USB port Type A Outputs AUDIO OUT PARTY CHAIN OUT L R Voltage 2 V impedance 1 kiloh...

Страница 62: ...z 108 0 MHz 50 kHz step AM tuner section Tuning range Russian models 531 kHz 1 602 kHz 9 kHz step Other models 530 kHz 1 610 kHz 10 kHz step 531 kHz 1 602 kHz 9 kHz step Bluetooth section Communication system Bluetooth Standard version 3 1 Output Bluetooth Standard Power Class 2 Maximum communication range Line of sight approx 10 m1 Frequency band 2 4 GHz band 2 4000 GHz 2 4835 GHz Modulation meth...

Страница 63: ... horn type Subwoofers 350 mm cone type Rated impedance Woofers tweeters 4 ohms Subwoofers 10 ohms Dimensions w h d Approx 490 mm 660 mm 363 mm Mass Approx 26 0 kg Quantity 2 pieces SS SHAKE44 for SHAKE 44D Speaker system 3 way Sound Pressure Horn Speaker unit Woofers 300 mm cone type Tweeters 25 mm horn type Mid speakers 100 mm cone type Rated impedance Mid speakers tweeters 5 ohms Woofers 4 ohms ...

Страница 64: ...plied accessories Remote control 1 R6 Size AA batteries 2 FM lead AM loop antenna 1 Video cord 1 Bottom panel 1 SHAKE 88D SHAKE 66D SHAKE 44D only Design and specifications are subject to change without notice ...

Страница 65: ...dic 1408 Oriya 1535 Tonga 1067 Tibetan 1254 Italian 1417 Punjabi 1538 Turkish 1070 Breton 1257 Hebrew 1428 Polish 1539 Tsonga 1079 Catalan 1261 Japanese 1435 Pashto Pushto 1540 Tatar 1093 Corsican 1269 Yiddish 1436 Portuguese 1543 Twi 1097 Czech 1283 Javanese 1463 Quechua 1557 Ukrainian 1103 Welsh 1287 Georgian 1481 Rhaeto Romance 1564 Urdu 1105 Danish 1297 Kazakh 1482 Kirundi 1572 Uzbek 1109 Germ...

Страница 66: ...ce 2376 Netherlands 2499 Sweden 2046 Austria 2109 Germany 2390 New Zealand 2086 Switzerland 2057 Belgium 2248 India 2379 Norway 2528 Thailand 2070 Brazil 2238 Indonesia 2427 Pakistan 2184 United Kingdom 2079 Canada 2254 Italy 2424 Philippines 2090 Chile 2276 Japan 2436 Portugal 2092 China 2304 Korea 2489 Russia 2115 Denmark 2363 Malaysia 2501 Singapore ...

Страница 67: ... data is recorded in Dolby Digital as well as in PCM allowing you to enjoy more realistic audio presence Furthermore various advanced functions such as the multi angle multilingual and Parental Control functions are provided with the DVD VIDEO DVD RW A DVD RW is a recordable and rewritable disc that is the same size as a DVD VIDEO The DVD RW has two different modes VR mode and Video mode DVD RWs c...

Страница 68: ...chnology The picture data is compressed to about 1 140 of its original size Consequently a 12 cm VIDEO CD can contain up to 74 minutes of moving pictures VIDEO CDs also contain compact audio data Sound outside the range of human hearing are compressed while the sounds we can hear are not compressed VIDEO CDs can hold 6 times the audio information of conventional AUDIO CDs There are 2 versions of V...

Страница 69: ... Multisession disc 9 N NFC 15 40 NFC Easy Connect 40 Normal Play 26 O OSD 31 P PARENTAL CONTROL 28 34 Party Chain 46 PAUSE MODE 32 PBC playback 26 PHOTO EFFECT 32 PHOTO INTERVAL 33 Playable discs files 7 Power Saving Mode 21 Preset station 38 Program Play 27 Q QUICK setup 20 R Region code 9 Remote control 14 Repeat Play 28 RESET 34 57 S SCREEN SAVER 34 Setup Menu 31 Shuffle Play 26 Slide show 23 S...

Страница 70: ......

Страница 71: ......

Страница 72: ... 2014 Sony Corporation Printed in Malaysia ...

Отзывы: