background image

14

GB

While playing a disc

Press TIME/TEXT repeatedly.

Notes

• The display may not show all the characters, 

depending on the disc.

• This player can display only the disc name, artist 

name, and track names from TEXT discs. Other 
information cannot be displayed.

Turning off the information on 
the display

Press DISPLAY MODE on the remote while 
playing a disc.

Each time you press DISPLAY MODE, the 
display turns off and on alternately.
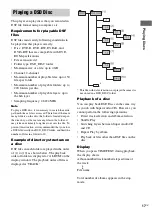
When you press DISPLAY MODE to turn off 
the display, “Display Off” appears and goes out 
after about 2 seconds. When you press 
DISPLAY MODE to turn on the display, 
“Display On” appears and the display appears 
after about 2 seconds.
The display remains lit during stop or playback 
pause, irrespective of the display mode.

Tip

If you operate buttons to select a track, etc., after you 
turn off the display, the display turns on for about 2 
seconds, and then turns off again.

You can select a track before you start playback.

Press the number button(s) to enter the 
track number, and press ENTER.

For example,
• to select the 8th track: 8 

t

 ENTER

• to select the 21st track: 2 

t

 1 

t

 ENTER

• to select the 103rd track: 1 

t

 0 

t

 3 

t


ENTER

Remaining time of the disc

Playing time of the current track

Remaining time of the current track

Track title

*

Elapsed time of the disc

*

When there is no track title, “NO TEXT” 
appears.

Locating a Track Directly

— Direct track selection

Number 
buttons

ENTER

Содержание SCD-XE800

Страница 1: ... 2010 Sony Corporation SCD XE800 4 193 086 11 1 Operating Instructions Super Audio CD Player ...

Страница 2: ...s Sony Deutschland GmbH Hedelfinger Strasse 61 70327 Stuttgart Germany For any service or guarantee matters please refer to the addresses given in separate service or guarantee documents Disposal of Old Electrical Electronic Equipment Applicable in the European Union and other European countries with separate collection systems This symbol on the product or on its packaging indicates that this pro...

Страница 3: ...by qualified service staff only To ensure that the battery will be treated properly hand over the product at end of life to the applicable collection point for the recycling of electrical and electronic equipment For all other batteries please view the section on how to remove the battery from the product safely Hand the battery over to the applicable collection point for the recycling of waste ba...

Страница 4: ...ing the Display 13 Locating a Track Directly 14 Direct track selection Locating a Particular Point in a Track 15 Search Playing Tracks Repeatedly 15 Repeat Play Playing Tracks in Random Order 16 Shuffle Play Selecting the Playback Layer 16 Playing a DSD Disc 17 Additional Information Precautions 18 Notes on Discs 18 Troubleshooting 19 Specifications 20 Index 21 Table of Contents ...

Страница 5: ...cs refer to their respective notes below Music discs encoded with copyright protection technologies This product is designed to play back discs that conform to the Compact Disc CD standard Recently various music discs encoded with copyright protection technologies are marketed by some record companies Please be aware that among those discs there are some that do not conform to the CD standard and ...

Страница 6: ...yer you want to listen to Since both layers are on one side it is not necessary to turn the disc over You can play the CD layer on a conventional CD player High density signals of Super Audio CD are recorded on this layer The layer can be played on a conventional CD player Channel areas of Super Audio CDs A Super Audio CD has 2 types of channel areas 2 channel area An area in which 2 channel stere...

Страница 7: ...ns the display information on or off E Disc tray 12 Holds a disc F Z button 12 Opens and closes the disc tray G N button and lamp 12 Plays a disc The lamp lights up during playback H X button and lamp 12 Pauses playback The lamp lights up during playback pause I x button 12 Stops playback J AMS dial AMS Automatic Music Sensor 12 Rotate the dial to select a track then press it to start playback K D...

Страница 8: ... playback F SA CD CD button 16 Switches between the Super Audio CD layer and the CD layer of a hybrid disc G TIME TEXT button 13 Switches the playing time of the track the remaining time of the disc or TEXT information on the display H DISPLAY MODE button 14 Turns the display information on or off I ENTER button 14 Select a track directly J CLEAR button 15 16 Resumes Continuous Play from Repeat Pl...

Страница 9: ...pparatus Doing so may cause a malfunction If you do not intend to use the remote for an extended period of time remove the batteries to avoid possible damage from battery leakage and corrosion Connecting a component with analog input jacks Use the supplied audio connecting cord Be sure to match the color coded pin to the appropriate jacks white left to white and red right to red Be sure to turn of...

Страница 10: ...utput through the jack Connecting a digital component with the optical digital input jack Use an optical digital cable for this connection When connecting the optical digital cable to the DIGITAL CD OUT OPTICAL jack push the cable plug in until it clicks into place Be careful not to bend or twist the optical cable Optical digital cable not supplied Note Only the audio signals of conventional CDs c...

Страница 11: ... checking the internal status of the player itself This is not a malfunction Note Install this system so that the AC power cord mains lead can be unplugged from the wall outlet wall socket immediately in the event of trouble Signals output 2 channel audio of Super Audio CDs and CDs a Outputs audio signals Does not output audio signals The player does not play a multi channel area Output jacks ANAL...

Страница 12: ...s during play Note During playback increase the volume level gradually starting from the lowest level The output from this player may contain band width that is out of the normal listening range This may cause damage to the speakers or ears Auto standby The player enters the standby mode automatically when it is in the stop or playback pause without any operation for more than about 30 minutes AUT...

Страница 13: ...t name and current track name as TEXT information If a name has 14 or more characters the first 14 characters will remain after the name scrolls by on the display Before you start playing a disc Press TIME TEXT repeatedly Each time you press the button the disc name or artist name appears on the display When you select the artist name ART appears on the display Using the Display TIME TEXT Display ...

Страница 14: ...y On appears and the display appears after about 2 seconds The display remains lit during stop or playback pause irrespective of the display mode Tip If you operate buttons to select a track etc after you turn off the display the display turns on for about 2 seconds and then turns off again You can select a track before you start playback Press the number button s to enter the track number and pre...

Страница 15: ...r page 16 Press REPEAT on the remote repeatedly until REPEAT or REPEAT1 appears on the display REPEAT All the tracks on the disc will be repeated In the Shuffle Play mode page 16 all the tracks are repeated in random order REPEAT1 A single track only is repeated To cancel Repeat Play Press REPEAT on the remote repeatedly until both REPEAT and REPEAT1 disappear or press CLEAR Note If you do the fol...

Страница 16: ... layer of a Super Audio CD and CD When playing a hybrid disc with a Super Audio CD layer and a CD layer page 6 the player plays the Super Audio CD layer only the 2 channel area automatically You can select the CD layer Press SA CD CD in the stop mode SA CD on the display turns to CD and the CD layer is selected to be played back If you press SA CD CD again the Super Audio CD layer is selected If y...

Страница 17: ... take an extremely long time to access the file To prevent this situation it is recommended that you store a DSF file directly in a DSD_DISC folder and limit the number of files in a folder to 20 Example of directory structure on a disc DSF files in each folder are played in the order of 1 to 10 as shown below The playback order of folders is displayed at ALBUM on the display window The playback o...

Страница 18: ...rates On cleaning Clean the cabinet panel and controls with a soft cloth slightly moistened with a mild detergent solution Do not use any type of abrasive pad scouring powder or solvent such as alcohol or benzine On transporting the player Before transporting the player be sure to remove the disc from the player and close the disc tray Before transporting the player be sure to disconnect any conne...

Страница 19: ...player Remove the disc and leave the player turned on for about an hour There is an incompatible disc on the tray page 5 The player enters the standby mode automatically The player enters the standby mode automatically when it is in the stop or playback pause without any operation for more than about 30 minutes Auto standby AUTO STANDBY flashes on the display for 2minutes before the player enters ...

Страница 20: ...a distance of 200 mm from the objective lens surface on the Optical Pick up Block with 7 mm aperture Power requirements 230 V AC 50 60 Hz Power consumption 20 W Power consumption during standby mode 0 5 W Dimensions w h d 430 95 295 mm incl projecting parts Mass approx 3 5 kg Supplied accessories Audio connecting cord Red and White plugs 1 Remote commander RM ASU097 1 Batteries R03 size AAA 2 Desi...

Страница 21: ...CD OUT jack 10 Direct track selection 14 DISPLAY MODE 14 Displaying information 13 DSD Disc 17 DSF File 17 H Hybrid disc 6 Switching the playback layer Super Audio CD or CD 16 I Inserting a disc 12 P Pause 12 Playback Discs with DSD files recorded 17 Locating a particular point 15 Locating a track 14 Playing a disc 12 Repeat Play 15 Shuffle Play 16 Switching the playback layer Super Audio CD or CD...

Страница 22: ......

Страница 23: ......

Страница 24: ...Printed in Malaysia ...

Отзывы: